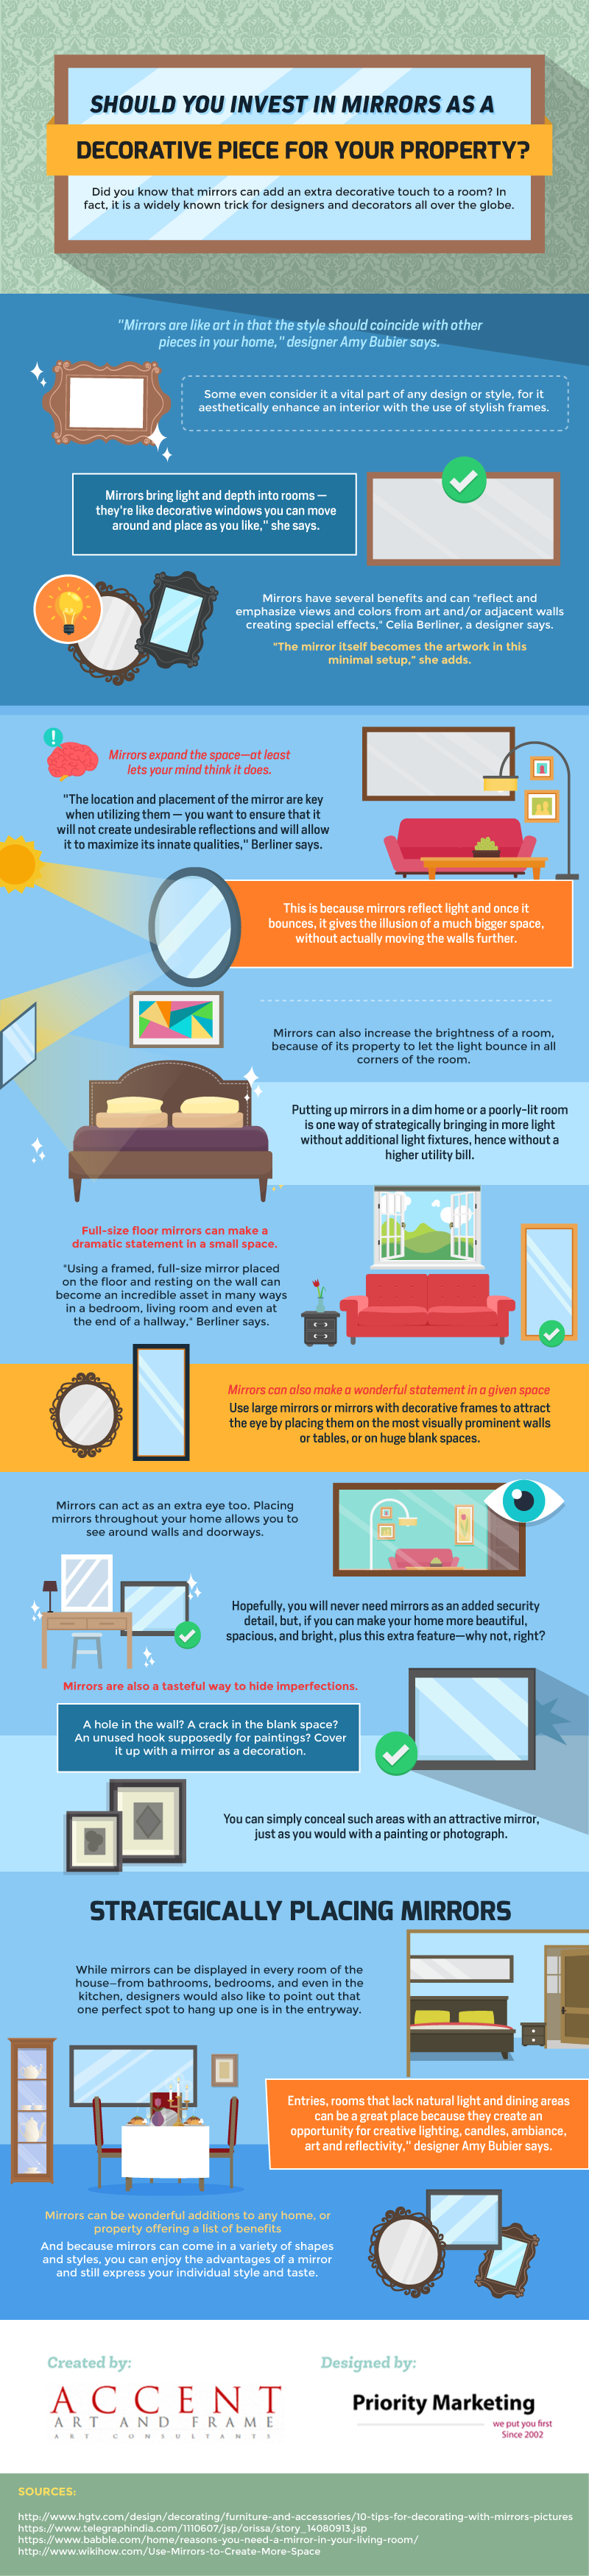
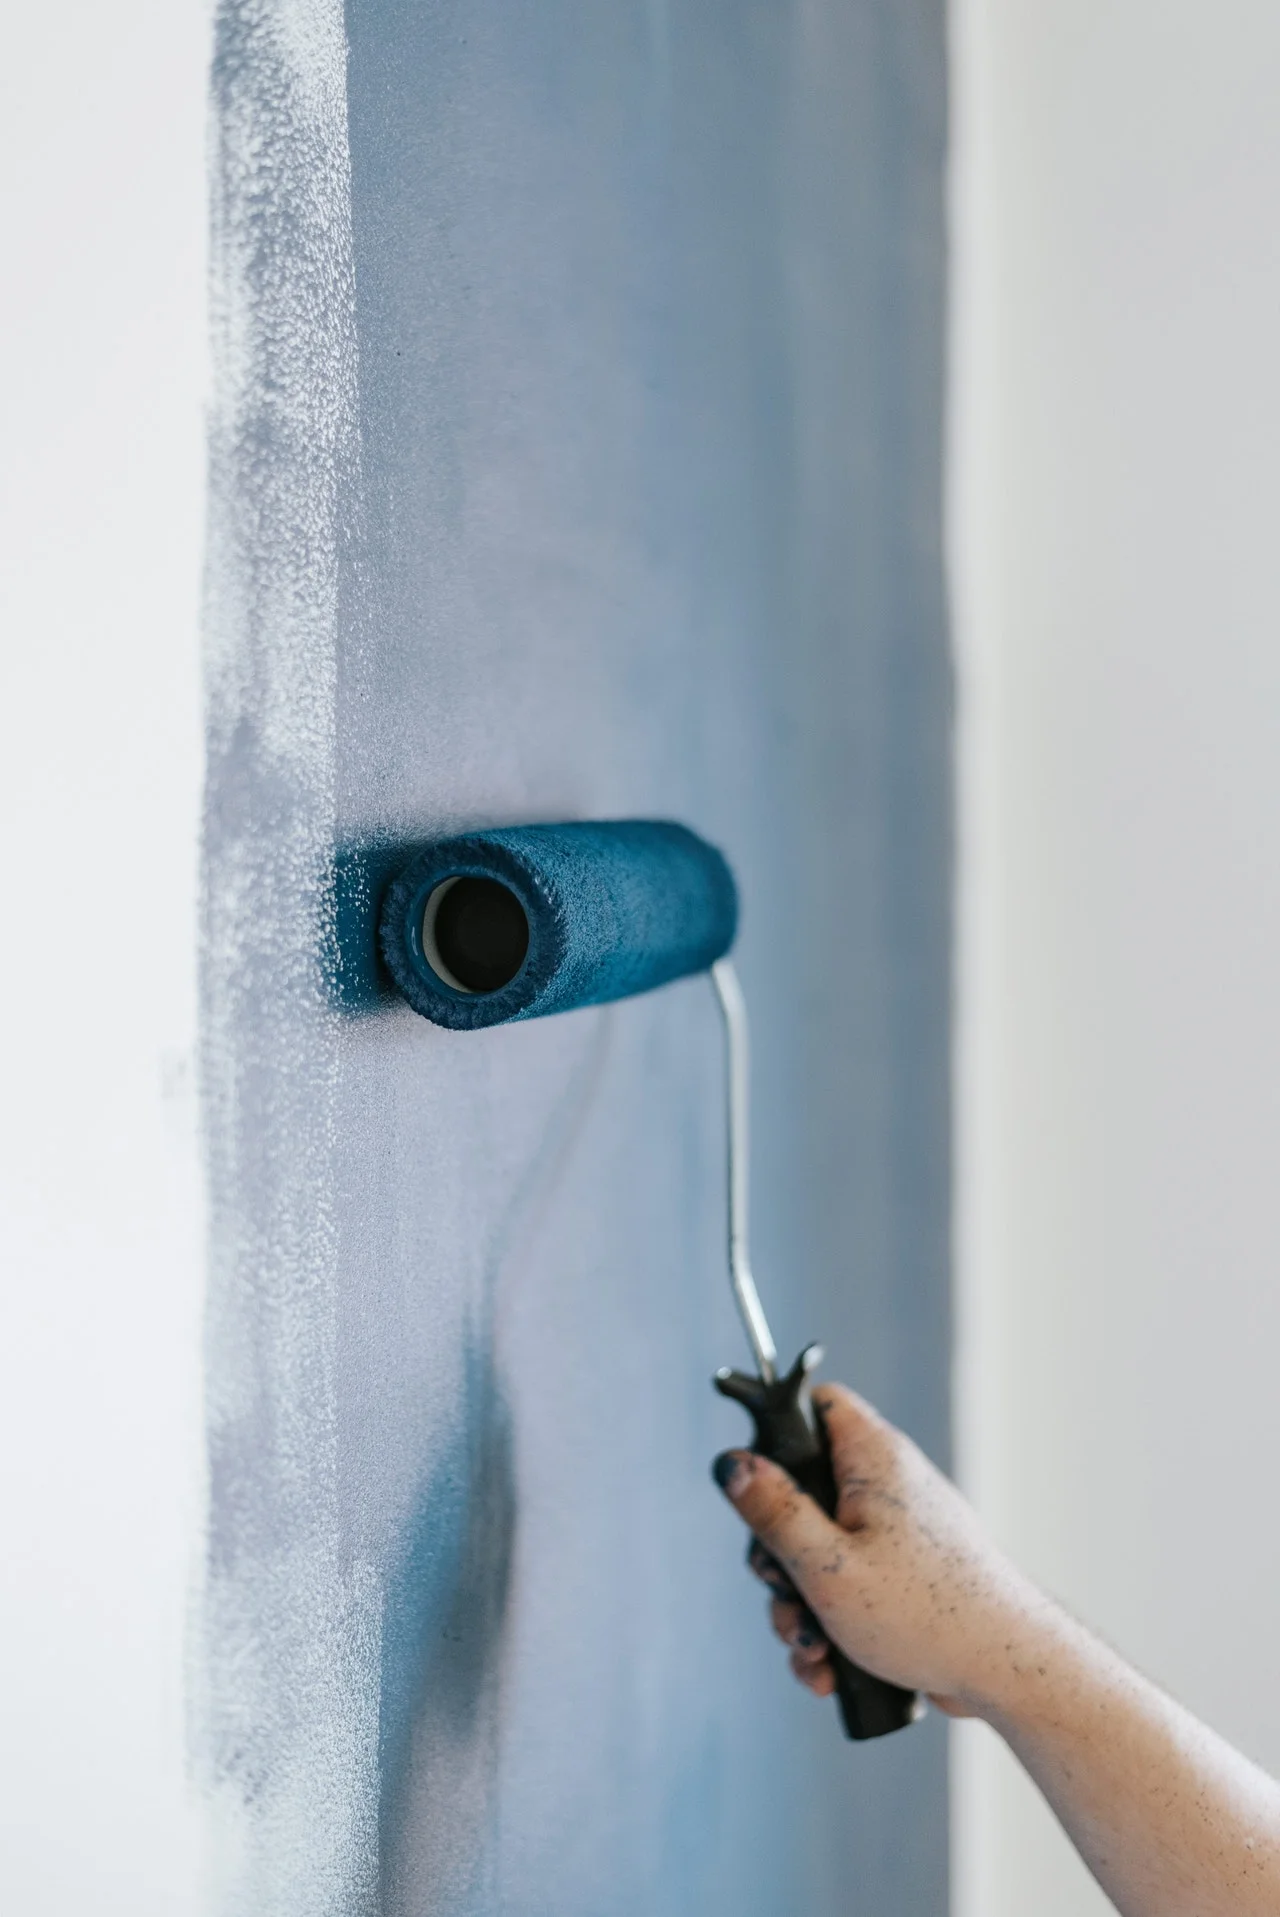
Bathroom Painting Tips
The bathrooms in your home serve a very necessary and functional purpose. However, they are also another room in the home where you can showcase your personal style. Throwing a new color of paint on the walls is just one of the many ways you can add style to the space. It’s also one of the greatest ways to do so.
If adding your own style to the space isn’t enough, another great reason to paint the space is due to the fact that most bathrooms are likely to undergo a lot of abuse from the steam that constantly arises from baths and showers. The humidity levels in your bathroom are likely to rise and fall more drastically which remains a tough challenge for the paint and walls to persist against.
Fortunately, freshly painting your bathroom is a simple DIY project that tends to take no more than a few days to complete, but before you begin slathering paint everywhere you should continue to read the helpful painting tips below.
Choose a Paint Color First
Since it is already established that shinier sheens are best for bathrooms where moisture is often a concern, you must only be concerned with your choice of paint color. Choosing the wrong paint color can easily make your bathroom seem sterile and uninviting. To avoid this, it is suggested that you choose an overall color scheme for your bathroom based on three colors complementary to one another on the Color Wheel. Once you have these three colors, choose one that best suits your bathroom as a paint color for the walls. The other two colors can be shown through any other accents and decor.
Collect All the Proper Materials and Supplies
Before you begin painting your bathroom, gather all the proper painting materials and supplies. These may include:
● Primer
● Paint
● Stir sticks
● Paint rollers
● Roller covers
● Disposable gloves and other safety gear to protect your skin or inhalation
● Small paint brushes, for cutting in or touch-ups
● Paint trays
● Painters tape
● Rags
● Drop cloths
● Sandpaper
● Tack cloth to remove any sanding dust
● Painters putty
● Putty knife
Being prepared to paint is extremely important. Otherwise, you may end up with a mess or an unfinished project due to the lack of supplies. Running out for more could cause the paint to dry in the meantime, which won’t due any justice to the overall appearance of the paint job.
Make Sure Your Bathroom Is Properly Ventilated
It’s vital to your health and the completion of your bathroom paint project if proper ventilation is provided. The higher levels of humidity can damage your paint in no time or stop it from completely drying. To provide adequate ventilation, open windows, turn on ceiling fans nearby, or start the exhaust fan to help clear the room of any steam. This will remove the moisture faster. Have those in the household run a fan if they need to use the bathroom at any point.
Conduct Prep Work
Prep your bathroom by removing any outlet plates such as electrical sockets or light switches. Then, lightly wash down the walls with soap and warm water. After the walls dry completely, apply painters tape to the baseboards. Next, patch and sand any dents or holes in the walls. To protect your floors, tape down a drop cloth. You may also want to cover your counter, sink, bathtub and toilet to prevent them from paint spills or drips.
Before you paint, you will want to prime the walls first. Make sure the primer is fully dry before you start putting on the first layer of paint. When you do go to paint the color on the walls, cut in around the room’s edges first. This includes where the walls meet adjoining walls, the ceiling and the baseboard.
Use More Durable Paint on Window Sills
If you plan on repainting your window sills in the bathroom, you may want to consider using more durable paint. High gloss or semi gloss paint is perhaps best for your window frame and sill since moisture seems to be more prevalent in these areas. If moisture around the window sills of your bathroom is of your utmost concern, you may even upgrade to an exterior paint for this part of your project.
Consider Wood Paneling
If your drywall isn’t in the best of shape or you prefer not to redo the drywall in your bathroom, consider wood paneling. You can often find wood paneling sold cheaply by the sheet. These sheets come in many styles, wood types, and colors. Nonetheless, you can always install them and paint them whichever color you choose. When you apply wood panels to your bathroom walls, they are adding more protection against moisture as well as a lovely contrast to whatever paint color you chose for the remaining wall space.
Have a Variety of Lighting and Capture the Room’s Essence
Lighting plays a large role in the essence of your bathroom even after you paint. Since the levels of natural light are always changing in a bathroom throughout the day, it’s wise to have a good balance of both natural and fixed lighting. A lot of natural light will only enhance any and every flaw you make in the bathroom during your painting project. Even after you complete the paint job, the flaws will still be noticeable. With this in mind, paints with a higher shine are best.
When you have a smaller sized bathroom that gets a lot of natural light, ask the representatives where you plan to purchase the paint if they can mix it at 75% strength. This will lighten the color slightly which prevents flaws from being as noticeable. Aside from lighting the strength of color in the paint, there are ways you can play with the lighting to keep the color of the walls looking as close as possible to the color you desire. For instance, to warm up the color you can choose 40 watt incandescent light bulbs, while 100 watt light bulbs tend to make the color in the room seem cooler.
Don’t Rush Your Project
Perhaps the most detrimental thing you can do while painting the bathroom in your home is rush to complete it. Of course, poor preparation also plays a substantial role in a bad paint job. Nevertheless, it is the failure to take your time that really makes the paint in your bathroom lack appeal and showcase any flaws. Take your time. Even by doing so, the entire bathroom should be fully painted and completed in just a few days time. Make sure that you prepare your drywall, smooth out the walls, prime, and paint the next layer after each layer is completely dry. By doing so, you are certainly going to be more pleased with the results.
Guest Contributor, Tom Masters