Google+

contact us

Use the form on the right to contact us.

Day or Night, we are here to serve you. Leave your plumbing problem to us.


Tinley Park, IL

(708)845-7922

Residential and Commercial plumbers and plumbing contractors available in Orland Park, Tinley Park, Oak Lawn, Palos Heights, Midlothian, Oak Forest, Homer Glen, Mokena, Frankfort, and the surrounding Chicago South Suburbs. Emergency plumbers.

copper water lines.jpg

Kevin Szabo Jr Plumbing Blog

Kevin Szabo Jr Plumbing is Tinley Park, Orland Park, Oak Forest, Midlothian, Orland Hill, Homer Glen, Mokena, Frankfort, Crestwood, Palos Heights, Oak Lawn, local plumber. Read our blog for advice, tips, a good laugh, and basic home improvement.

**We are moving our old blog to our new and improved website. Too see all our posts visit kevinszabojrplumbing.blogspot.com

Filtering by Tag: Tinley park Plumbers

How to Get Bali Bathroom Furniture Shipped To Your Door

RH Business Marketing Solutions

Plumber in Crestwood il

How to Get Bali Bathroom Furniture Shipped to Your Door

No one purposely lets their home fall out of style, but it is bound to happen to even the best of us. Life takes over, and more important things occupy the mind. As much as you may love design, chances are at least a few rooms of your home could use some attention.

If you think this is where you are at, maybe it is time to consider a remodel. If you keep up on current trends and place an emphasis on aesthetics, you have no doubt noticed the rise in popularity of Bali bathroom furniture.  

Just take a look at any design blog and you will see Bali influences everywhere. There is no question for those with objectively good taste—the elements present in Bali furniture design are like a breath of fresh air.

Whether it is because everyone is pining for a little piece of island life, or simply because this decor is highly modern, it is clear that this trend is sticking around for a while. In a time inundated with a great deal of maximalism, these fixtures offer a kind of reprieve from clashing patterns and color.

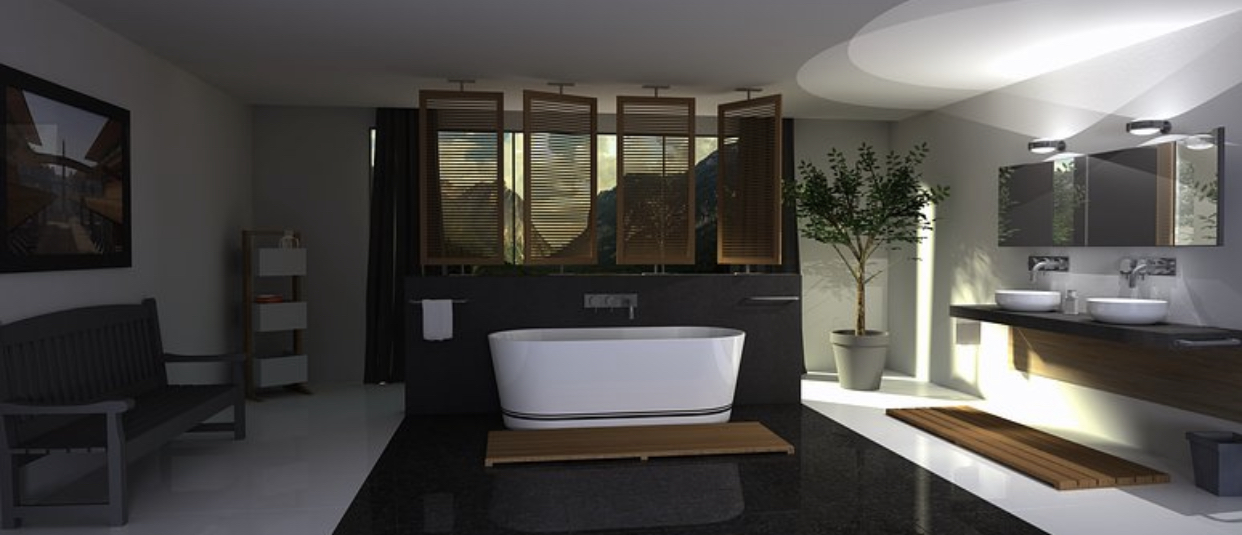
Picture vanities without fixtures, softly rounded bathtubs and sinks, light colored wood—these elements are all common in the Bali furniture trend.

These sleek designs prominently feature clean lines and smooth curves, sometimes accented by wood or stone, without anything extra or ornamental. Metal is not often featured in this style.

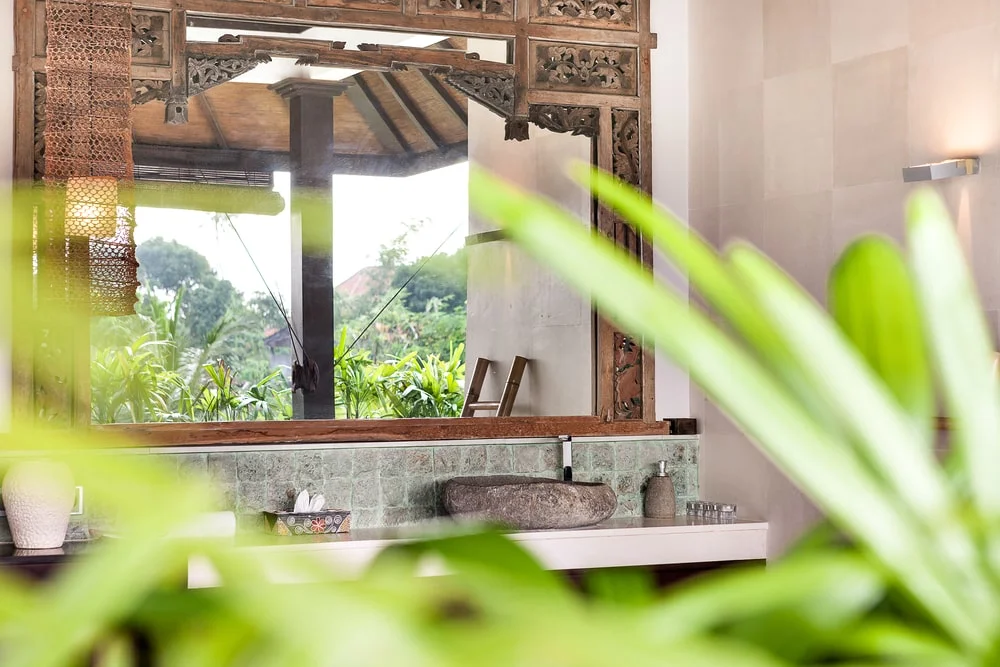
Bali furniture in the bathroom inspires a sense of calm and relaxation, so it’s no wonder why anyone planning a bathroom remodel right now is likely on the hunt for this kind of fixture—but how?

Bali is not exactly centrally located, but there are still ways to get authentic forms of this furniture shipped directly to your door, and it is not as difficult (or expensive) as you might imagine.

Here are a few simple steps you can take in order to achieve the goal of decorating your bathroom with Bali furniture.

●       Plan a design

Obviously, the first step in achieving your new, Bali inspired bathroom is to create a design plan, but this first step is actually three-pronged: you will need to choose a design, set a comfortable budget, and speak with a remodeler.

Take a look at some inspiration boards, and get an idea of how your bathroom would look in a perfect world post-remodel.

Sites like Houzz are aimed at helping homeowners find design ideas that resonate with them, and many reputable businesses will have accounts you can browse on the site.

Next, figure out a price point at which you are comfortable for this remodel. It is important to have a figure in mind, and to stay realistic about what that amount will buy you.

Finally, speak with a pro about how much of your vision is physically possible. You might love a waterfall shower, double sinks atop an expansive counter top, perfect soft lighting, but it may not all be achievable.

Bear in mind that no one is a miracle worker, and sometimes considerations like space and budget will get in the way of your ideal design, but a good remodeler will do their best to offer comparable alternatives if something is not possible.

Once you have a better grasp on what can be achieved, you will be able to confidently pick out what types of furniture and fixtures will be appropriate for your new, updated space.

●       Pick out your furniture

If you have already done the design leg work, sift through your inspiration pictures for ones that align with the plan you have discussed with your remodeler.

Make sure you have considered aspects like color palette and placement within your bathroom (including measuring the space) otherwise you may miss something that will impact the overall aesthetic.

Whether you are on the hunt for a new counter top, a pedestal sink, or just some shelving, you are sure to find plenty of beautiful options available for purchase, but which pieces you go with will depend on several factors.

These factors include things like cost and material, but perhaps the most important of these is authenticity. Is it important to you that your Bali bathroom furniture is actually made in Bali, and not just in that style?

If so, you will have a few more steps to complete before your furniture arrives.

●       Work with the creator

Assuming you choose to go with a Balinese creator, they may or may not have a preferred shipping provider available for you to use.

Even if the creator does have a preferred shipping provider, it may be in your best interest to explore your options, as there may be a more cost effective or convenient one for your location.

Talk with the creator of the furniture you have chosen about their flexibility on this point and how much they are willing to assist your efforts, then work on researching options.

●       Find a shipping company

This piece of the process will entail finding a reputable company who offers freight shipping. Make sure that they have the necessary capabilities to perform this kind of long-distance shipping.

Once you have found a company, request a quote so you know how much shipping your furniture will cost you. Legitimate companies should offer you a quote without requiring anything from you in return.

From here, you can set up coordination between the creator and the shipper, or facilitate the coordination yourself.

Whichever direction you decide to go, the most important factor of this step is choosing a shipper you can trust so that you do not experience undue anxiety waiting for the furniture to arrive.

After you have completed all of these steps, the only thing left for you to do is sit back and leave the rest to the professionals. Before you know it, your Bali bathroom furniture will arrive and your remodeler will bring your vision to life.

In just a few simple steps you can have high quality furniture shipped from across the world to your doorstep, and enjoy a wholly transformed bathroom.

If a more calming, tranquil room is what you are after, do not wait to start this process. Take your time researching designs and remodelers so that you can rest assured you will be pleased with the outcome.

Guest Contributor, Tom Masters

Tips to Avoid Common Heating Problems This Winter

RH Business Marketing Solutions

IMG_0734.jpeg

Tips to Avoid Common Heating Problems This Winter 

They say winter is the most magical time of the year, but is that still so if your heater breaks down? There’s nothing more troublesome than going through the cold months with a faulty heating system. Sure, it’s nice to watch the snow falling and feel the cold breeze once in a while, but it’s a different story when you’re looking forward to a cozy night at home only to find your heater fail you.

Keeping your home warm over the winter months is not only essential to your comfort but your health as well. The drop in temperature can affect your immune system and make your body more vulnerable to sickness and infections. That said, it is imperative that you take the time to make sure that your heater works well before the colder days hit.

How To Keep Your Heater Working Smoothly 

Schedule regular heater maintenance

Nobody will ever do it better than the pros. Make it a point to schedule a heater tune-up before winter starts and another when it’s over. Having your heater cleaned and checked by professionals will extend its life and give you peace of mind throughout the season.

Make sure the pilot light is on

Checking if the pilot light on your furnace is lit should be one of the first things on your list when preparing for the cold days ahead. This is a fairly simple task, and the steps on how to do it should be on your user's manual.

Clean your heater and perform a visual inspection

Wipe the dust off your heater and clean or replace dirty filters. Also, give your heater a visual once-over to ensure that all parts are intact. Check the wires closely for any signs of damage or fraying. If you see something wrong with the wirings, get in touch with an electrician as soon as possible.

Watch out for weird noises

As you clean your heater, turn it on and listen for any odd noises. Any weird or gurgling sounds could mean that there's a leak, a crack, or some other problem within. Holes in the heater can be dangerous and should be addressed by an HVAC professional immediately.

Give your heater a trial run

Lastly, do a trial run. Turn your heater on for about 10 to 20 minutes to make sure that the system is generating the expected level of heat. This will assure you that your heater is in prime condition and will work like new when you need it to.

Guest Contributor, Michelle West

How to Install a Ventilation Fan in Your Bathroom

RH Business Marketing Solutions

IMG_0732.jpeg

How to Install a Ventilation Fan in Your Bathroom

Your bathroom is the one room in your home that is constantly under assault from a variety of sources. Harsh chemical cleaners, steamy showers and the remnants of last night’s Mexican entrees all need a way out and vent fans can do just that.

While the odor of a recently used restroom is definitely something we want to get rid of, the more important factor in installing a ventilation fan is evacuating the steam and water vapor created from baths and showers. 

This moisture, if left unaddressed can cause floors to bow, caulking to degrade, and mold to grow in our bathrooms, leaving us with costly repairs and unsightly walls, floors and ceilings. 

When you’re ready to start keeping your bathroom dry, here’s how to do it. 

Selecting a Ventilation Fan

Finding the right fan for your bathroom is an easy process, but an important one. When considering which fan fits your needs, consider the following. 

● Square footage. Fans are designated by the CFM (cubic feet per minute) of air that they move. You’ll want a fan that has at least one CFM for every square foot of your bathroom. Find square footage by multiplying the length of a room by its width. 

● Features. It may sound silly, but this is the 21st century, even our ventilation fans come with features and options now. Modern fans can commonly be equipped with a built in light, a heater, humidity sensor, motion detector, night light and even Bluetooth speakers. 

● Install options. Vent fans can be installed with or without attic access, on the ceiling or walls, and with or without cutting into the wall material. Figure out which option suits you best and pick a fan to match. 

The Tools

Installing a vent fan is a diy task that most homeowners can take on. However, you will need a few tools. 

● A drill with bits and drivers

● Screws

● Flathead and phillips screwdrivers

● Utility knife

● Jigsaw or drywall saw

● Respirator and eye protection

● Duct tape

● Wire cutters and crimpers

● Assorted electrical connectors (may be included with fan)

Time to Get Started

Once you’ve selected the right fan and have assembled the tools, you’re ready to get going. First, determine where your fan will be installed and gain access to that area. If you’ll be venting the fan through the ceiling, you’ll need to be able to get into the attic. 

Drill a Reference Hole

Find a suitable position on the ceiling, ideally between the shower and the toilet, and drill a reference hole through to the attic. A 3/8” bit is big enough for this. 

Measure the vent fan housing and note it on a piece of paper, you’ll need this next. 

Now, climb into the attic and locate your reference hole. Clear away any debris, insulation, or stored objects from the area. Using the measurement you just took, locate the final position of the fan between two joists nearest your hole. 

Note that position in relation to your reference hole so you can transfer that to the ceiling back in the bathroom. 

Mark the Layout in the Bathroom

Back in the bathroom, measure the inside dimension of the fan’s intake. 

Using your reference hole and the notes you made in the attic, transfer the measurements from the attic to the ceiling and use a square to mark out the intake port on the ceiling. 

Cut the Hole

Using the saw you have on hand, cut along the lines you just drew for you intake port. Be sure to wear your airway and eye protection and support the cut-out piece so that it doesn’t rip drywall paper from the ceiling as you finish the cut. 

Drop in Your Fan

Now, head back into the attic with your vent fan. Attach a 90-degree elbow to the outlet port of the fan and secure it with duct tape (preferably foil duct tape).

Remove the knock out panel and attach applicable wiring (you may need an electrician for this portion).

Attach the metal brackets to the fan at the designated points. 

Drop the fan into position, through your ceiling hole 

Secure the Fan

Using the drill and 1 ½” drywall screws, secure the brackets to the joists. 

Slide the flexible ducting over the elbow you installed and secure in place with foil tape. 

Cut Your Vent Hole

All exhaust fans need to be vented to the outdoors. Never allow a fan to blow into the attic or other space, this will cause mold and water damage as the steam condenses into water. 

Locate a spot on the inside of the roof close to your vent fan. Using a hole saw sized to the cap kit, cut a hole through the roof to the outside. 

Connect Your Flexible Hose

Once you’ve cut your hole, make your way onto the roof and locate the opening. Using the cap or vent kit, place the cap in position and secure it according to the instructions provided.

The SheltonRoofing.com information guide says that while you’re up there, check out the condition of your roof. Aging and disheveled roofs cause homeowners a multitude of problems and can be extremely costly if they fail.

Back in the attic, connect the other end of your flexible hose to the cap or vent kit and secure it with foil tape. You may also need to fill any gaps around your ceiling hole with spray foam or caulking. 

Give it Power

Ensure that power to the wiring you’ll be using is disconnected. 

In the bathroom, expose the blower motor and its wiring. 

Make the applicable connections using the wiring diagram provided in the fan kit. If you’re uncomfortable with home wiring, consider hiring an electrician. 

Secure all wiring and attach the ground. Cover the blower motor and turn on power to the fan. If it comes on, you’re good to go. 

Finishing Up

Replace the cover to the vent fan and secure it in place. Caulk or silicone any gaps between the fan and ceiling. 

Retest the operation and that’s it, you’re in the venting business.

An exhaust fan makes an excellent addition to any bathroom and removes the water and odor vapors that can cause you bathroom headaches for years to come. With this guide, we hope you can get a new vent fan installed in no time!

Guest Contributor, Tom Masters  

Transform Your Bathroom into a Luxurious Spa Experience

RH Business Marketing Solutions

IMG_0727.jpeg

Transform Your Bathroom into a Luxurious Spa Experience

Can you imagine just how perfect it would be if you could enjoy a relaxing spa experience every day? Well, if you want it, you don’t have to dream it. You just need to go for it. And if this is something that feels like it would better your life considerably, investing your time, money and energy into creating a perfect bathroom spa experience in your own home is well worth it. Even more so if you live in a tropical climate such as Australia where taking the time for a shower or bath is true bliss. But, regardless of where you are in the world, bathroom time is your quality “alone” time and you deserve to make it truly special. So, what’s the secret to your own bathroom spa? Keep on reading to find out.

1. Take care of the colors

First things first: you need to create a relaxing atmosphere in your bathroom. This is one of the simple tricks that you can use even when you’re not ready to invest in your plumbing. In general, spa colors involve soothing neutral colors such as white and beige. You can’t go wrong with these. But before you decide to go in this direction, take the time to think about the colors that soothe you the most. While you should always go with gentle pastel hues, you may find that green, pink, yellow or blue work better for you.

IMG_0731.jpeg

2. Incorporate natural elements

This is where things can get more complicated. But, if you want a perfect bathroom spa in your own home, wood and stone should be a part of it. Wooden elements and stone countertops don’t have to be too challenging if you know what kind of a layout you want. In recent years, Zen-inspired bathrooms have been all the rage in Australia, which is why it’s not that difficult to imagine the best ways to incorporate these elements into your bathroom. In the end, waterproof vinyl wallpaper that imitates wood and stone can be your budget-friendly option. Also, let your creativity run wild. It’s not just about the countertops and shelves. A wooden bench or a similar seating arrangement inside a bathroom is definitely spa-like.

IMG_0728.jpeg

3. The real deal – plumbing

If you’re set on transforming your bathroom into a spa oasis completely, you’ll definitely need to invest more time and money into this project. Essentially, plumbing will be your biggest concern. But, as mentioned, the whole country of Oz fell in love with Zen-inspired bathrooms years ago, which is why you can have a professional service for plumbing in Gold Coast get this done for you. You may want to transform your shower area by making it bigger with proper seating and side table, or you may want to have a whole new spa tub installed. Just make sure to consult with your contractors in order to find the best possible option for your space. 

IMG_0729.jpeg

4. Get rid of the clutter in favor of plants and candles

It’s important to know what your bathroom spa essentials are. You can’t possibly relax properly if there’s clutter everywhere, and especially half-empty bath products you never use. It’s time for a thorough declutter. Get rid of everything you don’t use. The whole point is to keep only those products that you love and that make you happy when you use them. Also, organize them so that you can keep them on display and easily reachable. On the other hand, don’t hesitate to enrich this space with real greenery. There are plenty of plants that thrive in bathrooms. Of course, don’t forget a scented candle here and there.

IMG_0730.jpeg

5. Play with the details

Details are very important for the perfect bathroom spa experience. Just like plants and candles, these can make or break the whole project. In that respect, embrace natural light and openness and ditch the curtains altogether. You want to achieve that warm, relaxing look of a spa with the mentioned natural elements but opting for warm (perhaps bronze or rose gold) pipe and plumbing finishes can look absolutely amazing. Furthermore, a bathroom mat that matches the overall style will add much-needed texture to this room. And if you want, you can add more personality with the use of patterned vinyl wallpaper in strategic places or with an interesting mirror frame. 

While there are some general guidelines for creating a home bathroom spa, the important thing is to always follow your intuition and stick with the theme that helps you relax the most. The concept of self-care is very important in Australia, and it’s time for you to embrace it wholeheartedly. 

Guest Contributor, Diana Smith


Designing the Perfect Home: Mission Possible 

RH Business Marketing Solutions

Plumbers in Crestwood

Designing the Perfect Home: Mission Possible 

When facing the home designing process, most people complain about not having enough money to fulfill their dreams or how building laws and regulations are acting as an obstacle. Well, unless you are a billionaire with your own island paradise, some trade-off may be inevitable. Then again, they do not have to feel like compromises. Designing a perfect home is not about fantasizing— this is just the first and easier part of it all. So, you cannot just spit-ball ideas. You have to separate essentials from features and amenities you can do without. Likewise, start thinking about what realistic and feasible is. 

Meaning of perfection

Preferences are always subjective and personal. When thinking about the realization of our wishes, there are many factors such as land and climate that act as potential hurdles. These objective factors affect design, floor plan, size, shape, and construction of the home. So, we may have to adjust the definition of what a perfect home is. I would say you should ignore glossy magazine pictures and images on the internet. They are a nice source of inspiration, but not something you should even try to recreate. Designing revolves around what YOU want and your ability to make it happen.

crestwood plumbers

A list of things

The construction process is a living thing that changes and develops over time. As it unfolds, what is possible and perfect tends to shift. So, you cannot expect to simply translate a fixed image into reality. Often, you have to choose one priority over another: perfect choices most often equal suitable and prudent choices. To navigate this labyrinth of decisions, you should be crystal-clear on what you want to achieve. Determine the optimal layout, type of home, number of rooms, etc. Work out a list of must-have features and only then establish nice-to-haves.  

Assemble a team

Note that you have to be a design leader guiding the whole process or you can decide to hire one if you are not up to the task. It helps to work with designers, architects, and builders that are able to understand, but also expand your initial vision. You need to trust them to flesh out your ideas by sketching a draft of the floor plan with all desired features. For instance, these Sydney-based home builders offer custom, bespoke solutions that reflect who their clients are. They support them every step of the way, from conceptualization and planning to construction and completion.

Plumbers in crestwood IL

From dreams to reality

For the time being, you can think about your dream home as if money was no object. Feel free to tour actual neighborhoods that spark your interest and see if there are any houses that are close to what you dream of. You can take photos of them for later studying. At one point, though, you have to take into account your budget— how much you can afford to spend on construction. What is more, it is necessary to consider specific site conditions and the environment, as well as town planning requirements and zoning regulation.

Finishing touches

Next, it is time to finalize your plans. The key question is: how do you want your home to feel? What are the design styles that speak to your personal sensibilities? Do you crave to have a connection to nature, an open and airy environment, or something else? Try to keep a design notebook with notes, photos, calculations, and musings. Set a preferred level of privacy, the amount of space you want, and get familiar with specific materials and building techniques. Finally, pick an ideal location. After that, you can finally start building a home that feels like ‘you’ and ticks all the boxes. 

Success by design  

Finding a perfect home is not overly likely, but you can design your own. You need to plan ahead of time and start mining for ideas to get the best outcome. Make an effort to manage your expectations and use a reality check. Have clarity about what you set out to accomplish. Enlist the help of trusted professionals and draw up an articulated budget. The ultimate goal is to put together a home that perfectly matches your lifestyle, budget, and circumstances on site. Following the steps above, you should be able to do that and get the most bang for your buck.

 Guest Contributor, Lillian Connors