Google+

contact us

Use the form on the right to contact us.

Day or Night, we are here to serve you. Leave your plumbing problem to us.


Tinley Park, IL

(708)845-7922

Residential and Commercial plumbers and plumbing contractors available in Orland Park, Tinley Park, Oak Lawn, Palos Heights, Midlothian, Oak Forest, Homer Glen, Mokena, Frankfort, and the surrounding Chicago South Suburbs. Emergency plumbers.

copper water lines.jpg

Kevin Szabo Jr Plumbing Blog

Kevin Szabo Jr Plumbing is Tinley Park, Orland Park, Oak Forest, Midlothian, Orland Hill, Homer Glen, Mokena, Frankfort, Crestwood, Palos Heights, Oak Lawn, local plumber. Read our blog for advice, tips, a good laugh, and basic home improvement.

**We are moving our old blog to our new and improved website. Too see all our posts visit kevinszabojrplumbing.blogspot.com

Filtering by Category: October 2018

5 Practical Tips for Relocating a Small Family-Owned Business

RH Business Marketing Solutions

Plumbers in crestwood

5 Practical Tips for Relocating a Small Family-Owned Business

When you’re running a small family-sized business, every client counts, and the concept of “time equals money” becomes so close to you that there is not a second to lose during your busy week. Sure, it’s great fun, and it helps preserve personal relationships with clients that bigger brands just can’t create or uphold, but when it comes to finally relocating, things can get a bit messy.

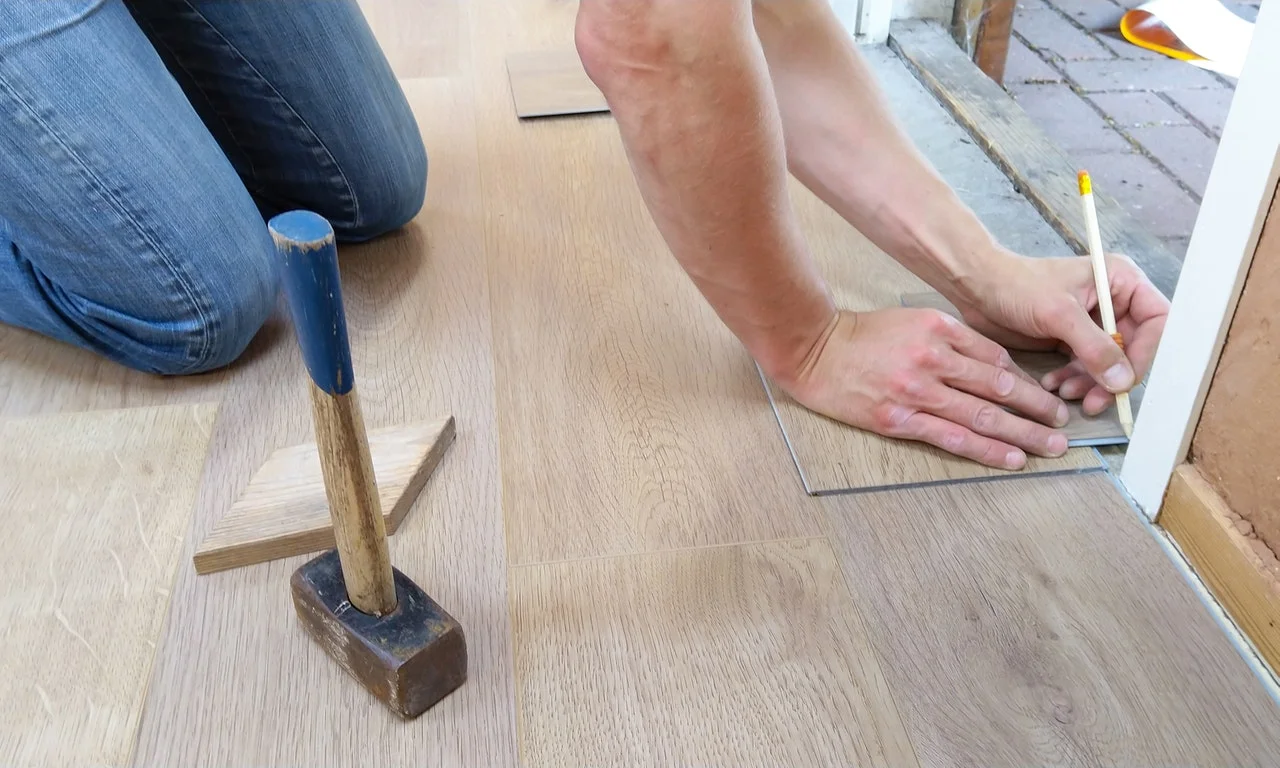
Just imagine running a family-owned plumbing business and having to move all of those tools and delicate equipment you carefully stored in your current office to a completely new location across town. Now that’s a challenge, especially when trying to keep your clients at your side. With that in mind, here are the five relocation steps you should follow for a safe and quick small business move.

Set Up your New Office Beforehand

Whether you’re moving to a new house or to a new office or facility, the first thing you need to do is prepare the new space for you arrival. This doesn’t just mean you should tidy up or connect the utilities, this means picking up right where you left off without feeling it on your budget, and without your clients feeling it on their own skin.

This is why complete office preparation is so important. You can start by deciding where everything, down to the last screwdriver, is supposed to be in the new office. Make a mock-up of the new space and write down where everything is supposed to go – it will save you plenty of time when you arrive.

Crestwood plumbers

Make a Detailed Packing Plan

It should go without saying that you should have a sound packing plan when it comes to moving your entire operation, but let’s say it anyway. Relocating a business, no matter how small, can only be done efficiently if you know what you’re doing every step of the way. This means that you need a detailed packing plan that will take you from inception to completion without losing business, your stuff, or your employees.

Instead of packing everything on moving day, start the packing process early. You can pack your non-essential equipment first, and then move on to the essential tools as the moving day approaches. Be sure to consult your schedule to ensure you didn’t pack a crucial piece of equipment that you actually need.

Crestwood IL plumbers

Save Time and Money by Renting a Truck

Hire professional movers? Sure, that might be the first thing that pops in your head, but that might not be the best cost-effective solution to your predicament. The truth is that moving companies tend to be needlessly expensive, especially in the wake of the truck hire revolution and the benefits it brings: lower cost, saving precious time, and complete control. Therefore, opting for Budget truck rental service to relocate your operation quickly and without busting the proverbial bank is the best way to go. Simply load everything up and be on your way while your customers and clients are still sleeping and you’ll be up-and-running without losing a dime.

Plumbers in Crestwood IL

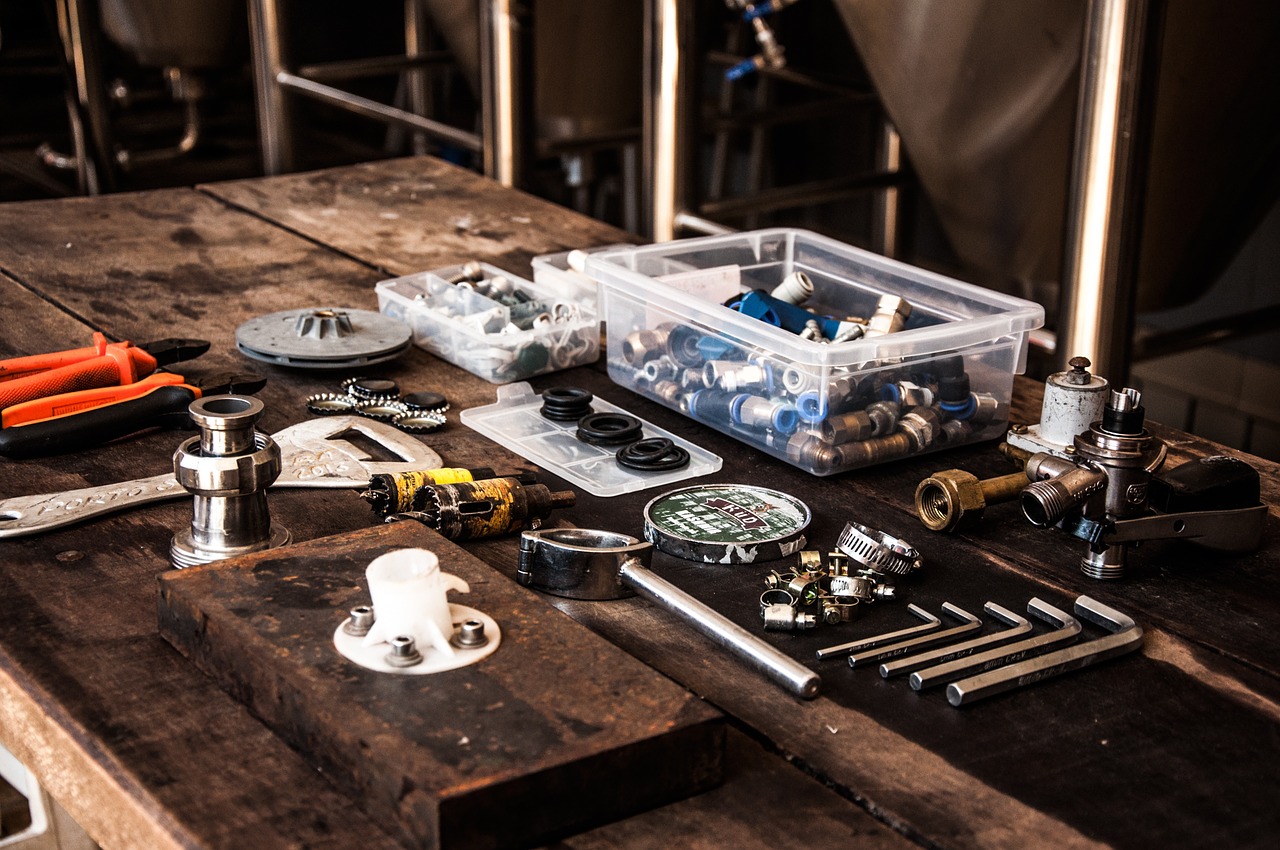
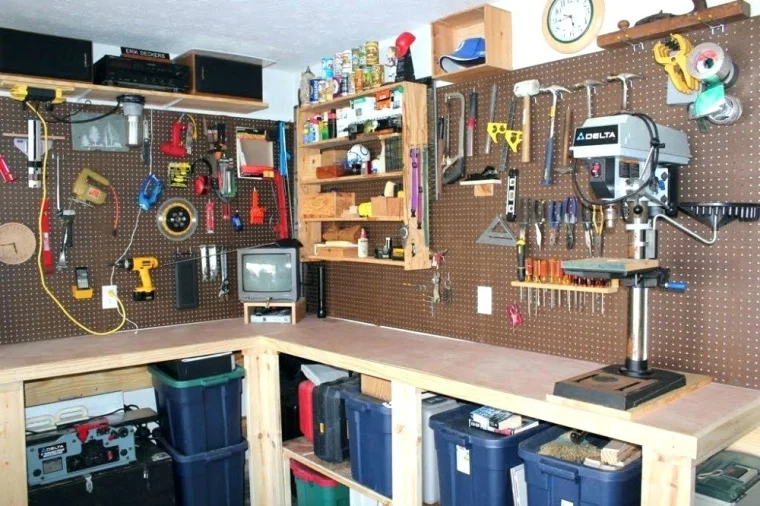
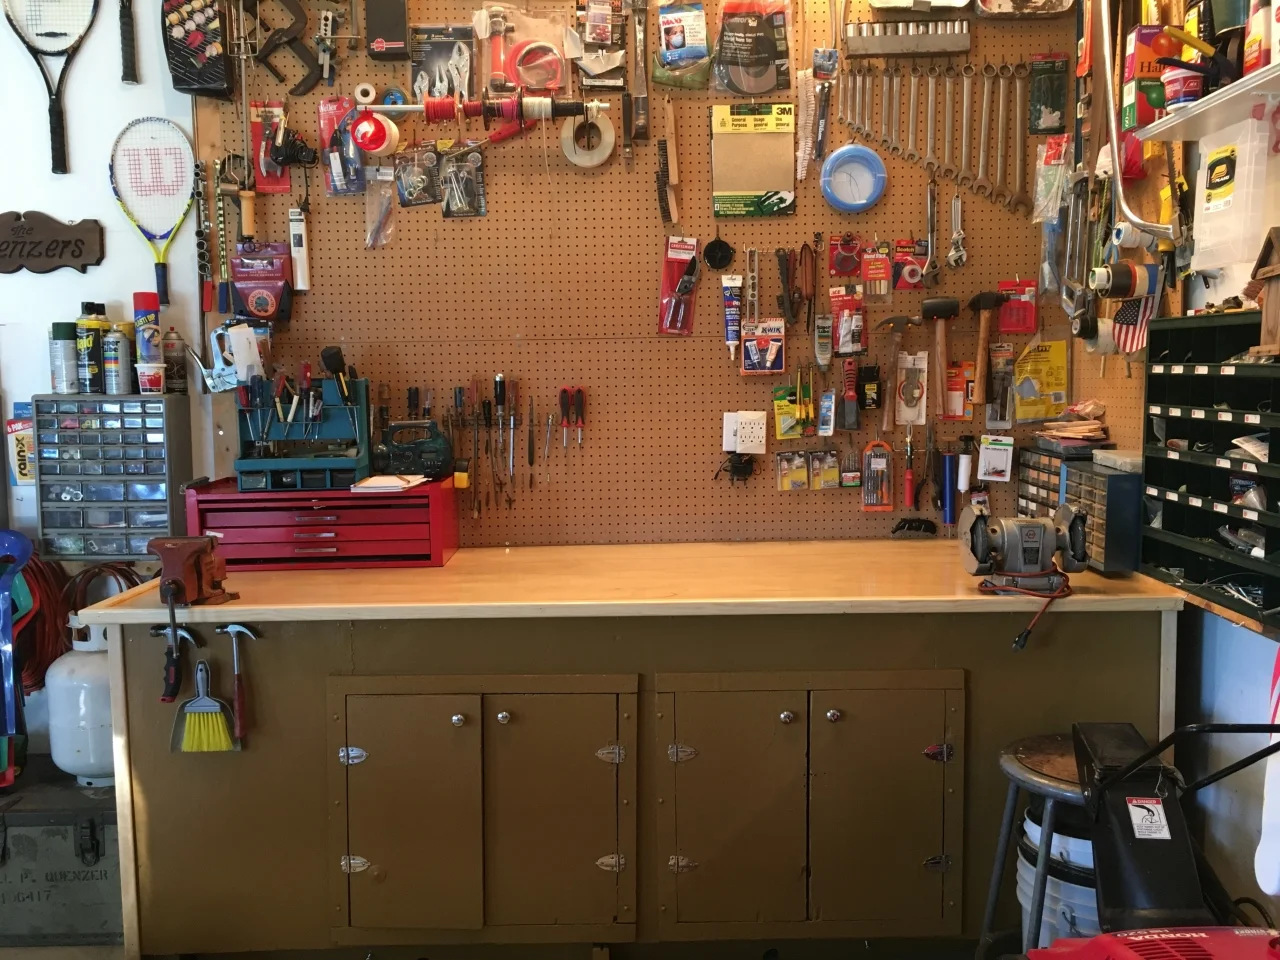
Sort and Pack your Tools

For a small family business such as a plumbing company or an electrician, the tools are worth more than anything, and therefore they require special handling and care during the relocation process. The first thing you should do, of course, is to sort all of your tools before packing them. Be sure to clean them as well, as there will be no time to do this in the new place.

Pack all of your hand tools into the toolbox and be sure to sort them into their corresponding sockets instead of just dumping everything in the main compartment. You can pack all of your power tools in labeled boxes, as these are sturdy enough to withstand the trip without special protection. Remember to drain all motorized tools of fuel before you pack them, because you never know what might light a disastrous spark.

Crestwood Plumbers

Inform Everyone of your Move

Last, but definitely not least, everyone should be in the know when it comes to your relocation. Don’t wait until the last day to inform your clients that you’re moving, because chances are you’re going to spook them. If you spook them, they will start looking for the same service somewhere else. Be sure you inform all relevant people of your move several months in advance, especially if you’re running a business where people come to you. This way, everyone will know exactly what to expect, and how to continue doing business with you without wasting their time or money.

Relocating a small family business is not a walk in the park, no matter how small the business is. By following these steps, though, you will have no problem moving your company to a new location without putting pressure on your employees, customers, or your wallet.

 Guest Contributor,

About the author: Mike Johnston is a home improvement blogger and DIY enthusiast from Sydney. He is a regular writer at Smooth Decorator and contributor on several interior design, lifestyle, real estate and eco blogs. Mike’s goal is to create and share meaningful content that helps and inspires people.


10 Plumbing & Maintenance Tools You Should Always Have At Home

RH Business Marketing Solutions

Plumbers in Crestwood

10 Plumbing & Maintenance Tools You Should Always Have At Home

Hiring a plumber isn’t always the thing that you may be wishing to do for a variety of reasons.

You may be living in a secluded location without quick access to such services. Or you may be in an emergency situation where mere minutes could be decisive.

Besides, some plumbing jobs are relatively simple and actually don’t require a professional necessarily.

In either case, you would probably want to have some plumbing & maintenance tools on hand for such cases. Even if you won’t really be doing plumbing jobs yourself, you should have a couple of basic tools just in case.

So without further ado, let’s see what the 10 basic plumbing and maintenance tools you should be having in your toolbox are.

Toilet Plunger

Toilet plungers are essential for any household. In fact, you may want to have two plungers instead of one: one flange and one cup plunger. Even if you don’t run into a clog issue that frequently, you should have them just in case.

Flange plungers are suitable for clearing toilet clogs because they have an additional soft rubber coming from the cup. And the cup plunger is a tool that would be useful for clearing clogs in sinks, tubs, or other flat-surface drains.

Basin Wrench

A staple in any plumber’s toolbox, the basin wrench can come in handy in basically any plumbing task.

It is a self-tightening wrench designed to fit into narrow spaces, so you could easily tighten or loosen fittings with a basin wrench in hard-to-reach corners where other types of wrenches just wouldn’t be able to fit into.

And you wouldn’t need to break through any walls to reach those areas!

Pipe Wrench

Pipe wrenches nowadays aren’t being used as widely as they once used to, but they still are necessary plumbing tools.

A pipe wrench is used to tighten and loosen fittings and nuts. In fact, you would probably need to have two pipe wrenches: one to hold the fitting and the other to actually loosen or tighten it with.

You could use just one pipe wrench to adjust the fittings, but you would put stress on the installation. If you are dealing with delicate piping, then using only one pipe wrench could end badly.

Adjustable Wrench

Adjustable wrenches are used on compression fittings, supply lines, and generally all the plumbing parts that have hex-shaped nuts. In addition, an adjustable wrench could be used if you don’t want to scratch any finish off of the installation.

When choosing an adjustable wrench, you would want to get one that has a firm jaw setting. If an adjustable wrench doesn’t have one, it just won’t work properly. And if it slips, you may damage your installation.

In addition, make sure to get both 6- and 10-inch adjustable wrenches.

Auger & Snake

Plumbing auger and snake are actually two separate plumbing tools, but since they are often used in tandem, we figured to list them as one.

The auger-and-snake tandem is used for clearing drain clogs that simply don’t yield to a regular plunger. Most commonly, auger and snake are used for dealing with toilet clogs.

Both are designed to easily move through the toilet drain to catch the potential clogs and pull them out. The difference between the two is that a snake is a much more flexible plumbing tool.

Hacksaw

A hacksaw would allow you to cut through metal and plastic pipes, hardware, screws, nuts, and whatnot. This is a tool that could come in handy if you can’t really deal with the problem by just tightening or replacing a couple of fittings.

A typical hacksaw is quite bulky and is thereby unsuitable for use in tight areas. You could, however, remove the blade, wrap it in a piece of cloth on one end, and then slip the blade in the tight area. Or, you could just go for a more compact hacksaw to deal with hard-to-reach areas.

Make sure to keep some extra blades in your toolbox just in case. Besides, when dealing with tough cuts, make sure that the blade is tense.

Tongue-and-Groove Pliers

Tongue-and-groove pliers are used to grab, hold, tighten, loosen, or pull something. In fact, some plumbers use these instead of a pipe wrench, probably because they prefer them to pipe wrenches thanks to their compactness and convenience.

Just like pipe wrenches, tongue-and-groove pliers work best in a pair when you hold the fitting with one plier and loosen or tighten it with the other. You would thereby want to have two, though one would still be sufficient for many plumbing jobs.

Tubing Cutter

A tubing cutter is another tool to cut piping with. It is generally more convenient than a hacksaw since it allows you to do quick cuts. Besides, tubing cutter does the cutting much cleaner.

However, whether you need a hacksaw or a tubing cutter will depend on the metal, so you would probably want to have both in your toolbox. Tubing cutters are most commonly used to cut copper or plastic piping.

There are also mini tubing cutters available on the market, so consider to get one as well for reaching tight corners.

Thread Seal Tape

Commonly referred to as PTFE tape or plumber’s tape, thread seal tape is used to sealing pipe threads. Aside from that, the tape works as a thread lubricant and as a deformable filler. Because of that, a joint wrapped in thread sealed tape doesn’t become hard to tighten.

Thread seal tape is inexpensive, so make sure to have a couple of rolls in your toolbox.

Metal File

A metal file is used to smoothen the edges of cut metal pipes, as well as to remove burrs. For jobs where you use a hacksaw, a metal file may be a necessity.

There are various file sizes available on the market, but you don’t have to get every single one of them. Generally, having a rat-tail file and a half-round file in your toolbox would be sufficient for the majority of plumbing jobs.

Of course, there are hundreds of other tools you can get for your home. We tried to stick to the basics to keep you safe when the time comes.

Guest Contributor, Morgan Antoinette

Bathroom Painting Tips

RH Business Marketing Solutions

Painted Bathroom.jpg

Bathroom Painting Tips

The bathrooms in your home serve a very necessary and functional purpose. However, they are also another room in the home where you can showcase your personal style. Throwing a new color of paint on the walls is just one of the many ways you can add style to the space. It’s also one of the greatest ways to do so.

If adding your own style to the space isn’t enough, another great reason to paint the space is due to the fact that most bathrooms are likely to undergo a lot of abuse from the steam that constantly arises from baths and showers. The humidity levels in your bathroom are likely to rise and fall more drastically which remains a tough challenge for the paint and walls to persist against.

Fortunately, freshly painting your bathroom is a simple DIY project that tends to take no more than a few days to complete, but before you begin slathering paint everywhere you should continue to read the helpful painting tips below.

Choose a Paint Color First

Since it is already established that shinier sheens are best for bathrooms where moisture is often a concern, you must only be concerned with your choice of paint color. Choosing the wrong paint color can easily make your bathroom seem sterile and uninviting. To avoid this, it is suggested that you choose an overall color scheme for your bathroom based on three colors complementary to one another on the Color Wheel. Once you have these three colors, choose one that best suits your bathroom as a paint color for the walls. The other two colors can be shown through any other accents and decor.

Collect All the Proper Materials and Supplies

Before you begin painting your bathroom, gather all the proper painting materials and supplies. These may include:

●      Primer

●      Paint

●      Stir sticks

●      Paint rollers

●      Roller covers

●      Disposable gloves and other safety gear to protect your skin or inhalation

●      Small paint brushes, for cutting in or touch-ups

●      Paint trays

●      Painters tape

●      Rags

●      Drop cloths

●      Sandpaper

●      Tack cloth to remove any sanding dust

●      Painters putty

●      Putty knife

Being prepared to paint is extremely important. Otherwise, you may end up with a mess or an unfinished project due to the lack of supplies. Running out for more could cause the paint to dry in the meantime, which won’t due any justice to the overall appearance of the paint job.

Make Sure Your Bathroom Is Properly Ventilated

It’s vital to your health and the completion of your bathroom paint project if proper ventilation is provided. The higher levels of humidity can damage your paint in no time or stop it from completely drying. To provide adequate ventilation, open windows, turn on ceiling fans nearby, or start the exhaust fan to help clear the room of any steam. This will remove the moisture faster. Have those in the household run a fan if they need to use the bathroom at any point.

Conduct Prep Work

Prep your bathroom by removing any outlet plates such as electrical sockets or light switches. Then, lightly wash down the walls with soap and warm water. After the walls dry completely, apply painters tape to the baseboards. Next, patch and sand any dents or holes in the walls. To protect your floors, tape down a drop cloth. You may also want to cover your counter, sink, bathtub and toilet to prevent them from paint spills or drips.

Before you paint, you will want to prime the walls first. Make sure the primer is fully dry before you start putting on the first layer of paint. When you do go to paint the color on the walls, cut in around the room’s edges first. This includes where the walls meet adjoining walls, the ceiling and the baseboard.

Use More Durable Paint on Window Sills

If you plan on repainting your window sills in the bathroom, you may want to consider using more durable paint. High gloss or semi gloss paint is perhaps best for your window frame and sill since moisture seems to be more prevalent in these areas. If moisture around the window sills of your bathroom is of your utmost concern, you may even upgrade to an exterior paint for this part of your project.

Consider Wood Paneling

If your drywall isn’t in the best of shape or you prefer not to redo the drywall in your bathroom, consider wood paneling. You can often find wood paneling sold cheaply by the sheet. These sheets come in many styles, wood types, and colors. Nonetheless, you can always install them and paint them whichever color you choose. When you apply wood panels to your bathroom walls, they are adding more protection against moisture as well as a lovely contrast to whatever paint color you chose for the remaining wall space.

Have a Variety of Lighting and Capture the Room’s Essence

Lighting plays a large role in the essence of your bathroom even after you paint. Since the levels of natural light are always changing in a bathroom throughout the day, it’s wise to have a good balance of both natural and fixed lighting. A lot of natural light will only enhance any and every flaw you make in the bathroom during your painting project. Even after you complete the paint job, the flaws will still be noticeable. With this in mind, paints with a higher shine are best.

When you have a smaller sized bathroom that gets a lot of natural light, ask the representatives where you plan to purchase the paint if they can mix it at 75% strength. This will lighten the color slightly which prevents flaws from being as noticeable. Aside from lighting the strength of color in the paint, there are ways you can play with the lighting to keep the color of the walls looking as close as possible to the color you desire. For instance, to warm up the color you can choose 40 watt incandescent light bulbs, while 100 watt light bulbs tend to make the color in the room seem cooler.

Don’t Rush Your Project

Perhaps the most detrimental thing you can do while painting the bathroom in your home is rush to complete it. Of course, poor preparation also plays a substantial role in a bad paint job. Nevertheless, it is the failure to take your time that really makes the paint in your bathroom lack appeal and showcase any flaws. Take your time. Even by doing so, the entire bathroom should be fully painted and completed in just a few days time. Make sure that you prepare your drywall, smooth out the walls, prime, and paint the next layer after each layer is completely dry. By doing so, you are certainly going to be more pleased with the results.

Guest Contributor, Tom Masters

Signs Your Heat Pump Needs Immediate Service

RH Business Marketing Solutions

Winter House.jpg

Signs Your Heat Pump Needs Immediate Service

Heat pumps have always been a reliable way of keeping ourselves warm during the winter. However, heat pumps are still machines that are bound to have something go wrong with it in the course of its lifespan.

When it suddenly acts up, it most likely means that it needs immediate service. Here are some signs that should tell you when to call an HVAC company for a professional heating system repair.

Insanely high energy bills

Getting high energy bills when you’ve got your heat pump running all throughout the summers and winters is perfectly natural. What isn’t is an energy bill that is practically double what you usually get. The prime suspect in any suspiciously high bill will be your heat pump.

Dirty air filters could be the cause as it restricts airflow and makes the heat pump work harder, which in turn leads to more energy consumption and higher bills. There could also be holes in your duct, which wastes a lot of precious heated air. These are possible causes that you can DIY, but some problems like low refrigerant charge or refrigerant overcharge are best left to HVAC experts.

Weird sounds

An HVAC system does make some noise, but when it’s louder than usual, and there are clattering, banging, hissing, or bubbling sounds involved, waste no time in shutting the unit down and calling a trusted HVAC company. Only pros should deal with what could be a poorly-lubricated central air fan motor, a loose fan belts, a compressor running under too much pressure, or a refrigerant leak.

Burning smells

Does the heated air coming out of your heat pump smell have a burning smell? If so, shut it down immediately because there really must be something burning inside. It could be a component that’s overheating or a simple electrical problem. Whatever the cause, never even try to turn the unit on again until the HVAC pros get there.

No more heat

If the heat pump has been running for an hour and everyone is still shivering, then there must be something wrong with your heat pump. A dirty air filter can cause it, but so can a malfunctioning PCB assembly, a defective thermistor, or a failing capacitor.

While you can change the air filters yourself, only skilled and experienced HVAC professionals should deal with the other possible issues.

You wouldn’t want your heat pump to break down in the middle of winter, so if you notice any of the signs mentioned above, call an HVAC company right away.

 Guest Contributor, Michelle West

Getting Rid Of Mold In Your Home

RH Business Marketing Solutions

Mold in your house.jpg

Getting Rid of Mold in Your Home

Although just a tiny organism, minuscule mold can pack a serious punch: one report reveals mold cost the U.S. $22.4 billion in health care expenses in 2016 alone. How much is that? That’s almost the GDP of Jamaica. Without plumbing performed by a professional in your kitchen, bathroom, or workplace, mold can quickly get the upper hand. So what can be done to rid your household of mold in your sinks, leaky showers, closets and bed sheets? Here are some tips to get you started.

Humidity: Mold’s Favorite Environment

Mold loves moisture. In fact, it needs it to survive. Just like us humans and other animals, mold needs water to survive and thrive. But given even a little bit of moisture, this simple organism becomes a nuisance, wreaking havoc on our respiratory, and even neurological, systems. Once mold gets exposed to moisture, it can begin to multiply. At that point, it is able to release spores that go up into the air and settle on nearby surfaces, creating veritable mold colonies. With humidity above 50%, mold starts flourishspawning new mold wherever it can. However, without humidity, mold dies of thirst. So step one in controlling mold is to dehumidify your home.

Get Leaks and Floods Fixed by Pros

A quality professional plumbing service is a must when your home has sprung a leak. Yes, maybe you could tighten a nut or bolt or two, but while the leak was happening, how much mold started to grow? A plumbing expert can come in and not only fix the problem but analyze the area to see if any mold used the leak to start building an unwanted home. And if there is any significant flooding, regardless of the source or type, it’s a must to get experienced pros to handle the cleanup. These things cannot be left to chance.

You Can Hunt and Kill It

Even though mold can be dangerous, it’s also a fairly fragile little creature. Once spotted, some bleach mixed with water will get the job done. Killing the mold really isn’t the most difficult part of the job. The challenge comes with protecting yourself and your family in the process. Cover all of your skin and blow a fan out a window to whisk away any spores stirred up while cleaning. And, when in doubt, play it safe by hiring a professional to handle the work.

If you find mold lurking in your house, be sure to check and double check all plumbing fixtures nearby. Quite often, it is visible in various different colors, so you can easily spot it and quash it. If you can’t see it, you can sniff it out. It has an unmistakable musty odor.  Even if you don’t have bleach handy, don’t worry, other household cleaners also do a good job of stopping it in its tracks. If, after zapping the mold, you keep the humidity down, you can quite literally breath easy.

Guest Contributor, Cindy Trillo

Should You Invest In Mirrors As A Decorative Piece For Your Property?

RH Business Marketing Solutions

Plumber in Crestwood IL

Guest Contributor, Our Friends at Art Consultants Accent Art & Frame

Chic Home Office Decor Tips For Winter

RH Business Marketing Solutions

Home Office.jpg

Chic Home Office Decor Tips For Winter

As the most dazzling season of the year approaches, we all strive to implement something new and original into our home. The most exciting part of the year brings cozy colors, seasonal outlook, and warm feeling into our home. If you happen to work from your house, you would be in for a treat because there are great new décor innovations coming up this winter. Whether you have a small or large office area, you should consider using some of these tips for revamping your workstation.

Bring in the cushy furniture

There is nothing better than having a nice cup of cocoa in front of a warm fireplace. Since during winter time you have to spend a bulk of your time in the office, why not bring that coziness there. Start off by rearranging your furniture, place an old-school brown leather sofa or an upholstery furniture, add funky cushions and even install a modern gas fireplace. Not only will you invite winter in, but you would be amazed at how productive you would be. Also, consider putting vintage indoor brick tiles on one side of the wall. This will spruce up the entire ambient in a cuddled up style.

Glaze up the surroundings

Winter is usually associated with golden, red and white colors. You don't have to follow that tradition entirely, but you can always add a hint of winterly touch here and there. You can give your home office a seasonal update by placing a shining silver mirror, silk pillowcase canada, Kiss Silk or luxurious velvet frames for your Christmas family photos. If you are feeling more festive, you can complete color the office into golden or brownish color, or go simple and buy emerald green lamps or lanterns. Red is the main color of this season, so you can add stunning curtains in this vivid color and open up the surrounding.

Rehabilitate your spirit 

The most important thing, when it comes to winter décor, is to feel and emotionally sense this season in your home office. You can do that by adding chic elements into your office ambients. For instance, place a riveting air freshener with cinnamon scent, or add mesmerizing and soothing candles and silver centerpieces. If you have been standing for a long time, preparing the necessities for the Christmas and running around doing the chores, then you might be feeling tired. To completely indulge into this season and focus better on your job you should add anti-fatigue mat for your desk. Since this mat has fast recovery foam, you would feel more comfortable on your feet and ready to face up any challenge without feeling tired.

Add posh details

In order to feel merry and bright during this season, you don't have to utterly reshape the office but rather add slight details. Winter decorating is all about layering on the fabrics and chic materials. Sheepskin is the epitome of cozy winter home décor. So have a sheepskin pillow or blanket placed on your chair, or cover the chairs with winter style slipcovers. What is more, you can treat your guest with hot green tea in white as snow dishware. Last but not least, adding classical winter decoration such as a traditional wreath in chic details and bold colors, you will definitely create a holiday atmosphere in your office.

Find the right rug

Why not replace the tedious and plain carpet with a great multicolored rug? You can ground your office space with a colorful area rug. If you have simple and clean furniture, you can spice up the chic winterly look by placing a striking rug. Nowadays, you can find an affordable textile rug in various patterns that work perfectly with any wall color. To top it all up, you can go bold and get a one of kind ornamental rug that would stand up age and time.

Bring in the life

When the weather outside is cold and chilly, then you should do the opposite and bring warmth to your home office. Give your home office a makeover and add a touch of life in. Put lush greenery inside, place a nice plant, add a fragrant bowl of potpourri in a pine needle scent. Display that in an arrangement as a casual winter centerpiece and welcome the season inside.

Any décor won’t be complete without a Christmas tree and some shiny ornaments, so don’t hesitate to add that as well.

Guest Contributor, Chloe Smith

Bathroom Painting Tips

RH Business Marketing Solutions

Bathroom Blog post.jpg

Bathroom Painting Tips

The bathrooms in your home serve a very necessary and functional purpose. However, they are also another room in the home where you can showcase your personal style. Throwing a new color of paint on the walls is just one of the many ways you can add style to the space. It’s also one of the greatest ways to do so.

If adding your own style to the space isn’t enough, another great reason to paint the space is due to the fact that most bathrooms are likely to undergo a lot of abuse from the steam that constantly arises from baths and showers. The humidity levels in your bathroom are likely to rise and fall more drastically which remains a tough challenge for the paint and walls to persist against.

Fortunately, freshly painting your bathroom is a simple DIY project that tends to take no more than a few days to complete, but before you begin slathering paint everywhere you should continue to read the helpful painting tips below.

Choose a Paint Color First

Since it is already established that shinier sheens are best for bathrooms where moisture is often a concern, you must only be concerned with your choice of paint color. Choosing the wrong paint color can easily make your bathroom seem sterile and uninviting. To avoid this, it is suggested that you choose an overall color scheme for your bathroom based on three colors complementary to one another on the Color Wheel. Once you have these three colors, choose one that best suits your bathroom as a paint color for the walls. The other two colors can be shown through any other accents and decor.

Collect All the Proper Materials and Supplies

Before you begin painting your bathroom, gather all the proper painting materials and supplies. These may include:

●      Primer

●      Paint

●      Stir sticks

●      Paint rollers

●      Roller covers

●      Disposable gloves and other safety gear to protect your skin or inhalation

●      Small paint brushes, for cutting in or touch-ups

●      Paint trays

●      Painters tape

●      Rags

●      Drop cloths

●      Sandpaper

●      Tack cloth to remove any sanding dust

●      Painters putty

●      Putty knife

Being prepared to paint is extremely important. Otherwise, you may end up with a mess or an unfinished project due to the lack of supplies. Running out for more could cause the paint to dry in the meantime, which won’t due any justice to the overall appearance of the paint job.

Make Sure Your Bathroom Is Properly Ventilated

It’s vital to your health and the completion of your bathroom paint project if proper ventilation is provided. The higher levels of humidity can damage your paint in no time or stop it from completely drying. To provide adequate ventilation, open windows, turn on ceiling fans nearby, or start the exhaust fan to help clear the room of any steam. This will remove the moisture faster. Have those in the household run a fan if they need to use the bathroom at any point.

Conduct Prep Work

Prep your bathroom by removing any outlet plates such as electrical sockets or light switches. Then, lightly wash down the walls with soap and warm water. After the walls dry completely, apply painters tape to the baseboards. Next, patch and sand any dents or holes in the walls. To protect your floors, tape down a drop cloth. You may also want to cover your counter, sink, bathtub and toilet to prevent them from paint spills or drips.

Before you paint, you will want to prime the walls first. Make sure the primer is fully dry before you start putting on the first layer of paint. When you do go to paint the color on the walls, cut in around the room’s edges first. This includes where the walls meet adjoining walls, the ceiling and the baseboard.

Use More Durable Paint on Window Sills

If you plan on repainting your window sills in the bathroom, you may want to consider using more durable paint. High gloss or semi gloss paint is perhaps best for your window frame and sill since moisture seems to be more prevalent in these areas. If moisture around the window sills of your bathroom is of your utmost concern, you may even upgrade to an exterior paint for this part of your project.

Consider Wood Paneling

If your drywall isn’t in the best of shape or you prefer not to redo the drywall in your bathroom, consider wood paneling. You can often find wood paneling sold cheaply by the sheet. These sheets come in many styles, wood types, and colors. Nonetheless, you can always install them and paint them whichever color you choose. When you apply wood panels to your bathroom walls, they are adding more protection against moisture as well as a lovely contrast to whatever paint color you chose for the remaining wall space.

Have a Variety of Lighting and Capture the Room’s Essence

Lighting plays a large role in the essence of your bathroom even after you paint. Since the levels of natural light are always changing in a bathroom throughout the day, it’s wise to have a good balance of both natural and fixed lighting. A lot of natural light will only enhance any and every flaw you make in the bathroom during your painting project. Even after you complete the paint job, the flaws will still be noticeable. With this in mind, paints with a higher shine are best.

When you have a smaller sized bathroom that gets a lot of natural light, ask the representatives where you plan to purchase the paint if they can mix it at 75% strength. This will lighten the color slightly which prevents flaws from being as noticeable. Aside from lighting the strength of color in the paint, there are ways you can play with the lighting to keep the color of the walls looking as close as possible to the color you desire. For instance, to warm up the color you can choose 40 watt incandescent light bulbs, while 100 watt light bulbs tend to make the color in the room seem cooler.

Don’t Rush Your Project

Perhaps the most detrimental thing you can do while painting the bathroom in your home is rush to complete it. Of course, poor preparation also plays a substantial role in a bad paint job. Nevertheless, it is the failure to take your time that really makes the paint in your bathroom lack appeal and showcase any flaws. Take your time. Even by doing so, the entire bathroom should be fully painted and completed in just a few days time. Make sure that you prepare your drywall, smooth out the walls, prime, and paint the next layer after each layer is completely dry. By doing so, you are certainly going to be more pleased with the results.

Guest Contributor, Tom Masters

5 Essential Renovations To Do Before Moving Into Your New Home

RH Business Marketing Solutions

Plumber in Crestwood IL

5 Essential Renovations To Do Before Moving Into Your New Home

There’s no use denying it. Moving homes is definitely one of the most stressful tasks that you can tackle. Of course, it’s nothing impossible, but the amount of effort, time and planning you have to put into it can really put some pressure on you. There are finances to worry about, the obvious changes in lifestyle and the general break you have to take in order to sort everything out. And there is also the need to take care of your new place so that it’s perfectly comfortable and functional once you move in. This is why it’s so important to know the most essential renovation projects when it comes to moving into a new home.

new_paint.jpeg

Wall painting

If you’re happy with the current state of the walls in your new home, you’re lucky. But, if you find that there’s room and need for improvement, giving the walls a fresh coat of paint may be necessary. Not to mention that you simply may want to enjoy different color combos in your own place. Painting the walls doesn’t have to be a difficult process. What’s more, you can easily do it without professional help, on your own or with friends if you want. But, you may want to consider low-VOC paint for this project to make sure your indoor air is clean and toxin-free.

electrical.jpg

Check the electrical and plumbing system

Now, this task is a bit more challenging and complex compared to wall paint. However, it’s also one of the most essential renovation projects as it will hugely affect your life in the new home. After all, you don’t want to worry about water leaks and/or short circuits once you’ve completely moved in. It’s always better to have a professional examine your electricity to avoid any potential danger. When it comes to the plumbing, you can see for yourself whether there are some issues. For instance, pay attention to the look and taste of water. Check whether the water boiler and sinks are working properly. Take some time to see if there are any leaks or drips. You may also want to check whether the toilet flushes as well. Of course, don’t hesitate to call a professional when your plumbing system is concerned as well, especially if you need to have your pipes and valves replaced.

moving_boxes.jpg

Safe transport

Obviously, you’ll need to install all the appliances and devices before moving into your new home. This is another essential part of the pre-moving process to ensure your complete comfort later on. But, in this case, you need to think about the safety of your appliances and other delicate pieces you need to transport to the new place. This also goes for furniture, in case you have to organize the new layout from scratch. To reduce the stress that comes with the move, it’s always smart to get a proper moving truck so that you can deal with everything more efficiently, and thanks to affordable Budget truck hire deals, you can do exactly that.

flooring_installation.jpeg

Flooring installation

In general, taking care of the wall paint, furniture and appliances as well as dealing with electricity and plumbing tend to be the most common renovation practices every new home needs. But, this may not be everything if you want to make sure your new environment is perfect. In that sense, it’s important to check the condition of your floors as well. Investing in a new floor, and especially green flooring options, can boost your home’s value instantly, make the maintenance a lot easier, secure the floor durability and looks, and sometimes even help with insulation.

Kitchen and bathroom remodeling

Even though you dedicate a lot more time to decorating your living room and bedroom, kitchen and bathroom can make or break the homey feel of your new place. If you’re not satisfied with the look and feel of these two rooms, you probably won’t feel content with the home in general. So, if you know that you don’t fancy the current kitchen and bathroom in your new place, don’t rush with the move. Hire contractors so that you can remodel the kitchen and upgrade the bathroom to fit your needs and taste perfectly before you proceed with the move.

Aside from the obvious renovations that may involve electrical and plumbing work, it’s important to remember that your personal environment affects your mood greatly. In that respect, you should never settle for something that doesn’t make you happy and fulfilled. Therefore, don’t hesitate to renovate and tweak your new home into something perfectly suitable for your own peace of mind.

About the author: Mike Johnston is a home improvement blogger, DIY enthusiast and sustainability buff from Sydney. He is a regular writer at Smooth Decorator and contributor on several interior design, real estate and eco blogs, always on the lookout for new ideas and the latest trends in these fields.


How to Set Up a DIY Garage Workshop

RH Business Marketing Solutions

Plumber in Crestwood

How to Set Up a DIY Garage Workshop

Every craftsman knows how important it is to have a perfect working space. You want to start your business at home and make beautiful things from wood? If you are up for it, then roll up your sleeves and turn your garage into a magnificent workshop. 

Cleaning

Before you start with any changes in your garage make sure to clean it well. The garage is usually the place where people keep old things (besides their car), but now it’s time to make some order in that clutter. After that first step you can paint the walls. Use white paint for the ceiling and soft colors for the walls so that the light would circle all around the place. Finally, get a dust collection, central vacuum and air ventilation system because it will clear the air you breathe in the workshop and keep your lungs safe from the dust and wood particles.

Plumbers in Crestwood

Equipment and tools

High-quality equipment makes every task easier. Your workbench should be solid so make sure to get one with a hard and heavy top plus sturdy legs. It has to be able to endure everything you do on it. Once the wood materials come in you will have to cut them with the precision of a genius, and that’s why you will definitely need a measuring (length) stop. It will help you manage the saws more easily than ever before and make every piece you cut exactly the way you want it.

Save some space

Oh, to be able to walk around the workshop whole day and never trip on anything! Believe it or not, it’s possible. Don’t crowd the floor with shelves or small boxes and take those nuts and bolts away from your workbench. How? Very simple – mount the old or handmade shelves and cabinets on the wall and store everything there. Not only will you avoid tripping on that toolbox but you will also keep the tools away from the dust that your work creates. Place those long-handled tools in concrete-forming tubes or make a cut-off cart from old boards and casters for it. Finally, don’t forget to put some hooks on garage doors to hang even more things.

Crestwood Plumbers

Flooring and lighting

After the job is done, it sounds like a nightmare that you have to clean the floor around your workbench, doesn’t it? That’s why you should go for an epoxy floor finish. In case you have to spend several hours standing in order to finish the current project, put some rubber floor mats under your feet. After you finish painting the walls and ceiling, let some light inside your workshop. If you have task lighting in the garage you will also need a work lamp on your table to avoid shadows falling on your work. Want more brightness? Install fluorescent lights.

Insulation, cooling and heating

If you don’t want to freeze during winter or sweat in the summer days while you are working in your workshop, then you should do something about it. The first step is to insulate the garage as well as possible. Insulation is also very important when it comes to cooling your garage in the summer. While it’s snowing outside keep yourself warm in the workshop with a few space heaters – just don’t forget to turn them off once you finish for the day!

Electrical Service

You will be able to finish the job more quickly if you don’t need to unplug one corded tool in order to plug the other one. Put away that extension cord and ask the electrician to install numerous power outlets close to your workbench. If you do this there will be absolutely no danger of you tripping over all those cords that end up in the extension cord lying somewhere behind your desk.

Your workshop should be a place where everything you need for the job is in your reach. If you achieve that while renovating your garage into a working environment, you will easily get work done and immediately start looking forward to another project.

Guest Contributor, Lillian Connors