Google+

contact us

Use the form on the right to contact us.

Day or Night, we are here to serve you. Leave your plumbing problem to us.


Tinley Park, IL

(708)845-7922

Residential and Commercial plumbers and plumbing contractors available in Orland Park, Tinley Park, Oak Lawn, Palos Heights, Midlothian, Oak Forest, Homer Glen, Mokena, Frankfort, and the surrounding Chicago South Suburbs. Emergency plumbers.

copper water lines.jpg

Kevin Szabo Jr Plumbing Blog

Kevin Szabo Jr Plumbing is Tinley Park, Orland Park, Oak Forest, Midlothian, Orland Hill, Homer Glen, Mokena, Frankfort, Crestwood, Palos Heights, Oak Lawn, local plumber. Read our blog for advice, tips, a good laugh, and basic home improvement.

**We are moving our old blog to our new and improved website. Too see all our posts visit kevinszabojrplumbing.blogspot.com

Filtering by Category: JUNE 2020

A Professionally Crafted Schedule for Cleaning Your House 

RH Business Marketing Solutions

A Professionally Crafted Schedule for Cleaning Your House 

[Daily, Weekly, Monthly & Years]

Our house is our sanctuary, a place where we are the most comfortable as well as vulnerable. It is essential that our sanctuary remains tidy and clean because our life depends on it. From the minute we wake up, the air we inhale, the clothes we wear, the floor we walk on or the food we cook in the kitchen and the bathroom we use for the shower, everything adds up to our health and immunity. So, the bottom line is cleaning is a big necessity.


However, cleaning is not as easy as it sounds. Because it’s not just sweeping or mopping. There is more to it. And, if we consider cleaning a whole house every day, then the idea might just seem to be next to impossible. But, what if you could use another sneaky way to keep the house and everything inside it on a regular clean check and organized? Well, read more to find out. 

Checklist: Cleaning Tips for the Household 

Since cleaning an entire house seems like a whole lot of work, what you can do is break it down and make a scheduled checklist where you can assort them into sections. For instance, cleaning routine for every day, every week, every month and every year. 


Little confusing? Here’s a more detailed scheduled checklist that you can apply for an optimal cleaning routine:

Things to Clean Every Day

When it comes to everyday cleaning, you can resort to cleaning things that do not take up much of your time. This way, you can keep them clean and also attend your work schedule on time. Additionally, it will also prevent germs and bacteria from growing. Here’s what you can do:

1.    Tidy Bedroom 

In order to keep your bedroom organized when you come back home from a tiring day, you can simply wake up in the morning and tidy it up. Set new sheets whenever required, clean up the mess on the bed, keep everything back to where it belongs. This will help you to get into an organized timeline. 

2.    Clean Dirty Dishes 

It is needless to say that dirty dishes should be cleaned as soon as possible because the longer you keep them unwashed, the faster germs will grow. When you are done cooking, place them on the sink and clean them up instantly. Or, the least, after you are done eating and before going to bed. 
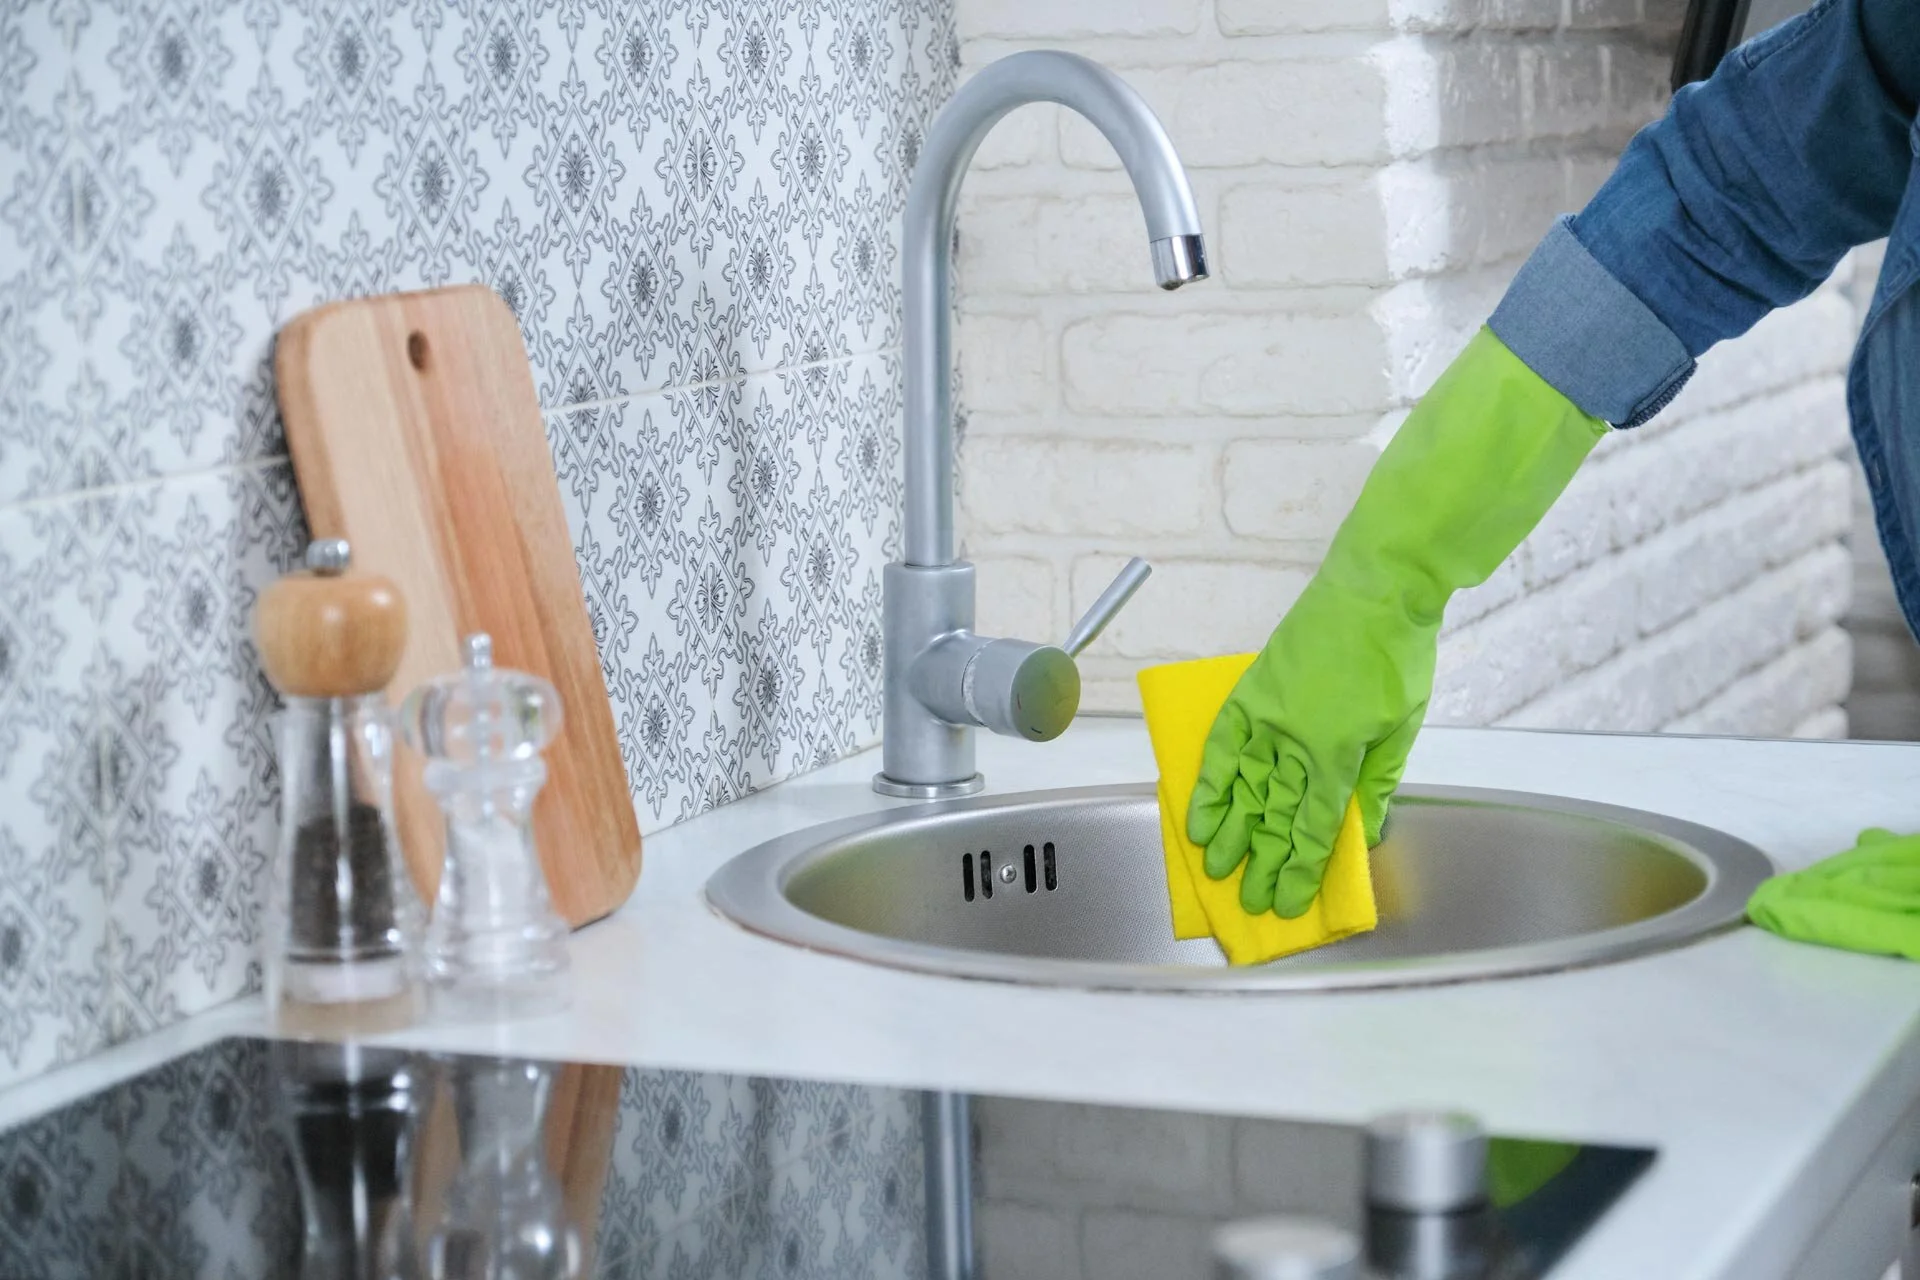
 

3.    Sanitize Sinks 

The sink is what we use daily. It makes sense that it needs to be cleaned every day. But, it only takes a few minutes to do it. Simply use a cleaning sponge to wipe away the stains and food residues. To sanitize the sink, use warm water and pour it down the drain. Use bleach for a few minutes until you wash it off. 

Things to Clean Every Week 

Now that you have set a routine for cleaning things daily, it's time for you to make a weekly routine. This way, you will be covering more areas and more things in the house every week. Here’s what to do:

1.    Clean Microwave 

We use a microwave every day for warming up food. Even though it does not make much of a mess every day, however, by the end of the week, you’ll see some food residue and stains left here and there. So, it is ideal for a weekly clean. Take one whole cup of water and a few small spoons of vinegar. Mix it well in a microwave protected bowl and warm it up inside. Wait until you see steam gas formed and then let it sit for a while until you use a clean fabric to take off the mess. 

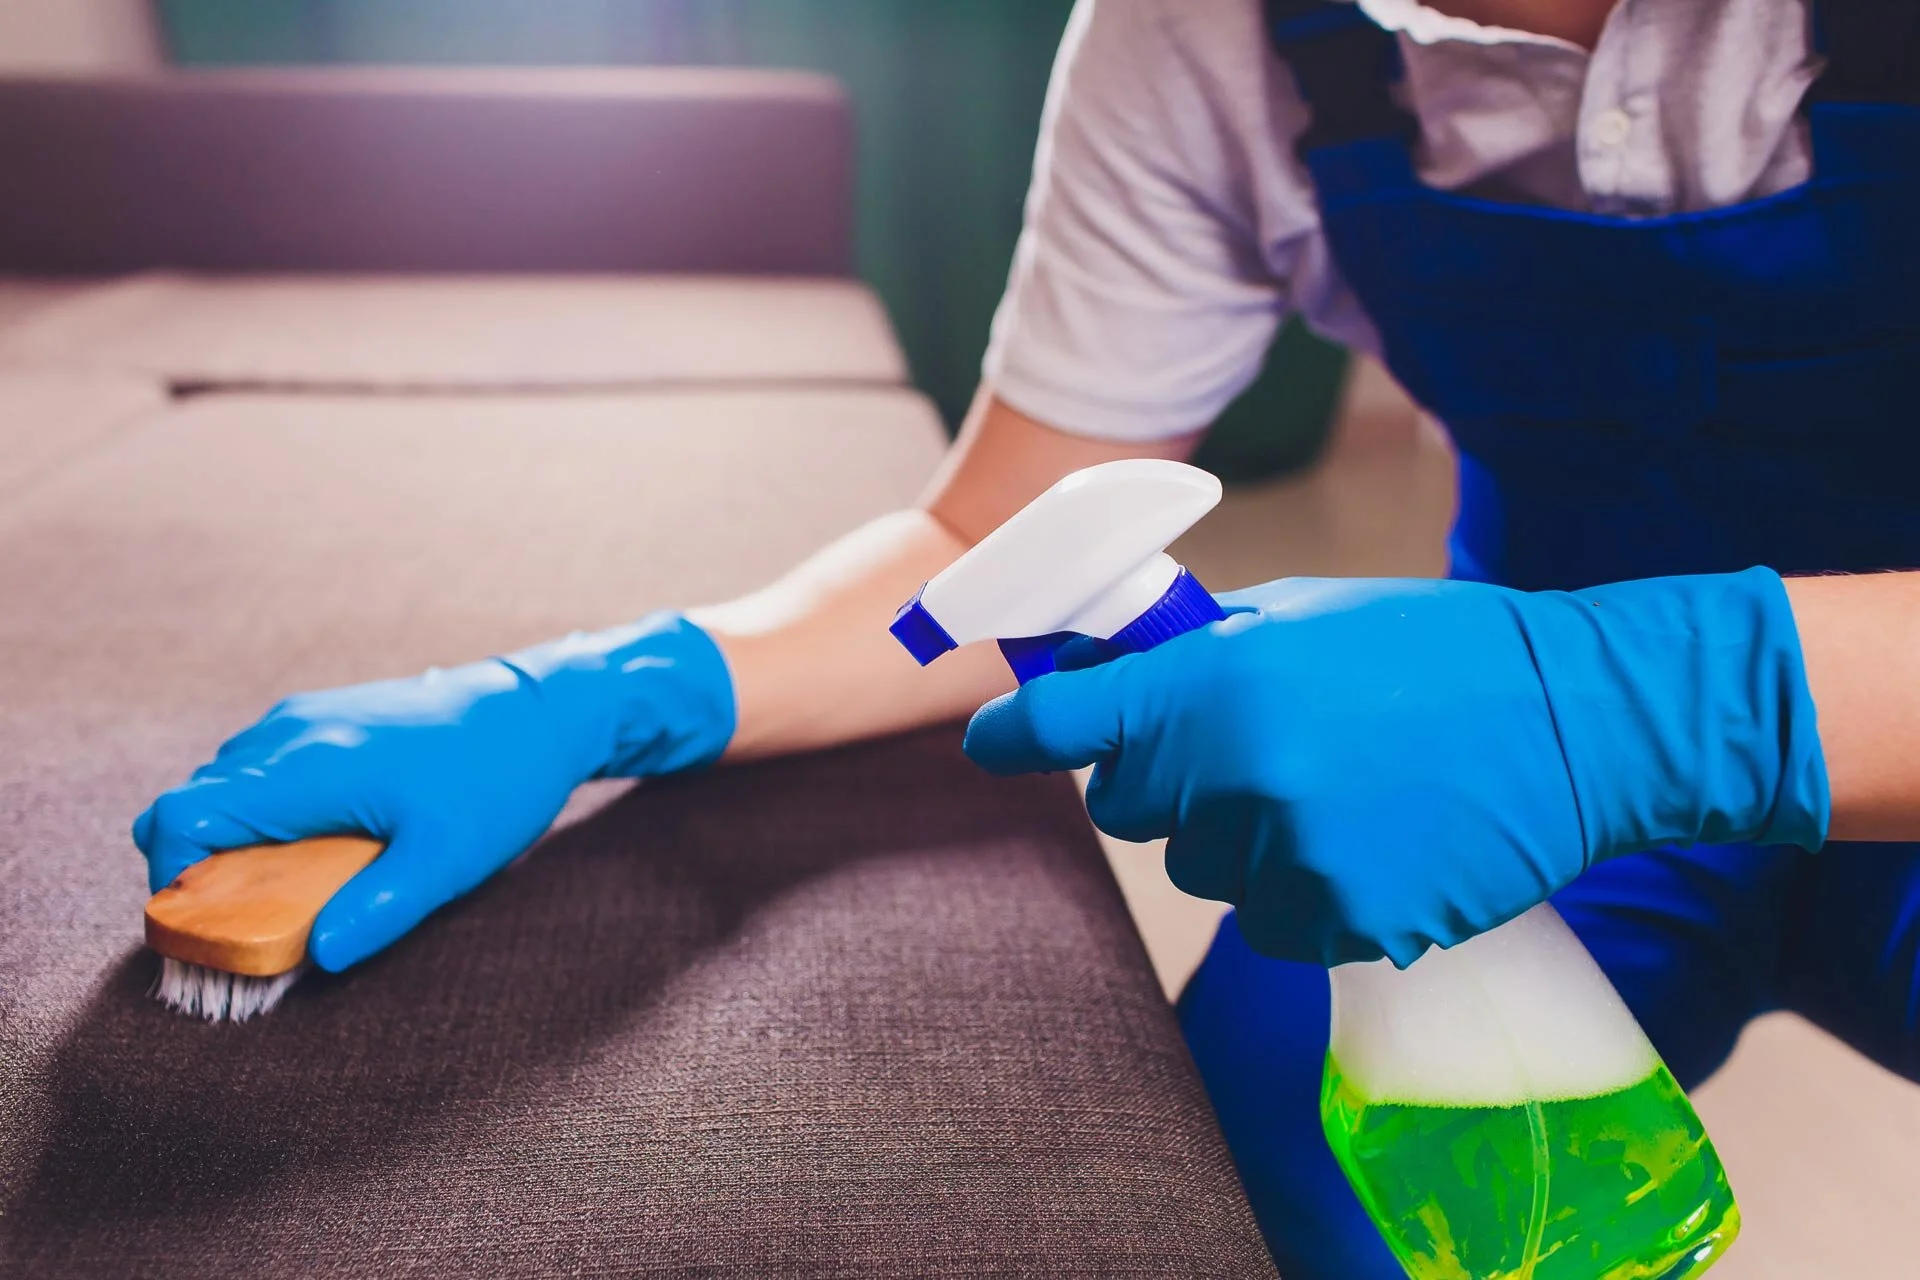
2.    Clean Bathroom Surfaces 

To immaculate your bathroom, do the basic things like mopping the bathroom floor, sweeping of dust, and dirt from the surfaces using a clean fabric. Make sure to disinfect the toilet bowl using quality products that are capable of killing 99% of germs. Don’t forget the bathroom tiles, glass, shower head, and bathtub in the process. 

3.    Clean the Refrigerator 

Cleaning refrigerators every week is a good choice because it keeps your food safe and the air inside clean. By the end of the week, you will see spills from food, stains, and perhaps a foul smell. Simply take out the food from the refrigerator and empty it. Now, take out the removable shelves and keep them aside. Use a refrigerator cleaner and a fabric to wipe out the stains and food residue. Don’t forget to defrost the freezer and clean it too. Once it is done, put the shelves and food back in order. 

Things to Clean Every Month 

Now, let us take a look at the task that can stay on hold until the next 30 days passes. Here’s the task that you need to go through every month, whenever you can:

1.    Washing Machine 

For cleaning the washing machine, all you need to do is make sure to put it on a wash cleaner cycle mode. This is meant for models that are new to the market. However, if you have an older model then you can simply use a normal cycle. Fill in water and put washing machine cleaner detergent in the detergent segment. This will clean the insides thoroughly. 


2.    Dishwasher

To clean the dishwasher, take a cup of water mixed with vinegar. Place it on the top shelve of the dishwasher and turn on the cycle. A heat dry cycle would be advisable to clean the dishwasher properly.  

3.    Clean Vacuum 

Since you use the Vacuum almost every day, it is essential to change the vacuum bag once every month. This will keep the suction power strong and intact. Try replacing the filters too, if necessary. Take out tangled threads using a soft brush as well.

Things to Clean Every Year 

There are additional things that you need to clean every year and that will pretty much keep your house perfectly clean:

1.    Deep Clean the Rugs/Carpets 

Carpets tend to absorb a lot of dirt, dust, germs, and bacteria. They hide in deep layers and often don’t come out even after dusting. Hence, at a suitable time, vacuum all the carpet first. Then, you need to wash them. During the washing process, scrub deeply using a special carpet cleaning agent. Then, rinse it off properly. Now, soak out the remaining water and leave in the sun to dry off. 

2.    Clean the Windows 

Too clean windows, you need a pair of clean fabric cloth and a glass cleaner. Start from one edge and cover all the sides, corners, and the sill. Wipe out the layers of dust and keep wiping until the stains are removed. Then, spray water and take off the remaining grease and cleaning agent. 

3.    Deep Clean Pillows/Mattress/Covers

Take off the pillow covers and put them in the washing machine along with your bedsheets. Make sure to put warm water on a normal cycle. Meanwhile, clean your mattress and pillows. Make sure to scrub it using quality products to take out the deep hidden germs and allergen. Additionally, you can also try steam cleaning them, it is more effective. 


Since you’ve successfully noted the checklist, get started today. Or, if you have any difficulties cleaning, then you can refer to Dubai-Cleaners for quality cleaning services. At the end of the day, nothing is better than seeking professional assistance for all your cleaning tasks.

Author bio:

 An enthusiastic tech blogger with a creativity-mind and an entrepreneur in himself. His focus and passion adjoin for seeking the latest technological developments and travel. A content crafter who can enchant you with his ideas on home improvements. His love for blogging makes him an inventory and an influencer. 

Guest Contributor: Sunil Verma

The most common home plumbing problems and ways to avoid them

RH Business Marketing Solutions

Screen Shot 2020-07-07 at 3.57.28 PM.png

The most common home plumbing problems and ways to avoid them

As a homeowner, your attention is divided between so many things: work, school, vacations, budgeting, kids, and so much more. It’s all-too-easy for your home’s plumbing—something many of us take for granted—to go unnoticed. However, home plumbing problems have a habit of inserting themselves into our busy lives, even when it’s inconvenient. As part of your regular home maintenance and upkeep, you should be taking steps to prevent major plumbing problems. In this article, we’ll review several of the most common home plumbing issues and the best ways to go about avoiding them.

Water heater problems

Without a properly working water heater, you and your family are in for some cold morning showers. As water heaters age, they may begin to exhibit several signs that they need to be replaced. If you notice declining performance or capacity, for instance, that could signal that the heating element is no longer effectively warming the tank. Water pooling around the bottom of the tank is a sign that the tank wall is starting to be compromised by corrosion, or that the emergency pressure-relief valve has opened and that the pressure in the tank is too high.

Left untreated, any of these water heater issues could lead to the failure of the tank. In the case of either excessive pressure or tank failure, it could result in the tank “bursting” open and flooding your home. At the first sign of any water heater problems, you need to bring in a plumber and follow any recommendations they have for repairing or replacing the unit.

Pipe leaks

Any water leak is bad news for your home. Repairs, cleanup, and mold remediation can collectively cost thousands of dollars.

Many leaks have a specific cause: freezing temperatures. When overnight lows dip below freezing, your home is at risk of frozen pipes. Your furnace generates enough heat to generally protect these pipes, but any interruption to this heating—such as a system breakdown—can result in the pipes beginning to chill, and then freeze. As the water in your pipes turns to ice, it expands, putting incredible pressure on the pipe walls. With enough pressure, the pipe will burst open, flooding your home.

There are several ways to guard your home against frozen pipes. The first is by having your furnace maintained at least once-per-year: this greatly reduces the likelihood of a heater breakdown, which in turn keeps your pipes warm enough to prevent them from freezing. Another preventative measure is pipe sheathing, which involves a plumber putting insulated material around the pipe to slow down the heat loss in the event your heater stops working. Finally, on the coldest nights of the year, you should run your faucet at a slow drip. Moving water is less likely to freeze than stationary water.

Sewer line trouble

A sewer backup is a waking nightmare for any homeowner. This occurs when a clog or blockage forms in the sewer line. With nowhere to go, the wastewater from your home comes back up through the drains, toilets, and sinks. It’s a disgusting disaster. Generally, sewer line blockages are caused by either household waste or by tree roots. The good news is that you can take preventative measures to keep clogs from happening. Let’s dive in.

There are certain types of food waste that are known to cause sewer line issues. Most infamously, grease. Grease and oils change from a liquid to a solid as they cool, making them incredibly dangerous to a sewer line. What gets poured down the sink as a liquid might solidify deep in the line, starting a potent clog. Uncooked rice and pasta have a similar issue: as they become waterlogged, they expand and can become stuck in the line. Coffee grounds, eggshells, and flour also tend to stick to the interior walls of a sewer line. With enough of this waste built up, the line will start to partially, and then eventually fully, clog. Never put these items down the sink: dispose of them in the trash, instead.

Your property’s trees can also threaten your line. Sewer lines generally develop small fractures as soil shifts and the line ages. Thirsty nearby tree roots seek out these moisture sources like a homing missile. With enough time, they’ll grow around and then greedily delve into the line. Some sewer line clogs are caused exclusively by a tree root that has grown into the line, fully blocking wastewater from traveling to the municipal sewer. We recommend you talk to an arborist: certain species of trees and bushes with fast-growing, aggressive root structures may need to be moved away from the sewer line.

Protect your home

If you’re noticing any plumbing issues in or around your home, now’s the time to bring in a professional plumber to take a closer look. Many plumbing problems can start small and then quickly spiral out of control, necessitating expensive repairs and cleanup. An experienced plumber can help you diagnose any major issues and offer recommendations for your next steps.

To learn even more about the most common plumbing problems homeowners face and how to avoid them, be sure to check out this infographic.

Guest Contributor: Amanda L

Guest Contributor: Amanda L

How To Install A Dishwasher Supply Line

RH Business Marketing Solutions

Screen Shot 2020-07-07 at 3.44.54 PM.png

How To Install A Dishwasher Supply Line


Installing some appliances can seem like a daunting task if you don’t take care of some important details. For example, the installation of a dishwasher cannot take place unless there is an extension of the hot water supply line to the dishwasher and a connection of the drainpipe to the dishwasher. For an already installed dishwasher, replacement of the supply line is also a tad difficult if you don’t know what you’re up against. 


What is a hot water supply line?

Hot water is needed to wash the dishes. Where does that water come from? It comes from the hot water supply system at your house. This system consists of the heat source, water treatment apparatus, pipelines that transport water, and certain devices that maintain and control the temperature of the water. The main concern for the supply system when dealing with the dishwasher installation is the pipeline that is bringing the hot water to the dishwasher.


Dishwasher’s supply line:

The dishwasher’s supply line does not come with the dishwasher. It needs to be purchased from the plumbing supply store. It has a variety of lengths, varying up to 10 feet. Stainless steel supply lines are considered better than other materials. The supply line can get damaged if you do not take care of the following:


●      Make sure the shut-off valve is within reach.


●      When you don’t want to use the dishwasher for a long period, say a week or more, you must shut the valve off.


●      Regularly check the water supply line for leaks especially at the place where the hose is connected to the water supply shut off valve.


When do you need to change the dishwasher supply line?

As mentioned above, the comfort of using a dishwasher can turn into a disaster if an issue arises with the water supply line. You may have to replace the dishwasher supply line in case any of the following happens:


●      Less or no water reaches the dishwasher -- If there is no water in the dishwasher, then you need to check if the water inlet hose is properly connected and the valve should be in the open position. In case it was not properly connected or in a closed position, then fixing that would solve the problem. If there is less water, then you need to check the leaks and fix them. If nothing works, then you need to change the water supply line.


●      Frozen pipeline -- Another reason for your dishwasher not filling up with water may be that the water supply line could be frozen. It is a pretty serious problem as the supply line may burst at any time. Then you would definitely have to replace the supply line. 


●      Water under the dishwasher -- if the water starts filling up under the dishwasher, you need to check the water supply, check every connection to tighten and secure it. If the problem persists, then the cause may be a hole in the pipeline that should be fixed immediately as it may result in extensive water damage.


Installing a dishwasher supply line:

The whole thing can be a tedious process so you need to have all the tools and equipment at hand before you start connecting the supply line and the drainpipe to the dishwasher.


Tools and equipment required:

You will need the following tools to install a dishwasher supply line, along with the electric connections:

●      A power drill with a hole saw attachment

●      Screwdriver

●      Wrench

●      Pliers

●      Electrical tape

●      Teflon tape

●      Supply and drain tubes

●      T-fittings

●      Compression fittings

●      Wire nuts

●      Tube cutter


Precautions you need to take before the installation process:

You need to be very careful when installing the dishwasher as you will be attaching it with the water supply line and you may need to work with the electrical wires. You could end up flooding your house or get an electric shock if you do not take the following precautions:


●      Make sure you shut the water supply to the sink before you start the work.

●      Ensure that the power is off at the fuse box or the circuit breaker while you do any electrical work as it can have serious repercussions that may result in serious injuries even death.


Steps for installing a dishwasher supply line:

You can easily install the dishwasher supply line by following the steps given below.


1. Cutting the hole in the cabinet wall:

If you are installing the dishwasher for the first time, you will need to cut a hole in the cabinet wall. After you have ensured that the water supply is shut, you can start by drilling a hole in the cabinet wall separating the dishwasher compartment and the area under the sink. You should use a power drill to cut a round hole in the cabinet wall (of about 3-inches).


2. Attaching the drain line to the dishwasher:

Attach the drain line connection of the dishwasher to the main drain line pipe using hose clamps. You must secure the hose clamps by crimping them around the hose using pliers. With a tube cutter, cut the drainpipe under the sink. Then, attach a T-fitting to the drainpipe of the dishwasher. The T-fitting has a horizontal and a vertical part. The vertical part connects the dishwasher line to the drain pipe and the horizontal part connects the drain line.


3. Placing the dishwasher:

Now, the dishwasher needs to be placed under the countertop and you can push and slide it in place. After sliding the dishwasher under the sink, you need to level it with the countertop by balancing the height of the legs using a wrench. When you have adjusted it according to your requirement, secure it to the countertop with screws. Don’t forget to thread the hose through the hole in the cabinet wall. 


4. Attaching the hot water supply line:

To attach the water supply line to the hot water input valve in the dishwasher, you need compression fittings. Tighten the compression fittings using a wrench. You will need a tube cutter to cut the water supply line, after which you will install a fitting and connect it to the dishwasher’s water supply. Then, connect the dishwasher’s supply line to the hot water supply under the sink.


5. Turning on the water supply and switching on the power at the breaker:

After you are done connecting all the parts, turn on the water supply. Then connect the dishwasher’s drain line to the plumbing system. Switch the power on at the breaker and your dishwasher is ready for use. You have installed your dishwasher’s supply line. All that remains is to test if everything is in working order.


6. Testing the supply line:

After successfully installing the dishwasher or replacing the supply line, check the supply line and the drain line for any leakages or problems. Check if the dishwasher gets filled up with water easily and the drain line is also working properly. In case there is some issue, check all the connections again. If the problem still persists, contact a professional plumber to check things out. 


If you follow the 6 steps properly and take the necessary precautions, you will have no trouble at all in installing your dishwasher or replacing the supply line. I hope these easy steps will make your work a breeze and you will be using your dishwasher in no time.

Guest Contributor: Aisha S

Bathrooms We Are Currently Loving

RH Business Marketing Solutions

Basin Bowl Sink Bathroom

Basin Bowl Sink Bathroom

White Themed Farm House Bathroom

White Themed Farm House Bathroom

Mosaic Marble Shower

Mosaic Marble Shower

Modern Dark Theme Tub and Shower

Modern Dark Theme Tub and Shower

Contemporary Cage Shower

Contemporary Cage Shower

Glass Shower with Mosaic Shower

Glass Shower with Mosaic Shower

Shiplap Bathroom Remodel

Shiplap Bathroom Remodel

Top 5 Tips on Smart Home Repair 

RH Business Marketing Solutions

Screen Shot 2020-06-29 at 8.48.52 AM.png

Top 5 Tips on Smart Home Repair 


Home automation is becoming prevalent because of its convenience, to the point where it practically works like magic. You can control your entire house with a click of a button, the sound of your voice, and sometimes, from anywhere in the world. In fact, it is estimated that the global smart home market will exceed $53 billion. But every now and malfunction can occur. 

Technology may not always be 100% perfect and is one of the arguments against smart homes, but sometimes, all it needs is a simple fix. 

In this guide, we will provide solutions to 5 smart home repair problems that are experienced with smart home products. 

1. Have You Tried Restarting? 

We have all heard this advice when working with any device and albeit for good reason. The IT department or customer service agent is not just being lazy when they ask this question. Turning your device off and switching it back on again can fix the problem. 


If the problem persists, it might be your modem or router that needs rebooting, or it might even be the problem itself, more on smart home Wi-fi problems in the next step. 

2. Check Your Wi-Fi


You may experience hiccups with the connection, such as your smart switch not connecting to Wi-Fi. When it comes to the placing of your modem or router, your device may have trouble staying connected or respond slowly due to an unstable bandwidth. 

This is what technicians refer to as a “dead zone”. The best solution is to move it to the middle of your house and preferably on higher ground such as an upper floor. Devices work better the closer they are to the Wi-Fi source. Signals also travel downward, so placing it higher can improve your Wi-Fi significantly. 

Your router may also be transmitting two wireless frequencies: 2.4 GHz and 5Ghz. Simply put, your smartphone might be connected to one of the frequencies and your smart home device to another, so make certain they are all connected to the same one.  

3. Update Your Software

Smart home failures can be avoided by merely updating your software. All devices, including routers, will need to be updated periodically for the purposes of seamlessness and security, which are highly prioritized in a smart home.  

While most modern devices update automatically, older models may need you to manually do it yourself, so don’t be too worried if your device confirms your email address, password, location, or asks you to download a file. Of course, do be careful as not all pop-up messages are for updates. 

If it states there is an error, you may have to read up on the manual, check forums or FAQs on the site, or contact a customer service agent for your product. 

4. Fix Hardware

When you pertain to smart home repair it may require you to probe into your hardware too but only if you are an expert in the fields of electrical or hardware, no one wants to get into any serious accidents. 

If you’re like the rest of us who might be able to spot these issues but don’t know how to fix them, the best thing to do at this point would be to contact the manufacturer or consult handyman professionals such as HandyKith, for example.

5. Power Problems


Our last tip on the list of smart home complaints would be to ensure that you have a dependable power supply. Being a smart home, everything will be running on power, so it is important to correct any power issues causing the problem.  

There is no harm in guaranteeing that your cord hasn’t come loose or that you don’t have other wiring problems before looking for other possible malfunctions. You can also start supplying yourself with rechargeable batteries and adjust settings to conserve energy. Most devices will come with an LED indicator to display whether your device is receiving power. 

Conclusion

Next time you stumble upon problems with your smart home, keep these tips in mind. If you have any problems setting up, let us know as there might just be a simple solution.

About the Author 

The author has experience working with a few fully-equipped, high quality rated, professional contracting companies like HandyKith, that specializes in all kinds of house repairs and installations, including smart home repair. She has been a smart home enthusiast over the years and educates about the advantages of having smart homes.

Guest Contributor: Clyde Kincaid

How You Can Best Prevent Water Leaks in Your Home

RH Business Marketing Solutions

How You Can Best Prevent Water Leaks in Your Home

A flooded home is every homeowner’s worst nightmare. However, much of the water damage in American homes comes from inside the house. Roof, pipe, and slab leaks can cause thousands of dollars in damages and require extensive cleanup. In this article, we’ll review what commonly causes indoor leaks, what their economic consequences are, and how you can work to prevent them from occurring in your own home.

What commonly causes home water leaks?

Most indoor water leaks have one of two origin points: your roof or your pipes. As you might imagine, roof leaks are caused by an issue with your home’s roof. In most cases, this problem starts small—a few missing shingles, or a piece of flashing out of place—but soon evolves into a major mess. Your roof’s shingles or tile are its protective shield against the elements. Any gaps in this armor exposes the underlayment, and then the roof structure itself, to moisture from rain and snowmelt. Under these conditions, a roof leak is only a matter of time.

Pipe leaks are generally caused by either the deterioration of the pipe—which can happen to metallic pipes in older homes—the shifting of the home, or, perhaps most commonly here in the Midwest, the pipe freezing on a cold winter night. As the water in your pipes freezes, it expands, putting incredible pressure on the pipe itself. This stress can cause the pipe to pop open like a frozen soda can, sending water flooding into your home. As we’ll discuss below, frozen pipes require the intervention of a professional who has the right tools and slow approach to safely thaw the pipe out.

Some pipe leaks occur underneath your home’s foundation slab. Appropriately, these are known as “slab leaks,” and they can be difficult to access or detect. Most homeowners first notice a slab leak when they see massive usage increases on their utility bill. As with other pipe leaks, you’ll need to bring in a professional plumber to help you pinpoint the leak’s location and access it.

What are the consequences of water leaks?

In a home, water is a highly destructive force. A pipe leak, burst pipe, or leaking roof can damage your floors, foundation, drywall, ceilings, and furniture—nothing in your home is immune. Indoor water damage creates the ideal conditions for mold to grow, causing a potential safety hazard for you and your family. All-in-all, insurance claims for water damage and leaks top $2.5 billion annually, making it one of the most expensive home repairs out there. What’s worse is that insurance doesn’t cover every type of leak, which means homeowners end up paying about $2,800 out-of-pocket for cleanup and repair.

Preventing water leaks

Just like all home problems and needed repairs, not every leak can be prevented. Some things are just out of your control. However, the right preventative maintenance and proactive forethought can make a difference and help you avoid many potential disasters.

Roof leaks

Preventing roof leaks is as simple as keeping your home’s roof in good shape. We recommend you have a roofer out to your home at least once-per-year in the spring to assess your shingles and make sure your roof made it through winter okay. Then, in the other seasons of the year, get up on a ladder and take routine looks at your roof. If you notice ripped-off shingles after that latest storm, it’s time to take action. Call a roofer and get it fixed before the underlayment is damaged.

Older pipes

If you own an older home, it’s probably a good idea to talk to your local plumber and get a report card on the property’s pipes. Most metal pipes need to be replaced every 70-80 years. If your home was built in 1950, for instance, you’re probably coming up on the maximum lifespan of your copper, brass, or galvanized steel pipes. A home plumbing inspection might be a good idea.

Frozen pipes

To keep your pipes from freezing, you should schedule your annual furnace tune-up with an HVAC professional. This inspection and preventative maintenance ensures that your heater is in its best-possible condition heading into the freezing nights of winter, making it far less likely to break down and expose your pipes to below-freezing conditions. For long-term added protection, you might also want to talk to your plumber about sheathing your pipes in insulating material. This slows down the temperature exchange, buying your pipes many extra hours in the event your heat goes out on a January night.

As it turns out, there’s a lot homeowners can do to prevent water leaks and avoid major problems. Be sure to check out the infographic below,, for even more advice on avoiding water damage and expensive cleanup costs.

Guest Contributor: Amanda L

Top plumbing repairs that shouldn’t be ignored

RH Business Marketing Solutions

Top plumbing repairs that shouldn’t be ignored

Our lives are hectic. In between the hustle-and-bustle of dropping the kids off at soccer practice, getting groceries, going to work, and finding time for relaxation every now and then, it’s easy for home maintenance to get pushed to the proverbial backburner. However, when your home is faced with urgent plumbing repairs, the issue may not be able to wait. Here are the major plumbing issues that require fast action on your part.

Sewer line issues

Just mentioning the words “sewer backup” to any long-time homeowners is probably enough to give them the shivers. Sewer line issues are among the most expensive and messy of plumbing disasters. The key to avoiding a sewer backup and an incredible amount of damage to your home is taking quick action at the first sign of a problem. So, just what do you need to look out for?


Sewer line clogs are most commonly caused by organic (grease, oil, eggshells, flour, coffee grounds, and more) and non-organic (sanitary products, “flushable” wipes, trash) waste that is put down the kitchen sink or toilet and becomes trapped deep in the line, forming a partial clog. Eventually, with enough time, this will fully clog the line, preventing wastewater from exiting your home into the municipal sewer or your septic system. The telltale sign of a sewer line clog is all of your sinks, drains, and toilets clogging at once. When this happens, immediately turn off the water supply to your home and call a plumber for emergency service.


Sewer line cracks and leaks also represent a potential problem. As the ground shifts around your line or tree roots burrow around it, parts of the line can crack or separate, leading to a leak. On the surface, you’ll probably notice a perpetually wet spot in your yard and smell the problem when above it. This is your time to call a plumber. Unfortunately, a sewer line leak isn’t going to resolve itself, and a leak can attract nearby tree roots, making the problem much worse.

Frozen pipes

On the coldest of winter nights, your home’s pipes are at risk of freezing. In cities throughout the Midwest and Northeast, plumbers get thousands of calls every winter about frozen pipes. There are two common, yet untrue, myths about frozen pipes. The first is that do-it-yourself thawing tricks, such as using a hairdryer, can safely and effectively thaw out a pipe—this can actually damage the pipe and increase the risk of a burst. The second is that homeowners can just ignore the frozen pipe, as it will eventually thaw out. This is also untrue.


First, consider what happens when the water in a pipe freezes. As anyone who has left a can of soda pop in the freezer too long can tell you, liquids expand as they freeze, occupying more space than they once did. When the water in your pipes freezes, it, too, expands, putting immense pressure on the interior walls of the pipe. A pipe burst is what happens when the pipe walls can no longer take the pressure. This pressure is cumulative, so just letting frozen pipes stay frozen and procrastinating means you could be flirting with disaster.


Most frozen pipe incidents occur when the property’s furnace stops working: that’s what allows indoor conditions to get cold enough for pipes in exterior walls to reach the freezing point. If your frozen pipe issue is accompanied by a malfunctioning furnace, you can’t expect your pipes to thaw out on their own anytime soon.

Water heater problems

Tucked away in your garage, utility closet, or basement, it’s all-too-easy to ignore your water heater. Yet, as water heaters age, they generally start to show signs of trouble that can serve as the proverbial “canary in the coal mine” for a disastrous tank burst. 


Standard water heaters contain an important component—the sacrificial anode rod—which draws corrosion away from the tank walls. Once this rod has been eaten through, however, that corrosion will start to attack the tank itself. This can weaken it. Just like in the frozen pipes scenario, your water heater is under pressure. Under normal conditions, the tank is more than built to handle this sustained pressure. In a corroded and weakened state, however, it will have issues.


Typically, this begins with water leaks, as small fractures in the tank shell allow water to escape the tank and start pooling under the system. If you notice water gathering around the bottom of your older water heater, that’s as good a sign as any that you need to call in a plumber right away. Left untreated, these fractures will continue to expand and multiply as the shell weakens. Eventually, the tank could burst open, flooding your basement, closet, or garage with water.


Old age comes for everything—including your water heater. If yours is more than 10-15 years old, keep an eye on it and don’t wait to call a plumber at the first sign of any trouble.

Be proactive and take care of your home

One of the main things that separates happy homeowners from stressed-out ones is proper home maintenance, upkeep, and proactive action. When it comes to your home’s plumbing—and, for that matter, many other aspects of your home—procrastination and delay are the enemy, and only increase the risk of something disastrous happening. When in doubt, bring in a plumber: as the old saying goes, it’s better to be safe than sorry.


If you’re looking for even more great tips for maintaining your home—including your pipes, HVAC systems, roof, and more—check out this infographic .It’s your guide to other home repairs that you should never ignore.

Guest Contributor: Amanda L