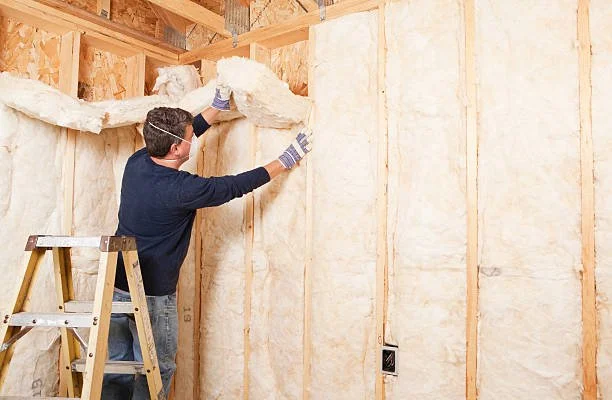
Google+

contact us

Use the form on the right to contact us.

Day or Night, we are here to serve you. Leave your plumbing problem to us.


Tinley Park, IL

(708)845-7922

Residential and Commercial plumbers and plumbing contractors available in Orland Park, Tinley Park, Oak Lawn, Palos Heights, Midlothian, Oak Forest, Homer Glen, Mokena, Frankfort, and the surrounding Chicago South Suburbs. Emergency plumbers.

copper water lines.jpg

Kevin Szabo Jr Plumbing Blog

Kevin Szabo Jr Plumbing is Tinley Park, Orland Park, Oak Forest, Midlothian, Orland Hill, Homer Glen, Mokena, Frankfort, Crestwood, Palos Heights, Oak Lawn, local plumber. Read our blog for advice, tips, a good laugh, and basic home improvement.

**We are moving our old blog to our new and improved website. Too see all our posts visit kevinszabojrplumbing.blogspot.com

Filtering by Tag: Best Ways To Prevent The Most Common Plumbing Problems

Creating a Cozy She Shed

RH Business Marketing Solutions

Transforming a backyard shed into a cozy retreat, also known as a she shed, is a popular trend that allows you to create a personal sanctuary just steps from your home. Whether you're turning it into a craft room, reading nook, or yoga studio, the possibilities are endless. In this infographic from Sofas and Sectionals- retailer of flexsteel furniture, we'll explore essential tips and creative ideas to help you design and decorate your own she shed. From choosing a decor theme to incorporating versatile lighting and pet-friendly features, we've got everything you need to turn your ordinary shed into an extraordinary space you'll love spending time in.

Preparing Your First Home: Essential Pre-Move Tips

RH Business Marketing Solutions

Preparing for your first home move can be an exciting yet daunting task. Ensuring a smooth transition requires careful planning and organization. With this infographic from Mountain Movers- a moving company in Round Rock TX, we've compiled essential pre-move tips to help you navigate this process seamlessly.


From researching moving companies to unpacking essentials in your new home, we've got you covered every step of the way. Begin by researching moving companies and gathering packing supplies such as boxes, tape, and bubble wrap. Start packing nonessentials, labeling boxes for easy unpacking, and decluttering items you no longer need. Creating an inventory of belongings, disposing of hazardous materials safely, and shopping for furniture for your new home are all important steps in the pre-move process.


As you move closer to your moving date, arrange utility connections, schedule inspections, and gather important documents such as passports and medical records. Notify schools or educational institutions about the upcoming move and update your address with work, doctors, and other necessary parties. Plan for the disposal of perishable items in the kitchen and coordinate the transportation of vehicles if necessary. By following these pre-move tips, you can ensure a smooth transition into your new home and start enjoying life in your new space hassle-free!

Upcycling Old Décor for a Home Refresh

RH Business Marketing Solutions

Transforming your home décor doesn't have to break the bank or harm the environment. Upcycling old home decor items is a fantastic way to breathe new life into your space while reducing waste. In this infographic from Foton Pearled Candle, we'll explore creative and sustainable upcycling ideas to inspire you to give your old home decor a fresh and eco-friendly makeover. From repurposing furniture to reinventing decorative items, discover how you can add style and personality to your home while minimizing your environmental footprint.

Home Design Materials That are Kid & Pet Friendly

RH Business Marketing Solutions

Little hands and paws can wreak havoc on your home, causing premature wear-and-tear such as unremovable stains in the carpet and scratch marks on furniture. However, there are proactive measures you can take to defend against this mess and destruction. Below, we'll explore several materials and home design choices to make your house more resistant to the challenges of living with kids and pets.


Let’s begin with one of the most problematic areas: your floors. Experiencing heavy traffic day in and day out, certain flooring materials may wear much faster than others. Solution-dyed fiber carpeting is an excellent choice for families with young children or accident-prone pets. Utilizing modern technology, this method allows the carpet fiber to soak up the dye, making it highly resistant to new colors or “stains.” Available in a wide range of shades, these carpets are also free of harmful materials and chemicals, ensuring both aesthetics and the well-being of your family.


Another flooring option to consider is waterproof luxury vinyl flooring,  particularly those with stone plastic composite (SPC). Sustainable and waterproof, the stone dust core layer makes this surface denser and more durable than other vinyl planks and composite flooring options. Featuring a transparent wear layer, it offers excellent scratch and stain resistance. SPC flooring is easy to install and comes in a variety of wood and stone visuals to complement your desired design.


Next, let's turn our attention to the walls. With children using them as canvases and pets splashing muck up to the ceiling, your walls need some defensive reinforcement from time to time. Enhance your walls with the right paint choice, opting for a satin or eggshell finish. This makes the walls much easier to maintain, as messes can be wiped away quickly and easily.


For those who want to add flair while maintaining family-friendly walls, consider pet-proof wallpaper. Perfect for accent walls or enchanting entryways, modern wallpaper offers endless design potential. Crafted from safe, durable materials, it provides stronger resistance and easy clean-up. When renovating your walls, explore the wide selection of non-woven or laminated options to find a unique look you'll love.


Lastly, when selecting furniture fabrics, it's essential to choose wisely. Numerous fabrics have been developed to withstand even the most active of households. Solution-dyed acrylic fabrics, for example, are spill- and stain-proof, making them perfect for both functional and decorative throw pillows and furniture cushions. If you've already invested in furnishings, consider using slipcovers to make upkeep easier. Machine-washable and versatile, modern slipcovers can be cycled seasonally and help prolong the life of your higher-traffic furniture.


For further information on kid- and pet-friendly materials for your home, check out the accompanying resource from Floor Covering Associates.

How to Manage Plumbing Around Elevators

RH Business Marketing Solutions

In tall buildings, the plumbing and elevator systems are installed close together. If not properly managed, this can lead to hazards like water leaks that damage elevators and put people at risk.

This guide covers best practices for integrating these critical systems, ways to prevent and handle plumbing issues near elevators, and how to maintain safe building operations. Let's get into the details.

Integration of Plumbing and Elevator Shafts

Understanding the Infrastructure

Elevator shafts and plumbing systems are often close together in buildings because plumbing needs to reach all floors, and placing it near the elevator shafts is practical.

This proximity requires careful planning to prevent the systems from interfering with each other. Ensuring the plumbing does not cross into the elevator’s mechanical space is crucial. It's all about placing everything correctly to avoid future problems.

Best Practices for Integration

Setting up plumbing near elevators needs thoughtful planning to make sure both systems work well together. Here are some simple guidelines:

1. Strategic Placement of Plumbing Access:

Place plumbing access points where they won't interfere with the elevator's mechanics. This avoids problems between the systems and ensures maintenance can be done without affecting elevator service.

Making sure these points are easily reachable will also help in quick fixes without extensive downtime.

2. Simplify Maintenance Access:

Organize the plumbing in a way that maintenance can be carried out swiftly and easily, without having to stop the elevator. This reduces inconvenience for building users. Regular and easy maintenance prevents larger issues and keeps both the plumbing and elevator running smoothly.

These steps help ensure that plumbing and elevators can operate side by side efficiently, minimizing the risk of complications and simplifying upkeep. Effective management of these systems is key to maintaining a safe and functional building environment.

Safety Protocols and Legal Standards

Recognizing Potential Hazards

When plumbing and elevator systems do not work together properly, it can create dangerous situations. A common problem is water leaks that get into elevator equipment and wiring, which can stop the elevator from working or cause electrical issues. It’s important to spot these risks early to keep everyone in the building safe.

Regular checks can help identify leaks before they become a major issue. This proactive approach reduces the risk of accidents and increases the overall safety of the elevator system.

Adhering to Regulations

It is crucial to follow safety codes and regulations. Elevator experts are well-versed in the relevant codes and regulations. These rules are set by bodies like the American Society of Mechanical Engineers (ASME) and by local government laws. They make sure that elevator and plumbing systems are installed and maintained safely. Sticking to these standards helps prevent problems and ensures the safety of everyone using the building. 

Being familiar with and understanding these regulations can also help building managers avoid legal issues. Regular updates and training on these standards are necessary for maintenance staff to stay informed.

Regular Routine Inspections

Regular inspections are essential to keep both elevator and plumbing systems safe and up to code. These checks can find small problems before they turn into bigger, more dangerous ones. Inspections also make sure that all parts of these systems are working well and are safe to use. This consistent review is crucial for the long-term safety and functionality of building systems.

Keeping a detailed record of all inspections and maintenance work is also beneficial for tracking the health of the systems and proving compliance with safety regulations.

Preventing and Handling Water Leaks Near Elevators

Implementing Preventive Strategies

Regular checks and routine upkeep are important to stop water leaks near elevators. These checks help find problems early, which can stop big damage later. Installing sensors and automatic systems in elevator pits can also help. 

These tools alert you early when there's a leak, giving you time to act before it gets worse. This way, you can keep everything running smoothly and avoid costly repairs.

Steps to Manage Water Leaks

When water leaks happen near elevators, it's key to act fast to keep things from getting worse. Here’s an easy guide to help you handle leaks quickly:

Step 1: Detect and Assess the Leak

First, figure out where the leak is coming from. Use the sensors installed to quickly find the leak’s location and see how bad it is. Knowing the size of the leak helps plan the best way to stop it. This step is critical to prevent the leak from affecting other parts of the building.

Step 2: Contain the Leak

Once you know where the leak is, do what you can to stop the water from spreading. This might mean turning off the main water supply or using barriers to block the water. 

Quick action here helps minimize damage and keeps the elevator from being affected. This is all about stopping the water fast to protect your building.

Step 3: Repair the Leak

Call plumbing professionals to fix the leak properly. Ensure they look at why the leak happened and fix it so it won’t happen again. Fixing leaks right away helps prevent bigger, more expensive problems in the future. 

It’s important to choose experienced plumbers who know how to handle leaks near elevators safely.

Step 4: Restore and Test the Elevator System

After fixing the leak, clean up any water and check the area for any other issues. Make sure the elevator works right by testing it thoroughly before using it again. This step makes sure everything is safe and working well.

Testing helps ensure that the elevator is safe to use, which is very important for everyone in the building.

Following these straightforward steps can help you manage water leaks effectively, keeping your elevator and building safe. Regular maintenance and quick responses are key to preventing and handling these issues.

Impact of Plumbing Problems on Elevators

Immediate Effects of Plumbing Failures

Water leaks or other plumbing issues near elevators can quickly make them unsafe to use. These problems can stop the elevator from working, creating safety risks for people who use them.

It's important to fix these issues quickly to keep everyone safe and the elevator running smoothly. Regular checks can help catch these problems early before they lead to bigger issues.

Long-Term Risks to Elevator Health

If water keeps getting into elevator parts, it can cause a lot of damage over time. This damage can be expensive to fix and might mean the elevator needs to be out of service for a while.

Keeping an eye on these issues and dealing with them quickly helps avoid big repair bills and long downtimes. It’s crucial to keep the elevator’s surroundings dry and well-maintained to prevent lasting damage.

Common Plumbing Challenges Near Elevators

Elevator areas in buildings often have specific plumbing problems. One common problem is clogged drains in elevator pits, which can cause water to build up and flood the area. 

This flooding can stop elevators from working and may damage the building. To prevent these issues, it’s important to keep the drains clear and check them regularly. Clear drains help ensure that water flows out properly and does not accumulate.

Addressing Clogged Drains

Clogged drains are a significant concern near elevators because they can quickly lead to flooding if not addressed. Regularly cleaning these drains can prevent debris from blocking them. Ensuring these drains are not blocked is vital for the smooth operation of elevator systems. 

Scheduled maintenance to remove debris and buildup can keep water flowing correctly and prevent emergency situations. It's a simple but crucial task to maintain safety and functionality.

Implementing Preventative Solutions

Installing sump pumps and backflow preventers can effectively solve common plumbing issues near elevators. These devices help manage excess water and ensure it does not back up into the building. 

Sump pumps remove water that collects in elevator pits, while backflow preventers stop dirty water from contaminating clean areas. Together, these systems protect the building from water damage and maintain health standards. 

Regular testing of these devices ensures they are always ready to work when needed. This proactive approach saves time and money by preventing larger problems.

1. Sump Pumps

Sump pumps are installed at the lowest part of an elevator pit to pump out accumulating water. By doing this, they keep the area dry and protect critical elevator parts from water damage. Having a working sump pump is essential for preventing water from damaging the elevator mechanics. 

Regular checks ensure these pumps are operational, especially during rainy seasons or in high-risk flood areas.

2. Backflow Preventers

Backflow preventers are devices that ensure water flows only in one direction. They are crucial for preventing the reverse flow of water, which can carry contaminants and cause flooding. Installing these in elevator areas helps maintain clean water and prevents the mixing of different water sources.

Regular inspections guarantee that these preventers are functioning correctly, which is essential for building safety and hygiene.

Conclusion:

In conclusion, managing plumbing around elevators is essential for safety and smooth operations. It involves properly integrating both systems, adhering to regulations, preventing leaks, understanding the impact of plumbing issues, and addressing common challenges like clogged drains.

Regular inspections, maintenance, and proactive solutions like sump pumps and backflow preventers are crucial. By following best practices, building managers can effectively manage plumbing near elevators, avoiding hazards and downtime.

Don't compromise on the safety and functionality of your building. Consult experts today and implement a comprehensive plan to seamlessly integrate and maintain your plumbing and elevator systems for a secure and efficient environment.

Top 10 Decor Essentials for the Ultimate Boys' Room

RH Business Marketing Solutions

There was a time when parents felt that their son’s room should only be colored blue and have pictures of zooming cars or superheroes. While there’s nothing wrong with these ideas, they have now become too common and cliche. Small children and teenage boys now want different colors and patterns in their rooms.

Moreover, with the development of platforms like Pinterest and Instagram, there’s so much more to explore. In fact, the kids’ decor industry in the US is projected to reach around $24,490.1 million by 2032.

So, if you wish to know some ultimate decor essential for your boy’s room, then keep reading!


1. Study table

No matter how old your son is, he’ll definitely need a study table. Of course, the size and design of the table will depend on his age and specific requirements.

For example, a toddler will need a small table, enough to hold his toys, and a few coloring books. But if he’s a teenager, the study table needs to be bigger and wider to be able to hold multiple books and stationery. You can also install storage shelves above the table.


2. Cutout toy sets

For newborn babies, matching toy sets are a must. Not only do they develop your son’s cognitive skills but they also let their imagination run wild!

You can also explore metal wall art with plasma dxf files that will help you build different things - from a sports car to a fire pit. 


3. Gaming corner

For the boy who just can’t let go of his PlayStation, a gaming corner is a must! You can even turn it into a lounging corner for the times when he’ll need to take a little nap or simply enjoy a snack or two with friends and family.

A gaming corner doesn’t have to be anything fancy, all you have to do is put a comfy sofa or a few couches and a small table, preferably in front of the TV screen.


4. Signboards

While neon signboards are now very popular, a lot of boys prefer to tone it down. If you feel that the space above your son’s bed could use a little touch-up, go for a single letter that has a vintage feel to it, such as the first letter of his name lit up with small vintage bulbs.

Or you can even custom-make his favorite quote from a movie and put it as a laminated sign on the headboard to vamp up the place!


5. Hobby corner

Just as it’s important for your son to relax in his gaming or lounging corner, it’s equally important for him to have a hobby corner. For example, if he likes to paint, dedicate an entire wall to his artwork and ask him to hang his paintings using a string and some paper clips.

Or if he’s interested in singing, put up aesthetic song lyrics or posters or musical instruments on the wall.


8. Potted plants

Another great addition to any room is potted plants. Not only do they light up the room and add a cheerful vibe but they are also said to elevate any child’s mood.

And adding some cute shrubs or potted plants to your son’s room might also help him to develop a passion for preserving nature and gardening! 

Some of the most popular bedroom plants are aloe vera and lucky bamboo but always check for possible pests and poison.


9. Sports-themed decor

It’s mostly seen that a young boy is interested in sports. Therefore, go ahead and ask your son what his favorite sport is and incorporate that into the room’s walls or decor.

For example, if he loves baseball, you can install a shelf and line it up with different baseballs and use two small-sized baseball bats as the two ends of the shelf. Or you can display small badminton racquets on one wall.


10. Storage space

Sure, your little one might not need many things right now but in a couple of years, he’ll start going to school. As your son grows, he’ll require more and more storage space.

So, it only makes sense to keep enough storage space right from the beginning so that you won’t have to keep renovating his room. For example, you can install storage boxes underneath his bed or study table.


Conclusion

These are some of the must-haves in your son’s room, but of course, it is not a one-size-fits-all. Discuss it with your little one, and then make the final decision. Remember, he is going to spend a lot of time in this room so it must encompass his needs & desires.


How To Fix A Clogged Sink

RH Business Marketing Solutions

Got a sink that’s stubbornly clogged and driving you nuts? Don’t panic. We’ve all been there. 

Whether it’s a slow drain or a complete blockage, dealing with a clogged sink can be a real headache. 

In this article, I’ll walk you through the steps to get that sink flowing freely in no time. 

Are you ready to say goodbye to standing water and hello to smooth draining?

Let’s get started. 

What Causes A Clogged Sink 

Clogged drains and sinks are one of the most common plumbing problems. Pouring non-liquid things into the sink is the leading cause of clogged sinks. 

Food scraps and grease waste are common items that cause kitchen sink clogs. If you dump food scraps into the sink instead of the bin, small scraps will wash away, and the larger ones will get deposited. With time, the scraps can build up and cause blockages. 

Grease waste becomes solid at room temperature. Hence, this too can block your sink. 

Hair, toothpaste, and soap buildup are the leading causes for the bathroom sink to get clogged. 

Additionally, since the bathroom sink is heavily used, it’s more likely to undergo clogging.


Steps To Fix A Clogged Kitchen Sink Or A Bathroom Sink

If your sink is not draining, draining slowly, or releasing a bad odour it’s more likely clogged. 

To unclog your sink, you must have basic knowledge of the sink parts and their functions. Now, don’t panic. I’ll explain everything you need to know. Just keep reading.

Kitchen sinks and bathroom sinks are almost similar, with some minor differences. 

Kitchen sinks are connected to garbage disposals and dishwashers, while bathroom sinks involve faucets, drains, and stoppers. The stopper allows you to fill the sink with water.

Most sinks have a curved pipe under them known as the P-trap. The P-trap holds water and creates a block against sewer gases entering the kitchen or bathroom through the sink drain. 

Now, let’s go through the steps to remove clogs from your sink.

Clean Out The Standing Water

Standing water supports the growth of bacteria, insects, and mould. Hence, if you find any standing water in the sink, remove it immediately. This also makes room for water that you will  add later to flush out the drain. 

If you see any food scraps or other debris, remove them by wearing rubber gloves.

Check out this article for tips and tricks to prevent pest infestations in your plumbing system.  


Inspect The Garbage Disposal

If your kitchen sink is clogged, the first thing you should do is inspect the garbage disposal to find out whether it’s blocked. Here’s how you do it:

  • Turn on the garbage disposal and run it. Clogs might break while the garbage disposal is running. 

  • If it’s not running, check whether it’s overheated. Reset and turn on the disposal again for this. 

  • If the clog is not cleared even after running the disposal, disconnect it from power and proceed to the next steps.

Pour Boiling Water

Boiling water can dissolve soap and fat. Hence, it’s effective in removing clogs caused by oil and soap deposits. 

First, remove any standing water in the sink. Then, pour a pot of boiling water into the sink drain in a steady stream. 

The water will begin to drain. If not, allow the water to cool and remove it with a mug. Then, pour hot water again. 

You’ll have to repeat this process several times to remove the drain blockage. 

Warning: Boiling water can damage plastic pipes. Therefore, don’t use boiling water if your sink is attached to PVC pipes. 

Pour A Baking Soda Mixture/White Vinegar/Caustic Cleaner

Baking soda and vinegar are useful ingredients to unclog the sink drain naturally. They’re gentler on the pipes than chemical drain openers. 

When baking soda and vinegar are mixed, it causes a bubbling reaction that helps to remove the clogs. 

Pour a cup of baking soda followed by one cup of white vinegar. If it’s your bathroom sink, remove the drain stopper before pouring. 

Let the mixture stand for around 15 minutes. Wait till the bubbling stops, and then flush with hot water. 

You can also use a cup of baking soda and half a cup of salt, and then flush it with hot water after 15 minutes. If the drain is still not cleared, try this process several times. Be careful not to overdo it. 

Caustic cleaners can remove grease, hair, food, and other organic materials blocking your sink. 

However, they are very strong and leave harsh chemicals in your pipe. So use them only as a last resort. When using caustic cleaners, make sure to wear gloves and use them in a well-ventilated area.


Plunge The Sink

If boiling water, baking soda, and vinegar are not working, try plunging your sink. Plunging creates enough pressure to dislodge minor clogs.

Remove the stopper and cover the overflow opening with a wet cloth. Fill the sink with 2-3 inches of water. It should be enough to cover the head of the plunger without overflowing. 

Place the plunger cup on the drain hole, press it firmly, and then move it up around 1 inch.  Repeat this up-and-down movement for 15-30 seconds. 

Check whether the water drains and flush with hot water to remove any remaining clogs.  

Useful tip: Apply a thick layer of petroleum jelly onto the rim of the plunger cup. This will create a tighter seal and make plunging more effective. 

If your kitchen sink is connected to a dishwasher, close the dishwasher line using a clamp or a pair of vice grips on its hose. 

If you’re worried about damaging the hose, disconnect it and cover the disposal inlet with a pipe cap. This prevents water from back-flowing into the dishwasher line while plunging. 

Note: Keep a toilet plunger separately to use for bathroom sinks.

Use An Auger/Drain Snake On The Upper Part Of The Pipe

If solid material is stuck in the drain, you can unclog it with an auger, also called a drain snake. 

Connect the drain snake to a drill. Insert it down the drain till it meets resistance. When the snake meets resistance, run the drill to unclog it. Then, move the snake further down and repeat the process. 

Usually, you can connect the snakes to any standard drill or use it without a drill. 

While using a hand snake, first feed the drain with it. Then, twist it around to get the proper angle. 

Once you meet resistance, allow the barb to hook the clogged material. Then, pull out the snake along with the clog. Finally, flush out the sink drain with hot water to remove any remaining clogs.

You can buy a drain snake from a hardware store or make one at home using a coat hanger. 

Let’s make a drain snake at home:

  • Take a metal coat hanger. 

  • Unwind and twist it to make a long, thin wire. 

  • Use needle nose pliers and bend the end to make a small hook. 

There you have a DIY drain snake. Now, you can insert it into the drain and pull out or break down the clogs. 

Use A Wet-Dry Vacuum

Pressure from the wet-dry vacuum can unblock a clogged drain. Plug up the vacuum for wet use. If you don’t know how, refer to the user manual. 

Place the end of the vacuum’s hose on the drain opening and tighten the seal around it. Then, turn on the vacuum at the highest setting. 

If you have a double sink and only one side is clogged, cover the other side with a drain stopper before turning on the vacuum. 

Use Pliers To Remove Clogs 

Hair collects under the stopper in the bathroom sink and blocks the drain. You can remove these efficiently using a nose needle plier. 

Simply remove the stopper, pull out the clog with a plier, and put back the stopper.


Inspect The P-Trap

If all the above-given methods are not working, it’s time to fix your clogged sink from beneath it. 

There’s a curved pipe underneath your sink known as the P-trap. The P-trap holds water between the open drain and the home’s plumbing to prevent odours.

You must disassemble the P-trap and see if any materials are blocked in it. Before that, place a bucket underneath the kitchen sink so that water or debris can fall into it while removing it. 

Loosen the slip nuts on the P-trap arm and wiggle it free. If there is any debris, remove it. 

Reassemble the pipe and run water into the sink to check whether the clog is removed correctly. While reassembling, don’t tighten the slip nuts too much. 

Note: You can use rubber gloves and a wrench to make the above process easy.


Use An Auger On The Wall Pipe

Suppose the water is not running through the sink drain after you inspect the P-trap; this means the clog is present farther up the pipe. 

To remove it, disassemble the P-trap again and remove the horizontal pipe that connects the sink to the wall pipe. 

Insert the auger into the wall pipe, twist and turn, and pull out any debris or run the drill to break it. 

After removing the debris, fix the pipes back. Remember not to tighten the slip nuts too much. Hand tightening and a quarter turn with a wrench would be enough. 

If you can’t remove the clog from your bathroom or kitchen sink, call a professional plumber or contact a drain cleaning service as soon as possible.

How To Prevent Clogging Of Your Sink

We all want our sinks to function smoothly. It isn’t very pleasant if you have to unclog your bathroom/kitchen sink frequently. 

Follow the instructions below to keep your sink drain free of clogs. 

  • Avoid disposing food scraps into the kitchen sink.

  • Don’t overload the garbage disposer. Grind a maximum of one cup of food waste at a time. 

  • Collect waste materials such as oil, grease, and coffee grounds into a disposable bag and discard them. Don’t allow them to flow through the sink drain.

  • Flush out the sink with hot water after every use.

  • Freeze some ice cubes, pouring vinegar and water in equal proportions. Drop one or two ice cubes into the disposer to keep it fresh and support the unclogging of minor waste deposits. 

  • Pick up any long hairs in the bathroom sink using an old toothbrush rather than flushing them out into drains. 

Some Essential Tools Required To Unclog A Sink

You don’t have to call a plumber to unclog a sink every time. Keep the simple tools below with you at home so you can do it yourself if it’s a simple issue:

  • Plunger.

  • Nose needle plier. 

  • Gloves.

  • Adjustable wrench. 

  • Drain snake.

  • Flashlight.

  • A bucket or pail that fits under your sink.


Can You Unclog A Sink By Yourself?

Your bathroom or kitchen sink can get clogged due to excess food scraps, hair, oil, and other organic waste. 

If you have a sink blockage, first follow the easy methods, such as flushing it out with boiling water, baking soda, and vinegar. If it doesn’t get flushed for these, try unclogging it with a plunger, vacuum pump, or drain snake. 

If the clog is stubborn, you’ll have to remove the P-trap and take the waste out. If any of the above are not working, call a licensed plumber. Check out the importance of hiring a licensed plumber here.    

FAQs

1. What’s The Quickest Way To Unclog A Sink?

The quickest method to unclog a sink depends on the extent of the clog. So, start with the easy steps, like pouring hot water, and then move to the complex methods like removing the P-trap if any of the simple techniques don’t work. 

2. What’s The Best Natural Drain Clog Remover?

Baking soda and white vinegar can unclog a sink naturally.


3. What’s The Safest Way To Unclog A Sink?

Start with simple techniques like pouring boiling water and adding baking soda and vinegar. If this doesn’t work try unclogging with a plunger or auger. Then try to remove the P-trap to unclog. If you’re not comfortable with any of the above, call a professional service to sort out the issue.


4. Is It OK To Use A Chemical Drain Cleaner To Unclog The Sink?

Chemical drain cleaners can damage your pipes. Hence, use it only as a last resort before calling a plumber.

Why Is Lead Paint Dangerous And What Can Be Done About It?

RH Business Marketing Solutions

We’re sure that you have heard before that lead paint can be dangerous, but knowing that something is dangerous and knowing why are two completely different things. If you are going to take risks seriously, you need to be informed as to why it is and then understand what you can do about it. If you are interested in learning more about lead paint and its associated dangers, you are in the right place. Read on down below if you are interested in finding out more.


Where Will You Find Lead Paint?

Lead paint was banned in homes in 1978, meaning that if a home was built or decorated before this, there is a chance that it will have some somewhere. You can assume that if your house was built before 1978 when the ban came into effect, there is some residual lead somewhere, and that’s not what you want. It’s not a guarantee that your house has this, but the Victorians did use lead-based paint for pretty much all decorating needs at the time, so it’s important to get this checked out sooner rather than later.


The Dangers of Lead Paint

Before the complete ban on lead-based paint in 1978, some studies were conducted on its impact on health, and they needed to be more positive. While children and pregnant women are usually the ones who are most at risk, any human can get seriously sick if the paint is ingested. It is also poisonous to animals if they ingest the paint. 

It has been known to damage the brain and other vital organs such as the kidneys, the blood, and even your nerves. There have also been links to seizures and in extreme cases, death. However, some of the milder symptoms can include dizziness, nausea, headaches, and excessive tiredness.

Lead poisoning is not something that can be taken lightly, and if you think that you or anyone you know has ingested any lead-based paint. If you are experiencing any of the symptoms, you need to see a medical professional as soon as possible.


Understanding How To Remove Lead Paint

Removing lead paint can be tricky, and it must be done extremely carefully to avoid creating any kind of dust or fumes, which, if breathed in, can cause health problems. If you commonly work in buildings containing lead-based paint, it’s a good idea to look into something like Lead Classes to ensure that you have the correct knowledge for removal.

If you are just trying to get the lead paint out of your house, then make sure you do your research and wear protective clothing and a face mask to avoid inhaling anything.


We hope that you have found this article helpful and now have a more solid understanding of why lead paint is dangerous and what can be done about it. Whether you are renovating your home or you work in buildings where there could potentially be lead paint, it’s imperative that you are educated on the safe removal of lead paint, or else you could be putting yourself and others at risk.

Money Management Tips to Keep in Mind as a Homeowner

RH Business Marketing Solutions

One of the most exciting steps in many adults' lives is transitioning from renter to homeowner. Experts encourage first-time homebuyers to have a plan in place that will save time and maximize their budget. Home ownerships comes with many additional expenses that most renters do not have. Most first-time homeowners know this at least on a surface level but do not fully appreciate it until later. With that in mind, let us explore some money management tips that every homeowner should consider.


Budget for Home Maintenance and Improvement

Ongoing maintenance is a fact of life as a homeowner, an itemized monthly budget should have an amount dedicated to it. There are two schools of thought when it comes to how much: either 5% of your income per month or 1% to 2% of the home's value annually. If you need to start at a lower amount, do so, but always be working toward the higher amount.

You may not need that money every month, but rather than spend it elsewhere, save it and ideally in an interest-bearing bank account. There will be big costs eventually, such as a new roof. Perform all maintenance as needed, including small jobs. Procrastinating will only lead to higher costs down the line. Over time, you will build up enough money to begin investing in improvements. Those projects including repainting, kitchen remodeling, bathroom remodeling and so forth.


Create a Rainy Day Fund

The general rule of thumb is to have enough money in savings to cover six months' worth of expenses. Many experts recommend getting to three-month mark as soon as possible. You can then build up to the six months as it makes sense for your unique financial situation. Once you get to that point, the next step experts recommend is creating a rainy day fund for home maintenance. The value experts typically recommend for the average homeowner is $10,000. This amount is enough to cover most emergency repairs and system replacements.


Hire Qualified Contractors and Avoid Low Bids

Some people have a lot of skill when it comes to home maintenance and can save a considerable amount of money doing it themselves. That is not most homeowners, however. In fact, studies show that the average homeowner ends up costing themselves more in the end through DIY repairs. When it comes to your home, you should find skilled contractors you trust and pay them for a job well done.

Avoid the allure of a low bid. Money can be tight as a new homeowner, but find other ways to save. Schedule three or more estimates for any sizable job. This will give you a clear picture of what a fair rate is for labor and materials. Low bids are more trouble than they are worth generally. Possibilities include poor workmanship or an unfinished job.


Keep Receipts and Get Professional Tax Help

Your federal tax return will likely become a lot more complex as a homeowner. It is usually good practice at this point to hire a professional. A good accountant can save you more than you pay in their fee. You should also get in the practice of saving receipts related to all home maintenance and improvement. Write any notes on the back of the receipt that your accountant may need to know about. You may be surprised at how many of these expenses are deductible.


Monitor Utility Bills and Energy Usage

Energy costs are a major component of home expenses. You can keep a handle on what you are spending by tracking those expenses month to month and year. Sudden spikes can often be the first sign you have an HVAC or water heater issue, for example. It can also reveals areas of inefficiency and where you may want to improve your home.


What to Avoid as a Homeowner

Financial experts recommend first-time homeowners avoid draining their savings. Of course, houses are expensive, and that can be easier said than done. Still, rebuilding your savings should be a budgeting priority. Not making it a priority is one of the most common new homeowner mistakes. Another common mistake is getting caught up in do-it-yourself projects. Many new homeowners not only overwhelm themselves but spend a lot on equipment and supplies that they will never use.


The Bottom Line

With home ownership comes great freedom but also significant financial and maintenance responsibilities. Having a plan in place will help you keep your family and home safe while avoiding the common pitfalls that have undermined so many first-time homeowners over the years.


Written by Taylor McKnight, Author for LoneTree Wealth Management

THE ULTIMATE GUIDE TO CHOOSING THE PERFECT ARTISAN TILES FOR YOUR KITCHEN

RH Business Marketing Solutions

Just like with everything in life, choosing the perfect tiles for your kitchen looks easy until you actually start doing it. Once you get into the tangle of different materials, durability options, colors, and shapes that tiles come in, finding your way out will require stamina and focus. Of course, you shouldn’t be discouraged by this, especially if you’re designing your perfect kitchen for the first time and want your tiles to fit into the style of your home.

If you’re looking for a special touch to add to your kitchen and make it feel your own and unique, then artisan tiles may be the way to go. This is a great way to support local businesses, and it’s potentially more environmentally friendly, plus, these tiles are hand-made, meaning no two are identical. If you’re looking for guidance on picking the best tiles for your kitchen, here are some pointers to keep in mind.

HOW TO CHOOSE THE PERFECT ARTISAN TILE FOR YOUR KITCHEN?

There’s a lot that goes into picking the right kitchen tiles, like the shape, material, texture, and durability, but it all starts with knowing the style you want your kitchen to be in. Are you going for a modern, rustic, cottage, or boho feel in this communal space? This is the place your family will spend a lot of time in, so you want to ensure you all feel comfortable there.

Once you’ve figured out your style, you can move on to finding that picture-perfect artisan tile that will complement everything else. Here are some factors to keep in mind.

IT ALL STARTS WITH THE MATERIAL

Before you can explore different shapes and colors, the first thing to decide on is the material of your artisanal kitchen tiles. Everything else hinges on the material and should be chosen based on its use. The backsplash and floor tiles have different uses, so the materials for them should be chosen accordingly. Some of the best-serving tile materials include:

●      Porcelain Tiles: It’s no wonder we mention porcelain first, as it’s among the most cost-effective and durable options on the market. Pretty much any tile you can think of can be made of porcelain, making it versatile and a good solution for your kitchen floors, as it is wear and moisture-resistant.

●      Terracotta Tiles: If you’re looking for tiles that will give your kitchen space warmth and a rustic feel, you may like artisan terracotta tiles. While they’re glossy and polished, terracotta tiles bring forth earthy, homey tones that will make you feel as if you have a hearth in your kitchen. A good example is any clé zellige tile you can find, as they’re perfect in their imperfection. Just remember that these tiles require sealing to prevent water damage.

●      Marble Tiles: A staple of modern, sleek-lined kitchens, artisanal marble tiles are gorgeous and can give any space a sophisticated tone. These tiles catch the light beautifully, and because they’re usually polished to showcase their signature vein patterns, marble tiles are better suited to be on walls and as a backsplash.

●      Ceramic Tiles: This material will be your loyal companion in the kitchen because it’s very easy to clean and widely available in many shapes and patterns. When ceramic tiles catch your eye, make sure you check with the manufacturer about their durability because not all ceramic tiles are created to withstand the same level of wear and tear.

While these are the most popular materials to keep in mind, there are many more to choose from, like glass, vinyl, limestone, and cement. It all depends on your taste and budget.

WHAT COLOR WOULD WORK BEST IN YOUR KITCHEN?

This is usually the biggest question people face while remodeling their kitchen, and it makes sense. When in doubt, look at the light you have in the room.

Do you have many windows, and is there plenty of daylight coming in? Then, you can opt for pretty much any color you want as long as it fits nicely with the overall style. Darker shades of the tiles give the space depth, but it can also make it feel cramped if not balanced nicely.

However, if your kitchen doesn’t have much light, consider bright tiles that will catch and augment any light there is in the room. They may be harder to clean, but they also make your kitchen look bigger and brighter. You can even mix and match colors if you’d like, just be sure that the colors aren’t clashing and that the pattern isn’t overwhelming to look at.

ALWAYS THINK ABOUT THE TILE PATTERN AND TEXTURE

Finally, always consider the pattern in which your tiles are installed, as well as their texture, because they will also impact how your kitchen looks and feels. The patterns, similar to the color, affect the way the kitchen looks, and if you’ve got a smaller kitchen, it’s usually advised to go for bigger tiles because the grout in between the tiles won’t break the view of the kitchen as much. You can use smaller tiles with intricate designs on an accent wall or in more expansive spaces.

The texture of the tiles also plays a big role in the kitchen, both regarding their usability and look. Matte and textured tiles give depth and a more natural feel, and they’re less slippery. On the other hand, polished tiles catch light magnificently and make the kitchen look brighter and richer, but they are probably the most useful on walls.

CONCLUSION

Picking the perfect kitchen artisan tile may be a bit of a task, but it will be easier if you set your priorities from the get-go. Once you figure out the three most important elements we mentioned above, your hunt will become much more focused, and in no time, you’ll have a kitchen you’ll be proud of.