Google+

contact us

Use the form on the right to contact us.

Day or Night, we are here to serve you. Leave your plumbing problem to us.


Tinley Park, IL

(708)845-7922

Residential and Commercial plumbers and plumbing contractors available in Orland Park, Tinley Park, Oak Lawn, Palos Heights, Midlothian, Oak Forest, Homer Glen, Mokena, Frankfort, and the surrounding Chicago South Suburbs. Emergency plumbers.

copper water lines.jpg

Kevin Szabo Jr Plumbing Blog

Kevin Szabo Jr Plumbing is Tinley Park, Orland Park, Oak Forest, Midlothian, Orland Hill, Homer Glen, Mokena, Frankfort, Crestwood, Palos Heights, Oak Lawn, local plumber. Read our blog for advice, tips, a good laugh, and basic home improvement.

**We are moving our old blog to our new and improved website. Too see all our posts visit kevinszabojrplumbing.blogspot.com

Filtering by Category: July

Remodeling Old-style Bathroom- Transformation Ideas form outmoded to modern

RH Business Marketing Solutions

So, you have decided to transform your outdated bathrooms! Well, first of all, you have to make a plan whether you are going for overall change, or prefer some minor yet effective changes (where needed). It all depends on budget, if you are not concerned about budget due to your deep pockets, then you can remodel your bathrooms thoroughly. 

Otherwise, modifying bathtub shower doors, improving lighting, and other small changes would do the same job. These transformation ideas are a five-finger exercise and need just little changes. This piece of business would help you guys to thoroughly transform your outdated bathrooms into modern ones.

Why revamp old-style bathrooms? Is it worth it?

Well, this question arises whenever we hear or read about remodeling interior. The answer to this question is pretty simple! You don’t need to change the style but functionality! Modern equipment helps us to tackle our daily life problems in a much easier way. So, have a look at these reasons and remodeling ideas;

  • Remodeling outdated bathrooms is the best idea to enhance overall look of your interior and even it will add in sale value.

  • You can adopt this option to improve the functionality of a bathroom by upgrading the lighting, fixtures, and other safety reasons.

  • In old bathrooms there’s a chance of increasing mildew, so you have a great chance to remove it.

  • Your bathroom needs more storage! So, increase the storage spaces by adding modern vanities or medicine cabinets.

Best outdated bathroom remodeling and transformation ideas

  • Change the flooring of your bathroom- add tiles with a lighter tone

image2.jpeg

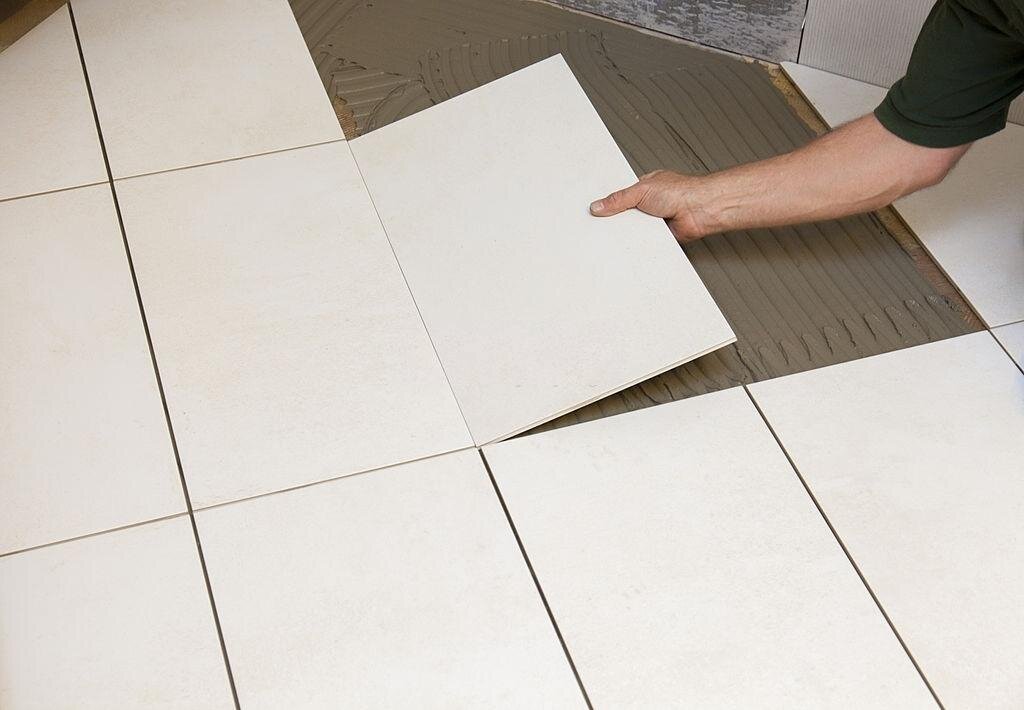
Believe me, changing flooring does have a great impact on overall décor. You can change the tiles to a neutral color or whatever you want. But, make sure you don’t run out of the theme. Flooring matters a lot and even bright tiles can enhance the brightness of the bathroom. 

  • Switch to shower doors- a brilliant hack!

image3.jpeg

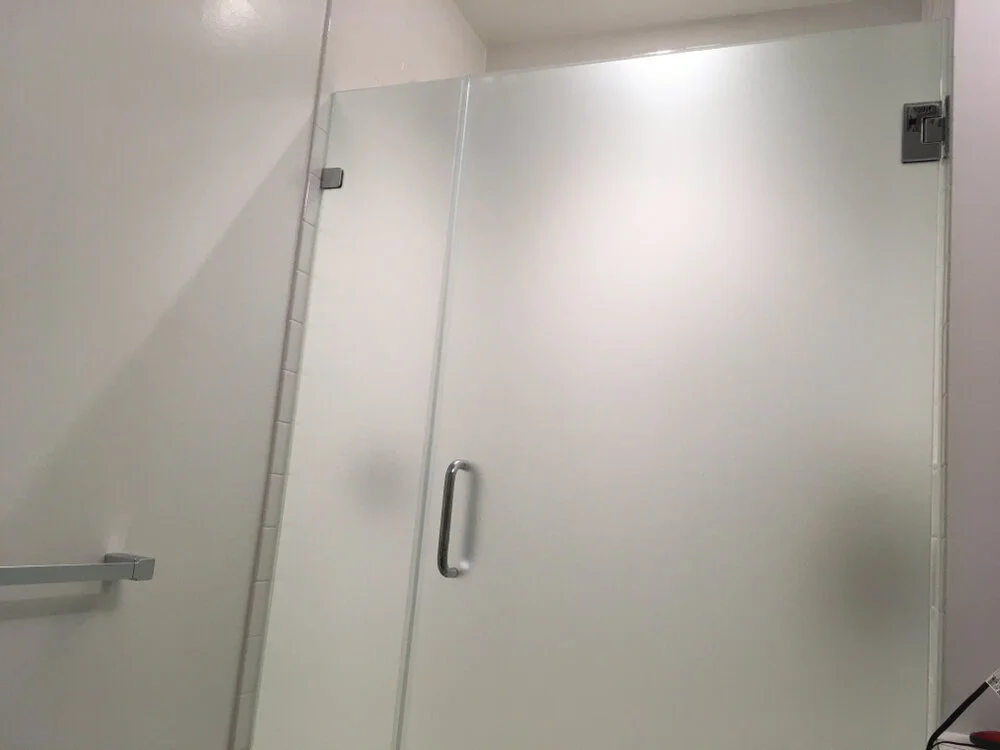
Your outdated bathrooms may still carry shower curtains to maintain privacy and just because they are cheap. But, their time-to-time maintenance can cost you a lot. So, try switching towards shower doors. A shower door not only guarantees low maintenance but also it’s a cool idea for modern bathrooms. It can totally change the look of your bathroom. And the best part is, shower doors, too, can maintain your privacy, such as frosted shower doors. 

  • Bathtub shower doors- separate the shower area!

image4.jpeg

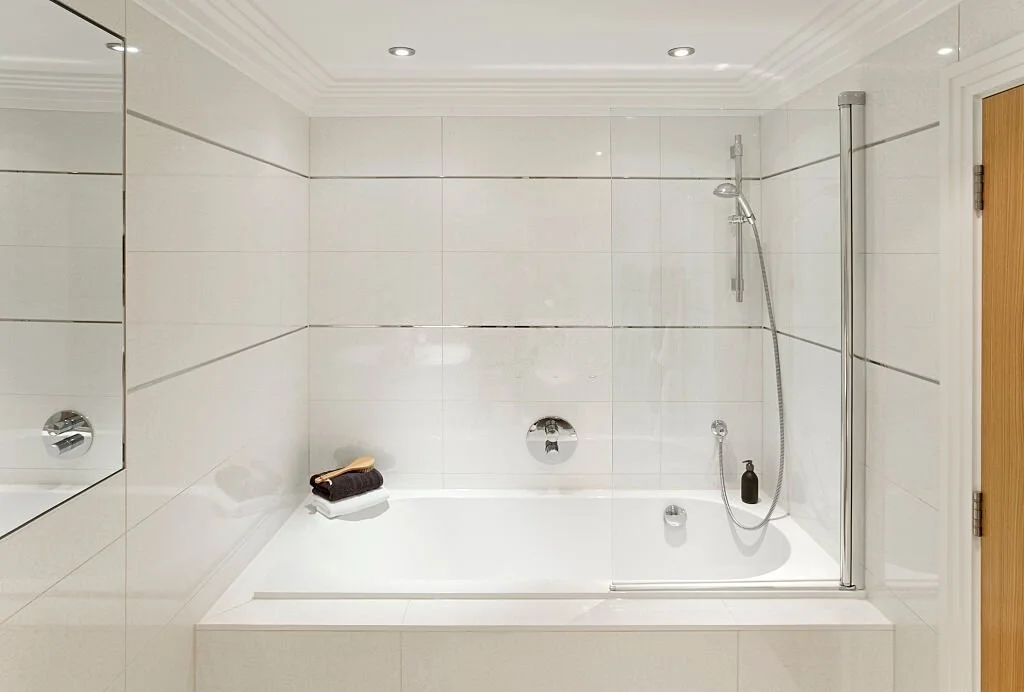
Some people consider the installation of bathtub shower doors is like a rocket science, but it isn’t so. Call experts and let them transform your old-style bathrooms into modern and classy ones. Bathtub shower doors can be easily installed over the tub and ensure long-term sustainability. 

  • Add greenery

image5.jpeg

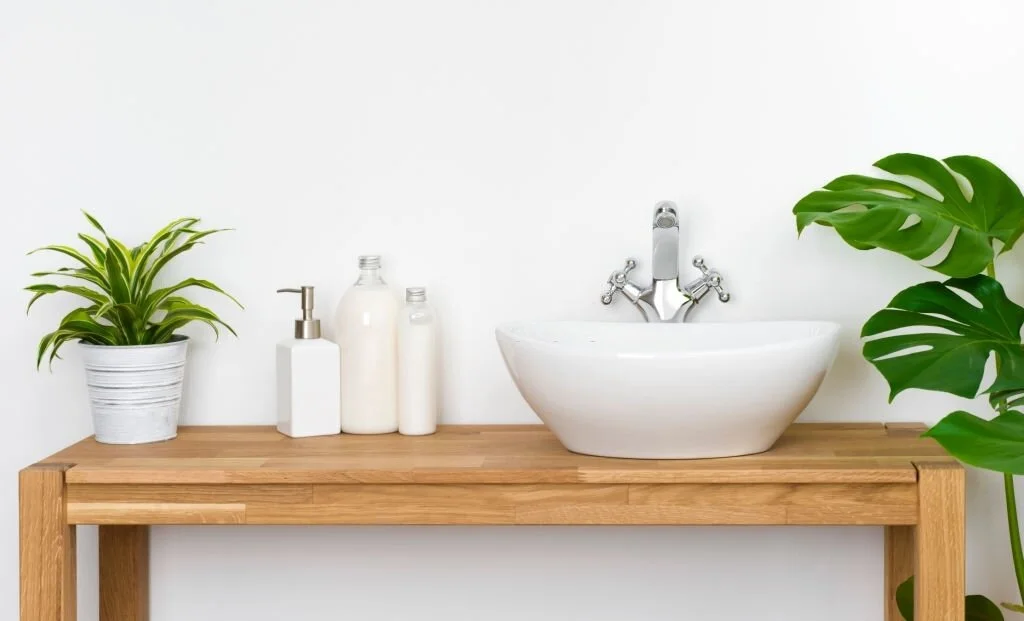
Adding some greens to spacious bathrooms is a brilliant idea. It will not only maintain the freshness of your bathroom but also keeps the décor up a notch. You can add mini plants or hanging plants to small bathrooms.  

  • Add a LED Mirror for a way clearer view

image6.jpeg

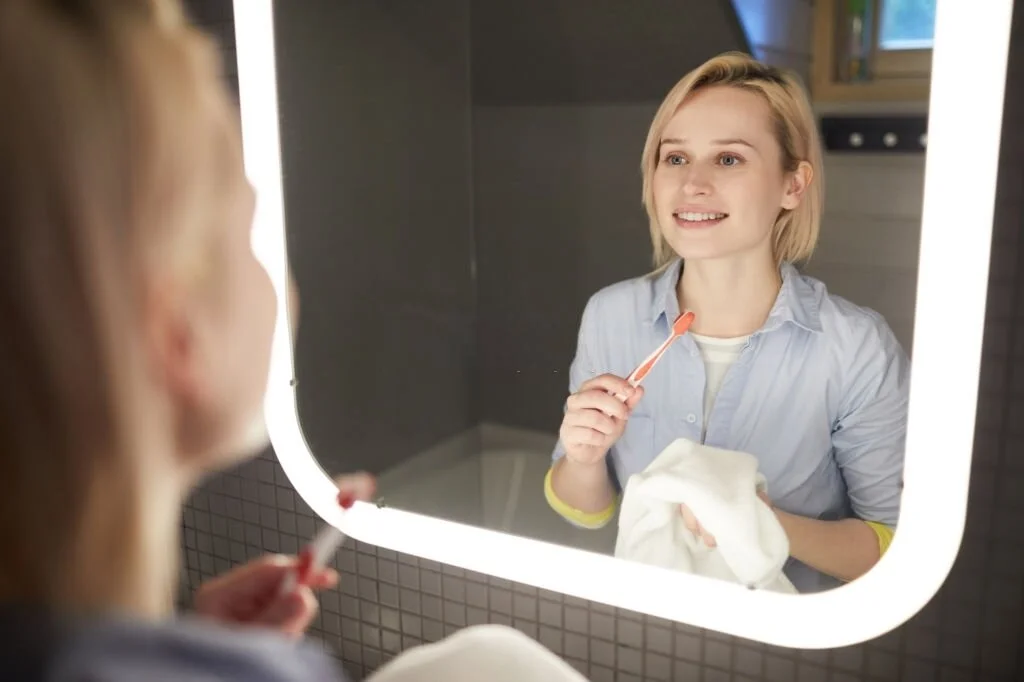
A mirror itself increases the value of any space, and the superiority is its built-in LED light. Modern bathrooms mainly consider this mirror over an ordinary one because it can serve you in multiple tasks. You can do your makeovers or shavings in this built-in LED mirror to get a perfect and clearer view. 

  • Hang baskets or hooks to hang towels

image7.jpeg

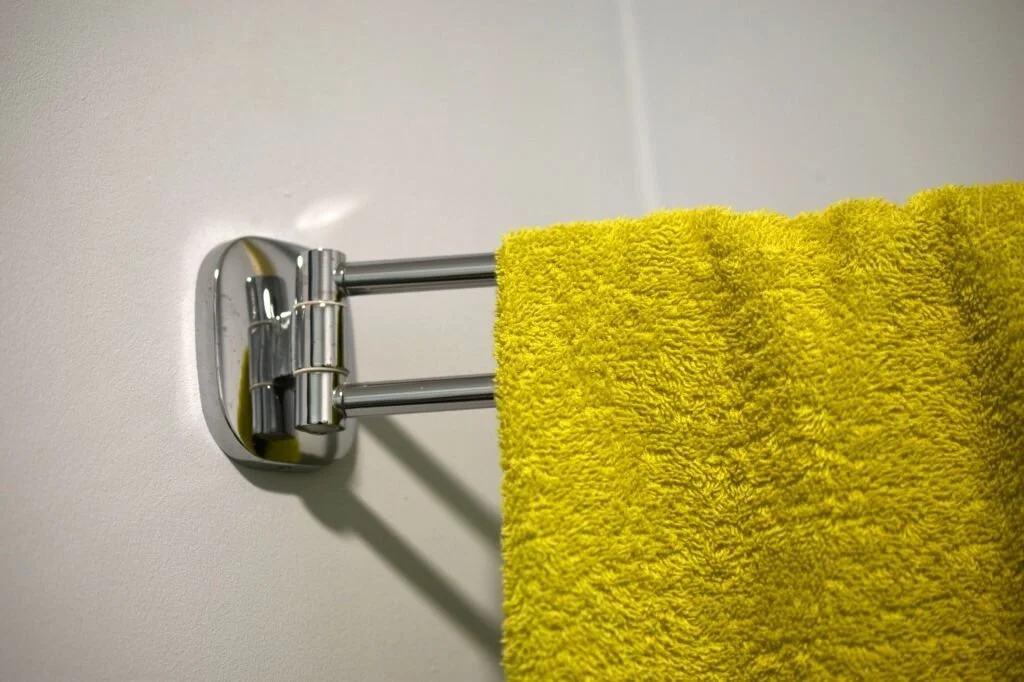
Especially in less spacious bathrooms, you need these hanging baskets. They can store a lot of stuff plus manage the visibility of your space. You can store your towels, bottles, or other stuff here. Or, simply install the hanging clips in order to hang towels or other clothes. 

  • Add more and more lights

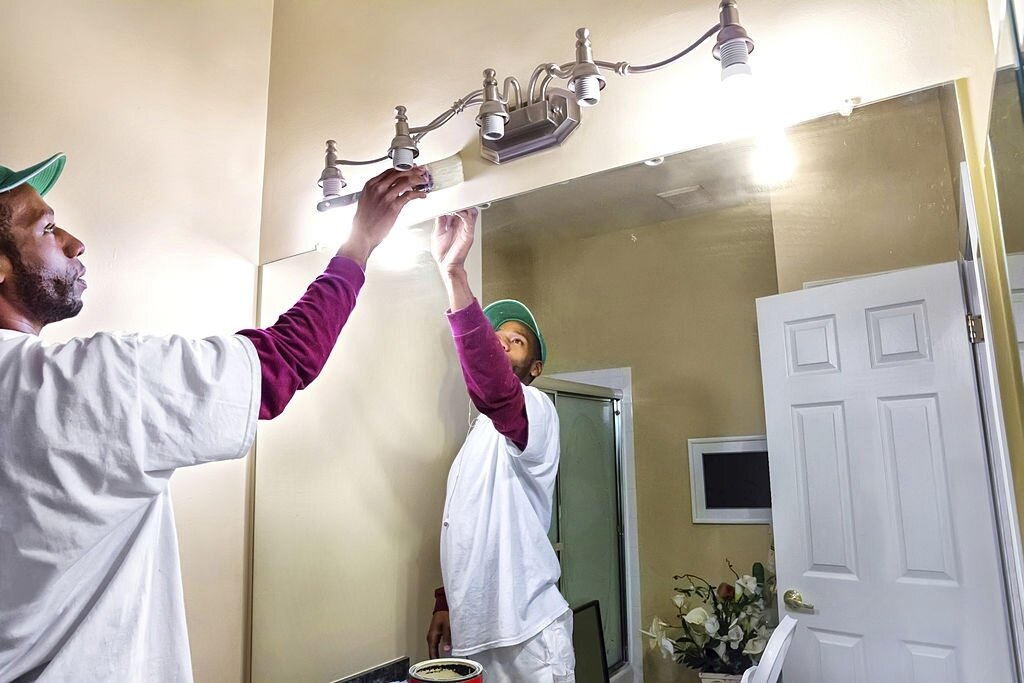
For changing your outdated bathrooms to new and modern ones, enhance its lighting first. Add a warm and luxurious touch to your bathroom décors by increasing the lighting of your bathroom. You can add more and more recessed lights or simple bulbs to achieve this goal. 

  • Pay attention to your Ventilation system

image9.jpeg

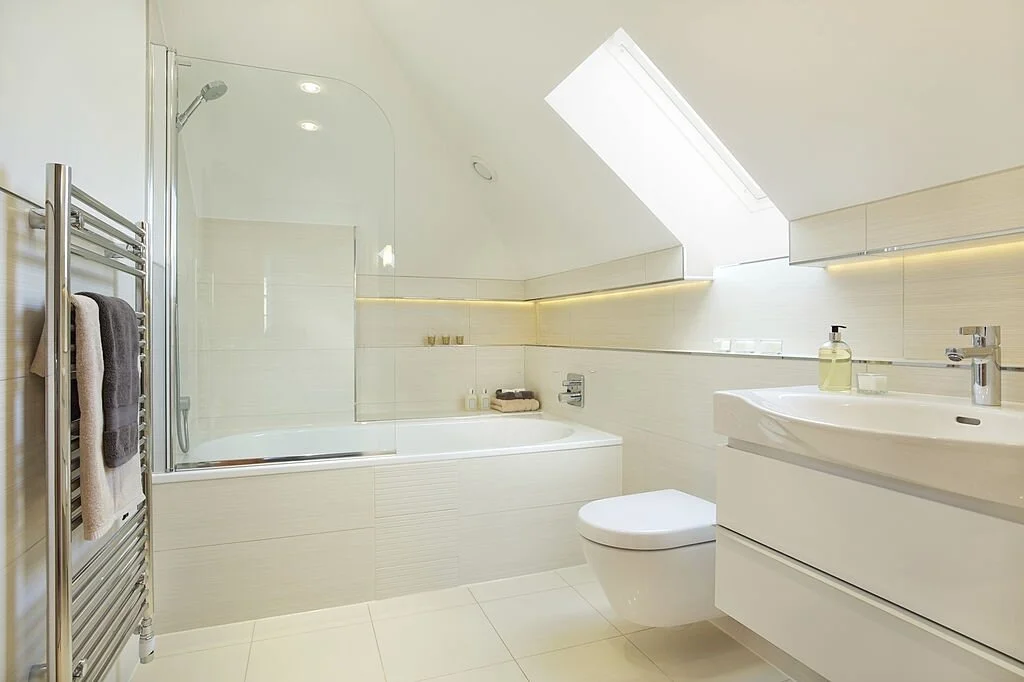
Another main thing to keep in mind while renovating a bathroom is to add good ventilation. For this purpose, try making some space for a window or install a skylight, if you can. Otherwise adding greenery is a great option for keeping the atmosphere good and pure. 
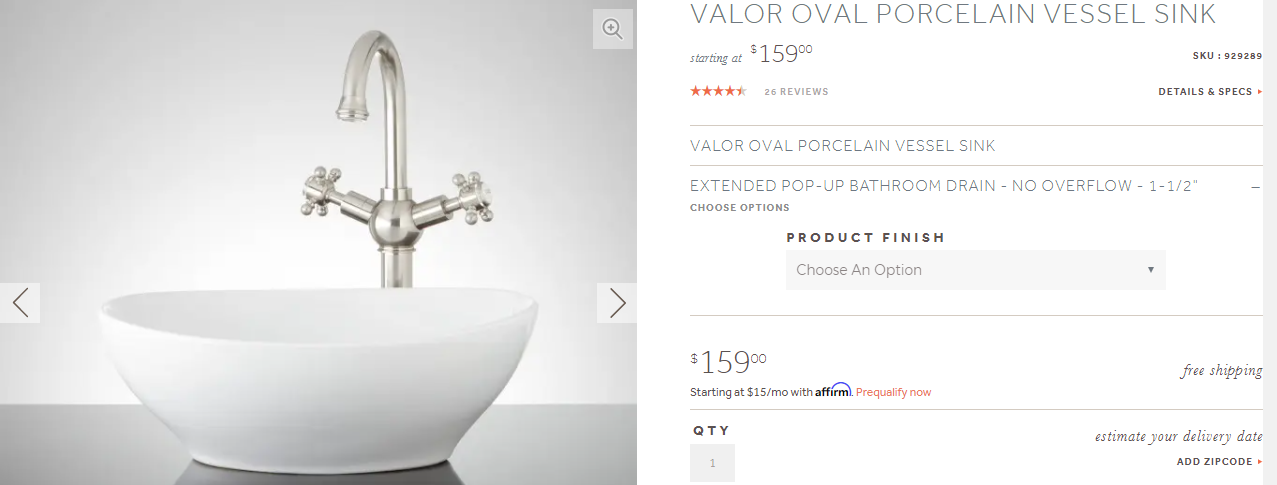
  • Change the fixtures

image10.jpeg

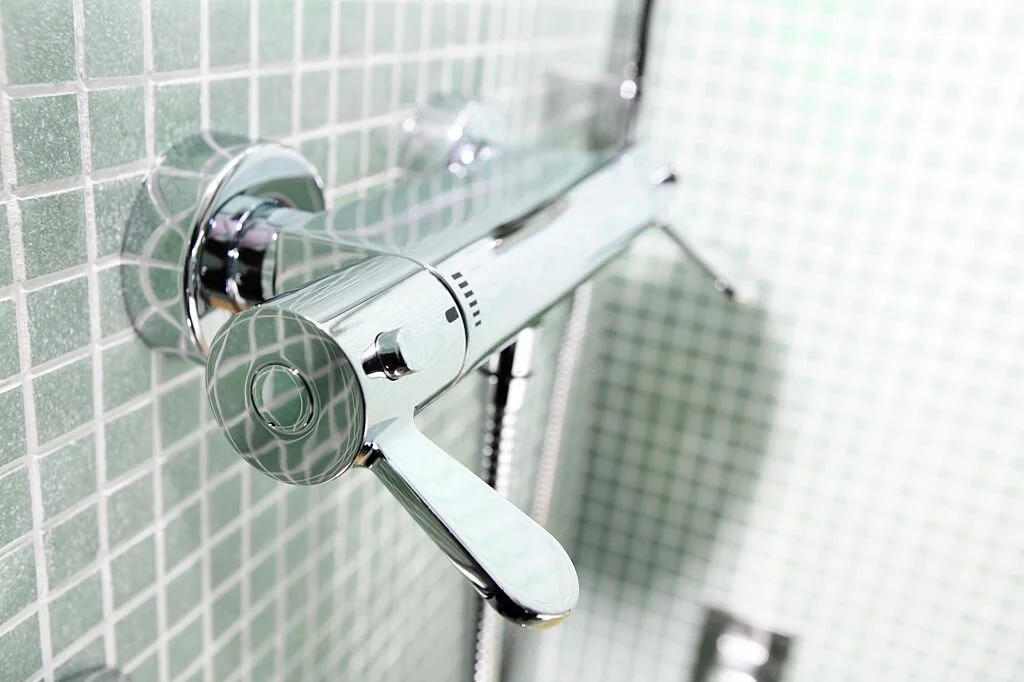
Change your old and rusted fixtures! Don’t go for lavish and expensive taps and handles, just buy new ones. 

  • Build more storage spaces with medicine cabinets

image11.jpeg

Now, you have a chance to make more storage space, so avail it. More and more space for storage is the brilliant hack to make your bathrooms look modern, tidy, and lavish. For this purpose, you can either add vanities or a medicine cabinet to store more stuff. 


Some extra tips:

  • Always maintain the cleanliness of your bathroom and make it look neat and clean every time.

  • Leave your shower door open every time you take a bath, to let the air circulate thoroughly.

  • Use some DIY glass cleaning solutions to protect your shower doors from mildew or soap scums.

Final words!

Transforming an old bathroom to a modern one is a piece of cake if you follow proper guidelines. You can either hire professionals for this task or just do it by yourself. You need to buy some main items so you can make great effects with little changes.

Guest Contributor: Muhammad Yasir

Office Renovation and Its Impact on the Working Environment

RH Business Marketing Solutions

Renovating your workplace is one of the most effective ways of affecting your company’s workflow. Your brand, the disposition of your talent and even the productivity of your staff can be affected by the working environment. This would mean that an interior redesign of your office has the potential to become much more than a slight furniture shift. In a way, it can turn into a change in your business model. 

Seeing as how some of these changes can change the pragmatism of the entire area, it can add new functions or dictate a new company policy. Of course, the success of the project sometimes depends on finding the right person for the job.

With that in mind and without further ado, here are several ways office renovation can impact the work environment.

Higher employee morale

Working in a new, clean and optimized environment will improve the mood and the morale of your staff. First of all, by being surrounded by new equipment, furniture, paint and other elements, they’ll see your office as something that’s constantly being invested in. By proxy, they will also see that you’re making an investment in them, as well. Now, different office interior design elements can have different effects on your employee morale but, by following this logic, just the fact that it’s new can cause this positive effect, as well.

Functionality

The layout of the office space determines the amount of space that you can use. Every employee needs to have enough personal space so that they feel comfortable, stimulated for work and that they’re not disturbed by people traversing the room. On the other hand, by cramming more desks in the same space, you’ll create a scenario where you can home a larger staff in a smaller office. This will positively affect your rent but have a negative impact on the working environment. This is a huge decision in front of you.

Proper workstations

Workstations are an integral part of your overall work process. Still, the proper workstation can also affect the health of your employees. The height of the desk and the adjustability of a chair will affect the angle at which you see the screen. According to experts dealing in office fitouts in Brisbane, proper seating will affect your posture and determine whether you suffer from back pain. 

You could also be interested in something more innovative, even revolutionary, for your office. One such example is standing desks. This is a method that can be easily integrated with interval working. When used properly, this method is healthy, efficient and it keeps employees alert for a lot longer. Just keep in mind that trying a couple of these stations as an experiment is the right way to go. Going all-in could be a bit over the top.

The open concept of a cubicle system

There are two opposed concepts for office decoration that have various advantages and disadvantages. For instance, an open concept lets more light in the room. Natural light is known to be a great motivator and can be ground-breaking for creatives. Also, an open concept lets people develop a stronger sense of community and it facilitates communication across the office floor. It’s also worth mentioning that the open concept gives you more space, in total, to work with.

As for the cubicle system, in the past, a lot of office managers abandoned it because of theories that it isolates office staff and makes them feel imprisoned. Cubicles, however, provide every employee with their own office. They also give employees a higher sense of ownership of the total office space since they can organize and decorate this cubicle to their own liking. In the COVID-19 era, it goes without saying that a cubicle system is far more efficient at keeping the office floor healthy.

Planning potential

What are your plans for the future? Do you want to hire more people? Is your intention to switch to a more flexible working model? These are just some of the questions that you’ll have to answer before proceeding. More and more enterprises are allowing their staff members to work from home (at least part-time). 

This means that they potentially have more space available that they are currently underusing. This is why with a proper strategy; you can reorganize the place to embody all the future goals of your enterprise. In other words, you need to look past the place’s current potential and into the future. In the future, some of the problems may be solved by outsourcing, which means that your need for more work station wouldn’t grow exponentially. For instance, hiring an outside project management company could make quite a bit of difference in your efficiency.

In conclusion

In the end, office renovation is one of the simplest ways to reinvent your business. This is your opportunity to figure out what you want your business to be and what you want it to represent. It will help change the way your staff feels about your business and even impact their ability to perform admirably in your employ. It is really a tremendous push in the right direction with a miniscule investment of your time and resources.

Author bio:

Gabriel Hill is an Australian blogger interested in a variety of spheres from home improvement and health to management and environment. 

What is the Cost to Build a Shed or Playhouse for Your Kids?

RH Business Marketing Solutions

Adding a shed to your yard gives you additional workspaces, storage space for your garden supplies, or you could even turn it into a playhouse for your kids to encourage their imaginations. If you’re a DIYer, you’re most likely wondering about the cost to build a shed when you realize that they come in a huge range of sizes, styles, and uses. All of them will add visual interest to your yard, and a high-quality shed can boost your home’s curb appeal when it comes time to sell. 

Since sheds come in different materials, sizes, styles and can be used for a large range of things, the cost to build a shed will include a range of associated costs. You can have your shed custom made, assemble it from a kit, or build it DIY from a plan. However, if you need additional storage space, sheds can be a secure and safe area to store your items and keep them organized and out of your way. 

You could pay anywhere from $200 to $30,000 for the cost to build a shed. The national average starts at $1,500 and goes up to $10,000. So, on average, the cost to build a shed falls right around $5,600 for a 10 by 12 storage shed with pine siding and a simple roof. This works out to between $15.00 and $150 per square foot. You can break this cost to build a shed down further by knowing your material cost will range from $5.00 to $75.00, and the installation costs range from $10.00 to $75.00. Brick is one of the most expensive materials to use, and vinyl is very cost-effective. If you’d like to get a closer estimate on your cost to build a shed, this is for you. We’re going to walk you through all of the biggest cost components, and you can pick and choose which ones will apply to you and which ones won’t apply. By the end, you’ll have a good idea on your cost to build a shed, and you can start budgeting for it. 

Turning a shed into a playhouse is a great way to give your kids a lot of space to move around outside and it encourages their imaginations. You can make them as large or small as you like, and it’s easy to add improvements without massively increasing your costs to build a shed. Playhouse-scale by Page DeWolfe / CC BY-NC 2.0

Decide What You Want to Build Your Shed For

One of the first things you want to do is decide what purpose you want to build your shed for. Do you want a place to store your gardening tools? Maybe you need more space for bigger items like golf carts, bikes, or riding lawn mowers. Or, maybe your kids really want a new playhouse. The purpose will dictate how large your shed is, the flooring, and how you lay it out and finish the inside. Common uses include but are not limited to: 

  • Children’s Playhouse – A simple shed can transform into a playhouse for your child. You can pick virtually any size, and they can be finished or unfinished. Your cost to build a shed will dictate how the final product turns out, and it’ll be more expensive to finish it.

  • Gardening – These are usually slightly smaller sheds that are just big enough to put a potting table and have storage space for your basic gardening equipment or items like pots, shovels, dirt, and hand tools.

  • Horse Run In – This shed has very open and board bays that allow horses to run in and out as they please. They’re usually larger and more spacious.

  • Storage – You can have any size storage shed, depending on what you want to put it in. Storage sheds are popular for rakes, lawn mowers, gardening equipment, sports equipment, bikes, and more.

  • Workshop or Office – If you plan to turn your shed into a fully functioning office that is separate from your home, this will push your cost to build a shed up. You’ll have to fully finish it, insulate the walls, and wire it for electricity and heating. It is like a much smaller house, so it costs more.

Shed Material Cost

Sheds typically use metal, resin, or wood for their material, and each one will dictate a different cost to build a shed. Metal and resin are most common in DIY kits, but you can custom build a shed with a wood frame and these materials. You can also build custom sheds out of brick and concrete, but this will push your cost to build a shed up because you’ll need to call in a specialist and pay labor fees. 

Brick

You can build a brick shed with a wooden frame and clad it in brick, or you can build it completely out of brick with a timber roof. However, this is more rare and time-consuming to do. You can finish or customize them in a huge variety of ways. However, your cost to build a shed with brick, whether it’s with a wooden frame or without, is expensive. On average, you’ll pay $24,000 for a shed made out of this material. Concrete

Concrete sheds usually use ICF blocks or concrete blocks during the construction process. You can also use poured concrete if you plan to use the shed as a workroom, playhouse, or a finished office. You can customize this shed in several ways, and you can have plain concrete that you paint or clad them with several roofing and siding options. The cost to build a shed out of concrete is also on the expensive end of the spectrum, and they typically cost $18,000 on average. 

Metal

You can buy kits that feature metal sheds, but these are usually more flimsy. You shouldn’t use them if you live in an area that has snow or high winds because it can cause a partial or full collapse. A metal shed with a wooden frame and metal roofing with metal walls will do well virtually anywhere. Metal does have more limited color and style options, but you can build it to almost any size if you choose to custom build it using a wood frame. A metal shed with a wooden frame costs around $4,500 from start to finish. 

Resin 

You can build this shed from a kit, and it’s generally very low-maintenance. They’re lightweight and decently durable, but you’re very limited on colors, styles, and sizes. There aren’t a lot of customization options you can get, and it’s rare that these sheds come with floors. You can custom build a floor, and this will increase your cost to build a shed. You’ll pay around $1,000 for this type of shed. 

Wooden

Wooden sheds are the most common custom-build shed types. They’re available in a huge range of variations and styles, and you can outfit the exterior with any siding to make them more resistant to your local weather conditions. They have wooden or concrete flooring, and you can pick from any roofing material. These can be a higher-maintenance choice if you use wood for the siding and floor because you’ll have to stain and seal them to protect them from the elements. The cost to build a shed out of wood averages around $6,000. The material you choose will impact your cost to build a shed, but it’ll also have a direct influence on how long it lasts and how much maintenance you have to put into it. Some materials are more high-maintenance than others. Playhouse by Jim Littlefield / CC BY 2.0

Comparing Shed Materials

Maybe you want to have more than one material in your shed, or you’re not sure which one will work best for your intended shed use. If so, it’s relatively easy to compare the three most popular shed materials to help make your final choice. 

Metal vs. Wood

When it comes to comparing wood and metal, you want to consider combining the two to get a more durable shed while controlling your overall cost to build a shed. A wooden frame is far more sturdy than a metal frame, and this makes it less likely to sustain damage from snow or wind. But, metal roofs and walls are more resistant to moisture, rot, flames, and insect activity, and this allows them to last longer than wood. 

Plastic vs. Wood

You can get plastic kits for small sheds, and they can be very durable. However, you have limits on the style, sizes, and customization options you can get. Wooden sheds need more maintenance overall than your plastic shed will, but it’s possible to customize your wooden sheds with trim, colors, sizes, roofing choices, and siding that you can’t do with plastic. 

Cost to Build a Shed by Square Foot

The cost to build a shed will have a broad range per square foot, depending on the shed’s purpose, materials you use, how finished it is, and whether it’s a DIY build using plans, a kit, or a custom shed. To have a professionally-built shed, you’ll pay around $50.00 per square foot if you don’t plan to finish the interior. If you want to finish the inside of the shed for a playhouse, workshop, or office and add electrical, you need to insulate it at $200 per square foot. Some DIY builds and kits run around $25.00 a square foot. 

Shed Sizes and Price Points

One of the biggest factors in your cost to build a shed is the size you want. This is true no matter if you go with a custom build, DIY build using a plan, or if you use a kit. Assuming you have a professional build your shed, the following price points apply: 

  • 6’ by 4’ – $1,200

  • 6’ by 9’ – $2,700

  • 8’ by 8’ – $3,200

  • 8’ by 10’ – $4,000

  • 8’ by 12’ – $4,800

  • 10’ by 8’ – $4,000

  • 10’ by 10’ – $5,000

  • 10’ by 12’ – $6,000

  • 10’ by 16’ – $8,000

  • 10’ by 20’ – $10,000

  • 12’ by 16’ – $9,600

  • 12’ by 24’ – $14,400

  • 16’ by 12’ – $9,600

  • 16’ by 16’ – $12,800

  • 16’ by 20’ – $16,00

You should keep in mind that square footage won’t give you a solid cost to build a shed estimate, but i’ll give you a rough idea. This is because a shed can be shorter or taller, have a flat roof, lean-to on an existing building, or have a decorative roof. 

Say you want to build a shed that is 10-feet by 12-feet. This will cost around $6,00 for a basic design with a gable roof. If you get a flat roof, the cost to build a shed can drop. If you wanted a two-story shed that is much taller, you could pay the same as you would with a 16-foot by 20-foot shed because you’ll have to use more material, add an extra floor, and add stairs. Depending on how you finish, build, and construct your 12-foot by 24-foot shed, it could cost anywhere from $14,400 to $30,000. Additionally, incorporating decorative elements like gable pediments can enhance the shed's architectural appeal.


How a Roof Impacts Your Shed Costs

Any materials that you can use for a roof on your home you can use on your shed.  It’s popular to match your shed’s roof to your home’s roof material to create a cohesive look. However, if you’re worried about yoru cost to build a shed, keep the roof flat and cover it in less expensive materials. The following outlines popular materials for your roof and the cost per square foot: 

  • Asphalt – $2.10 per square foot

  • Bitumen – $2.00 to $5.00 per square foot

  • Metal – $5.00 to $20.00 per square foot

  • Tile – $3.00 to $30.00 per square foot

  • Tin – $1.50 to $2.50 per square foot

  • Spray Foam – $2.00 per square foot

You can get creative with the roof on your shed, or you can go with something simple and more traditional if you’re worried about increasing your cost to build a shed. You could even make it match your home’s look for a cohesive design. Playhouse framing-01002 by Donna & Andrew / CC BY 2.0Cost to Insulate a Shed

Most sheds are uninsulated, and the only time you should need to insulate your shed and drive your cost to build a shed up is when you want to use it as a workplace or playhouse. Insulation comes with a broad cost range associated with it, and you can get everything from ICF blocks to more low-cost fiberglass. You should expect to spend at least $200 to insulate a basic shed. Sheds that have living areas above them, larger sheds, or sheds that use ICF blocks in the construction come with higher costs attached. 

Labor Costs

There are several factors that influence your labor costs. You can build almost any shed in clear areas of your yard. If you do need to clear out an area, you’ll have to excavate it first, and this adds to your total cost to build a shed. The most common type of land preparation is grading, and it typically costs between $4.40 and $5.40 a square foot. If you have an existing deck or patio you want to put your shed on, this can keep your cost to build a shed down. 

Whether you choose a wood or concrete floor and the material type will also impact your costs. Most sheds won’t come with plumbing or electricity in them, so this will also add to your cost to build a shed if you want to add them for your office space. This will boost your labor costs. Getting a kit and having a professional put it together has the lowest costs for labor associated with it. If a builder or a carpenter puts your shed together using plans, your labor costs go up. You may need to recruit one or more of the following professionals to help build your shed: 

  • Carpenter

  • Electrician

  • Handyman

  • Shed building company

The labor costs to build a shed, on average, fall right around $70.00 an hour. This adds up to around half of your total cost to build a shed if it’s a 10-foot by 12-foot wooden model that costs $3,000. If you have a kit, you’ll pay between $100 to $500 for labor. If you choose to contract with a shed building company, the company will get all of the materials, build the shed off-site, and deliver it to your property to finish it. 

Should You Buy or Build a Shed?

If you’re worrying about the cost to build a shed, you may consider buying one outright and having it delivered to your location. Another cost-effective option is to buy a kit and put it together by yourself to save on labor costs. There are a broad range of overlap costs with this option. You can buy a small upright resin shed for around $500, or you can go with a fully custom-built option that comes to your home assembled for around $30,000. You could also build an inexpensive one from lumbar for $500, or you could hire someone to build a shed on your property for around $30,000. 

When you’re trying to decide to build or buy your shed, the biggest cost factors will be trying to decide on a durable option that will withstand the climate and be large enough to store your kid’s sports equipment or your bigger garden tools like a riding lawn mower. Some people may be satisfied with a resin shed that is prebuilt, and other people want to have a custom shed that will blend with their property or be large enough to turn into a small space to accommodate guests. The intended purpose should be a consideration you keep in mind throughout this decision process. 

If you’re not comfortable building a shed and you don’t want to hire someone to do it for you, you could buy a prefabricated one that comes to your home ready to use. This can be just as expensive as building a shed from the ground up, but it’s usually quicker. Shed by iheartpandas / CC BY-NC-ND 2.0

Price to Transform a Shed Into a House or Playhouse

If you have a big enough shed, it’s possible to finish it completely, add plumbing, and wire it for electricity to create a fun playhouse for your kid or a tiny house for guests. Since the biggest cost to build a shed would be finishing it, this would be an expensive project unless you plan to do it all on your own. Per square foot, finishing costs are around $125. This doesn’t include running the electrical lines, plumbing, and insulation. When you add these factors, the costs go up to $250 a square foot. 

This pricing also assumes that you don’t add any more square footage to your shed since most sheds are only a single room. They don’t get divided into bathing, sleeping, or a kitchen area. You’ll also need inspections and permits before it’s legal to live in. 

Shed Enhancement Costs

There are enhancements you can choose to add to your shed to make it more functional and aesthetically pleasing. Depending on the shed, these enhancements can increase your cost to build a shed significantly, so it’s good to lay out a budget first and decide if you can afford to add these items. 

Adding on a Lean-To

If you already have an existing shed and you want to add on a lean-to, this will cost less than you’d spend for a full addition. The cost to add this part to your shed runs around $30.00 a square foot. So, larger lean-tos will increase your costs quicker than a smaller one. 

Barn Doors

A lot of sheds come with wide doors to accommodate storage and larger equipment like zero turn mowers or wheelbarrows. The most frequently installed style of door is the barn door because they’ll open up significantly wider than normal doors. These doors will increase your cost to build a shed by around $100. 

Flooring

A lot of sheds need a floor, especially if you want to use it as a potting shed or workshop. You can make your floor out of plastic, plywood, and poured concrete. If you buy a kit, you’ll usually have to install a floor separately from the shed, but custom sheds can have the floor built right on. The cost to build a shed will go up starting at $100 to add a floor. 

Gutters

Maybe your shed comes with a pitched roof. If so, consider adding gutters to funnel the rain way from your shed’s foundation. Per foot, you’ll pay between $3.00 and $5.00 a foot to install gutters on your shed. 

Workshop-Style

It’s very popular for people to use sheds as workshops. However, this can increase your cost to build a shed because you’ll have to add insulation. You’ll also have to run electricity and maybe plumbing to the shed to get it ready for long working clips. You’ll pay around $200 a square foot to create a workshop-style shed. 

Cost to Remove a Shed

If you have an older shed on your property with asbestos insulation and flooring or masonite siding, you’ll have to call in an expert team to tear it down. You don’t want to do it on your own due to the toxicity of the asbestos. The cost will largely depend on how much asbestos there is and where the shed is. The costs start at around $500 to call in experts. 

Where to Find a Shed Builder Near You

For anyone who wants to get a shed and is wondering about the cost to build a shed, you can get a more concrete answer by getting in touch with several local builders. The following resources will help you find reputable shed builders near you, and they include: 

Frequently Asked Questions 


When you start calling around for estimates on your cost to build a shed, you’ll want to ask the same questions of each company to get a more solid estimate range. Always call several companies to see which ones offer the best deals. 
Shedby Jared Cherup / CC BY-NC-ND 2.0

  1. Is it hard to build a shed by yourself?

It depends. Are you comfortable with the tools you’ll need to use? How familiar are you with woodworking? If you’re not very comfortable with any of this but you still want to build your own shed, consider going with a complete kit that has pre-drilled lumber to make it easy on yourself. 

2. Do you need a permit to build a shed?

In most areas, you usually won’t need a building permit to erect a smaller shed like an 8-foot by 10-foot or a 6-foot by 8-foot one. However, there are local zoning restrictions that you have to abide by, and you may need permits for larger sheds. You may also need a permit if you choose to run electrical or plumbing to your shed. Always check with your local zoning commissioner’s office before you start building. 

3. What is the average cost to move a shed?

As long as the shed doesn’t have a concrete pad, it shouldn’t be too expensive to move your shed. Larger sheds will cost more, but the average cost is around $50.00. 

4. Is it safe to use a shed as a playhouse for the kids?

Yes. As long as your shed is stable and sturdy, it can be a great play area for your kids. You can finish the walls or leave them unfinished. If it gets cooler in your area and your kids want to play in it, it’s a good idea to insulate it to keep it warmer. 

Bottom Line

The cost to build a shed will depend on many factors, and you can use this guide as a reference point to get a rough estimate of this project so you can budget for it correctly. Consider what you want to use the shed for and how big you need it to be. This will give you a good idea on your base costs, and be sure to add in for any improvements or enhancements to get a functional shed that will last for years.

Guest Contributor: https://happydiyhome.com/cost-to-build-a-shed/

5 Ways Builders Can Secure More Home Renovation Clients

RH Business Marketing Solutions

With ever-changing trends and recent renovation stats in the USA, we can see that renovations are on the rise. Since there is a lot of business in the market, it is time to up your client-fishing game. Here are five ways that you can bag and secure more clients for home renovation.

Get Easy to Find and Reach:

People love to renovate their homes, but they have a lot of things on their plate such as family responsibilities, work-life, leisure, etc. The last thing they want to do is to put a lot of effort into finding a reputable builder and reach them

Even if they find you and have no way to contact you directly, trust us that they will move on to someone else who is more reachable. To cater to this problem, ask yourself the following questions.

Have you provided a direct contact number where a client can call you directly?

Can they find your direct email address easily and contact you via it?

Are you reachable on social platforms such as Facebook, Twitter, Instagram, etc.?

If your answer to the above questions is “yes”, you are on the right path. Else, it's time to open the lines of communication. Offer the clients around the clock free consultation, you will see them coming to you in herds.

We know that it is not easily manageable to run all these platforms by yourself. This is exactly why modern digital tools were created. Set up automated responses. For voice calls, set up a voicemail message to let your clients know that you are on a site and will answer all the messages in few hours. 

This will not only impress the clients but will also portray you as a responsible, punctual, and skilled builder.

Create an Online Presence

Believe it or not, flyers and billboards are in the past. If you want to reach a huge number of clients, you need to build a strong online presence with popular social media platforms. But before that, get your business an official website. 

State everything about you and your business that glorifies it on the website. Let people know about your recently completed projects through your online portfolio. You can also connect your website with social media platforms such as Facebook, Twitter, and Instagram, etc.

Engage with your audience and watch them turn into your biggest clients. Learn about techniques that can help you reach a larger audience and convince them to hire you through attractive and engaging content.

Remember that only creating a presence does not mean anything unless it has sound impressions on the audience. Hence, keep your online profiles alive and give recent updates.

Turn Your Customers into Brand Ambassadors

Do you know what is the biggest source of getting more clients? Word of mouth. When previous clients talk about your brand in a good way, they attract more clients. If they say otherwise, others are likely to believe them more than you.

Hence it is very important to focus on your current customers. Give a shining performance and ask them subtly to talk about you on Social Media Platforms. You can use reputable review management software to gather more and authentic reviews. This review management software helps small businesses in gathering more positive customer reviews for their services. 

Once you get a strong force of customers/reviewers, you will not have to pay large sums for digital ads since they will become your brand ambassadors and bring you more clients.

Bag Some Builders’ Awards

This might sound cliché but a few more feathers in your hat will impress more potential clients. Some might consider it gloating but calling yourself an “award-winning builder” has its own perks. 

The plan of action to bag an award is the same as renovating a house. Start by marking the award that you have your eyes on. You can consider the National Association of Home Builders and Great American Living Awards etc. Look for the requirements and go through the detailed application.  

Think thoroughly to see what kind of a project can help you get this award. Make sure you have adequate time, finances, and resources that are required to win the awards. Put all the efforts as you would put into a renovation project.

Involve the Clients in the Remodeling

Now, this may sound a little weird but think of it this way. The home renovation projects are usually assigned by the owners themselves and they have a huge attachment to their properties. They will be chatty, excited, will ask a lot of questions, and point out even the smallest errors.

Our suggestion is that a smile goes a long way. Listen to all their concerns positively and provide feedback. If something is out of their forte, they might take some time to digest it. Give them time and communicate everything. 

Never try to cut them out. Sure, you can be a little rough around the edges but let them get involved and be a part of the process.

Guest Contributor: Arslan Hassan

7 Tips for Pet-Proofing Your Plumbing

RH Business Marketing Solutions

To prevent unwanted repairs, taking care of your plumbing system is a must. For homeowners who have those lovely pets, it involves extra precautions to ensure that they do not undermine the diligent upkeep. However, installing wall access panels flangeless can help secure the main control valve of the plumbing system away from pets.

Check out some valuable tips that will help to pet-proof your plumbing systems. Incorporating these practices can help keep both pets and pipes safe in the long term so you can enjoy your pets without worrying about your plumbing system. These tips could also be beneficial for pet safety as well.

Tip #1: Keep Toilet Lids Closed

Although this practice might not be a natural habit in every household, it is worth adopting for your pet's safety. And it is a well-known fact for cat and dog owners: pets can be notorious for sneaking sips from the toilet bowl. While other owners might regard this behavior as a funny and endearing quirk, it can lead to serious illness from ingesting water from the toilet. 

It is not only for obvious sanitary reasons, but the chemicals from the toilet cleaning products can remain in your toilet bowl for weeks. Therefore closing the toilet's lid will keep your pets safe.

Tip #2: Avoid Flushing Cat Litter

Although various cat litter brands claim to be flushable, deciding to flush kitty litter through the pipes can cause many problems and damage the plumbing system. The design of cat litter is to absorb more moisture and increase up to 10 times more into its original shape and volume. When flushing cat litter in the toilet bowl, it will naturally expand and lead to clogging and blockage in the plumbing system. 

Additionally, the waste litter might contain parasites like Toxoplasma Gondii that can infiltrate the water supply. Therefore it is highly recommended that pet waste is placed in designated trash bins and not flushed down into the plumbing pipes.

Tip #3: Cover The Floor Drains 

It is essential for pet owners who usually bathe their cats and dogs at home, to cover floor drains or use drain guards. Especially if the pet is prone to shedding, it is essential to catch the pet's fur in drain stoppers to prevent it from clogging the pipes. 

Tip #4: Install Water Temperature Balancing Valves

While we are grooming and bathing pets at home, ensuring the water temperature stays balanced can make bath time more manageable. It can be jarring to touch or be hit by freezing or scalding hot water while in the middle of a bath; it can also traumatize your pet so that they are afraid the next time you attempt to bathe them. 

Tip #5: Cover Exposed Piping

Pets sometimes are curious, and they won't hesitate to dig or find out what that piping under the sink is in the cabinet. They might bite or scratch these pipes to satisfy their curiosity, resulting in injury and irreparable damage to your plumbing. Either way, it's wise to cover exposed piping to avoid vet or plumbing expenses down the road.

Tip #6: Don't Allow Digging

As a general rule, it is necessary to discourage your pets from digging around pipes. If your pet has a passion for digging, it's best to nip it in the bud. Digging will not only ruin a yard but can lead to sewer or water line damage. 

Tip #7: Bathe Pets Outside

It is best to bathe your pet outside. If the pet's fur is soiled and you try to wash it in the sink or bathtub, clumps of matted hair can lead to clogged up drain pipes leading to unavoidable repairs. 

Be sure to pet-proof your plumbing system! It will keep your plumbing system clean, protect those lovely pets from injury and illness, and allow you to continue enjoying the services of your well-maintained plumbing system. 


Guest Contributor: Chris Jackson

Resource-Saving Tips for a Green Kitchen

RH Business Marketing Solutions

With all the green veggies, leafy plants, fresh herbs and fruits, one might think that your kitchen is already green. However, there are ways you can save even more resources and make your kitchen eco-friendly and energy-efficient. Here are a few tips on saving resources, reducing waste and turning your kitchen into a completely green space:

Invest in quality cookware

One of the easiest ways to make your kitchen more sustainable is to invest in quality cookware that will stay with your family for generations. Unfortunately, this means you have to say goodbye to Teflon—it’s debatable whether it’s good for human use, but it definitely doesn’t have the best lifespan. On the other hand, cast iron and stainless steel are very durable, even though a sizable investment.

Also, choose quality utensils instead of cheap plastic and wooden ones—these can break, rot and melt if you leave them on the stove for too long. Investing in handmade knives you can sharpen at home and using washable cloth dishtowels instead of paper towels is also a great idea.

Be energy-efficient with appliances

Many of us have old refrigerators and freezers in the basement or garage. While practical, these old appliances eat electricity like crazy. Reconsider how much extra space you need for meat and veggies and upgrade to newer models of appliances. And maybe you don’t even need any extra freezer space so you can be greener than ever and save a lot of money—one large fridge/freezer usually needs less energy than two smaller ones.

Wash dishes the right way

Did you know that washing dishes by hand wastes over 30% more water than using a dishwasher? Well, rejoice because numbers don’t lie! You can additionally green up your dishwashing process by using completely natural dishwashing balls from well-equipped Shoppster website and get them delivered to your doorstep. These are powerful in removing grease and food from dishes, friendly to the environment and hypoallergenic. If you wait to have a full load of dishes to run your dishwasher, you can save even more energy and water than running two half-loaded dishwashers.

Cook greener

Your big oven is good for big roasts and casseroles but if you’re preparing a smaller dish, switch to a toaster oven or a slow cooker which use 30% less energy. According to estimates, microwaves use even less energy—with them, you can save around 50% of electricity than using a regular oven. If you need to heat a larger meal, using a stove is usually more efficient, though. In the summer, using a microwave is even smarter because it doesn’t release too much heat so you need to blast your AC.

Repurpose and recycle

Save those jars that come with your purchase of pickles, salsa and spaghetti sauce and repurpose them easily and efficiently. Take off the labels and fill them with pasta, rice, spices and whatever you can buy in bulk. This will minimize your trash and take you closer to zero-waste living. You can also sort your garbage and recycle all the plastic, cans and glass bottles you don’t need anymore. If you want to take it a step further, setting up a composting station is also possible, especially if you have a lot of leftovers from cooking.

Bring your own bag

Being green in the kitchen starts at the supermarket, so instead of choosing plastic or paper bags, bring your own reusable canvas bags (keep them in your car or backpack). When you unload your groceries, place empty totes in the hallway and take them with you to your car the next time you’re leaving somewhere. Even plastic or paper bags can be reused, so don’t throw them away.

Use green kitchen cleaners

If you look at the list of chemicals and toxins that go into regular dishwashing liquids, detergents, floor cleaners and degreasers, you will realize why they are so harmful to the environment. However, there are companies that produce natural cleaners, but you can also take a DIY route and make your own with everyday ingredients like vinegar, baking soda and essential oils.

Being green in the kitchen will not only do wonders for the environment but also save you some money in the long run. Plus, you’ll be inspired to eat better and experiment more with your homemade recipes. In a blink of an eye, you’ll lead a much healthier and eco-friendly life.

Guest Contributor: Diana Smith

How To Impress Your House Guests With Modern Sinks

RH Business Marketing Solutions

Sinks are some of the must-have things in every home today. But then, many people do not think about getting creative with sinks when looking to decorate their homes. However, the reality is that besides being functional, sinks can spruce up outdated bathrooms and kitchens.

There are different modern sink designs that you can use to enrich your home. The sink you settle on needs to meet your requirements in terms of functionality and budget. This article looks into some of the modern sink designs that you can use for inspiration and guidance.

Let’s get started.

1. The Under Mount Sink

One of the best sink designs that you can consider is the under-mount sink. This type of sink has a sleek look that will add a unique look to your home. Besides its distinctive features, the under-mount sink is one of the easiest to install. It is also easy to use and clean as residues do not get stuck on gaps or edges.

Undermount sinks get installed from below the countertop, leaving a flawless countertop surface. This helps highlight the beauty of the materials used to make the sink. For example, imagine how your kitchen or bathroom will look with an under-mount sink and a countertop made from granite or marble. It looks elegant and well put, right?

2. Pedestal Sinks

Pedestal sinks are also known as free-standing sinks because of their designs. A pedestal sink is an excellent option for limited spaces. But then, many people include them in their homes because of the trendy and neat look that they bring in whatever space they get installed.

This type of sink is worth considering if you are looking for small bathroom sinks. They fit well into every bathroom theme and home décor. Pedestal sinks are also cheap, easy to assemble, and easy to remove. However, you need to choose your pedestal sink carefully as there are different options available.

3. DIY Concrete Sink

As mentioned earlier, you can get as creative as you want when it comes to sinks. For instance, you could be looking to take the extra challenge of building your sink at home. You only need to find the right materials and a guide to making the type of sink you want.

An excellent example of a material that you can use is concrete. You can then look for a tutorial that will guide you on how to make concrete sinks for guidance. You can also check out some best concrete sinks online and choose the concrete sink design that will be a perfect fit for your home before starting to build it.

4. The Farmhouse Sink

Another popular sink design you can consider today is the farmhouse sink. It is a simple option that creates a rustic modern appearance to the place. Traditionally, farmhouse kitchen sinks came white, but then they have evolved, and it is easier to find a color that blends with your home décor today.

The elegant look that farmhouse sinks bring into a home is why they are trending among homeowners. The good news is that you can also effortlessly make a DIY standing farmhouse sink at home. It is a great pick for you if you’re looking to build a farmhouse or rustic-style kitchen.

5. Vanity Sinks

You cannot talk about modern sink designs without mentioning vanity sinks. This type of sink is among the most luxurious options that you can consider. But then, vanity sinks require a lot of space to put up and are therefore not ideal for apartments but are excellent for spacious homes.

They come with a vanity unit or table that consumes a lot of space. However, you also get massive amounts of storage beneath the sink, meaning there’s no wastage of space. Besides, vanity sinks come in different designs. For example, it can be in the form of an under-mount or self-rimming sink.

6. Self-Rimming Sinks

Self-rimming sinks make up some of the best small bathroom sinks you can find in the market. It is also one of the easiest to set up and use in the bathroom. You can install a self-rimming sink on a countertop or a vanity unit in your kitchen. Of course, this depends on how you have designed your kitchen.

You can install self-rimming sinks over any material. They are also fairly easy to clean, making them one of the best picks for homeowners. Self-rimming sinks can wow your house guests with their simple yet appealing design. They will also not give you a hard time if you ever want to replace them.

7. Semi-Recessed Sinks

This type of sink can be a great option for you if looking for bathroom sinks. Semi-recessed sinks sit in front of the countertop and vanity. The best thing about them is that they do not consume a lot of space. You should think about furnishing your bathroom with them if you have limited space.

Semi-recessed sinks make good use of the little space they consume. This is because they have storage spaces underneath that you can use to keep different items. The only downside of semi-recessed sinks is that you have to deal with water spills as there’s no countertop around the basin.

8. Vessel Sinks

This type of sink adds a unique modern look to anywhere it gets installed. It is bowl-shaped and gets installed above countertops. You can also partially fix it on the countertop to make it sturdier. The best thing about using vessel sinks is that they do not consume a lot of space like most sinks on this list.

Besides, a vessel sink can help you showcase the beauty of your counter space to your guests. You can choose different materials when buying vessel sinks. Some options include stone, ceramic, crystal, and mosaic. You also can use countertop material that matches your home décor for the best results.

9. Dual Faucet Sinks

One of the most trending types of sinks is the dual faucet sink. The best way to describe this type of sink is by referring to it as a two-in-one sink. It comes with one wide basin with two faucets installed on it. This makes it look unique from the many types of sinks we have already discussed in this article.

Besides looking good, dual faucet sinks can help you save a lot of time. It can prove helpful if you have many guests who need to get ready at the same time. A dual faucet sink is also perfect for small spaces. If you have limited spaces, having two faucets in one sink can be a great idea.

Conclusion

As mentioned earlier, the sink you choose for your home will depend on various factors. An ideal sink should be more than visually appealing. Everything from the materials used and the design of the sink should meet your needs. In short, it should serve the purpose that makes you buy it.

We have already looked into some of the modern types of sinks that you can consider today.  You may also have to decide whether to buy manufactured sinks or make concrete sinks at home. Now you have an idea of some of the modern sinks that you can consider for your home.

Guest Contributor: Daniel Martin

Best Practices When Cleaning Out Your Gutters

RH Business Marketing Solutions

Roof gutters are more important than many homeowners think. They take gallons of rainwater and carry it down through their spouts. This prevents waterfalls from pouring off of your roof during heavy rainfall. Without gutters, water can pool around your property and cause damage over time. 

How do you maintain gutters? Clogged and dirty gutters are particularly problematic. They require maintenance throughout the year, especially if you live in an area with a high volume of trees. Leaves are one of the most common things to clog gutters. Now, let’s dive into keeping your gutters functioning properly throughout the year.

The Need for Gutter Cleaning and When to Do It

The main aim of cleaning gutters is to ensure rainwater from the roof flows freely through the gutters and down through the spouts. Cleaning gutters is much cheaper than the repairs associated with not doing the clean-up. When should you clean your gutter?

The most appropriate time is right before the rainy season begins. All gutters should be cleaned at least once a year but you may need to get up there more often if you have trees nearby. It is recommended that you clean gutters every spring and fall in preparation for rains and snow. Special gutter cleaning is required after a storm, before a forecasted storm, and after strong winds that may have blown leaves and debris into the gutter.

The Gutter Cleaning Steps

1. Assemble all the items you will need.

2. Wear a long-sleeved shirt and wear rubber gloves.

3. Get an extendable ladder with standoff stabilizers to avoid placing it directly on gutters. Put the ladder on a spot that you put in the gutter.

4. Carefully move up the ladder with a waste bag in hand.

5. Pick up all debris carefully placing it in the bag. If there is some litter on the roof, start by removing this because if you don’t it will all end up in the gutter when it rains.

6. Use a small plastic scoop to remove any gunk.

7. Use a garden hose to clean and flush the gutter.

8. Unclog the downspouts if they are clogged and test their effectiveness by spraying water from the hose pipe at full speed. Repair any leaks you may notice.

Important Safety Measures

Cleaning gutters has more to it than just getting up there and cleaning away. You need to do it safely. Actually, there are thousands of people who get injured cleaning gutters every year. You can avoid these injuries by adhering to a few safety precautions.

The ladder you use should be strong and preferably, four-legged. This provides the support to hold your weight up there. Clean a small area, come down, and move the ladder to clean another portion. Avoid overstretching because you can easily fall off the ladder.

Wearing protective gear is very important. Wear rubber gloves to protect your hands from the dirt and germs in the debris. Eye protection is also necessary. Wear goggles to protect your eyes from aerosols from bird droppings on the roof as well as stings from insects like wasps and bees that may have made a home on your roof. The right kind of shoe for gutter cleaning is rubber shoes. These will give you a proper grip so you do not easily slide.

Conclusion

With the right practice, gutter cleaning can be done safely. Bear the above tips in mind the next time you carry out this important activity. Remember gutter cleaning is very important because clogged gutters can cause you to lose a lot of money in repairs.

Alex Capozzolo is a partner of Better House Buyers, a home buyer based in Georgia. He has been writing for the real estate industry for several years. Alex enjoys writing on real estate investing, home improvement, and interior design.

Guest Contributor: Mary Anderson

Contemporary Home Office: Design Essentials

RH Business Marketing Solutions

Crestwood plumbers

Contemporary Home Office: Design Essentials


Working from home sounds like the best thing in the world, and that’s usually not far from the truth. However, most people don’t realize that working from home is still working, and you need to do your job. In order to be productive, you need your own space, which is why setting up a home office is vital. If you’re thinking about doing that as well, here are a few design essentials you have to look into.

Find the right spot

Even if you’re working from home, not just any home office will do. It needs to be motivating, creative, and visually appealing, and that’s not always easy to achieve. That’s why picking the right location is so important. While some people can work in their bedroom or kitchen, others need separate space – quiet and isolated. Choosing the right location could take some time and energy, but you’ll surely be able to do it.

Make it big

Before you find the perfect spot for your home office, you need to take size into consideration. No matter what you do and how old you are, you need an office that won’t make you feel claustrophobic. It needs to be big enough for your desk and chair, but it needs some maneuvering space as well. This is particularly true if you’re planning on holding meetings in there and welcoming clients. That’s why turning a spare bedroom into a home office is the ideal solution, and you’ll always have enough space.

plumber in crestwood il

Impress your clients

Despite working from home, some people have to work with a number of clients they need to see regularly. That’s why their home office needs to be specious, equipped with some comfortable furniture, and properly decorated. This may not sound like the most important thing in the world, but it’s the best way to impress your clients. That’s why you should explore professional office interiors that are visually appealing and help you make a great first impression. This way, you’ll send the right message and make your home office more functional and remarkable than ever.

Think about the storage

All working professionals need proper storage space, even those who work from home. Luckily, being the boss of your own space allows you to do whatever you want. Most people get one of those wall-to-wall and floor-to-ceiling bookcases that give them enough space for their possessions. Others prefer smaller filing cabinets and shelves that are easier to organize. Whatever you opt for, try to keep your things in order and always close by.

Natural air and sunlight

This is another perk of working from home – you can keep your window open as much as you want. Fresh air and sunlight do wonders for your productivity, and insisting on these things is more important than people realize. That’s why installing bigger windows that let lots of air and sunlight in your home office goes a long way. Moreover, this will minimize your need for artificial lights and make your office more sustainable at the same time.

Organize your equipment

Every home office needs a computer, a printer, a wireless router, and a million other things as well. While most people don’t a problem with the mess, you need to get these things as tidy as possible. Instead of being knee-deep in cables, you should organize them and keep them under control. This will make your office look nicer and feel less cluttered, and that’s something we all need.

Designing your home office is easier than it looks, but only if you put your mind to it. Define its purpose, figure out what you’re trying to achieve, and insist on things that will help you reach your goals.

Guest Contributor, Lillian Connors

Guide To Keeping Pests Out Of Your Kitchen

RH Business Marketing Solutions

Plumbing companies in crestwood il

Guide to Keeping Pests Out of Your Kitchen

There are few things as horrifying as seeing a line of ants march across your kitchen countertops or feeling the dread of seeing fruit flies swarming your bananas. Pests can destroy your enjoyment of a good meal faster than almost anything. However, the last thing you want is to use poisons where you prepare food for your family and friends.

The wet spring and summer in most of the United States is spurring on pest infestations this year. While they won't all be kitchen pests, the environment is ripe for more than ever before. Even in drier regions, ants, cockroaches and flies will move indoors in search of food and water. Fortunately, there are some steps you can take to remove them quickly and safely.

1. Seal All Food

Pests such as ants, gnats and roaches are attracted by food. One of the first steps you should take when you notice an infestation is sealing all food sources. Put cereal in airtight containers, place open cracker sleeves in a sealed plastic bag and move fruit to the refrigerator.

Even if you don't yet notice any bugs, it's a smart move to seal anything dry in your kitchen and pantry. Pests often start as a small problem and grow into a larger one. Prevent them from taking hold in the first place.

2. Fix Cracks and Openings

If you're having an issue with ants or mice, these creatures are getting into your home from somewhere. Inspect the outside of your house for gaps and cracks in the foundation. Plug up any holes where mice might enter. Track down where ants are marching into formation. Fill any open spaces and remove the easy entrance to your home. Of course, very small pests such as ants will likely find a way inside anyway, but you don't have to make it easy on them.

3. Remove Infested Food

It might seem obvious, but if you notice even one pest in your cereal or flour, remove the food entirely. Where there is one bug, there are almost always more. Getting rid of the food source may also remove much of the temptation to the creatures invading your home. Seal new items the minute you bring them into your home.

4. Call an Exterminator

If the infestation doesn't seem to get better, don't be afraid to call an exterminator for help. A Terminix in Illinois professional can identify the species of bug and give you steps to remove the problem, as well as prevent it in the future. Yes, you will pay for the services, but you'll avoid months of aggravation and living in unsanitary conditions.

5. Use Natural Repellents

There are some natural things you can use that bugs simply don't like. Natural solutions are typically safe for your family and pets and much less costly than commercial solutions for getting rid of pests. Mosquitoes and flies don't like basil, so plant some and hang the dried herb in doorways. Peppermint drives away spiders. Use the same method of planting around the outside of your house or bringing dried peppermint into your home.

You could also try using essential oils. Fleas and moths dislike lavender and cockroaches hate catnip.

6. Sweep and Mop Regularly

Invaders such as ants are known as spilled food pests. They love to find debris and feast on it. Sweep and mop your floor regularly to keep food pieces to a minimum and remove the temptation for them to enter your home. Mop up spills the minute they occur and clean out cupboards and drawers regularly. The cleaner your kitchen is, the less chance these pests will find something to survive on.

7. Eat Your Fruits

Eating plenty of produce is healthy for you, so many people leave a fruit basket out on the table or counter. The problem arrives when you don't eat your fruit quickly enough and it begins to decay. Rotting fruit is nirvana to fruit flies, who will enter your home and lay eggs so fast you'll have dozens of them before you know it. Remove any spoiled produce and put out a small amount of red wine in a tall glass to trap the flies already in your kitchen.

Be the Food Police

Since food is the top culprit that attracts kitchen pests, make sure everyone eats in designated areas, cleans up after themselves and puts everything away in the refrigerator or a sealed container. Over time, you'll get rid of any pest problems you have and avoid finding new ones.

Guest Contributor, Holly Welles

Holly Welles is a home improvement writer who believes anyone can make the most of their space. You can find more of her work on her blog, The Estate Update.