Google+

contact us

Use the form on the right to contact us.

Day or Night, we are here to serve you. Leave your plumbing problem to us.


Tinley Park, IL

(708)845-7922

Residential and Commercial plumbers and plumbing contractors available in Orland Park, Tinley Park, Oak Lawn, Palos Heights, Midlothian, Oak Forest, Homer Glen, Mokena, Frankfort, and the surrounding Chicago South Suburbs. Emergency plumbers.

copper water lines.jpg

Kevin Szabo Jr Plumbing Blog

Kevin Szabo Jr Plumbing is Tinley Park, Orland Park, Oak Forest, Midlothian, Orland Hill, Homer Glen, Mokena, Frankfort, Crestwood, Palos Heights, Oak Lawn, local plumber. Read our blog for advice, tips, a good laugh, and basic home improvement.

**We are moving our old blog to our new and improved website. Too see all our posts visit kevinszabojrplumbing.blogspot.com

Filtering by Tag: Plumbing Facts

How to Choose the Best Floor for Every Room in Your House?

RH Business Marketing Solutions

Every room in your house has a unique purpose, ambiance, and aesthetic. It's no surprise, then, that each space may demand a distinct type of flooring. While aesthetic appeal is vital, functionality, durability, and maintenance also play pivotal roles in determining the right floor. Now, let's see how to select the perfect flooring for every nook and corner of your abode.

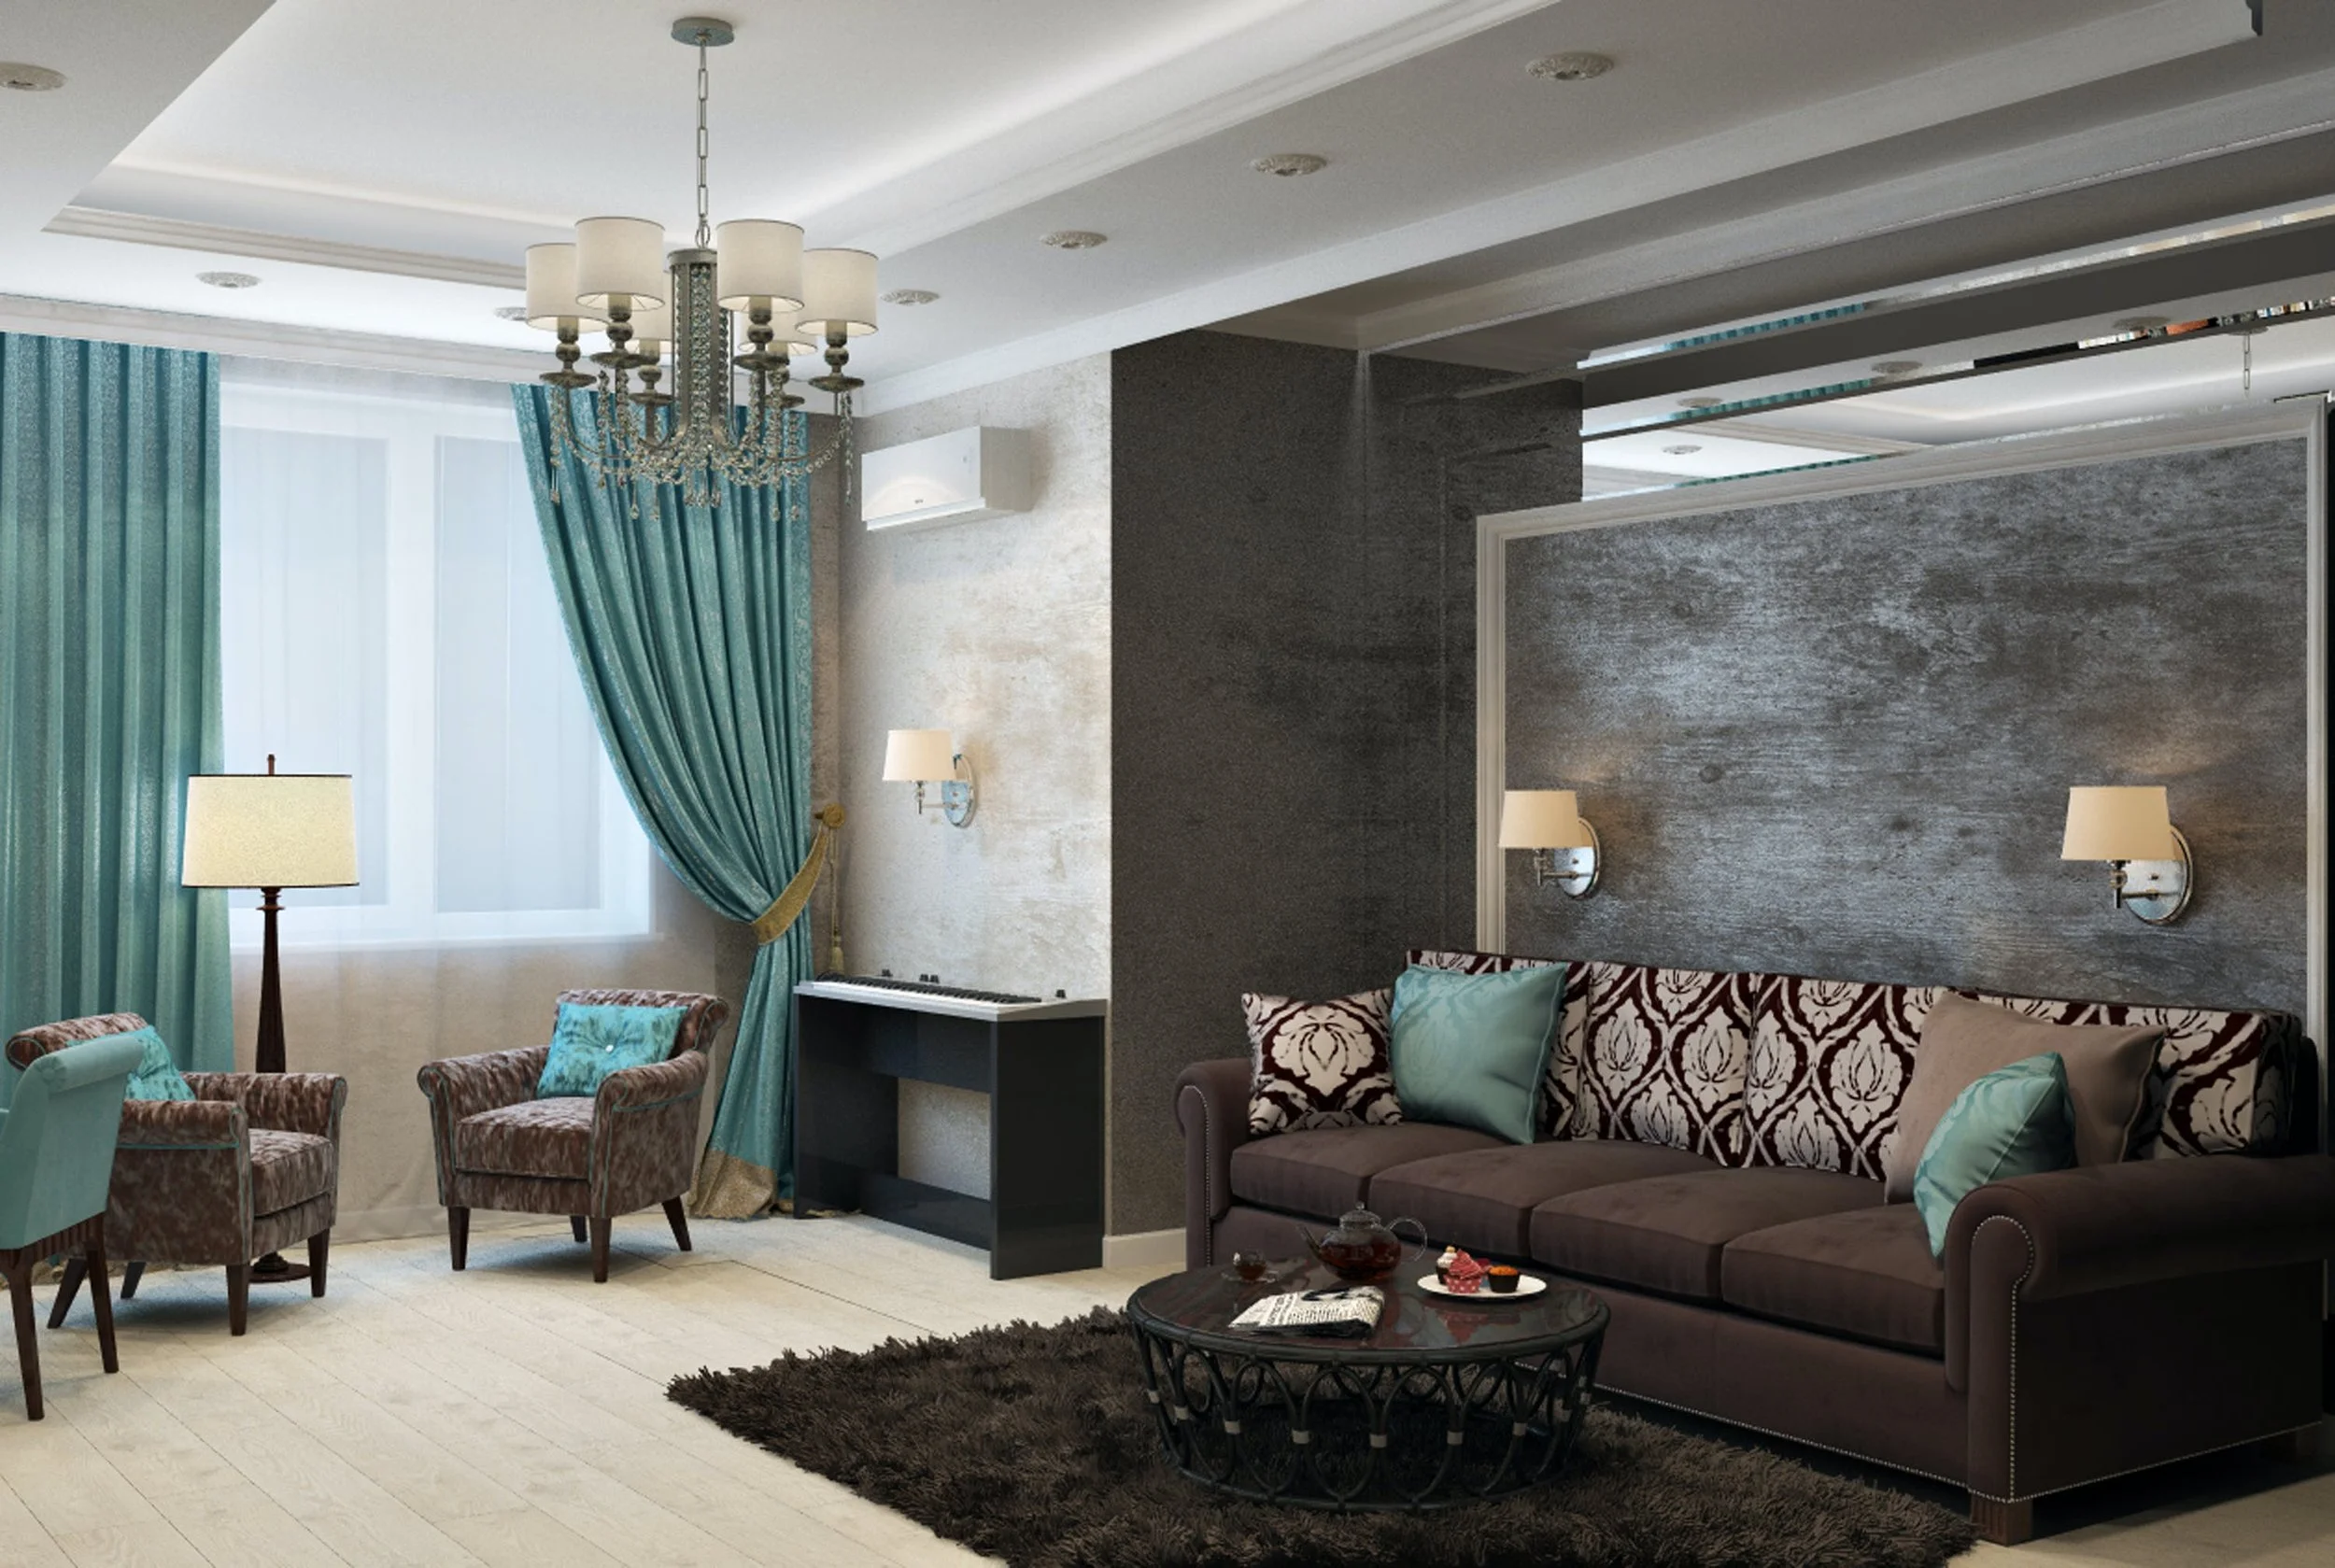
1. Living Room: The Heart of Your Home

For many, the living room is the focal point of their home. It's a space that witnesses countless memories, from family get-togethers to movie nights. A plush carpet might seem like a comfortable choice, but if you're looking for durability, consider laminated or engineered wood flooring. They offer the elegance of natural wood but come with added resistance to wear and tear.

2. Kitchen: Where Culinary Magic Happens

The kitchen floor should be able to withstand spills, stains, and frequent foot traffic. Ceramic tiles, vinyl, and linoleum are popular choices. They're easy to clean, water-resistant, and available in a plethora of designs and finishes. However, if you want warmth underfoot, radiant-heated tiles are an excellent option.

Another aspect to consider is the floor's slip resistance. With occasional water and oil spills in the kitchen, having a non-slip surface can be a safety game-changer. Textured tiles or matte finishes can provide additional grip, ensuring fewer slip-related accidents. Moreover, if you have an open-plan kitchen merging with a living or dining area, ensure the transition between different flooring materials is seamless and cohesive. This continuity can create a harmonious flow, amplifying the aesthetics of your living space.

3. Bedrooms: Your Personal Retreat

Softness and warmth are key for bedroom floors. Wall-to-wall carpeting remains a favorite, offering both comfort and insulation. If you're not a carpet enthusiast, consider adding area rugs to hardwood or laminate flooring. They provide a similar coziness but are easier to maintain.

4. Bathroom: Oasis of Relaxation

The bathroom floor needs to be waterproof above all. Porcelain and ceramic tiles reign supreme in this department. They're robust, water-resistant, and available in various designs. For a touch of luxury, you can also consider natural stone tiles like marble or granite. However, ensure they're properly sealed to prevent water damage.

While tiles remain popular, other innovative bathroom flooring options are emerging. Luxury vinyl tile (LVT) is becoming a favored choice due to its water-resistant properties and realistic mimicry of wood and stone finishes. It provides warmth underfoot, unlike traditional tiles. Additionally, rubber flooring, available in sheets or tiles, offers a slip-resistant, waterproof, and contemporary look, ensuring both style and safety in a bathroom setting.

5. Home Office: Boosting Productivity

With remote work becoming more prevalent, a home office requires a floor that's both functional and invigorating. While carpet tiles offer a modern look and cushioning effect, bamboo or cork flooring can be both sustainable and stylish. For those seeking an exceptional, elegant touch, maple hardwood flooring stands out. The radiant hue and fine grain of maple not only provide a lavish look but also promise durability. After all, a conducive environment can elevate your work game.

6. Basement: Maximizing Utility

Basements often face issues like moisture and temperature fluctuations. Hence, it's crucial to pick the flooring that can combat these challenges. Vinyl planks or tiles are fantastic as they are water-resistant and affordable. If you aim for a more cozy feel, consider using engineered wood, which can handle humidity better than solid wood.

When contemplating basement flooring, also think about potential usage. If you plan to transform your basement into a playroom or gym, padded interlocking tiles or carpets might be ideal for cushioning and insulation. For home theaters or music rooms, consider soundproofing materials or adding a layer of acoustic underlayment beneath your primary flooring choice. This will enhance sound quality and reduce noise transfer to other parts of the home.

7. Outdoor Spaces: Embracing Nature

Whether it's a patio, balcony, or porch, outdoor spaces need robust flooring. Natural stone, concrete, or specially designed outdoor tiles are fantastic options. They can endure the elements and still retain their charm. If you're aiming for a wooden deck, opt for treated wood to ensure longevity.

For those wanting a greener approach to outdoor spaces, composite decking is a noteworthy alternative. Made from a blend of wood fibers and recycled plastics, composite decks are durable, resistant to rot, and require minimal maintenance. Another emerging trend is permeable paving, which allows water to pass through, reducing runoff and recharging groundwater. These innovative pavers come in various materials and designs, offering aesthetics while being environmentally responsible.

Conclusion: Every Floor Tells A Story

Your house is an ensemble of stories, memories, and dreams. Every floor you choose can either echo or enhance this narrative. While aesthetics and trends are essential, remember that functionality and longevity are equally crucial. Research, envision, and select wisely. After all, the right flooring can elevate the very soul of your space.

Home Improvement Pallet Ideas

RH Business Marketing Solutions

Do you have extra pallets laying around that you don’t know what to do with? Lucky for you, we love DIY pallet projects. There are so many ways to recycle and reuse the pallets to make home decor!

A book shelf is the perfect thing to make with a pallet. Easy, affordable and customizable. You can choose whatever color you’d like to paint it to fit in with the aesthetic of your house!

Pallet bed frames are becoming a huge trend because of how easy it is to get ahold of the materials and how nice it looks. Lots of people love the idea of lighting up underneath their bed. Definitely a DIY money saver since bed frames can get expensive.

Need a spot to hold all of your household tools? A pallet is the perfect thing to use because it doesn’t take up much space, it’s big enough that the tools fit in perfectly and it keeps you more organized with everything in one spot. Not to mention, you can move it around your garage if you need to!

Looking for more decorations for your house? Pallets are perfect because you can accessorize it with almost anything you can think of and it still looks adoable. You can put this inside or outside, the possibilities are endless.

This is the perfect idea for a dog bed. A lot of dogs tear up their dog bed because of the material, but having a wooden base with a pad ontop of the base would probably deter them from ruining it. Plus, it’s a sturdy, reliable bed!

This pallet bar will take a little more effort in the DIY aspect but this would be perfect for an outdoor bar. Not too big, not too small and you can recycle your pallets into this.

Another bar set up, but this one would make a great permnanet bar in your backyard!

This cute pallet cabana can be your spring and summer get away outdoors. Perfect to sit in to read a book, or just enjoy the outdoors without sitting in the sun.

Want a fenced in garden but you don’t know what type of fence? This is perfect because it still allows light through the pallets, and the side of the garden can be endless!

Another fence type of design that allows for all those plant lovers to have a place to plant them!

Lawn furniture can get very expensive, but good thing pallets are very cost effective. This is a perfect way to get more bang for your buck!

Pallets are very durable and sturdy, so this would make the perfect porch swing.

Setting Up A Truck For Your Plumbing Business

RH Business Marketing Solutions

When setting up a truck for your plumbing business, there are a few key things to keep in mind. It's important to have everything you need on hand so that you can be efficient and effective while on the job. Here are some tips for setting up your truck

1. Truck tarps

A truck tarp is an essential piece of equipment for any plumbing business. It's important to have a quality tarp that will protect your truck and its contents from the elements.  Choose a tarp that is made of high-quality materials and is weatherproof. This will ensure that your truck and tools are protected from the elements. You can get custom mesh tarps that have a high level of water and wind resistance. Make sure the tarp is large enough to cover your entire truck. This will keep moisture and dirt from getting into your truck bed and causing damage. Look for a tarp with grommets along the edges. This will make it easier to attach the tarp to your truck. Choose a tarp that is flame resistant. This will help protect your truck in the event of a fire.

2. Ladder rack

A ladder rack is a must-have for any plumbing business. It's important to have a safe place to store your ladders while you're on the job. A ladder rack will keep your ladders safe and secure while you're driving. It's also a great way to organize your truck. You can store all of your tools and supplies in one place. This will make it easier for you to find what you need when you're on the job. Look for a ladder rack that is made of heavy-duty materials. This will ensure that it can withstand the wear and tear of everyday use. Its durable construction will help keep your ladders safe and secure.

3. Toolbox

A toolbox is another essential piece of equipment for any plumbing business. It's important to have a place to store your tools and supplies while you're on the job. A toolbox will keep your tools organized and safe. It's also a great way to keep your truck clean. You can store all of your tools and supplies in one place. This will make it easier for you to find what you need when you're on the job. Look for a toolbox that is made of heavy-duty materials. This will ensure that it can withstand the wear and tear of everyday use. It's also important to choose a toolbox that is waterproof. This will help protect your tools from the elements.

4. Shelving

Shelving is another essential piece of equipment for any plumbing business. It's important to have a place to store your tools and supplies while you're on the job. Shelving will keep your tools organized and safe. It's also a great way to keep your truck clean. You can store all of your tools and supplies in one place. This will make it easier for you to find what you need when you're on the job. Look for shelving that is made of heavy-duty materials. This will ensure that it can withstand the wear and tear of everyday use.

Setting up a truck for your plumbing business is essential for being efficient and effective while on the job. These were some of the most important and essential things to keep in mind when setting up your truck. Make sure you have a quality tarp, ladder rack, toolbox, and shelving to help you keep your truck organized and safe.

How to Become Cash Flow Positive

RH Business Marketing Solutions

Cash flow is the lifeblood of your business. Without a steady cash flow, you could be forced to shut down in a matter of months. You might have a product or service that customers love and are willing to buy from you. However, if you don't have the cash in place to fund your company's growth and development, this could spell disaster.

Assess Your Monthly Income

Assessing your monthly income will give you an idea of how much money you bring in each month. This is a good starting point for creating a budget since your budget will be based on your income.


Use Net Income instead of Gross Income. Net income is your gross income minus all taxes and other deductions. It's the actual amount of money that goes into your bank account each month, so it's what you should use when calculating your monthly expenses.

Improve Your Income Sources

The first thing you must do to become cash flow positive is to improve your income sources. The easiest way to do this is to get a second job or start your own business. If you don't have the time or know-how to start a business, then working part-time at night or on weekends may be your best bet. Either way, you need to find a way to make more money.

You Can Improve Your Income by Understanding the Rule of 72

As you start to earn more, your financial priority should be to become cash-flow positive. The first step to becoming cash flow positive is understanding the Rule of 72. This rule states that in order to find the number of years required to double your money at a given interest rate, you just divide the interest rate into 72. For example: If you are able to get an 8% return on your investment, then it will take 9 years for your money to double (72/8 = 9).


In order to become cash-flow positive, you need to find an investment vehicle that will give you a positive return and will do so consistently year after year. You also need to understand how compounding works and how it can dramatically increase your wealth over time.

Improve Your Income by Settling Debts

You can also improve your income sources by selling your house; you can sell your house to a company that buys houses in cash or states we buy houses San Antonio TX. If you are cash flow positive, then it may be possible for you to sell your house and use the proceeds from the sale as extra money to pay off debt. You can also choose to rent out your home and downsize into a smaller place while you begin to make an income from your rental property. This will help you build equity in your home and allow you to use that equity as collateral for loans that will help you pay off even more debt.

Track Your Expenses to Create a Budget

If you're like most people, it may be a while since you've looked at your bank statements and credit card bills. So, before we jump into making a budget, let's look at what you've been spending money on over the last few months. This will provide a good starting point for your budget.


Gather all the statements from the past three months—bank and credit card statements. You might be surprised by how much you spend in categories like dining out and groceries. This is especially important if you haven't made a budget before because you can see exactly how much money you're spending and where it's going.

Create an Emergency Fund

Creating an emergency fund is an important step toward becoming cash flow positive. The purpose of an emergency fund is to help you prepare for the unexpected.


The smallest possible starting amount for an emergency fund is $1,000. You can increase the number if you want to, but it is a good place to start. The idea is to keep building this fund so that you have 3-6 months' worth of expenses saved up in case you get laid off or suffer a financial setback.

Create A Retirement Account

You should start saving for retirement as soon as possible because the earlier you start, the more time your money can grow. If you're just starting out and don't have much to save, don't worry – even small contributions will add up if you start early enough.

Get A 401K Retirement Plan

Many employers offer their workers a 401(k) plan, which allows employees to contribute pre-tax money toward their retirement. These plans are often matched, meaning that the employer contributes to the employee's retirement fund as well.


The primary benefit of a 401(k) is the fact that it allows you to take advantage of tax-free growth, meaning you don't have to pay taxes on the money until you withdraw it from the account. In addition, many people like 401(k)s because they allow for automatic deposits into your retirement fund. However, 401(k)s have limited investment options and high administrative costs.

Conclusion

Becoming cash flow positive is an important milestone for any business, but it's not always easy to reach. The first and most important step you can take is to figure out where your business stands now so you have a reference point going forward. Once you know that, you can begin taking steps to get there.

Guest Contributor: Hannah Boothe

8 Essential Gadgets and Tools for Every Home DIY Needs

RH Business Marketing Solutions

Having the right tools and gadgets around your home makes DIY projects and repairs much easier and can even save you time and money. If you are a home DIY enthusiast, there are several tools and gadgets that are essential in your toolbox. Whether you are a beginner or an experienced builder, these eight essential gadgets will help make your home improvement projects easier and less time-consuming.


1. Hammer

A hammer is one of the most versatile tools around and can be used for a variety of tasks, from fixing things to pounding nails. It is a good tool to have around the house in case of a home repair emergency. In addition to being useful in DIY projects, a hammer can be used as a weapon for self-defense.

2. Drill

A Drill is an essential tool for any DIY enthusiast. A drill is useful when making repairs, installing new hardware, and more. A drill can be powered by a battery or an electric motor. Moreover, drill bits come in various shapes and sizes, and you can choose the one that fits your needs depending on the task at hand.

3. Screwdriver

A screwdriver is essential for tightening screws and installing door hinges and locks. You can also use it for removing screws from boards and panels. It can also be used as a stabbing tool when repairing furniture. Moreover, a screwdriver will come in handy when repairing electronics and automobiles. Some screwdrivers also have interchangeable heads that can be used for various tasks.

4. Tape Measure

A tape measure is essential for any DIY project because it allows you to measure distances and widths accurately. You can use it to check the size of furniture pieces before you start assembling them or to mark the location of holes on walls or ceilings for later installation of plumbing or wires.

5. Wrench

A wrench is used to tighten or loosen screws, bolts, and other objects. It is also used to pry open objects. A wrench can be made from many different materials, including metal, plastic, or wood. Wrenches are generally divided into three categories based on the shape of their handle: straight-handled wrenches, ratchet-handled wrenches, and socket wrenches. Their versatility makes them a must-have tool for any home DIY project.

6. Cordless Drill

If you’re a DIYer, then you definitely need a cordless drill. A good cordless drill can do everything from drilling holes in wood to screwing screws into boards. It comes in handy for smaller jobs, and it saves wear and tear on your hands and arms when doing projects that require repetitive use.


7. Lube Shuttle Electric Grease Gun

lube shuttle electric grease gun is a handheld tool that is used to apply lubrication to machinery, equipment, or other objects. It consists of a gun-shaped body that is fitted with a trigger and a nozzle. Lubricant is stored in the body of the gun and is released when the trigger is pulled. This type of grease gun is powered by electricity and is, therefore, suitable for use in areas where there is no access to a power supply. If you need to apply lubrication quickly and efficiently, this tool will come in handy.

8. Jigsaw

A jigsaw is useful when cutting wood into different shapes and sizes. It also has a blade that you can use to remove wood filler or other materials. This tool is helpful for creating a precise finish on projects. Additionally, you can also use a jigsaw to make cuts in metal or other hard materials. Moreover, the blade on a jigsaw can also be sharpened to create precision cuts. As such, a jigsaw can offer many benefits when it comes to crafting and repairing items to add value to your home.


Closing Thoughts

When it comes to DIY projects, having the right tools is essential. These eight items will help you get started on your project and make it easier and faster. If you have any questions about any of these tools, be sure to ask a professional before beginning a project. They can provide guidance and instruction that will help you complete your task successfully. Home improvement projects can be fun, but they're not easy—be sure to use the right tools to make the process easier.

Guest Contributor: Tracie Johnson

8 Reasons You Should Apply for a VA Loan

RH Business Marketing Solutions

Finding an affordable mortgage that you’re eligible for can be challenging, especially in the current home buying market. Despite so many different loan options available, it can be difficult to find the one that’s right for you.

If you’re a veteran or an active-duty military member, then you likely qualify for a VA loan! Even if you qualify for other loan types, if you can apply for and benefit from a VA cash-out refinance loan, then it’s definitely worth your time. In many situations, VA loans are the best option available and if you glance at the eight reasons below, you’ll quickly understand why.

8 Reasons You Should Apply for a VA Loan

#1. No Down Payment

While other mortgages will require a down payment of anywhere between 3.5% to 20%, a VA loan does not require a down payment. For many people, providing a down payment is one of the biggest obstacles in buying a house. You need to come up with a large sum of money before you can benefit from the loan and in many cases, this is very difficult.

With a VA loan, you won’t have to scrounge up every last penny you’ve saved in order to put down a down payment. Instead, you can benefit from the loan without this obstacle.

#2. No Minimum Credit Score

Another major challenge for potential homeowners is having a high enough credit score to be approved for a loan. While conventional mortgage loans have a minimum score of 620, FHA loans set their minimum to 580. Many lenders raise their minimum score requirement to avoid risky investments.

In many cases, you may be asked to show a credit score of 680 or higher which makes it difficult for buyers.

When it comes to VA loans there is no minimum score requirement. This being said, some lenders may still request a copy of your credit score in order to assess how much of a risk you are. Because of this, it’s recommended you have a score of 580 or more, though it is not an eligibility requirement.

The VA program will look at your credit history for the last year, so it’s important you haven’t filed for bankruptcy or had a collection marked on your credit score. As long as you have relatively good payback standings and haven’t had any problems, you’ll be good.

#3. Relaxed Debt to Income Ratio

Your debt to income (DTI) ratio often plays a huge role in the determining of your mortgage. For most conventional loans, this ratio is capped at 36%. For VA loans, however, it’s around 41%. Depending on the lender you contact, they may permit a higher ratio, though you shouldn’t always rely on this. 

#4. No Mortgage Insurance Requirement

Most mortgages will require you to get private mortgage insurance. The cost for this is added on top of your mortgage payment and is often raised if you’re unable to provide a 20% down payment. This makes paying for a mortgage much more expensive. 

While not all conventional loans require private mortgage insurance, all FHA mortgages require it. When it comes to VA loans, however, private mortgage insurance is never required!

As VA loans are backed by the government, lenders don’t require you to pay for private mortgage insurance in addition to your regular mortgage payments. All the money you would have otherwise spent on insurance can go directly into paying off your loan, saving you thousands of dollars.

#5. Lower Interest Rates

Mortgages typically have fairly high interest rates, especially if you don’t have an excellent credit score. While refinancing may help you switch to a loan with a lower interest rate, you won’t be able to do this right away and you’ll still lose quite a bit of money simply by having to pay so much in interest.

VA loans normally have lower interest rates than other mortgage types. This is again due to the loan being backed by the federal government.

While the average interest rate for conventional loans is anywhere between 3.5% to 4.5%, a high VA loan interest will hover around 3.5%. Of course, this will vary from lender to lender, but on average, you’ll have lower interest rates with a VA loan than you would with another type of loan.

#6. No Prepayment Penalty

In some cases, lenders will require you to pay an extra fee if you are able or willing to pay off your mortgage before the term ends. This can be discouraging for those who want to either refinance or pay in full for their loan.

If you are able or willing to pay off your mortgage in full, a VA loan will not penalize you.

#7. Easier Qualification

Qualifying for a mortgage can be a difficult and long process. You’ll be asked to provide multiple documents and even if you do, you may still be denied. Even pre approval may be revoked and you’ll find yourself back at square one.

VA loans are much easier to qualify for. Eligibility requirements can be found on the VA website along with more helpful information about applying for a certificate of eligibility and what to do if you don’t meet the requirements. There’s also a phone number provided at the bottom if you have any additional questions or need some extra assistance.

#8. Easy Refinance

If you’ve previously taken out another type of loan, VA loans can be used to refinance your current loans. When you refinance a previous loan into a VA loan, you’ll benefit from all the advantages mentioned above and won’t have to worry about managing multiple loan types.

Conclusion

VA loans are there to help former and active-duty military members. If you qualify, it’s certainly worthwhile to look into the option and take advantage of it. Even if you could easily qualify for a conventional loan, VA loans come with so many other benefits that it makes the most sense for you to take advantage of it anyway.

How to Properly Maintain Your Tankless Water Heater

RH Business Marketing Solutions

It’s always a good idea to learn how to maintain everyday appliances. Not only will you be able to get your appliance up and working quickly, but you’ll also save the money you would otherwise spend on hiring a professional. Of course, you will likely need help with major issues – but understanding your appliances means that when it comes to easy-to-fix problems, you’ll be able to handle them yourself.

This theory is also true for your tankless water heater. While water heaters may seem like a step too far when it comes to doing your own maintenance work, they’re not all that complicated to handle. 

If you’re wondering how you should go about maintaining your tankless water heater, you’re in the right place. Here are some tips you should keep in mind. 

Clean the Fan and Motor

The fan and motor of your tankless water heater should be clear of dust and dirt. You can clean these parts using pressurized or compressed air, which also allows you to get the dirt out of all the tiny crevices. This is one of the easiest parts of maintaining your water heater and should ideally be done every few months. 

However, depending on where you live and where your water heater is installed, you may have to clean it more often – it all depends on how much debris your water heater is exposed to. 

Flush Your Heater

You will need to flush your water heater at least once a year. Flushing the heater essentially means removing the mineral build-up from the inside of your appliance. If left unattended, this build-up can damage the walls of your heater and affect its lifespan and ability to function. 

Though flushing (also known as descaling) your water heater may seem complicated, it’s actually pretty straightforward. As explained by Sacramento-based plumbers, the tankless descaling procedure should be handled properly, so it’s best to have professionals inspect your heater before problems escalate. However, if you’re up for it, you can attempt to flush your heater yourself with the  steps below:

  • Turn off the power, whether that means turning off the gas or the circuit breaker.

  • Close all the water valves so that no water will enter or exit your heater during the procedure. There will usually be three valves for you to turn off. 

  • Remove the purge port valve caps. The purge valves help control the pressure in your heater, and their handles are T-shaped. When removing these valve caps, make sure to do so slowly and carefully so that the pressure can be relieved gradually without the hot water burning you. 

  • Attach hosing lines to each of the valves (as mentioned above, there are generally 3 valves to a tankless water heater)

  • Open the purge valves. 

  • Add descaling solution into your water heater. Alternatively, if you don’t want to use chemicals inside your water heater, you can use pure white vinegar as a natural alternative instead. You’ll need about 2.5 gallons of vinegar for a standard water heater, though this amount will change depending on the size of your appliance. 

  • Check the water heater manual for instructions on how to flush your appliance. Once you’re done flushing it, you will also need to drain it properly, and the procedure for this step will also be included in the manual. If you cannot find your manual, check to see if there’s a digital version you can reference instead. 

  • Once flushing and draining are complete, close the port valves, disconnect the hosing lines, and reseal the purge valves using the port caps you removed. 

  • Restart your water heater by turning the water valves back on and turning on the power. Don’t be alarmed if it takes a few moments before water starts flowing through your heater – the pipes will first expel the air within them before the water starts flowing properly once again. However, your water heater should be back to normal within a couple of minutes. 

Clean the Filters

Aside from the fan and motors, you will also need to regularly clean both your water heater’s air and water filters.

For the air filter, you will first need to detach it from the water heater. Once it’s removed, you can then use a soap and water cleaning solution and a soft brush to clean the filter. Clean it thoroughly to ensure there is no dirt or debris obstructing airflow, then rinse it well and let it dry before reattaching it to the water filter. 

The water filter in your water heater is essentially a screen that is meant to trap any sediment in the water so that the water you use is as clean as possible. However, this sediment will need to be cleaned from the filter regularly – a built-up will prevent the filter from doing its job and will prevent it from working correctly. 

To clean the filter in your tankless heater, you will first need to remove the filter. However, make sure the water is turned off before you remove it to reduce the risk of being singed by the hot water. Once it’s removed, clean the filter using the same water and soap solution you use for the air filter. 

Once clean, wipe down the water filter and let it dry before returning it to your water heater. 

Clean the Burners and Other Key Elements of Your Gas Heater

If you’ve got a gas tankless water heater, you’ll need to ensure that all the “control” components are working properly. This means ensuring there’s no dust or dirt around the burners and also making sure that the control compartments and air passages are completely clean. 

If these elements are not clean, you risk your water heater suffering from a major failure. Ideally, you should do this at least once a year. 

When maintaining your tankless water heater, you should also consider just giving the outside of your tank a quick wipe. This will make sure that the outside looks just as good as the inside does – and as an added advantage, you’ll have a visual confirmation that you’ve finished cleaning (and you can also use the external appearance of the tank to decide when it needs to be maintained again).

That said, keep in mind that not everyone should or is comfortable handling their tankless water heater maintenance themselves. If you’re worried about your handyman skills, a bit concerned about your safety, or simply have a major water heater issue to deal with, you should always be open to contacting a professional. After all, a professional will know exactly what they’re doing, and there’s a lower chance you’ll lose time and money over a mistake, which is always a positive!

Useful Boat Plumbing Maintenance Tips From the Pros

RH Business Marketing Solutions

Owning a boat is a wonderful luxury and not something to be taken for granted. There are many skills you’ll need to master to help take care of your precious investment, none more important than learning the basics of boat plumbing maintenance. Unless you leave your boat at a full-service marina, you will be unable to get away with owning a boat without learning how to take care of the plumbing. The following are some of the most important tips to keep in mind about your boat and will help you safeguard it for many years to come.

Water Tanks

It can be tricky to keep freshwater tanks on boats. Sure, the water is fine for boiling in a kettle to make tea or coffee, but they aren’t safe enough to drink as is. Also, large water tanks can be a liability when not cared for properly. It’s recommended that you don’t buy gigantic five-liter reusable water carriers and, instead, simply invest in smaller vessels. In terms of drinking water: just buy bottled water and bring it aboard for the crew and guests. If you must buy a water tank, then invest in something made of stainless steel, fiberglass, or even plastic since the flexibility is bound to help. 

Contaminated Water System

If you suspect that your water may have been contaminated, you will need to replace all the pipes, and maybe even the tank you have aboard. In this case, this is a fairly serious intervention that you shouldn’t attempt on your own. The local plumbers at a reliable boat repair shop in San Francisco recommend finding professionals in your area to consult regularly for maintenance. When pipes get contaminated with fungus or algae growth, it can be incredibly dangerous to your health, and the system would need to be sterilized completely by the pros moving forward.

Basic Troubleshooting

While water pumps are fairly resilient devices and can last for years with minimal trouble, things can go bad at the turn of a dime. For starters, you definitely have a filter installed in the system ahead of the pump, since that will ensure their longevity. In addition, you need to check on the wiring and problems in the electric supply that will end up affecting the lifespan of your plumbing. People don’t realize that the boat’s electricity can affect the capacity of the plumbing, which is a big mistake. 

Finally, if you see a leak from the tank, try to get it fixed straight away. These are fairly common and can strike at any moment. For this reason, stainless steel tanks could be your best bet in preventing holes from burrowing into your plumbing. For boats with more complex systems such as pressurized hot and cold water, or pressure valves, regular maintenance checks performed by professionals is a good way of protecting yourself from further trouble down the road.

While maintaining the plumbing on your boat is usually a lot easier than maintaining the plumbing at your home, it’s still useful to secure the assistance of a pro from time to time. If you are passionate about learning DIY techniques, then read up on a few tips available through your local boating association - just make sure not to skimp and save on the bigger expenses.

6 Things To Do If You Suffered Water Damage To Your Home

RH Business Marketing Solutions

If your home has been flooded or you’ve had a pipe burst, you may be dealing with water damage. While this can be a stressful and overwhelming experience, it’s important to take quick action to mitigate the damage and start the cleanup process.

Here are six things you should do if you’ve suffered water damage in your home:

1. Identify the cause of the water damage

The first step is to determine what caused the water damage. If it was due to a natural disaster like a flood or hurricane, you will need to take special precautions to ensure your home is safe and secure. If the damage was caused by a mechanical malfunction like a burst water pipe or plumbing leak, you will need to have the repairs made as soon as possible to prevent further damage. If the water damage was caused by an appliance, such as a washing machine or dishwasher, make sure to have it repaired or replaced before using it again. It is essential that you identify what caused the water damage so that you can be sure to avoid any future flooding or leaks and you can determine if the damage is covered by your insurance.

2. Remove all wet items

If you suffer water damage to your home, the first thing you should do is remove all wet items. This includes carpets, rugs, drapes, clothing, and anything else that has been soaked by the water. All of these items can harbor mold and mildew, which can cause serious health problems. Additionally, wet items can damage floors and walls if they are not removed quickly.


3. Start the cleanup process

The next step is to begin the cleanup process. This includes removing all of the wet items from your home and beginning the drying process. You will need to use fans and dehumidifiers to help remove the moisture from the air and prevent the growth of mold and mildew. Here are other important steps:

A. Turn Off the Power. If there is standing water in your home, it’s important to turn off the power to avoid the risk of electrocution. Locate your breaker box and flip the switch for any circuits that may be affected by the water. If you can’t access your breaker box or you suspect that the floodwater has reached it, you should call your utility company to have the power shut off at the street.

B. Remove Excess Water. Once the power is off, you can start removing excess water from your home. If there is only a small amount of water, you may be able to use a wet/dry vacuum to remove it. For larger amounts of water, you’ll need to use a sump pump or rent a commercial wet vac.

C. Clean and Disinfect. Any surfaces that have been affected by floodwater should be cleaned and disinfected as soon as possible. This will help prevent the growth of mold and bacteria. Use a mild soap and warm water for cleaning, then follow up with a disinfectant.

D. Dry Out the Affected Area. Once you’ve removed the water and cleaned the affected area, it’s important to dry it out as quickly as possible. This can be done with fans, dehumidifiers, or even opening up windows on a sunny day.

E. Inspect for Damage. After the area has been dried out, you can begin inspecting for damage. Look for signs of water damage on walls, ceilings, floors, and any other areas that may have been affected. If you find any damage, you should make note of it so you can repair it later.

4. Call Your Insurance Company

Once you know what has caused the water damage, you will need to contact your insurance company and let them know about the situation. If you have homeowners insurance, you should call your agent as soon as possible to start the claims process. They will be able to advise you on what steps to take next and how to document the damage for reimbursement. They will also be able to help you file a claim and get the reimbursement you deserve.

5. Throw away any damaged items

Once you have removed all of the wet items from your home, you will need to throw away anything that has been damaged by the water. This includes carpeting, furniture, clothing, electronics, and anything else that may have been damaged.

6. Prevent future water damage

The last step is to take steps to prevent future water damage from occurring. This includes fixing any leaks or burst pipes, installing a sump pump, and making sure your gutters are clear. By taking these precautions, you can help keep your home safe and dry in the future.

Taking quick action after water damage can help reduce the amount of damage and make the cleanup process easier. By following these six steps, you can start getting your home back in order after a flood or burst pipe.

Building a Pole Barn to Expand Living Space: A How-To Guide

RH Business Marketing Solutions

Building a pole barn can be a great way to expand your living space. Whether you need more storage for your car or extra space for a home office, a pole barn can provide you with the extra room you need. But before you start construction, there are a few things you need to know. This how-to guide will walk you through the process of building a pole barn, from choosing the right location to selecting the materials you'll need. By the end, you'll be ready to start construction on your own pole barn expansion project.

Plan the size, shape, and style of your barn

The size, shape, and style of your barn are important factors to consider when expanding your living space. The size will determine how much space you have to work with, the shape will affect the overall look and feel of the barn, and the style will dictate the functionality of the barn.

When deciding on the size of your barn, you should first consider what you plan to use it for. If you only need extra storage space, then a smaller barn may be sufficient. However, if you plan on using it as a workshop or a place to house animals, then you'll need a larger barn. Once you know what you need the barn for, you can start planning the dimensions.

The shape of your barn is just as important as the size. The most common barn shapes are gable, gambrel, and hip. Each shape has its own unique look and feel, so it's important to choose one that fits your personal style.

The last factor to consider is the style of your barn. Do you want a traditional-looking barn or something more modern? Barns are now easy to assemble thanks to customizable pole barn kits. There are modular, prefabricated, and DIY kits available. With many different styles of barns available, you should be able to find one that fits your taste.

Choose the right location

Building a pole barn is a great way to expand your living space. But before you start construction, it's important to choose the right location for your new home addition. Here are some things to keep in mind when selecting a spot for your pole barn:

  • Make sure the ground is level. This will help ensure that your pole barn is stable and won't be at risk of collapsing.

  • Avoid flood zones. If your property is located in a flood zone, it's best to choose another spot for your pole barn. This is because flooding can damage or even destroy pole barns.

  • Pick a sunny spot. If possible, try to choose a location for your pole barn that gets plenty of sunlight. This will help keep the inside of your pole barn warm and comfortable.

  • Consider the wind. When selecting a location for your pole barn, make sure to take the wind into account. If your property is located in an area with high winds, it's important to choose a spot for your pole barn that will be sheltered from the wind.

Select the right materials

Building a pole barn is a great way to expand your living space. But before you start construction, it's important to select the right materials. There are many factors to consider when choosing the materials for your pole barn. The climate in your area will dictate the type of material you'll need for the walls and roof. The size and style of the barn will also impact the material choices.

Here's a look at some of the most popular materials used in pole barn construction:

  • Wood: Wood is a classic choice for pole barns. It's strong and durable and can be easily customized to match the look of your home. If you live in an area with severe weather conditions, however, you'll need to take extra care to protect your wood barn from the elements.

  • Metal: Metal pole barns are becoming increasingly popular. They're durable and low-maintenance and can withstand even the most extreme weather conditions. If you choose a metal barn, be sure to select a high-quality material that won't rust or corrode over time.

  • Vinyl: Vinyl is another popular choice for pole barns. It's affordable and easy to work with, and it comes in a variety of colors and styles. However, vinyl can be damaged by UV rays, so it's important to choose a color that won't fade in the sun.

These are just a few of the most popular materials used in pole barn construction. When selecting the materials for your barn, it's important to consider the climate, the style of the barn, and your budget. With careful planning, you can build the perfect pole barn for your needs.

Building a pole barn is a big project, but it's one that you can do yourself with the right planning and materials. By following this how-to guide, you'll be able to build a pole barn that meets your needs and looks great, too.