Google+

contact us

Use the form on the right to contact us.

Day or Night, we are here to serve you. Leave your plumbing problem to us.


Tinley Park, IL

(708)845-7922

Residential and Commercial plumbers and plumbing contractors available in Orland Park, Tinley Park, Oak Lawn, Palos Heights, Midlothian, Oak Forest, Homer Glen, Mokena, Frankfort, and the surrounding Chicago South Suburbs. Emergency plumbers.

copper water lines.jpg

Kevin Szabo Jr Plumbing Blog

Kevin Szabo Jr Plumbing is Tinley Park, Orland Park, Oak Forest, Midlothian, Orland Hill, Homer Glen, Mokena, Frankfort, Crestwood, Palos Heights, Oak Lawn, local plumber. Read our blog for advice, tips, a good laugh, and basic home improvement.

**We are moving our old blog to our new and improved website. Too see all our posts visit kevinszabojrplumbing.blogspot.com

Filtering by Category: November 2022

6 Tips to Fix Your Home Safe after a Storm

RH Business Marketing Solutions

After a storm, your home looks like a disaster zone. The water damage is extensive, and the cleanup is time-consuming. How can you fix your home safely after a storm?

Storms are common occurrences during hurricane season, especially if you live in the South; you are aware of the harm a storm may cause to your house.

They cause flooding, power outages, and property damage. As soon as you and your family are secure, you should evaluate the damage and begin repairing and rebuilding.

Before a storm hits, you should prepare your home for the worst. Here are six ways to fix your home safe after a storm.

1.                  Always Put Safety First

If you live in an area prone to storms, ensure you have enough food and water supplies. Also, keep a flashlight with batteries nearby to see where you’re going when leaving the house.

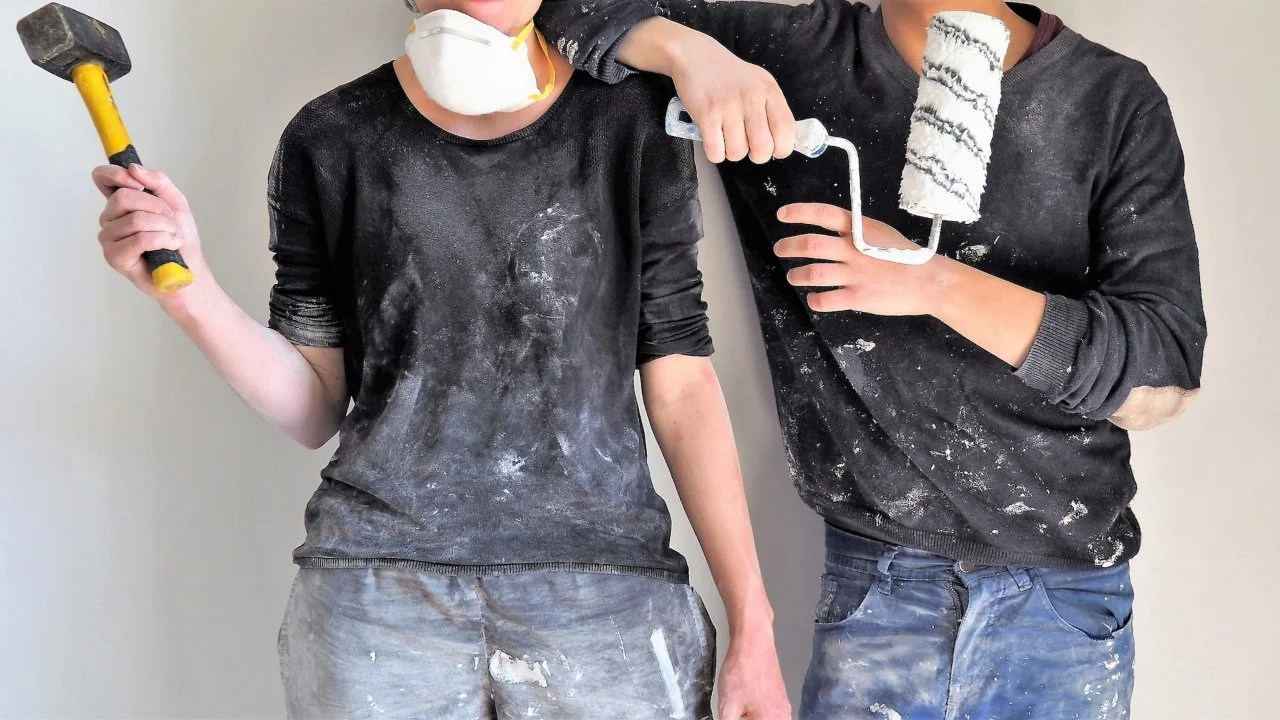
Before beginning any cleanup, the CDC always advises using the appropriate safety gear. This calls for using heavy-duty gloves, a face mask, a hard cap, and tall, water-resistant boots. Until you are certain that you won't get wounded while fixing anything, you are not ready to do so.

Wait till the storm has passed and daylight has begun before doing any work. After a storm, the power is frequently down, making it dangerous to operate without lighting.

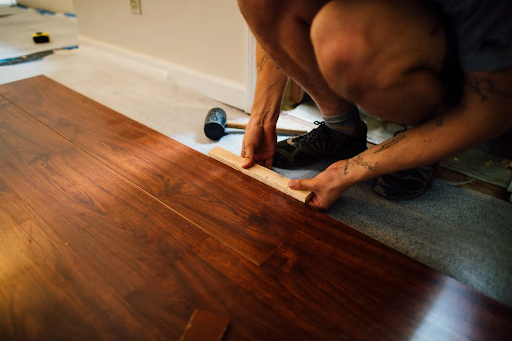
2.                  Be Sure to Inspect Everything 

After a storm, check your home for any signs of damage. Make sure everything is secure and safe. Look at the roof, windows, doors, and other areas vulnerable to wind and rain.

To completely comprehend what must be done, take a thorough walkaround of the inside and outside of your home. Be aware of damage to doors and windows, as well as flooding.

Look for wet carpets, as they can get mold quickly. Make sure to dry them as soon as possible to avoid any damage. You can speed up the carpet drying process by using a fan, air conditioning, or leaving them under the sun.

If you don't want lasting damage from water, you will have to replace everything. Always collaborate with a partner to watch for any hidden dangers.

 Remove plywood that has been installed to safeguard your home gently, gathering the nails along the way. Also, check your lawn for any sewage overflows; if there are any, you will need to call a professional to pump your septic tank.

3.                  Make Sure There Is No Secondary Damage 

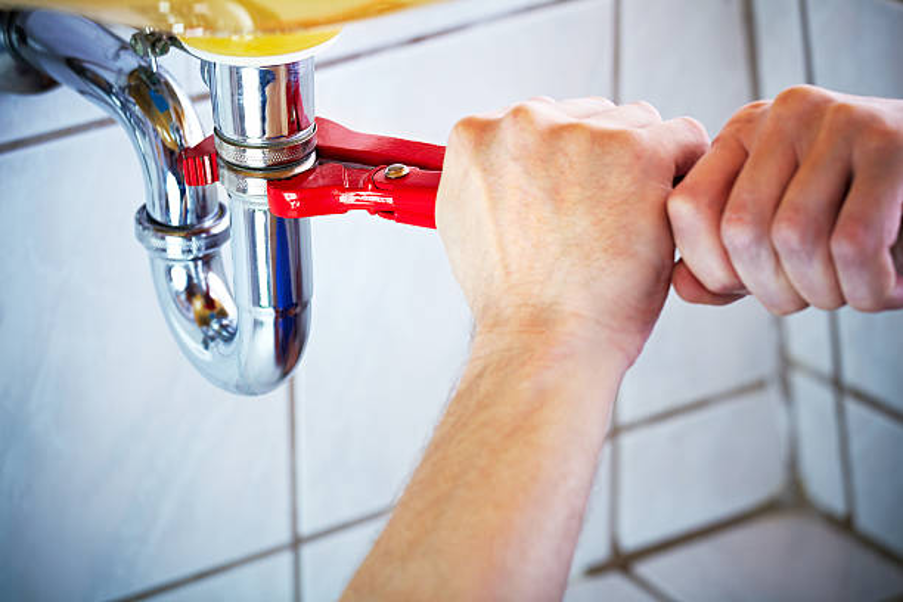
If there is no visible damage, it’s time to consider secondary damage. This includes things like water damage, mold, and structural issues. You should also inspect for utility damage under the ground.

In addition to the apparent indications of damage, such as downed trees or a leaky roof, you should be vigilant for concealed threats. Electrocution can occur because of flood water. Keep an eye on any downed electrical wires near water, and contact your utility company immediately.

Hurricanes can cause chemical fires in your home. You should contact the fire service department immediately if there is a sudden fire. They will safely put out the fire and indicate when to enter your home.

Chemical fire can leave a long-lasting bad smell in your house. Toxic substances may also be present in addition to their bad odor. Never use water to put out a fire caused by grease or chemicals.

4.                  Be Sure Your HVAC Is Working

It’s important to check your home’s heating and cooling system after a storm hits. Ensure everything is operating correctly after the storm and make any necessary repairs.

It can be challenging to resolve flooding in your HVAC system. Almost any moist environment can result in dangerous mold growing within 24 hours. A moldy HVAC system may spread a fungal colony, which will send spores flying into every nook and crevice of your house.

If you require a complete replacement or only a few repairs, speak with your HVAC provider. They will assist you with what steps you should take to fix them. 

5.                  Take Photos For Proof

You must take photos of the damage before leaving your house during a storm to submit an insurance claim later on. Always document the damage with pictures to show your insurance company.

It will be much easier to deal with them when you need emergency repairs after the storm is gone. Also, if you are a tenant it will help you claim the repair cost from your landlord.


6.                  Be Prepared for the Next Emergency

After cleanup and repairs have been completed, it's time to start thinking about the next disaster. Be sure to prepare an emergency kit before an emergency strikes. Blankets, bottles of water, non-perishable food, fire extinguishers, solar or crank radios, batteries, and external phone chargers should be included in the emergency kit.

Prepare your home as well. Check that all your shutters are functioning to protect your home from flying glass, and invest in adequate insulation to keep your building watertight and prevent basement flooding. Even renovate your storm shelter so you have a place to be safe during the next storm.

You won't be able to predict with certainty when the next hurricane will strike, and you might need more time to prepare. Get ready right away, and you'll be grateful.

Conclusion

Even if you have no control over the weather, taking precautions and putting an emergency plan in place can shield your family and house from many storm-related damages.

To avoid feeling overwhelmed by the amount of labor, divide the chores into checklists based on the season and the needs. Consult with experts if you are unsure of how to prevent storm damage on your own; they will be able to provide you the best advice.

Why Should You Pay Extra Attention When Doing Floor Installation?

RH Business Marketing Solutions

It's no secret that a well-done floor installation can add tremendous value to your Perth home. Not only will it make your space more attractive and comfortable, but it can also increase the overall resale value of your property.

That's why it's so important to pay extra attention when doing floor installation - whether you're hiring a professional or doing it yourself. Here are four reasons why.

Poor Installation Can Lead to Water Damage

The flooring you install will be exposed to the elements, so it's important to ensure that it's properly sealed and installed correctly. If this is not done correctly, water can seep in and cause major damage to your property, resulting in costly repairs. For instance, if moisture gets beneath the flooring and causes mold or rot, this can spread to other areas of your home and damage the structural integrity of your walls or foundation.

When it comes to decking, it's also important to use the proper fasteners and concrete when fixing them into place. Additionally, architectural cladding for Perth homes and businesses is often made from composite timber that's designed to withstand the elements, like composite timber decking and cladding. So, it's important to make sure that you are using the right materials and techniques for installation as well.

It Can Reduce Energy Efficiency

When you're installing a floor, it's important to consider how this will impact the energy efficiency of your home. Poor installation can create air leaks, which will cause your heating and cooling systems to operate inefficiently and increase your utility bills. In addition, a poorly insulated floor can also allow moisture to seep in and cause mold growth, which can be hazardous to your health.

Therefore, it's important to ensure that all gaps are sealed properly and that the insulation is adequate for your needs.

It Can Increase Liability

If you're doing the installation yourself, it's important to be aware of your liability in case something goes wrong. Poorly installed floors can cause injuries, and if you're found liable for this, it could lead to legal action being taken against you. To avoid such issues, make sure that all safety precautions are followed when doing floor installation - both when working with a professional or on your own.

It Can Impact Resale Value

Finally, you should consider how floor installation will affect the resale value of your home because poorly installed floors can be an eyesore and decrease the appeal of a property to potential buyers. Furthermore, buyers may be wary of purchasing a home with a floor that has been installed incorrectly and could offer less money for it when the time comes to sell.

Additionally, if you are doing the installation yourself, it is important to use the right tools and materials for the job. For instance, certain flooring types may require special drill bits or saws, which can be costly if purchased incorrectly.

Ultimately, there are many reasons why you should pay extra attention when doing floor installation in your Perth home. From avoiding water damage and increasing energy efficiency to reducing liability and impacting resale value, taking the necessary steps will ensure that your floors look great and last for years to come. 

Moreover, hiring a professional to do the job may be the best course of action, as they will have the necessary skills and experience to install your floor correctly. 

With careful consideration and preparation, you can make sure that your floors look amazing while adding value to your home.

Are Bath Products Safe for your Plumbing?

RH Business Marketing Solutions

If you're like most people, you probably don't think too much about the products you put down the drain. But if you're using bath products that contain harmful ingredients, they could be putting your plumbing at risk. In this blog post, we'll explore some of the dangers that certain bath products can pose to your plumbing and offer some tips for avoiding them.

What are some of the ingredients in popular bath products that can be harmful to your plumbing system if they end up down the drain?

Popular bath products can be a great source of relaxation, but it is important to remember that some products contain ingredients which can cause damage if they make their way down the drain. So, are bath bombs safe for plumbing?

Common items such as soaps, gels, shampoos and conditioners have potential to harm the plumbing system if they are not disposed of correctly. Many of these items contain oils, alcohols and phosphates which can all make your pipes more susceptible to corrosion.

In addition, bubble bath products often include foaming agents like sodium lauryl sulfate which can cause build-up on the inside of pipes and clog drainage systems. To avoid any issues with your plumbing system when using bath products, it's best to purchase those without any harsh chemicals listed on the label and always dispose of used product properly in the trashcan instead of down the drain.

With this in mind, you should be able to enjoy safe and relaxing baths without disrupting your plumbing system!

How can you avoid these products and still get clean in the tub or shower without harming your pipes or septic tank system?

Cleaning yourself in the bath or shower doesn't have to involve harsh chemicals and products that may damage your pipes and septic tank systems. An all-natural approach is an effective and environmentally friendly option.

Start by using plain soap made from plant-based ingredients like coconut oil and shea butter, which are naturally antibacterial and nourishing for the skin.

Additionally, you can make your own body scrub to exfoliate with natural ingredients like sugar, sea salt, oats, coffee grounds, baking soda or coconut oil. For those looking for even more cleansing power, herbal infused oils are an excellent alternative to chemical soaps.

Additionally, using a periodic vinegar rinse or a non-toxic cleanser designed specifically for plumbing systems will help keep your pipes clog-free without the need for harsh chemical detergents. By combining a few simple strategies like these into your routine, you can feel clean in the bathtub or shower without compromising your plumbing system!  ​​​​​ ​ ​​​​

What are some tips for avoiding plumbing problems when using bath products

Plumbing issues are among the most frustrating and expensive problems homeowners can face. But with a few preventative measures, you can avoid plumbing nightmares caused by bath products.

First, always make sure any product like bubble bath or bath oils are used according to the distilled water restriction specified on the packaging. As soapsuds enter the septic system they will damage and clog if too much is used.

Additionally, it's important to check that your bathroom sink isn't blocked as this can stop liquids passing through easily and build up pressure in your plumbing system. Finally, ensure all cleaning devices such as tubs or showers have good drainage systems for excess water to exit quickly rather than pooling and damaging seals or pipes around joints that could down the line cause significant damages.

With a little bit of effort, you can keep your plumbing from becoming a costly pain due to improper use of bathroom products.

Are there any environmentally-friendly alternatives to conventional bath products that won't damage your plumbing but will still help you get clean?"

Everyone loves to take a nice, relaxing bath or shower, but it's important to remember that traditional bath productscan have negative environmental impacts. Many of them contain harsh chemicals and pollutants, which can damage sensitive plumbing systems and cause long-term damage to the environment.

Fortunately, there are a variety of environmentally-friendly alternatives available for those looking for an eco-friendly bathing experience. For instance, liquid castile soap is plant-based and all-natural, so it won't strip away natural oils from your skin like conventional products may.

Additionally, bamboo charcoal products are growing in popularity due to their ability to detoxify both skin and water as it runs down the drain. Lathers made with sugar or salt are also becoming increasingly popular—the sugar helps remove dirt while providing needed hydration, while salt can disinfect and soothe your skin without over drying.

Finally, solid shampoos are the perfect alternative if you're looking to avoid single-use plastic packaging altogether—you don't need many additional ingredients when using these compounds other than water!  

With all these options available, there's no excuse not to make an environmentally responsible choice when choosing bath products—your plumbing loves you for it & Mother Nature will thank you too!


Conclusion: While it's important to get clean in the shower or bath, it's also crucial to do so in a way that doesn't damage your plumbing system. By avoiding harmful ingredients in popular bath products and using environmentally-friendly alternatives instead, you can enjoy a squeaky-clean bathing experience without worrying about harming your pipes.

Guest Contributor: Peter Yordanov

15 Chic Loft Bedroom Design Ideas

RH Business Marketing Solutions

For those looking for more storage space, an extra bedroom, or even a home office, loft conversions are a great solution as well as being a good investment into your property. 

With their unusual layout and shape, designing and decorating a loft conversion can be challenging to get right, especially as you will want it to flow with the rest of your home’s style. You may be navigating your way around exposed brick, beams, pipework, and Velux windows with your new conversion which leaves less room for furniture and to be clever with your designs. 

We’re on hand with 15 loft bedroom design ideas that will help you transform your space, injecting your own personality into the room, in a practical yet stylish way, reminiscent of an interior designers touch that feels naturally luxurious.

Key summary

  • Loft conversions have some unusual shaped walls, make use of these by having built-in storage and shelving installed. You could use the eaves as cupboard space.

  • Using Velux windows or skylights will help to enhance lighting in dark loft spaces.

  • Retaining exposed beams and joists can work well for those wanting industrial styles or period charm in their loft bedroom. 

Loft conversion bedroom ideas

  1. Minimalist 

A minimalist loft conversion is a timeless style that allows you the chance to easily switch out décor accessories if you fancy a change. The skylight windows allow light into the room without overwhelming the space, and the addition of the recessed spotlights creates a gentle ambience. Keep furniture, bedding, and accessories simple to maintain the ultimate minimal style.

2. Earthy greens

Green is having a moment in the interior design world, but by no means is this a one-hit wonder, as this classic colour will stand the test of time. The built-in storage within the eaves utilises every inch of the loft space to its full potential. Recessed walls make a great alternative to shelving and the double Velux windows leave the earthy tones of this room being lifted for the perfect balance between light and dark. 

3. Scandi-style

Scandi-style bedrooms have been a popular design in recent years, and this trend shows no sign of slowing down. If you are looking for loft conversion layout ideas that make the most of space, this built-in shelving behind the bed makes perfect use of an awkward shaped wall whilst also providing a functional storage solution. Small loft conversions often lack light, the addition of recessed lighting in the ceiling and large Velux windows helps to maximise brightness. 

4. Rustic

Rustic style loft conversion bedrooms utilise the wooden features that lofts often have before they are converted, creating a charming style that gives a charming nod to the room’s beginnings. A natural wood feature wall creates a warmth in the room that can be personalised with accessories and lighting. Make large windows a part of your design plans to lift the dark nature of rustic wood tones, if this is the bedroom décor style you desire. 

5. All-white

Loft conversions can often be darker than other rooms in the house, even with the addition of skylights, so keep your interior bright by using an all-white scheme. Add pendant lights on the slopes of the loft ceiling for added visibility on a dreary day.  

6. Monochrome

Monochrome can be an overwhelming colour palette to get right but this clean style creates a great loft bed aesthetic that really makes the most of the room’s features. Make a statement with a black feature wall which plays with the angular shapes of the room. By leaving the remaining walls white, as per this image, and with the addition of the large windows, the space becomes really open and maximises light within the bedroom. 

7. Grey

Grey is a versatile shade that has become a key colour within a modern neutrals colour palette. It works well if you plan to keep your furniture, bedding, and accessories in similar tones but equally, if you want to add in pops of colours, grey walls can accommodate this. Keeping the doors and frames white, with a natural wood flooring enhances the warm tones in this grey bedroom. The additional storage in the eaves will help to keep the space uncluttered, whilst painting the cupboards in the same shades as the wall keeps them discreet and hidden. 

8. Bold

Bold colours can seem scary at first, but use of strong bright shades can create a playful, happy aesthetic in a room. Make use of the sloped ceiling space by adding recessed and pendant light fittings on to support visibility in the room. Be mindful that darker colours can sometimes overwhelm tighter spaces, so if you have a small loft conversion stick to lighter bright shades such as a zesty yellow!

9. Cosy cottage

If you have a period cottage with a loft room, retain character by leaving the joists and beams exposed, as this loft conversion example shows. Your loft conversion construction company will be able to advise you on this.

 Keep the décor and furniture simple to allow the walls to do all the talking, bringing in some subtle floral prints on cushions and other soft furnishings to add to the cottage theme of the room. 

10. Urban

Industrial, urban styles are what many people may automatically think of when it comes to loft bedrooms, particularly as it lends itself well to the exposed brick walls and beams that can often form part of a loft conversion design.

Industrial style attic rooms are popular in America but are also becoming a more popular loft conversion idea in the UK, with furniture and accessories easily obtainable from home stores. Keep to dark woods and rustic metals to execute an urban style well. 

11. Neutrals

A classic style that will never fail, neutrals are a popular décor palette and it's easy to see why. The bright, airy nature helps to support the natural light in the room and stops the space from feeling overwhelmed. The rounded shape of the headboard in this loft conversion example counteracts the harsh, angular lines created by the walls. 

If you have an ensuite in your loft conversion bedroom, try to use similar tones throughout that keep a cohesive, gently flowing space. 

12. Traditional

For a more traditional property, you will want this style reflected within the design of your loft conversion bedroom, to make your entire home feel harmonious and balanced. Using a traditional style window, as per this image, as well as using more classic style furniture will help. 

The large rug used under this bed helps to make a feature of the classic bed frame placed below the cottage window. The suspended spotlights from the ceiling add a contemporary edge without disrupting the overall style. 

13. Colour Block

Make use of awkward spaces that can come from loft conversions by creating storage and shelving, as this image shows. Painting in a soft, pastel tone like this putty-coloured bedroom enhances the shape of the room and gives the illusion of space. If you are looking for inspiration and small loft conversion ideas, colour blocking is a straightforward yet stylish concept but be sure to add visual interest with texture. 

14. Modern

Keep your new loft conversion calm and clutter free with a modern style bedroom. Clean lines and soft, light neutrals give this room a relaxed feel. The glass bannister on the staircase into the room opens the space up further and helps to support the light flow. Light is important, especially in a modern bedroom, so the addition of a skylight in this mansard conversion keeps the space light and airy as well as being practical as it improves visibility.

15. Elegant

This dormer loft conversion offers light, open space with windows on multiple walls and plenty of headspace. The built-in wardrobes keep clothes and clutter neatly stored away without detracting from the rest of the space.

Summary

Loft conversions can be as stylish and comfortable as the rest of your home, and the styles we’ve listed go some way to demonstrating their versatility. There are plenty of clever ways to incorporate good lighting and storage spaces in the design of your conversion that won’t make it the struggle you may have feared it to be. 

Whatever your loft conversion ideas are, be it contemporary, traditional, or urban, this unique space can easily reflect the style of the rest of your interiors for a perfectly balanced home.

How To Raise Your Vibrations And Keep Your Home Clean

RH Business Marketing Solutions

The idea that your environment can affect how you feel is nothing new. It’s something that we’re all familiar with, even if we don’t realize it. It’s true that your home has a huge impact on how you feel. And it’s also true that the state of your energy can affect your home environment. The key is to find ways to keep yourself feeling good while also keeping your house clean and organized.

In this article, we’ll explore some of the ways that you can do just that. We’ll look at how to raise your vibrations so you feel good and then keep the energy flowing by keeping your home clean and organized. But first, what exactly are vibrations and how do they work?

What are vibrations?

Vibrations are the frequencies of energy that surround you, and everything around you. They can be positive or negative, and we can feel them when they surround us. The vibrations of our bodies, our emotions, and our thoughts are all interacting with each other all the time.

This makes it so important to be mindful of what we're sending out into the world. The energy that you send out are like seeds that will grow into either positive or negative outcomes for yourself.

Vibrations are also affected by their environment: if you put something with bad vibes into a space full of good vibes (like a home), the space will start to feel like what it's surrounded by.

People with negative energy often live in messy homes because the good vibes of cleanliness are replaced by bad feelings caused by those living there—and it shows.

In the same way that we can feel how a room feels, we can also feel how space and objects are affected by our own energy. If you put something into a space that already has positive vibrations, those good vibes will be amplified. Likewise, if you put something negative into a space full of positive vibes, it will amplify what's already there.

So, how can you achieve both a higher vibrational frequency and cleanliness in your home? Here are several ways you can do just that.

Allow for more natural light and fresh air.

Natural light has been proven to reduce depression, improve moods and energy levels, boost productivity at work and help you sleep better at night by resetting your internal body clock. It also helps cleanse the air in your home by filtering out harmful toxins that can cause allergies or asthma symptoms in sensitive individuals. Fresh air is also important for cleaning the air in your home, as it allows toxic gases to escape and helps circulate oxygen throughout the space.

By simply opening the blinds and a window when you can, you'll allow more natural light and fresh air in to your home. This can help cleanse the air of harmful toxins and improve your mood and vibration levels.

Declutter the home.

Decluttering the home is an important part of raising your vibration. It not only helps you feel less stressed and overwhelmed, it also makes your home look more beautiful and inviting. If you want to keep your home clean, one of the most important steps is removing clutter and unnecessary items from your life.

When you declutter, you can make more room for the things that are important to you. This will help you feel more organized and in control of your life. If you make a habit of decluttering and tidying your home regularly, not only will it improve your vibrations, but also keep the house clean.

It’s important to keep in mind that decluttering is more than just throwing away old items, it’s also about getting rid of things that are no longer useful to you. This can include anything from clothing and household items to old books and magazines.

If you have a garage sale or donate the items, this will help raise your vibration even more because it helps others as well.

Add plants.

Plants are one of the easiest ways to raise your vibrations and keep your home clean. They take in carbon dioxide and emit oxygen, which helps purify the air you breathe. Plants also absorb dust, allergens, and other particles that can make you sick. In addition to cleaning the air around them—and thus helping themselves—plants add a natural aesthetic to any room they occupy.

Plants also make great companions because they are living things that can give off positive energy. Plants are generally easy to care for and can help you feel more connected and grounded in your home. They’re also a great way to bring nature into your life.

Scented candles.

Scented candles are a great way to make your home feel cleaner. The warm, pleasant scent can help mask other odors and create an inviting environment for relaxation and sleep.

The right scented candle can help you relax, feel more positive and boost your mood. Scented candles are also a great way to bring the outside world into your home if you’re looking for a change of scenery.

The beauty of scented candles is that it lets you choose the type of mood you want to create, whether it’s calm and relaxing or upbeat and energizing. This can help you achieve the vibrations and energy that you desire.

Focus on yourself first.

Change should start with you. If you want to achieve higher vibrations that can help keep a more positive and cleaner environment, then start by cleaning up your own act. You can’t expect your home to be clean if you’re not taking care of yourself. Consider starting by maintaining a good standard of personal care, such as taking a shower, eating enough food, exercising regularly and learning continuously.

These simple things may seem insignificant, but they can make a huge difference in how you feel and the energy of your environment.

By first focusing on yourself, you’ll be better able to focus on other areas in your life. This will help you create the type of environment that supports a higher vibration.

Plus, the investment of time and energy you put into your well-being can be a source of enjoyment like how some people can think of plenty of reasons to love aerial yoga or find that personal development books help them improve and learn more about themselves.

Final Thoughts

It's important to keep your home clean, but it's also important to raise your vibrations. If you want to create a home that is supportive of your highest potential, then start by raising your own vibration. This will allow you to attract more positive energy into your life and help you reach new heights in all areas.

By following the steps outlined in this article, one at a time and with patience, you will gradually raise your vibration while simultaneously keeping your home clean.

Guest Contributor: Sophia Young

Old Plumbing and Its Effect on Drinking Water

RH Business Marketing Solutions

The home plumbing systems of yesteryear were held to a very different standard than the ones built today. If your house was constructed before 1970 and has never had its plumbing upgraded, chances are the system features galvanized steel—a metal notorious for corroding and contaminating water.

But it’s not just galvanized steel you ought to have concerns about. There are several health risks and hazards that arise from old plumbing and its negative impact on the water you drink.

How Can Old Plumbing Affect Drinking Water?

There are many ways in which old, outdated water pipes can affect drinking water, or any water, for that matter. However, it is most often contaminated drinking water that we notice first, due to our regular consumption of it.

From flavor and smell quality to the spread of bacteria, old pipes can cause a variety of problems that need proper identification before they can get properly fixed. Without further ado, let’s take a look at five of the most common ways that old plumbing can affect your drinking water.

1.     Bacteria Growth

When neighborhood or household water tanks sit stagnant for too long, it can cause unwanted bacteria growth to develop. And if your pipes are old, they could easily harbor bacteria from previous pipe issues.

Other problems, like weak soldering, poor materials, and even the growth of a tree root can cause bacteria to develop inside your water pipes. Unfortunately, this can allow many harmful types of bacteria to grow, such as:

●      Escherichia Coli (E. Coli) – Found in feces, E. Coli causes vomiting, nausea, diarrhea, and abdominal cramping.

●      Campylobacter jejuni – This bacteria causes infections and can result in symptoms of fever, pain, diarrhea, vomiting, and stomach cramping.

●      Hepatitis A – A very serious bacteria often found in contaminated water. It causes jaundice, stomach fever, fatigue, fever, and dark, odorous urine.

●      Salmonella – this is a common pathogen responsible for causing headaches, fever, body chills, vomiting, diarrhea, and stomach pain. Its onset is particularly rapid.

●      Giardia Lamblia – Though not strictly a bacteria, this parasite causes an infection called giardiasis. The symptoms typically include diarrhea, cramps, nausea, and stomach cramps.

This is just a small handful of potential bacteria that could develop in your water pipes if left unattended. Due to the seriousness of these bacteria and how they affect human health, they are all a great incentive to get your plumbing system updated by professionals.

2.     Taste, Smell, And Quality

One of the most tangible ways to become aware of poor or outdated plumbing is through the flavor and smell quality of your household drinking water. If the water tastes muddy, metallic, or otherwise unpleasant, it’s highly likely that there’s a leak or rupture somewhere letting in bacteria or rust.

Clean water should have no discernable flavor or smell. It should be completely clear while having no particular color, taste, or smell that deviates from the norm. While some clean water does taste vaguely of trace minerals such as zinc, it should generally be flavorless and transparent with no smell.

3.     Rust Contamination

If your pipes are made of galvanized steel or some other rust-prone metal, rust is likely to develop over time. This can cause problems for your water supply and expose you (and anyone you live with or visits) to rust contamination. 

Rust contamination can lead to the staining of fixtures, laundry, and appliances. While high levels of rust in your water supply can give it an unpleasant smell, taste, and appearance, it’s not likely to result in any major health concerns.

4.     Mold Growth

Mold loves dark, wet, and stagnant places. If your house’s plumbing system is too old, it could create the perfect environment for mold growth to thrive. Unfortunately, this can cause a multitude of health problems for the people that drink out of your water supply.

Some of the most common types of mold to develop inside damp, dark pipes include:

●      Alternaria – With a dark green or brown velvet-like texture, this mold often appears after water damage or leaks. It can cause allergic reactions, such as hives, asthmatic symptoms, and itching.

●      Acremonium – a fine, powdery white and pink mold, acremonium loves moist areas. Exposure can cause hazardous and highly toxic reactions, such as vomiting, nausea, and in extreme cases, can even cause diseases in the immune system and organs.
●      Chaetomium – A cotton-like mold that turns from white to brown to black over time. Chaetomium causes skin and nail infections and produces toxins that compromise immune systems.

You don’t want any of these mold types to have the opportunity to grow inside your plumbing system. However, without clean pipes and regular maintenance, mold can only be expected to spread.

5.     Lead Contamination

Lead pipes, alloys, and solder were often used in old plumbing systems. However, lead is potentially harmful, particularly when corrosion occurs and it starts to dissolve into the water source. The problem with lead is it has no taste or smell, so you may not notice it.

If you live in an old house it’s best to get your plumbing checked as the EPA stipulates the maximum contaminant level for lead in drinking water is zero. As lead is toxic, it can build up in your body over time and lead to persistent health problems.

Identifying Different Contaminations

It can be useful to identify the source of your water contamination before taking any steps to correct it. If you have a water filter, it may simply be time to change it, but if your pipes or water tanks are the problem, you’ll need to consider having your entire plumbing system redone.

Below are some common water contamination symptoms alongside their corresponding causes. The more you learn about these potentially hazardous impurities, the easier it will be to communicate with a professional plumber about what needs to be fixed.

●      Reddish-brown stains on fixtures, laundry, or in water – Rust contamination or corrosion of metal pipes, often galvanized.

●      Foul odor and flavor from water – Bacterial or mold contamination due to microbial activity.

●      Black or gray colored water – Sulfide corrosion or black mold contamination. This may also be due to the presence of natural manganese.

●      Blueish-green stains on fixtures – Copper corrosion or mold contamination.

Contaminated water is a serious issue that should never get ignored. If your home plumbing system has any cause for concern it’s time to contact a professional plumbing contractor.

The Final Word

A good plumbing system is one of those things you don’t want to skimp out on. For the sake of your health, your home, and the planet, updating your water pipes will result in a much cleaner, better quality, and sustainable plumbing system that you can safely use for decades to come.

Guest Contributor: Nina Sharpe

What Kind Of Tools Do You Need For A Garden DIY Projects

RH Business Marketing Solutions

There are many different tools that you can use for DIY gardening projects. Depending on the project that you are working on, you may need a different set of tools. In this blog post, we will discuss some of the most common tools that you will need for your garden projects. We will also provide tips on choosing the right tools for your needs. Let's get started!

For Bigger Landscaping, You Might Need Some Machinery

You may need more specialized tools and machinery for larger landscaping projects. For example, you may need to rent or purchase a lawn mower, Skid Steer, tiller, stump grinder, or chainsaw. These types of machines can help you cut down trees and shrubs quickly and efficiently. You will also need to have safety gear such as protective eyewear and gloves. 

When using these pieces of machinery, it is important to have someone nearby that can provide assistance if needed. Taking safety precautions when operating large machinery is essential for a successful project. Be sure to follow all the manufacturer's instructions before attempting any task. With the right tools, you can tackle larger projects with ease.

Pruning Shears

Pruning shears are essential for any DIY gardening project, as they allow you to shape and trim plants to get the desired look. Pruning shears come in a variety of shapes and sizes, from large shears that can handle tough branches, to small ones that can handle fine trimmings. Depending on the type of pruning you need, the right pruning shears can make all the difference. Pruning shears are also great for snipping off any dead leaves or branches that may be affecting your plant’s health. Investing in a good pair of pruning shears can save time and money when working on a DIY gardening project.

A Good Pair Of Gloves

A good pair of gloves is an essential tool for any DIY gardening project. They not only protect your hands from dirt and grime but can also help you grip objects more securely so that you don’t slip or drop them. A thick, durable pair of gloves should be chosen in order to provide adequate protection against thorns and splinters. It is also important to choose a pair of gloves that fit your hands well so that you can move around comfortably in the garden without them slipping off. With the right pair of gloves, gardening projects will be much easier and safer for you to complete! 

Hedge Trimmers

Hedge trimmers are an important tool for any DIY gardening project. They make it easy to trim shrubs and hedges into a neat, uniform shape. Electric versions of hedge trimmers are more powerful than manual ones and can get the job done faster, making them a great choice if you have larger gardens or more intricate shapes to trim. When choosing hedge trimmers, it is important to consider the size of your garden as well as the type and thickness of the shrubs or hedges you’re planning to trim. With the right tools, you can easily keep your outdoor space looking neat and tidy! 

 A Spade, Rake, And Hoe

Gardening DIY projects require a few basic tools to get started, and the most essential are a spade, rake, and hoe. A spade is used for digging and turning over soil, while the rake is best for breaking up hardened soil or removing weeds. The home can help loosen soil and create planting furrows. All of these tools are necessary for preparing the soil for planting and performing basic maintenance on your garden. 

These three tend to be the most commonly used tools for DIY gardening projects. You may also need additional tools depending on the scale of your project, such as a wheelbarrow to move soil around or a shovel to break up clumps. Other common tools include shears and pruners for trimming hedges and bushes and trowels for planting individual flower bulbs or seeds. 

A Hose With An Adjustable Nozzle

A hose with an adjustable nozzle is a great tool for DIY garden projects. It can be used to water plants, clean pathways, and reach areas of your garden that are hard to access. An adjustable nozzle allows you to control the pressure and flow of the water, making it easy to adjust for different types of tasks. The nozzle can also be removed from the hose, allowing you to use it to clean hard-to-reach areas without getting wet. It is an essential tool for any gardener looking to get creative with their DIY garden projects.


In conclusion, there are many tools and pieces of equipment necessary for any DIY gardening project. Pruning shears, gloves, hedge trimmers, spades, rakes, hoes, shovels, and trowels can all be used to help you create your dream garden. A hose with an adjustable nozzle is also a great tool for watering plants and reaching hard-to-access areas. With the right tools, you can make your garden look great in no time! 


Practical ways to Modernize Your Condo’s Living Room!

RH Business Marketing Solutions

Nailing down a modern look for your condo unit’s living room is a challenging task. But it can be possible with the right approach — especially if you're on the lookout for lofts for sale in Toronto, a playground for creatives and aesthetes.

Selecting the right color schemes, layouts, and patterns that reflect your personality is a daunting task especially when there are so many options to choose from. With expert help, we have created a guide that will assist you in transforming your living room into your favorite space.  Modernizing the living area should not be nerve-wracking. Follow our tips below and create the living room you deserve without breaking the bank.

1. Plan your layout

Planning your layout will depend on how you will utilize your living room. Is it meant to be an entertainment area for friends, or will it also function as your kid’s playroom or your work-from-home office?

The living room has many uses. Defining how you will use your living room will help determine its proper layout. This is imperative before deciding on details like color schemes and furniture.

2. Visualize your living room

What do you want your living area to look like? Visualize the look you want for your living room before hiring a decorator or purchasing random furniture. 

If you have a vision in mind, draw it on paper. If you don’t know how to sketch, you can browse through the net to see more home designs you like. Go on websites such as Pinterest and choose pictures of living rooms that you want to copy. You can create your pin board and save these pictures for future reference. You don’t have to stay with one design. You can go for an eclectic style and combine a variety of home designs to create a more unique look.  

3. Pick the right colors and accents

In choosing the right color for your interiors, you must consider the living room's height, appearance, and size. You may have already set your mind on a color scheme but before you apply that paintbrush to your walls you must consider if the colors are a perfect fit for the room. 

For example, if your living room is small, you may want it to look larger and brighter. The better choice of color would be an all-white or neutral-colored scheme. All-white interiors are a lot easier to decorate with. It makes a room look fresh and organized. You can complement this color scheme with other neutral shades such as soft grey, cream, or off-white. Integrate antiques, various linen fabrics, and bamboo lighting fixtures to create a unique and interesting design for your room

4. Choose furniture that’s fashionable and functional

Condo units, whether they are big or small will always have limited space. It is not like a home where you can extend your lounge to a patio or garden when entertaining guests. When remodeling, you may want to consider investing in fashionable but functional furniture that is suitable for your lounge.

There is a lot of furniture in the market that serves a dual purpose aside from giving the living area a stylish appearance. For example, your bookshelf may be a handy place to hide your Murphy bed. In case you need to sleep in the lounge, you just need to pull down the shelves to reveal the extra bed. There are coffee tables and ottomans that provide extra storage space for your books and things. These pieces may also be handy when you need places to keep your stuff during remodeling. Use a combination of closed and open storage furniture so you can keep your clutter and still have areas where you can display your eye-catching home accents.

Go ahead and redecorate!

Now that you have looked through our list of practical ways of creating a modern look for your condominium’s living room, you can go ahead and redecorate! With proper planning and a clear perspective, you will easily achieve the living room interiors that you’ve been dreaming of. 

Renovating Your Bathroom? Here Are Our Top Tips

RH Business Marketing Solutions

Are you in the process of renovating your bathroom? If so, you are probably trying to decide what upgrades to make. There are a lot of different options available, and it can be difficult to decide which ones are right for you. In this blog post, we will discuss our top tips for renovating your bathroom! We will cover everything from choosing the right materials to adding personality and style. Let's get started!

1) Rework the Plumping

When renovating your bathroom, one of the most important things to consider is the plumbing. As the team behind Plumbing Explained suggest, “Old plumbing can lead to leaks, slow drainage, and other problems.” This can be a big job, but it is worth it in the long run. It is best to hire a plumber so that they can inspect the existing pipes and make sure everything is in working order before you start your renovations. They'll be able to identify any potential problems and address them before they become major issues.

2) Choose the Right Materials

When choosing materials for your bathroom renovation, it is important to consider both your needs and your budget. There are a lot of different materials available, and some are more expensive than others. You should also think about how easy they are to maintain. Some materials, such as tiles, are easy to keep clean but can be expensive. Other materials, such as laminate, are less expensive but may not be as durable.

3) Add Personality and Style

One of the best things about renovating your bathroom is that you can add your own personal touch to it. You can choose finishes and fixtures that reflect your taste and personality. If you want a sleek and modern look, choose simple finishes and sleek lines. If you prefer a more traditional look, go for ornate fixtures and antique finishes. The possibilities are endless!

4) Consider Your Needs

When renovating your bathroom, it is important to think about what you need it to do for you. Do you need more storage space? A bigger shower? A bathtub? Think about what would make your life easier and use that as a starting point for your renovation plans. For example, if you need more storage space, consider adding shelving or a vanity. If you need a bigger shower, think about installing larger tiles and changing the layout of the room.

5) Don't Forget the Extras

While most of the focus when renovating a bathroom tends to be on the main features, don't forget about the extras! Things like towel racks, toiletry holders, and even plants can really add personality and style to your bathroom. Furthermore, adding these extras can help make the space feel cozier and more inviting. Don't be afraid to get creative!

We hope this blog post has been helpful in guiding you through your bathroom renovation process! Remember, no matter what style or materials you choose, it is important to consider your needs and budget when making any decisions. Good luck with your renovations!

10 Pieces of Equipment and Tools That Will Make Your Next Renovation Project a Success

RH Business Marketing Solutions

If you enjoy doing DIY projects or want to be ready to perform timely repairs or maintenance work at home when necessary, you’ve got to have a toolbox. There are some essentials you simply can’t live without if you want to perform minor repairs on your own.

While you can get away with borrowing some items you rarely need, there are some tools you just must have at hand. Today, the tools are very easy to get, so it has never been easier to equip yourself with the necessary items. Here is what you should have if you’re planning a renovation.

Cordless drill

A cordless drill is an indispensable item and considerably safer if you’re performing some roofing work.  You don't need to get a cordless tool with a ridiculous amount of power. Additionally, you want to opt for a device that charges quickly and has long run times, smooth handling, flexible speeds, practical features, and a strong warranty.

Decent hammer

Any task you undertake requires a good hammer to be completed. When beginning a renovation project, underestimating the hammer might lead to costly errors while certain hammers won't do the job properly.

Demolition bar

Metal bars with a flat end and a V split, often known as demolition bars or wrecking bars, are used for demolition operations and to tear out nails. The opposite end will typically have a chisel that can be used as a lever and for prying items apart. Using a hammer on the wrecking bar's curve, you can also drive this end in.

Angle locator

This is a very useful instrument for measuring angles and recreating an existing area's angle, outside and inside. Angle finder tools come in a variety of sizes and designs, but they all have the same function.

Safety gear

If you often look for opportunities to construct or mend things, you should keep a few basic pieces of safety gear on hand in case any DIY tasks come up, such as safety goggles, earplugs, all-purpose work gloves, and definitely some protective clothing. An oversized T-shirt or an apron will protect your skin or clothing from cleaning agents like bleach.

If you frequently use hazardous equipment, keep steel-toed boots on hand and quality coveralls to provide full-body defense. It’s important to have appropriate safety wear for these kinds of tasks. The good thing is, you can now choose between a whole range of men's and women’s workwear which will make you feel comfortable, not restrained, while doing heavy-duty work around the house.

Measuring tape

This common flexible measuring tool enables one to measure around curves or corners and makes it simple to carry a long measure in a pocket or bag. These days, it can also be found in tiny as a novelty item or keychain fob, so it’s very practical indeed.

Stable stepladders

There's a good likelihood that you'll utilize a ladder for any home improvement project you undertake. You can have all the other tools you require at your disposal, but without a ladder, you won't get very far. The finest option to choose while performing a renovation is a rolling ladder. They are lightweight, inexpensive, corrosion-resistant, and resistant to both water and fire.

Portable circular table saw

A table saw can come in very handy, particularly if you plan to work with wood, plastic, or other materials of the same nature. Making angled or straight cuts is the main purpose of this tool. Modern table saws have adjustable blades that let you change the cut's depth.

All-purpose pliers

Pliers may seem insignificant, but they are essential for carrying out several tasks during a restoration. When squeezing or bending objects, pliers work as a strong alternative to hands. There are numerous plier varieties to pick from. Never underestimate the value of sturdy pliers when working on any renovation project.

Voltage tester

Moving cables from one place to another is a part of home renovations. You must have a voltage tester in your toolbox because it is an essential piece of equipment for such tasks. This tool's sole purpose is to check to see if live electricity is flowing through the wires. But unlike a voltmeter, this device doesn't show how much current or voltage is flowing through the connections. A voltage tester solely uses sound, light, or both to show current flow.

Wrapping up

Home renovations are unavoidable. They can even be exciting and fun, but the interval from initial planning to final completion can be stressful. Because of this, it's useful for a homeowner to have a variety of tools that will make the task simpler, quicker, and help you survive your home renovation project. And, if you invest in good tools, you’ll be covered for a long time.

By Mike Johnston