Google+

contact us

Use the form on the right to contact us.

Day or Night, we are here to serve you. Leave your plumbing problem to us.


Tinley Park, IL

(708)845-7922

Residential and Commercial plumbers and plumbing contractors available in Orland Park, Tinley Park, Oak Lawn, Palos Heights, Midlothian, Oak Forest, Homer Glen, Mokena, Frankfort, and the surrounding Chicago South Suburbs. Emergency plumbers.

copper water lines.jpg

Kevin Szabo Jr Plumbing Blog

Kevin Szabo Jr Plumbing is Tinley Park, Orland Park, Oak Forest, Midlothian, Orland Hill, Homer Glen, Mokena, Frankfort, Crestwood, Palos Heights, Oak Lawn, local plumber. Read our blog for advice, tips, a good laugh, and basic home improvement.

**We are moving our old blog to our new and improved website. Too see all our posts visit kevinszabojrplumbing.blogspot.com

Filtering by Category: November 2022

How to Choose the Right Boiler to Install

RH Business Marketing Solutions

There are a number of good reasons why replacing the boiler for your home is an excellent idea.  With winter upon us the last thing you need is it breaking down on a cold night with a costly call out and repair bill to pay.  With the current cost of fuel being eye-wateringly high, now could be a great moment to invest in a fuel efficient, modern boiler that could pay for itself quite quickly.

Once the decision is made to go for a new boiler how do you choose the right one to install? How do you know the costs to install a new boiler? Looking at websites and showrooms can be pretty overwhelming so we are here to guide you through what you need consideri when choosing the right boiler for you.  Essentially it is purchasing the correct type and size of boiler and that is determined by the amount of hot water you need, how big your property is and what fuel source is available to you.

What are the factors to be considered in selecting a boiler? 

Before even looking at what's on the market you’ll need to consider the below factors:

  • Available fuel source.

  • Size of property.

  • Available space

  • Cost

  • Efficiency.

  • Environmental factors.

  • Futureproofing.

Fuel Source 

Gas 

Mains gas is the usual source of fuel for a domestic boiler supplying hot water and a heating system.  85% of British homes are connected to the main grid so unless you are going down the renewable energy route, this is  the most popular option.

LPG (liquid petroleum gas)

If you’re not on the national grid, LPG can be a good alternative to oil or electric.  It is more energy efficient and produces less carbon than oil or coal.  It is generally more expensive than oil.

Oil 

Traditionally oil has been the alternative fuel source where mains gas isn't available. You will need to store it in a tank and ensure reglar deliveries through the colder months.

Electricity 

Electric heating systems have had a bad press, think lukewarm storage heaters and non responsive cookers, but modern technology has created a new wave of electric boilers which could be a great option for your home.  As fossil fuels are being phased out and more electricity now being produced by wind and sun, this may well be a good way to future proof your new boiler installation.

Bio Fuel 

Whether you are off gas mains or want to explore more renewable energy sources for a new boiler, bio mass is on the up. A boiler designed to work with wood - either traditional logs or more commonly, wood pellets is a viable alternative if you have space to store the fuel and decent access for the delivery of it.  Carbon neutral, it is seen as one of the more sustainable options for heating your home.

Types of Central Heating Boiler

There are three main types of boiler.

Conventional Boiler 

Conventional boilers require separate tanks for both hot water and cold water. They do not supply instant hot water, hot water is stored in a tank.  Most older systems will be using this type of boiler and you may find it easier to replace your old boiler with the same.  Good for areas where the main water pressure isn’t very high.

Combination Boiler 

Often referred to as a combi-boiler, combination boilers work by supplying hot water on demand, straight from the mains so there is no need for a water tank. Small and compact they are an ideal choice if you’re short of space and your hot water demands aren’t too great.

System Boiler

System boilers take their water supply directly from a mains feed. They heat water into a hot water tank as well as into your central heating system.  Useful if you don’t have any attic space to house a cold water tank.  They can also handle a larger capacity making it a good choice for larger properties requiring lots of  hot water at the same time.


Which Boiler Do I Need?

Having explored the  types of fuel and boiler types, you next have to establish which is the best boiler for your house. System boiler vs regular boiler or is a combi-boiler best for you?  Read on to find out.

Household 

How big is your property and how many people live there?  If it is a large property with a family who all want to have a shower at the same time, a combi-boiler will not be effective.  They are more suited to a smaller home with only one or two bathrooms. 

Space 

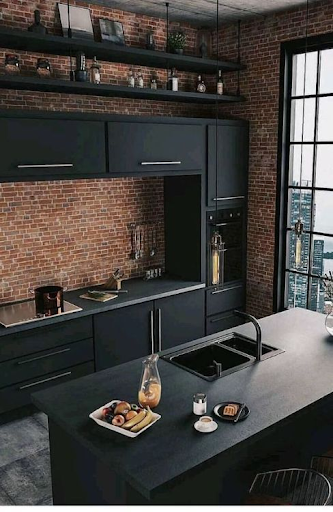
What sort of room do you have for your boiler?  A system boiler requires space for a large tank whereas a combi boiler can happily sit behind a regular kitchen cupboard.

Existing System

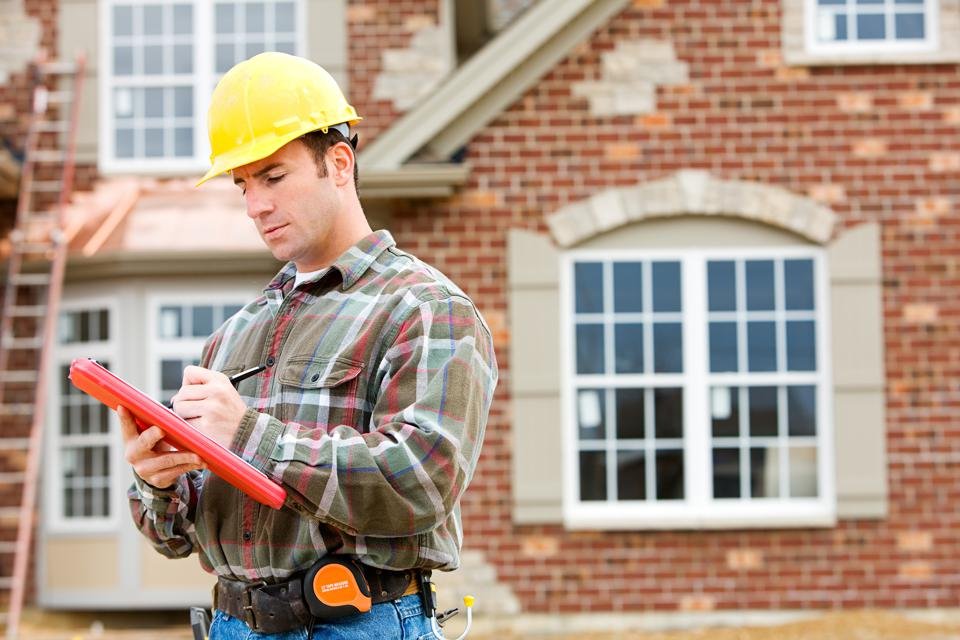
Replacing like for like will usually be the best plan as changing to a different system can be costly - get expert advice from a heating engineer about the pros and cons of switching.  

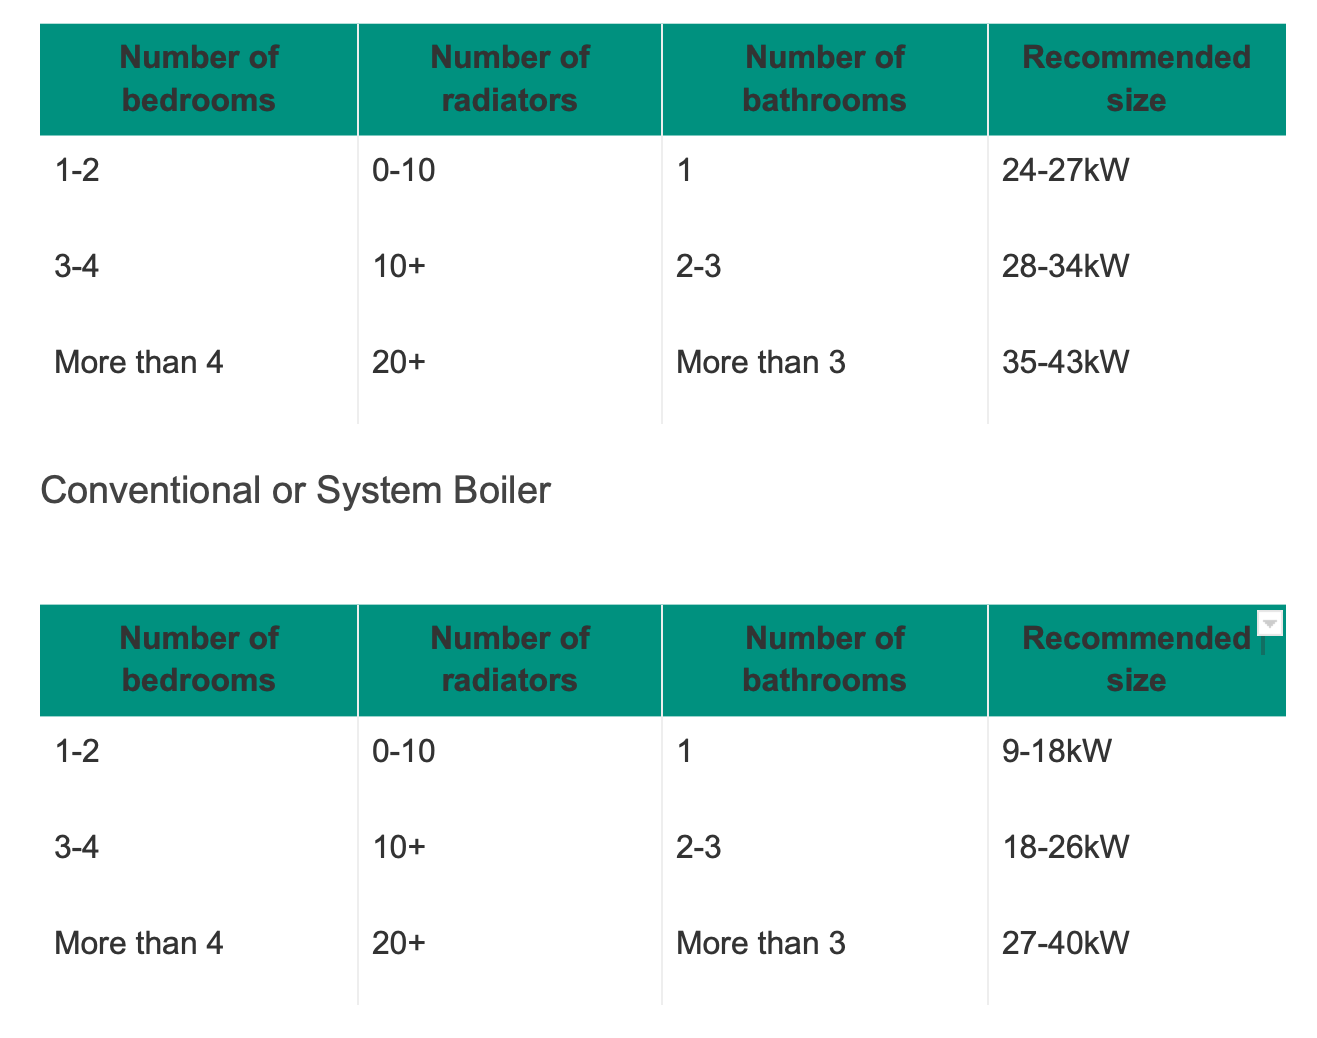
How do I know what size boiler I need for my house? 

The output of a boiler is measured in kilowatts (kW).  The more heat and hot water you need the higher the wattage required.  

Combi boiler

Final Thoughts 

Armed with the above info you will now be able to start your search for the perfect boiler for your home with a lot more confidence. It’s worth researching lots of manufacturers before getting advice and a quote from a trusted heating engineer to help you keep you warm and toasty this winter.

6 Tools To Make Your Home Improvement Easier

RH Business Marketing Solutions

There’s a reason home improvement is one of the most popular hobbies in the United States. It’s empowering to take on a project and see it through to completion, mainly when it results in an updated and improved version of your home. But while home improvement can be rewarding, it can also be challenging, especially if you’re doing it for the first time. There are many things to learn, and if you’re not careful, you could easily make mistakes that cost you time and money.

That’s why it helps to have the right tools for the job. Below are six tools to make your next home improvement project easier (and less frustrating).

1. A Milling System

A milling system can help you create straight and accurate cuts, which is especially important when working with wood. The tool comes in various shapes and sizes, so it’s essential to research before buying one. Make sure to find one that fits your needs and your budget.

Once you have it, read the owner’s manual carefully. This will ensure that you know how to use the milling system safely and effectively. One of the advantages of using it is that it can help you save time and effort on your home improvement project. By making accurate cuts, you won’t have to spend as much time sanding or fixing mistakes. And since a milling system is relatively affordable, it won’t break the bank either.

2. A Stud Finder

If you’re planning to hang something heavy, such as cabinets or a TV, then you need to use a stud finder to identify the locations of any wooden framing in your walls. This will help ensure that you have a stable place to hang your cabinets or TV and that you won’t damage the property.

When using a stud finder, make sure to be as thorough as possible. Run the tool along the wall up to the ceiling. Also, check in any places where walls meet corners or windows. This will give you the best possible chance of finding a stud.

3. A Level

A level is another essential tool for any home improvement project. It can help you ensure that surfaces are perfectly aligned and even, which will help give the finished product a more polished and professional look.

Many different types of levels are available on the market today, so do your research before buying one. Consider a laser level, which is more accurate than traditional levels but will cost a bit more.

4. A Drill or Impact Driver

A drill or impact driver can help save you a lot of time and effort when installing cabinets or shelves in your home. Both tools allow you to create holes and drive screws quickly and efficiently.

When using a drill or impact driver, it’s essential to be careful and prevent damage to your property. Always ensure the tool is in good condition (and replace worn-out parts as necessary) before you begin your project. Likewise, make sure to use the correct size drill or screwdriver bit and have the proper attachment for driving screws.

5. A Lightweight Ladder

A lightweight ladder is a must-have for any home improvement project that involves painting or hanging pictures. If you’re constantly lugging around a heavy ladder, moving around the house and getting your work done can be difficult.

When choosing a ladder, find one that is lightweight and easy to maneuver. Look for models made from durable materials, such as aluminum or fiberglass, so that they will stand up over time. And always remember to wear safety gear like a hard hat, safety glasses, and sturdy shoes when working with a ladder.

6. A Power Washer or Pressure Washer

A power washer or pressure washer can make cleaning your home’s exterior much easier and get rid of tough dirt and stains. Both tools use high-pressure water to blast away grime and stains and can help you save time and effort.

When using a power washer or pressure washer, it’s important to be careful. Make sure that you wear safety gear like protective eyewear and thick gloves. Also, make sure to use the right cleaning solution for your project – for example, an abrasive cleaner will work best for stripping paint, while a detergent can remove oil or grease. Finally, ensure that you maintain the tool and replace any worn-out parts as necessary. This will help ensure that your power washer or pressure washer is always working optimally.

Whether you’re repairing or renovating your home, many tools can help make the process easier and more efficient. Some of the most important tools to consider include the ones mentioned above and more. Choosing high-quality tools made from durable materials, and carefully maintaining them over time, will help ensure that your home improvement projects run smoothly.

How to make sure your gardening is eco-friendly

RH Business Marketing Solutions

From window baskets to immaculately manicured formal flower beds, gardens can offer so much joy and reward to their owners. For those that love to grow, there’s something special about seeing your first seedlings pop up, picking the food you’ve created, or simply sitting back and enjoying the flowers.

But whilst Mother Nature is essential for a thriving garden, she does sometimes need some human help in residential spaces. Working with nature is key to a successful garden, which means thinking about being eco-friendly in the way that you protect and nurture your space. Here, we take a look at some of the things that you need to consider to help you enjoy your garden in a sustainable way.

Ditch the peat

Peatlands are a vital part of our ecosystem. They can be seen across the world in the form of bogs and moors, and are created from plant material that is partially decomposed, mixed with an excess amount of rainwater. They are excellent at storing carbon – in fact, they’re the largest naturally occurring land-based carbon store – which is vital in tackling climate change. 

Additionally, they help control flooding, as they can hold up to 20 times their own weight in water, and support many unique species. Unfortunately, this level of water retention is also a trait that’s attractive to amateur gardeners, as it means that their plants don’t dry out, and retain their nutrients. This has led to over-farming of peat and destruction of these valuable natural ecosystems.  

As a result, the UK Government is banning peat compost from 2024, but you can do your bit by ensuring that you only buy peat-free at your local garden centre.

Organic pest control

It’s nature’s way that not all plants survive. They are valuable food for slugs and snails, which in turn feed birds and frogs, so everything is part of the wider circle of life. However, it can be quite disheartening for keen gardeners to come out one morning and find that all of their carefully curated crop has become a midnight snack.

Pest control solutions are a way of keeping certain less favourable elements of nature at bay for a short period of time. Of course, there are chemical solutions available on the market, but they can be harmful to the wider balance of your garden, and they’re not particularly respectful to nature. Whilst you might get pristine plants, your garden won’t necessarily be better for it.

Organic pesticides and pest control solutions, whether homemade or bought, are a good way of minimising pest damage within your garden without ruining the delicate balance of nature. They do take more work than simply sprinkling slug pellets, but your garden will be grateful for the extra effort.

Choosing the right plants for your garden

Not all gardens are created equal. Whilst you might long for tropical plants or a long period of flowers, this might be a little tricky if you live in a cooler climate. Additionally, you might want to grow succulent plants that love a dry environment, but you live in a country where there’s several rainy months per year.

There’s nearly always an artificial solution to help you keep the plants you want alive, but doing so comes at a cost. Heaters, special winter wrap and water diversion systems all require energy and resources to create, and ultimately it will always be a battle for you to keep these plants happy. Instead, try leaning into the garden that you have, and learn about which plants suit your soil and environment. The plants will be healthier, and you’ll be rewarded with better results.

Encourage wildlife

As well as being pretty to look at, the bees and butterflies in your garden have an important role as pollinators. They can also help you in your mission to reduce pesticides, as they often eat the small bugs that you’re trying to get rid of. 

In order to keep your animal visitors happy, consider planting a section of flowers and grasses to support them. Garden centres tend to have a specific label or section which shows the seeds and bulbs that are pollinator-friendly, so grab some next time you’re there and know that you’re supporting the wildlife that helps your garden to thrive. 

Guest Contributor: Bethany Tomlyn

What Is The Best Plumbing Pipe for Your House?

RH Business Marketing Solutions

Starting a kitchen or bathroom renovation project may bring you to the question of whether it is worth hiring a plumber or whether you can install water pipes yourself. But whatever option you pick in the end, it may be pretty confusing when it comes to choosing pipe materials. Various pipes are used for different purposes. Some of them may be perfect for gas supply, while others are commonly used for water supply, drainage, sewer systems, or even exterior. Therefore, it’s important to choose the right material that corresponds with your application and space. Let’s find out what is the best plumbing pipe for your house.

What Is The Best Pipe to Use for Plumbing?

Using an improper plumbing system may cause water problems in your local apartment or the whole building. Therefore, you need to take it seriously and provide reliable water distribution systems for each individual case. For example, there will be different types of pipes for private houses and apartments, as well as for hot and cold water supply.

Sometimes it may seem you can save money by choosing plastic material instead of copper pipes, but it’s not always possible. You’d better ask a professional plumber for advice or consider additional financing if it will not work without paying more. Even if you have some credit issues, it’s better to find a proper lender that can give you a home repair loan with bad credit than to deal with an insurance company after an emergency. Also, it may cost you more, in the long run, to redo the whole work and eliminate a negative outcome. Therefore, you need to choose plumbing pipes carefully, taking into account such factors as temperature, pressure conditions, and piping materials.

Actually, plumbing material is one of the most crucial factors that determine its operating conditions. Let’s take a closer look at the most common material types of plumbing pipes.

PVC Pipes

A PVC pipe (or a polyvinyl chloride pipe) has been used for more than 70 years now and is pretty popular with homeowners. Most modern homes nowadays have PVC piping, at least partially. PVC is a type of plastic that suits for sink and toilet drain lines, irrigation piping, main supply lines, pools, drainage pipes, and spas. However, it’s not recommended to use PVC pipes to carry hot water as it can lead to material breakdowns.

Which PVC Pipe Is Best for Plumbing?

First of all, we need to understand what types of PVC pipes are. There are only two of them – schedule 40 PVC (has a white color) and schedule 80 PVC (has a dark-gray color). But their design is not the main difference between them. Schedule 80 pipe has a thicker wall, so it is stronger. Therefore, it can handle higher pressures compared to a schedule 40 PVC pipe. A schedule 80 pipe is better for hot water systems and jobs that require higher pressurization, while a schedule 40 PVC pipe is the best for drainage, irrigation, and other cold water systems.

Pros

●      Convenient to use for irrigation or other long runs;

●      PVC pipes are easier to work with compared to metal pipes;

●      PVC piping allows you to forget about corrosion, rust, or degradation.

Cons

●      Can’t be used as hot water pipes;

●      Using plastic harms the environment.

CPVC Pipes

If you start a DIY home repair and are looking for a plumbing pipe that is easy to install and replace, a CPVC pipe is a great option for you. The chlorinated polyvinyl chloride piping provides more strength and flexibility for your water supply lines due to a much higher chlorine content. Thus, these plumbing pipes are longer-lasting compared to PVC pipes.

Pros

●      Don’t weigh much and are flexible;

●      Resistant to corrosion and rust;

●      Can be used for both hot and cold water applications.

Cons

●      Less stable than copper pipes as the material can get more fragile over time;

●      Can be used in outdoor systems due to UV sensitivity.

PEX Pipes

A PEX pipe (also known as a cross-linked polyethylene pipe) has been used for water supply lines since the late 90s and has gained dizzying popularity very quickly. PEX pipes are considered to be replacing copper pipes as they are rigid enough to high water pressure and flexible enough to be installed in the wall or ceiling. Therefore, PEX pipes are deservedly considered to be one of the best among all types of plumbing pipes.

Pros

●      Suits for both residential and commercial plumbing;

●      Have clear color codes for hot and cold water supplies;

●      Have an affordable price;

●      Demonstrate excellent flexibility.

Cons

●      PEX piping is a relatively new technology that is not tested for long-term capabilities;

●      Not the best choice for a drain line.

Rigid Copper Pipes

Copper piping is a great choice for hot and cold water supply lines. You can also use it to carry drinking water as it carries no risk to your health. If you need to use copper pipes in tight spaces, there is also an option for you. Just use flexible copper pipes.

Pros

●      Can withstand high water pressure and heat;

●      Good for the environment;

●      Rust and corrosion resistance.

Cons

●      Copper piping usually requires the solder-type connection, which calls for having appropriate skills;

●      High material cost;

●      Require additional fittings.

Cast Iron Pipes and Galvanized Steel Pipes

If you’re living in an old building, you probably know what a galvanized steel pipe and a cast iron pipe are. Cast iron and galvanized pipes are rarely used in modern buildings as they tend to rust and corrode over time. However, a cast iron pipe can still be used today. Some parts of modern water distribution systems contain cast iron pipes. Typically, cast iron piping is used for sewer systems or other drainage lines. However, when it comes to residential plumbing repairs, a metal plumbing pipe is usually replaced with plastic piping.

Pros

●      Galvanized steel pipes are able to reduce the water moving noise;

●      Strong, durable, and heat resistant.

Cons

●      Not corrosion resistant;

ABS Pipes

ABS pipes (or acrylonitrile butadiene styrene pipes) are rigid plastic pipes that are used specifically for drain lines and waste piping. They are known for withstanding low temperatures and being easy to install.

Pros

●      Good for low temperatures;

●      Highly durable;

●      Can be used for the underground exterior.

Cons

●      Can be deformed under direct sunlight;

●      Typically prohibited by building codes.

Brass Pipes for Plumbing

Brass pipes are known for being, perhaps, the longest-lasting compared to other pipe materials. They are easy to work with and very strong, so many builders recommend homeowners to go for brass instead of plastic. Also, brass pipes go well with brass connecting fittings that are easy to find and install too.

Pros

●      Extremely durable;

●      Flexible, can be easily adjusted;

●      Don’t deform and rust;

●      Have a good temperature conductivity.

Cons

●      High cost.

Tips on Choosing The Best Pipes for Plumbing

When buying a pipe for water supply, homeowners are more likely to choose the optimal ratio between affordable price and acceptable quality. However, it’s not always rational to lean toward the project’s economy. Here are some criteria you need to consider to determine the best option for you:

●      Budget: Of course, your financial situation influences the type of plumbing pipes you pick. But keep in mind that sometimes it’s better to overpay than to deal with an insurance company after water damage.

●      Type of water: Sometimes water can be corrosive, for example, if you live in a coastal area, so you should keep it in view when choosing pipe material.

●      Sunlight affection: For example, it’s not a good idea to use plastic pipes for spaces with access to direct sunlight.

●      Soil characteristics: If your soil is full of excess rocks and moisture, it can break down less strong pipes.

●      Local building codes: Your local building code is the first you need to refer to ensure the type of material you choose meets the municipality’s specific requirements for designing and amending a plumbing system.

●      Water pressure you want: If you want high water pressure, choose wide and durable pipes.

Bottom Line: Which Pipe is The Best for Plumbing?

PVC, CPVC, PEX, rigid copper, cast iron, galvanized steel, ABS, and brass pipes are the most common plumbing pipes people usually use for plumbing systems. Some of them are used only to supply water, while others are multifunctional. Thus, it’s hard to tell for sure which type will be better for you without knowing your budget, home size, and specific preferences. If you’re going to start a DIY project and have some doubts, seek advice from a professional plumber to avoid common mistakes that can lead to high costs of plumbing repairs.

Guest Contributor: Helen Beasley

Dark Kitchen Designs for a Modern Look

RH Business Marketing Solutions

If you’re looking to update your kitchen you will have noticed there’s a definite trend for using dark colors right now.  You might be tempted, but we know it can be daunting to make a change when you’ve been used to light, bright and white colour schemes.  Some common worries are that using dark colours will make your kitchen gloomy or make the room look too small, but believe us,  that doesn’t have to be the case.

Whether you’re looking for ways to modernize an existing dark kitchen or want some inspiration for a new one with a modern look, we’ve compiled an eclectic selection of schemes and designs that we think will get your creative juices flowing.  

Modern Kitchen Ideas

 A dark kitchen scheme can potentially be overwhelming, but with a bit of style know-how you can create a stunning designer finish that outshines any standard,  modern kitchen.

By using different  materials  such as paint, wood and marble, the contrasting finishes create a moody and chic look. Consider adding some interest to your existing kitchen by introducing different textures.

Scandi Style

This dark kitchen scheme is perfectly balanced using natural wood for the counter, shelves and furniture.  The light tiles and floor keep the overall look fresh and contemporary.  Having stainless steel utensils on display give the kitchen a utilitarian feel which is easy to recreate in your own home. 

Let There Be Light

Clever lighting is key when designing a modern, dark kitchen and is also one of the best ways to make an outdated kitchen look modern.  This kitchen features 4 different types of lighting - recessed spot lights, under cupboard strip lighting, mood tabletop lamps and an industrial style floor lamp - to create a dramatic yet warm ambience. 

Dark Blue Kitchen

So what is the best colour for a dark kitchen?  There is no one answer to that question as it will come down to your own personal taste, however,  there are a few style hacks that you can use which will ensure that whatever colour you go for will enhance your dark kitchen design.  

One way to really set off dark kitchen units is by pairing them with contrasting tiles, splashback or flooring.  This vibrant dark blue kitchen looks stunning against the metallic, gold tiling and contrasting stools. 

Dark Wood Kitchen

If you are looking to modernise a dark kitchen, then take inspiration from this sublime example from Denmark. Remove clutter and paint your walls an on-trend pink. Invest in a glossy new worksurface, floor covering, wooden dark cabinets and designer mixer tap for a sophisticated, contemporary look.

Eastern Promise

Dark doesn’t have to be drab.  This Zen like space illustrates that by balancing dark and light shades you can create the perfect dark, modern kitchen.  By keeping it simple and incorporating some natural wood and foliage, you too can get this dreamy look.

 Dark Grey Kitchen

Grey has been on trend in home decor for some time now and there’s a good reason why.  It’s timeless,  restful qualities make it an ideal choice for your dark kitchen units.  This delightfully minimalist kitchen makes full use of the extensive natural light with white painted walls reflecting the daylight.  Neutral flooring and stylish, statement seating finish off this clean, modern, dark kitchen.

High Drama

Using dark colours throughout your kitchen can make even the smallest space a talking point. Texture is created with high-gloss mosaic tiles, artisan rug and fresh greenery, all dramatically set off by bright, eyecatching light fittings..

Dark Grey Kitchen Ideas

If you like clean modern lines but don’t want the overall effect to be too clinical, consider a modern, dark grey kitchen like this one. Paired with white tiles and work surface,  it is softened by incorporating warm, yellow bar stools and houseplants that give it a welcoming, cosy vibe.

Black and White

One of the simplist and most striking dark kitchen designs for a modern look is to go monochrome.  Sticking with just black and white creates a stunning impression and will also stand the test of time. Consider your space and go for more white to create an airy feel or go for broke on the black to create that moody look.

By Contrast

Most modern kitchen designs tend to feature sleek cabinet doors to create a seamless, sweeping effect.  In this beautiful dark kitchen, cut out handles in a contrasting colour keep the streamlined look, but create extra interest and depth to the scheme.  The colour is picked up in the chopping board on display.

Industrial Revolution

Dreaming of a chic, loft space?  No need to head to the city,  simply think about mixing some industrial textures into your modern, dark kitchen design.  All matt, black kitchen cabinets and work surface contrast stylishly with the natural brick wall and brushed steel fittings. A slate floor and metal bar stool complete the look.

Last WorD

Hopefully this article has helped you to look at how dark kitchens can have a great modern look, whether that’s using dark cabinets with neutral or dark colour schemes.  Following some of the above tips, you can make any dark wood kitchen look modern and give it a new, contemporary lease of life. 

Everything You Need to Know About Water Mitigation

RH Business Marketing Solutions

What is water mitigation?

Water mitigation can be summed up into one word, water extraction. This may include assessment, containment, and prevention of further destruction during  water damage in a property, facility or place. This is an intervention made by a company to fully prepare it before restoring the premises. Unless the damage of the structures are beyond  repair and demolition of the property is imminent.

This is a specialized task wherein a special team or firm handles such work. Water damage from floods, rain, leaks and other sources can leave the property useless if untreated and intervened. Especially if the water is highly contaminated like sewage and industrial waste water.

Part of the mitigation firm’s task is also to identify the cleanliness and safety of the water so that they can determine the amount of work to be done to prepare the property for restoration.

What is the process?

 When the mitigation firm is tasked to fix a property, they will take steps to perform a variety of tasks before restoration.

1. FInding the water source

-       This is the first task of a mitigation contractor. Identifying where the water comes from and where it flows to and through. Some cases vary however, and water may stop flowing before the repairman arrives or the owner of the property has already turned off the water source such as a left opened faucet or valve. The importance here is that the contractor identifies thoroughly the site where the water comes in so that he may proceed to the next step.


2. Stopping the flow

-       As said earlier, finding the source is very important. Because the contractor may not fully identify the problem if there are more than one sources of the water intrusion. That is why the contractor may check all spaces of the property from foot to roof.


3. Assessment of the damage

-       After finding the source and stopping the flow of water, the contractor will fully assess how big the damage is so that he can foresee the type of repair needed


4. Extraction of the water

-       The contractors are equipped with extractors to remove standing water. These equipment can come with different power settings depending on the amount of water to be extracted.


5. Drying

-       After the water extraction, the contractors may perform drying by still using commercial or industrial grade dryers. But dehumidifiers and fans are adequate enough to dry the property.


6. Cleaning and Protecting

-       Other services may include cleaning and administering protective measures like antimicrobials to prevent molds and mildew.


These tasks are included in the mitigation process and will ensure prevention of any further damages. Contractors may have to remove some fixtures that are no longer needed, especially the damaged contents of the property. Extraction of water is the main focus to eliminate further damages.


Water mitigation is different from damage restoration. These tasks are performed separately. The main differences are the tasks involved. Although you cannot restore a property without mitigation first. Although some companies offer both tasks in their profile. So property owners need not employ more workers and also save fees if they get a company who does both mitigation and restoration.


Water damage contractors in Paola help with such concerns from water damage to restoration.

After mitigation, the damage restoration can finally proceed. The process will depend on how heavy the damage of the property is and return its condition to pre damage state.

Less Expensive Tips to Brighten Your Walls at Home

RH Business Marketing Solutions

When it comes to decorating your home, there's one thing that takes priority over all other considerations: the walls. They are the first thing people see when they walk into your home, and they set the mood for how you want them to feel. The right wall painting can make all the difference in creating a comfortable atmosphere or a cozy retreat, so today, this blog will show you some easy tricks and tips on brightening up those walls!

Swap Out Your Electrical Outlet Faceplates

To remove a faceplate, use a small screwdriver to pry it open. Then, push inward on the tabs until they pop out of their slots.

Next, measure down from where you want to install your new outlet and mark with tape or pencil where you want it placed. Place a pencil mark at least an inch away from each side of your desired location before drilling holes into drywall (or plaster).

Once made, drill holes through drywall/plaster/whatever material is used and cardboard if using this method. Use whatever tool(s) work best to get them very close together, so there aren't any gaps when installing faceplates onto outlets - but don't worry about cutting too much off either! Sometimes, all you need are new decorative electrical outlet covers to make your home feel like new.

Put Up Wall Decals

Wall decals are a great way to brighten your walls without spending much money. These stickers have been around for years, but they're still one of the most inexpensive ways to add color and design to your home.

The best part about wall decals is that they can be used on most surfaces, including wood and tile. If you love the design on one wall but want something different on another area in the house (or even outside), change the color combination from one decal by using another sheet from a diverse set! You don't need special tools or materials—grab some scissors or a knife if necessary—and get busy having fun with art!

Using dry-erase markers as well as wet-erase markers will allow you to use numerous colors without damaging your walls or furniture: make sure not too much pressure is applied during application so not too much ink gets squeezed out onto surfaces like fabric couch covers when removed later (which would ruin them).

Choose a calm wall paint.

If you're looking for a way to brighten your walls, choose a calm color. It sounds simple, but many factors influence the right wall paint shade.

Choose a light color. Light-colored paint will reflect more light than darker shades and make your room seem brighter overall. If you want something bright, try white or yellow — but don't go too far off the reservation! You don't want to look like an Easter egg (and we all know how much those hurt when they fall off).

Choose neutral tones and warm ones because they will balance out any other colors in your home without making it look too crowded or busy on its walls! For example: if I had just painted my living room with something dark blueish greenish purple-red, this would be very hard not only because it's so contrasting from everything else around us but also because our eyesight isn't able to process all these different hues together at once.

Hang Pictures and Artwork

If you want to hang pictures and artwork, the first step is to use a level to ensure that the painting hangs straight. Then use a hammer and nails to anchor your choice of frame or mat into place; if you choose not to use an edge, measure where you want the artwork placed on the wall and mark it with pencil or chalk, so it's easy for later hanging.

Once this has been done, slide in your favorite piece of art—either framed or unframed—and secure it with screws driven into studs along its length through either drywall or brick walls (or plaster). You may need some backing board as well.


Don't Neglect the Ceiling

Painting or decorating your ceiling can be a great way to brighten up any room, but it also has its challenges. If you have a high ceiling, you'll want to ensure that your chosen color won't clash with the rest of your walls. If you are planning on painting the ceiling, consider using one of these tips:

●      Use Color + Texture + Type = Beautiful Result

This is especially true for those who prefer warmer colors like yellow and orange—they tend to work well and add warmth when used alongside cooler hues like blue or green (which makes them perfect for bedrooms). When creating artwork displayed on a dark surface like wood paneling or stone walls (or even marble), remember how light will reflect off them when viewed from above—this can dramatically change how everything looks!

Create a Gallery Wall

A gallery wall is an excellent way to introduce color and texture into your home. You can create a gallery wall in any room of your house, but it's easiest if you have a space near the ceiling where you can hang multiple pieces of art.

●      Use a neutral color like white or off-white for the background and accent wall so that everything else will pop once it is hung on your walls.

●      Choose simple frames for this project; nothing too ornate or fancy! This will help keep things from getting cluttered quickly!

●      Try different sizes and shapes for each piece that goes into the display: try different sizes, from small ones up to large ones depending on what fits best within your budget constraints.

Remember, the most important thing when it comes to decorating is to have fun! Don't be afraid to experiment with different ideas. If you are stuck in a rut or don't know where to start, try one of these tips from our list above. The key is that you should never forget this feeling when looking for ways to make your home more stylish and beautiful; it will help you get through any new challenges!

How to Deal with Fire and Water Damage Aftermath

RH Business Marketing Solutions

After a disastrous event with fire and water, the damage can be quite devastating. The damage caused by these elements can be very traumatizing. Not only does it cause damage during the event but what it also leaves during the aftermath.


It can leave you overwhelmed with extensive distress and harm. The main concern is the health and safety of the people within the property and those affected by the damage. The primary contributors of damage are the fire itself and the suppression methods. Whether caused from natural disasters like storms and flood, volcanic eruptions and forest fire, the damages they leave behind can surely take a toll on human life and property.


To extinguish fire, we need water, a lot of water. So even though some parts of the property may not be affected by the flames, the water may soak these areas thoroughly. Water can drench the area from firehose sprays and sprinkler systems. This poses a more extensive problem to clean-up and restore. During a fire, damages to your plumbing systems will also occur and burst pipes leak and fail causing continuous water damage. Mitigation process then restoration are needed for such tasks.


While fire can be an instant problem, water may continue to be a hazard if left unconsidered. You need a professional to assess the damage so that the corresponding restoration can be attained. Unaddressed water can damage wood structures, cause air hazards, produce molds and mildew. These encourage sickness and respiratory problems.


Before you inspect for the fire and water damage, make sure everyone is safe and that the emergency professionals have already declared a safety clearance on the area. If you think your property structure is not safe, consider calling your insurance officer to inspect the damage. Once your insurance officer makes the assessment, call the fire and water damage professionals at Overland Park, KS. These water extraction teams have a rapid response to minimize water damage to your property. They handle mitigation services especially for residential concerns.


Surely your property may or may not be suitable to use yet. So you might as well cover it up with tarps, boarding your doors and windows, and check if your plumbing and water supply is cut off. Salvage your useful items, remove and dispose properly of the damaged ones.


Establish a plan to mitigate and restore your property so that it can be back to normal and original working order. Seek professional fire and water damage restoration firms. These experts have the experience, techniques and tools to return your damaged property back to normal in a short period of time. These professionals are mostly available 24/7 because these events are already considered an emergency.


The aftermath of these damages should be addressed quickly especially when we are considering a residential space. Damages will always be damages regardless of the setting and location. It takes good decisions and reliance on the proper experts to help you and your family to get a full restoration and recovery.


The Do’s and Don'ts When Hiring a Home Inspector

RH Business Marketing Solutions

If you're like me, then home inspections are a lot like math: they're hard and boring. But if you have the right inspector on your side, they can save you money and headaches in the long run. So I decided to get some expertise from one of my friends who has been doing inspections for years—and now wants to do more! Here's what he told me about hiring an inspector.

Employ an inspector you can have confidence in and trust.

When you hire a home inspector, you want to know that the person performing the inspection is trustworthy. This can be difficult because some inspectors are not necessarily experienced or qualified in their fields of expertise. Still, there are ways that you can tell if someone is being honest with you and what they plan on doing during your inspection.

Before hiring an inspector, make sure to request to examine their credentials.

The inspector’s credentials will tell you if they are qualified to do the job, such as being licensed or certified by an organization like the Association of Certified Home Inspectors (ACHI). You should also ask whether they have insurance coverage for their work, which can be costly if something goes wrong at your home. If an inspector doesn't have credentials or insurance and cannot provide proof of this information, it's best not to use them.

Do enquire about the inspector's membership in any professional associations, such as the American Society of Home Inspectors.

If you are looking to hire a home inspector, ask them if they are a member of any professional organizations like American Society of Home Inspectors (ASHI). A good organization will have a website where you can find information on the company, including their membership status and disciplinary actions taken against members.


Ask for references from previous clients who have hired this inspector before. Call those people and ask them about their experience with the inspector; did they find anything wrong with their home inspection report? Were there any problems that were not resolved during the inspection process or afterwards?

Do not hesitate to inquire about their fee, what it covers, and any potential additional fees.

A written report is usually provided by most inspectors, but you should also ask if they offer verbal reports as well. If you're unsure about whether or not to hire an inspector because they seem too expensive or don't provide enough information regarding their services, contact them before making any decisions so that they can give better answers.

If possible, schedule the inspection during a daytime period so that you may attend and ask questions.

You also will not be able to ask for an explanation of anything that happens during your home inspection; for example, if something is wrong with your furnace or electrical panel, it is important to know why this is happening so that you can take appropriate action before serious problems arise.

Even if the inspector requests it, don't pay the entire amount up front.

Before paying for any job that needs to be done, you should make sure that it will get done. Before spending any money at all, any repairs that are on the list but weren't included in your inspection report must be made. In fact, it's preferable if you complete this beforehand so they can go to work right away and save some time while they wait for payment from you (or whatever source of funds).

Don't be hesitant to conduct employment interviews with inspectors.

As you are interviewing inspectors for the job, don’t be afraid to ask them questions about their experience and qualifications. You should also ask them what they will be looking for during the inspection, as well as if they are licensed and insured. Finally, make sure that you know how long they have been in business and whether or not they have a good reputation with clients,You can Contact one of the best home inspectors in Philadelphia PA.

You should take every precaution to ensure that your property is a solid investment because it is most likely the biggest one you will ever make.

You should take every precaution to ensure that your property is a solid investment because it is most likely the biggest one you will ever make.


Home inspections are an excellent approach to obtain an unbiased assessment of a home's condition and value. A home inspector will check the quality of the roofing, plumbing, electrical wiring, and more! Before you purchase a home, you should engage in an inspection (or even just look at one).

DON'T just hire the first inspector you meet.

You should not be afraid to interview inspectors for the job. The best way to find a good inspector is to ask around and look at their reviews, but don’t assume that just because someone has had some experience in your area or with your type of home, they are automatically an expert. You will want an inspector who is knowledgeable about all kinds of homes and not just one particular kind.

Home Inspections, Everybody Else is Just Looking.

Hiring a professional is crucial whether you're buying or selling a home. A trained inspector can answer your queries about the property and its state by giving you useful information about upkeep requirements and potential issues before they turn into expensive repairs later on.


Storage During Remodeling: Where and How to Store Your Stuff Safely

RH Business Marketing Solutions

Remodeling your home can be a fun and exciting project, but it can also be very stressful. One of the most challenging aspects of a remodeling project is figuring out where to store your belongings safely and securely. This blog post will discuss some tips for storing your stuff during a remodel. 

Rent A Unit 

This is probably the best option to make sure your stuff isn't in the way while you're working on your project. People from around Queensland often rent a unit for self storage in Gympie so that they'd secure their belongings for a longer period. It's also the most cost-effective option since renting a unit is usually much cheaper than renting a house or other property.

Renting a unit can be beneficial in multiple ways, especially if you're looking to declutter your home or store items temporarily. Renters can expect storage units with high security and climate control, depending on what they need. Not only that but renting a unit means no tenancy agreement, meaning renters would have full access of their rented space at any time. 

Use Portable Containers

Removing items from a room you're about to remodel is an essential stage of planning a project like this. Portable containers can help you will make it easier to store items safely and securely during the process. These containers are perfect for storing all of your belongings, be it furniture, appliances, or even decorations.

They come in a range of sizes and styles to suit any need you may have. Depending on what type of space you're remodeling, you can easily find one that fits the size and shape of your items. These containers are secure, making it easy to store valuable items without worries.

Setting up these portable containers is have very little effort on your part as well. You can quickly set them up using a few simple tools and be ready to start using them in no time!

Pick A Free Room 

You can also find the most unoccupied space in your home to store your items during remodeling. If you’re lucky, there is a room in your house that isn’t used often and can be used as storage while the renovation is taking place. 

Look for an unused bedroom or attic space that can hold all of the items you need to move out of the way. Make sure it has enough space to accommodate boxes, furniture, and other large objects. You should also check if the room has any air conditioning or ventilation since some valuable items may require special environmental conditions.

Ask Friends And Family 

Friends and family can be an invaluable resource when it comes to storing items safely during a remodel. If you’re in need of additional space, asking friends and family might be the best (and free!) way to store your belongings while the construction is going on. Not only does this save money, but it also gives you peace of mind knowing that your items are safe and secure with someone you trust.

Create An Inventory 

When you've found your perfect place to store away your belongings, the next step is organizing it, and creating an inventory is the first step. Here's a checklist for making one:

  • Make a list of everything you have.

  • Group similar items together, like books or clothes. 

  • Include a detailed description of each item. 

  • Take pictures or videos of the items

  • Make sure to store this information securely and safely away 

  • Check on your stuff periodically and re-evaluate your inventory list as needed.

Creating an inventory and storing your stuff safely during remodeling can help you keep track of all your belongings, no matter how large or small. It's always good to be prepared.

Label The Boxes 

Every box needs to be labeled during remodeling. This will help you quickly identify what's inside when moving or searching for a specific item. Labeling each box also helps prevent mix-ups between boxes and makes it easier to keep track of your belongings throughout the process. Make sure to clearly write down what is inside in big letters that are easy to read. 

Immobilize The Items 

Make sure the items cannot be moved easily by immobilizing them. It's an easy way to store stuff safely during a remodeling project. This can be done in several ways, such as using shrink wrap to securely wrap the items or tie-down straps to immobilize furniture and other large objects. 

You can also use heavy-duty boxes or containers to store fragile items that would otherwise be exposed during a remodeling project. Not only will immobilizing the items help keep them safe, but it will also prevent any potential damage caused by shifting items or falling objects. 

Remodeling is a huge project and you have to protect your belongings during it so store them away properly. Rent a unit or use containers for the job. You could also pick a free room or ask people close to you for help. Make sure to create an inventory and label all the boxes. Finally, make sure the items cannot move around on their own in there for extra safety!