Google+

contact us

Use the form on the right to contact us.

Day or Night, we are here to serve you. Leave your plumbing problem to us.


Tinley Park, IL

(708)845-7922

Residential and Commercial plumbers and plumbing contractors available in Orland Park, Tinley Park, Oak Lawn, Palos Heights, Midlothian, Oak Forest, Homer Glen, Mokena, Frankfort, and the surrounding Chicago South Suburbs. Emergency plumbers.

copper water lines.jpg

Kevin Szabo Jr Plumbing Blog

Kevin Szabo Jr Plumbing is Tinley Park, Orland Park, Oak Forest, Midlothian, Orland Hill, Homer Glen, Mokena, Frankfort, Crestwood, Palos Heights, Oak Lawn, local plumber. Read our blog for advice, tips, a good laugh, and basic home improvement.

**We are moving our old blog to our new and improved website. Too see all our posts visit kevinszabojrplumbing.blogspot.com

Laundry Room Plumbing Tips: How To Maintain Plumbing Like A Pro

RH Business Marketing Solutions

Laundry room plumbing is one of the most overlooked areas of every home. Unfortunately, this can lead to mishaps such as drain blockages, clogged supply lines, damaged appliances, and even flooding. Luckily, we’re here to help you prevent all this — and more — from affecting your laundry room. 

Dealing with a flooded and dysfunctional laundry room is the last thing any homeowner wants to do. In this article, we give you tips on how to maintain your laundry room plumbing like a pro. 

5 Laundry Room Plumbing Tips to Consider

Most people put off necessary plumbing maintenance for fear of paying expensive laundry services costs. Regardless, regular plumbing maintenance can help prevent problems from affecting your laundry room. Additionally, it can extend the life expectancy of your appliances — saving you more money in the long run.

Use these tips to get the most out of your laundry room.

Tip #1: Regularly inspect hoses.

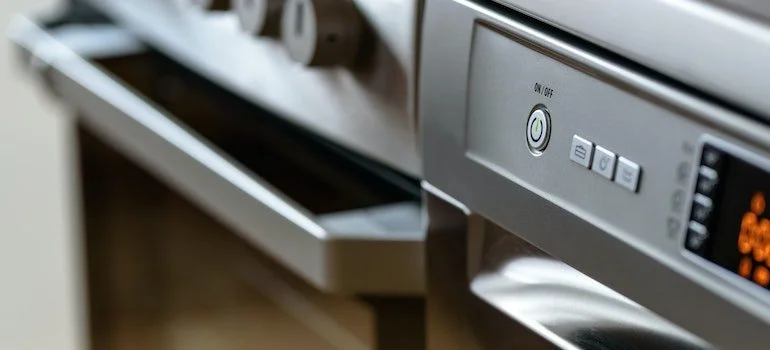
Washing machines and dryers have all sorts of hoses connected to them. Each one serves a different purpose; however, all of them can wear out over time. It’s best to regularly inspect the machine hoses for cracks, holes, or tears. Not only can these issues cause unwanted leaks, but they could also compromise your washing machine’s electrical components. 

Generally, washing machine hoses should be replaced every five years — or as indicated on your washing machine’s user manual. If you suspect something is wrong with your supply line or drain line, you’ll have to replace the equipment quickly. Visit your local hardware store or plumbing supply store. You could also contact a plumbing professional like us to help you resolve the situation.

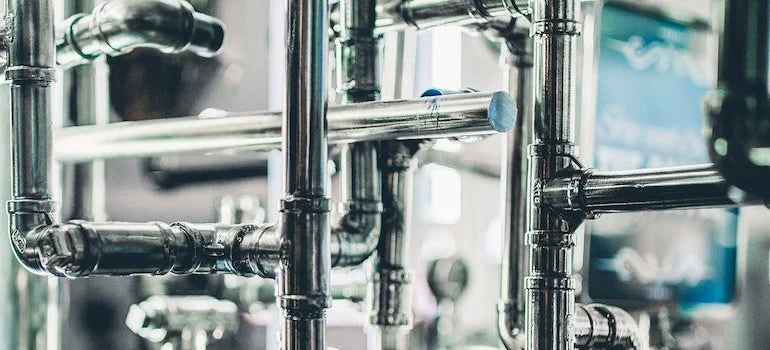
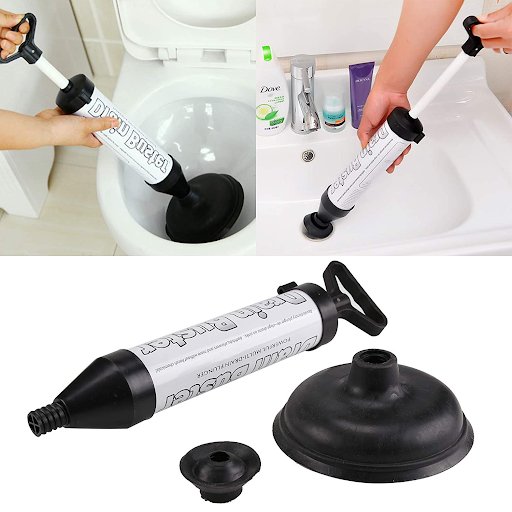
Tip #2: Inspect the pipes for leaks.

If your laundry room has exposed pipes, it can be easy for them to acquire cracks and holes that eventually lead to leaking. Water damage is an inevitable result of pipe leaks, so acting quickly in the situation is necessary to prevent further problems. Contact your plumber to conduct regular inspections on your laundry room pipes. 

Tip #3: Flush the p-trap. 

The p-trap is the u-shaped bend that’s that connects your washing machine’s drain to the sewer system. This part of the drain line contains water that prevents sewage gases from re-entering your home. Unfortunately, p-traps tend to dry up when they aren’t in frequent use. When the water inside the p-trap completely evaporates, foul odors can start to seep into your home, causing discomfort and even illnesses to your family. 

If you notice your laundry room is smelling less appealing lately, a quick p-trap flush should do the trick. Pour a bucket of water into the p-trap to create a fresh seal to prevent sewage smells from wafting into your house. 

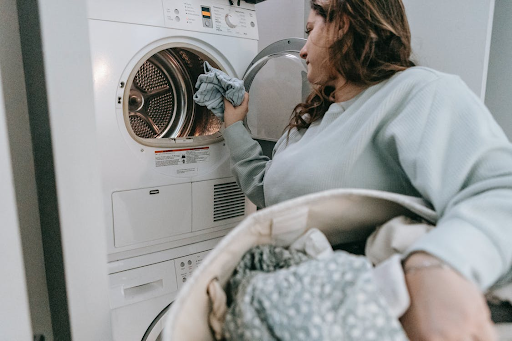
Tip #4: Place a strainer over the drains.

Wet lint might seem like the least of your problems when it comes to laundry room plumbing; however, it’s actually one of the things you need to watch out for. Wet lint can easily get into pipes and hoses during the draining process. Over time, some stray pieces of lint can get stuck inside the hose walls. This can cause poor drainage and even clogs in your pipes. If not addressed immediately, clogged pipes can also lead to burst pipes — which is not a problem anyone wants in their house.

Luckily, there are strainers designed specifically for washing machine hoses and pipes. These strainers can be bought at any hardware store at relatively low prices. They may also be bought online if you don’t want to make the trip to your local hardware. Experienced DIY-ers can easily install the strainer in their washing machine pipes while some may need expert assistance. 

Contact a professional if you don’t know how to install your strainer.

Tip #5: Only wash full loads of laundry.

As surprising as it might sound, small laundry loads are more harmful to your laundry room plumbing than full loads. Washing machines typically use 40 gallons of water for each load. Using 40 gallons for a single shirt and a few pairs of socks means you’re using your plumbing wastefully. You can extend your laundry room plumbing’s life expectancy by batching your laundry — waiting until you have enough to equate to a full load. If you absolutely need to get a single piece of clothing washed immediately, consider handwashing it as opposed to using your washing machine. 

Maintain Good Laundry Room Plumbing with Kevin Szabo Jr Plumbing!

Here at Kevin Szabo Jr Plumbing, nothing is more important to us than the happiness and safety of our clients. Thus, we ensure that the services we provide are both affordable and efficient. Our plumbing professionals are trained in the latest methodologies to meet industry standards. Whether it’s cleaning the drains or doing preventative maintenance on your laundry room plumbing, you can rest assured that our technicians will handle the job with utmost care and professionalism. 

For more details, please visit our website or send us an email containing your concerns and requests. 

CALL TODAY 708-845-7922

We look forward to working with you!

Guest Contributor: Sophia Young

What are Simple Ways to Decorate a Dorm Room?

RH Business Marketing Solutions

Choosing the Right Furniture and Accessories is Easy

Moving out to go to college can be an unsettling experience, but for students who have chosen good furniture, a dorm room can feel like home in no time.

Dorm rooms are almost uniformly small, slightly grungy, and can get cramped fast if roommates don’t coordinate a design plan early on in the school year. Most rooms will come with beds and desks, but otherwise, providing furniture and accessories for the dorm will be left up to the students who live there.

How to Choose Bedding for College Dorms

Many colleges have extra-long twin mattresses to accommodate very tall students. This will require the purchase of specifically fitted sheets, but fortunately these aren’t too expensive and come in as many colors and designs as students themselves. Choosing a simple, dark color or pattern will be best for hiding food or ink spills that occur on the bed and reduce the need to buy new sheets as a result of a stain.

Communicating with a roommate or roommates ahead of time about what colors are preferred will help in choosing a color scheme for the room and its furniture. If one student has fuchsia bedding and the other hot pink, the clash of colors will be annoying to both parties.

It’s important in choosing bedding that a duvet or bedspread that is warm and comfortable is on the list. Winter nights can get cold even in a well-heated dorm, and having a stylish, cozy bedspread can make all the difference. Finding sheets and a duvet that coordinate the room and still express the style of each student can be done easily at any department or bedding store.

Storing and Organizing School Items for Dorms

Keeping things organized in a dorm involves more than a few bins, and is much more stylish. Filing cabinets, containers with drawers and shelves can all be found in matching colors and patterns in most stores or places like PB (Pottery Barn) Teen. Talking to a roommate about how much room is available for storage items, a refrigerator, and a microwave. Then deciding on a color scheme will make the purchase of shelving and storing units much simpler.

Organization skills are very important for students who are committed to getting good grades, and having a convenient but attractive place to keep things will help both roommates stay motivated in keeping the room clean.

College Dorm Room Furniture

For rooms that can fit a futon, they make great places to sit and eat, work on homework or watch TV. Finding a futon with a cushion colored to match the decorations of both roommates should be simple, and having a comfortable place to sit and talk can be a great way to break the ice for new roommates.

If a university does not provide a desk, places like Walmart and Meijer sell inexpensive desk and chair sets that would be perfect for use in a dorm room. As most desks also end up being tables, it’s a good idea to find one that won’t be damaged by spilled liquids or heat. Having an extra chair can also be nice for students who plan on having company as well, if a futon would take up too much space.

Decorating Dorms with Posters

Most dorm room walls are white or gray cinder block walls – not much to look at. Adding posters, pictures or paintings can instantly make a room more comfortable and homey for the students. It’s important to communicate with roommates on how much wall space each person gets, what types of images may be offensive, and start there.

Picking posters and pictures that remind a student of favorite movies, good memories from home, or are familiar and fun can add a dimension of comfort to the room from day one. Sprucing up the bare look of the room will help students make the transition from home to school without too much trouble.

Buying inexpensive posters online can help avoid students needing to get frames for posters. Most colleges will not allow students to nail things to the wall. So buying a poster that can get torn or ruined after a year or two of use is financially wise.

Choosing Curtains for Dorm Room Windows

Windows in dorms are generally small, but often come with a shade and a curtain rod if students wish to buy curtains to go with the room. Again, communication with roommates on who will bring curtains and what color they will be is essential in making sure that the curtains chosen will coordinate with the room’s ambiance.

Buying inexpensive curtains that will help block or allow sunlight and maintain the temperature of the room will be essential in making the dorm feel more comfortable for the students. Adding colorful and patterned curtains will also improve the look of even the barest room.

While moving away from home, there are simple things any student can do to make a small dorm room feel comfortable enough to become a second home. By communicating with roommates, selecting durable bedspreads and sheets, decorating the dorm room walls and keeping organized, any student will be much better suited to college life.

About the author: Erica R. Gibson is a content writer on essaywritercheap.org. She writes primarily on the subject of technology and is interested in keeping up with the latest developments in her field. She spends her free time reading blogs and discovering new ways to improve her writing skills.

2022 Halloween Decorated Houses

RH Business Marketing Solutions

Looking to get out of the house during the spooky season to find the best decorated houses in the South Suburbs? Good thing we’ve got you covered. Every year we personally collect and modify a list to compose one giant cheat sheet for everyone to see the best decorated houses. If you do go out and enjoy the houses on this list, please be considerate of their neighbors. Have a wonderful time!

If you are interested in getting on our list for the upcoming years, please email us at kevinszabojrplumbing@yahoo.com with pictures and/or videos of your decorations, as well as your “name” for the decorations and address.

Plumbing Considerations When Remodeling Your Kitchen

RH Business Marketing Solutions

The kitchen is a vital part of every home. After all, it is where all the food is made, prepared, and enjoyed. This is why it is a must to have a clean, tidy, and operational kitchen. Remodeling can be challenging even for a seasoned veteran, but it can bring many benefits. Remodeling also opens up space for other considerations, such as plumbing. Plumbing is crucial to every good kitchen and should also receive good treatment. Remodeling your kitchen leaves you a place to do just that. Taking care of your plumbing means investing in the future and also reducing the chance of many things going wrong. In this article, we will be discussing some of the plumbing considerations when remodeling your kitchen.

Remodeling your kitchen

Remodeling is an excellent way to boost the productivity of your kitchen. But making specific changes can also mean that you will have to put a halt to the usage of that kitchen. Not all remodeling changes are significant and require a lot of your attention. Some of them, though, require you to think about rerouting plumbing and electricity, making it a challenging process. Before we head deeper into plumbing considerations, let's take a quick look at what improvements you can apply to your kitchen when remodeling:

 · touchless faucets

· beverage stations

· island sinks

· additional pantries

· water filtration system

At Kevin Szabo Jr Plumbing, we know that these remodeling changes can be an excellent opportunity to undergo some of the plumbing changes as well. Some of them definitely entail that some plumbing changes will occur. Knowing the scope of the remodeling can significantly help when undergoing plumbing changes, so everything falls into place as it should.

Plumbing Considerations When Remodeling

When undergoing kitchen remodeling, it is best to know what you will be doing. Understanding the scope of the process and what parts of the current setup will be changing is the key to success. This is very important as you can find yourself changing many things, only to find out that plumbing and electricity haven't been changed at all and can't fit into remodeled kitchen. Experts at Pro Movers Miami suggest measuring and accounting for both remodeling and plumbing rerouting. 

Rerouting your pipes

Let's be real now, rerouting pipes is probably a must when remodeling your kitchen. As this can be a reasonably challenging process, it can also be an opportunity to improve. This means it will take additional effort and time to rearrange all the pipes to complement the new kitchen design. But it is also a great way to replace old or unfunctional pipes that are not only a liability but also a danger. Broken or leaking pipes, if left unchecked, will cause significant damage to your property and should be dealt with as soon as possible. Putting in new and modern pipes will drastically lower the chances any of these mishaps will happen along the way. Investing in pipes is a good investment in the future.

Remodeling your kitchen is an excellent time for rerouting the plumbing pipes.

Shutoffs as one of the important plumbing considerations when remodeling your kitchen

Remodeling your kitchen is an excellent time to invest in shutoffs. Shutoffs are necessary when taking full control of your appliances. Dishwashers, sinks, and refrigerators can all be fitted with shutoffs, so you can handle how much of the water they will receive. This will help you act against any leakage that can occur. This is a smart and relatively cheap plumbing consideration that can significantly help you.

Additional plumbing when remodeling

Sometimes when undergoing kitchen remodeling, it can be an excellent time to install additional plumbing. The old plumbing system may not be adequate enough to support new appliances and whole kitchen remodeling. You may opt-in to add additional appliances, or a second dishwasher, meaning your old plumbing system may struggle to deliver. This is why contacting your expert plumber to help you with the project and assess the necessity of additional plumbing may be a great strategy.

If you have any plumbing considerations when remodeling your kitchen, contact your expert plumber.

Remodeling your kitchen on a budget

But what if you don't have enough money for extensive remodeling? Well, to be fair, although kitchen remodeling can be very much a steep endeavor, there are more affordable ways to do this. To remodel your kitchen without breaking the bank, there are a couple of things to do. You can go with making a new paint layer for your kitchen or opt for not buying everything new. You also don't have to break the old tiles and, instead, invest in lighting. Lighting is an excellent and cheap way to bring out the best in your new kitchen.

Appliances and kitchen remodeling

Appliances play a considerable part in every kitchen and its remodeling. When undergoing remodeling, it is very common to change your old appliances. No matter which of them you choose, they will probably run on water or gas. This is why you may also consider upgrading your current pipes or plumbing system. Modern-day appliances sometimes rely on, for example, bigger water consumption instead of electricity. New supply lines, waste lines, gas lines, garbage disposals, and hot and cold water supply lines may also be needed. Consider all of them when remodeling your kitchen to have maximum effect.

New appliances require some plumbing changes

Water filtration system

If you are undergoing remodeling of your kitchen, it can be an excellent time to consider installing a water filtration system. A water filtration system helps you filtrate the water coming to your tap and has many benefits. Probably the biggest pro of a water filtration system is the money you will save. Clear water for everyday use and low cost for basic home maintenance are also great parts of owning one such system. Although reasonably cheap, it requires some preparation, and kitchen remodeling represents an excellent opportunity.

There are many plumbing considerations when remodeling your kitchen to think about. No matter which one of them you consider applying, they will surely bring great benefits to your cause.

Guest Contributor: Sophia Perry

How to Keep Your Home's Backyard Lawn Looking Green & Healthy

RH Business Marketing Solutions

There's nothing quite like a well-manicured backyard lawn to bring a home's exterior together. A green and healthy lawn can also provide a great place for your family to relax and play. However, maintaining a beautiful backyard lawn can be difficult - especially during the hot summer months. Follow these tips to help keep your home's backyard lawn looking its best all year.

1. Mow Regularly

Mowing your lawn regularly is one of the most important things you can do to keep it looking its best. Be sure to mow at the proper height for your grass type - too short, and you'll damage the grass; too tall will be more difficult to manage.

If you have a lot of trees or other obstacles in your yard, consider investing in a self-propelled mower to make the job easier. And, if you want to take your lawn care to the next level, try using a mulching mower - they're great for maintaining healthy grass and keeping your lawn neat.

Regularly trimming your lawn will ensure that it looks its best. Be sure to use the proper tools and techniques for your grass type to avoid damaging it. Also, if you have any dead patches on your lawn, reseed them as soon as possible. This will help ensure that your lawn looks its best and stays healthy.


2. Fertilize Regularly

Fertilizing your lawn regularly is another important step in keeping it looking its best. Be sure to use a fertilizer specifically designed for your grass type - using the wrong fertilizer can damage your lawn.

Apply fertilizer to your lawn according to the instructions on the package. Be sure to water the fertilizer into the ground well so the roots can absorb it. Also, be sure to fertilize at the proper time of year - too early or too late, and you could damage your lawn.


3. Water Deeply and Less Often

One of the most common mistakes people make when watering their lawns is to water too frequently and not deeply enough. This can damage the roots of the grass and make it more difficult for your lawn to stay healthy.

Instead, water your lawn deeply and less often. This will encourage the roots to grow deeper into the ground, making your lawn more resilient and better able to withstand periods of drought. Be sure to water in the early morning, so the grass has time to dry before nightfall.

4. Aerate Your Lawn

Aerating your lawn is another important step in keeping it healthy. Aeration involves drilling tiny holes in the earth to give air, water, and nutrients access to the roots. You can use a hand aerator or a power aerator for this.

It helps to improve drainage and reduce compaction, which can damage the roots of the grass. It also allows air and water to reach the roots of the grass more easily, which helps to promote a healthy lawn.

Aerating your lawn is best done before the first frost in the fall. Be sure to use an aerator designed for your grass type - using the wrong type of aerator can damage your lawn. Also, follow the instructions carefully so you don't damage your lawn while aerating.


5. Use Fake Grass

If you want a lawn that looks green and healthy all year long without any hassles, consider NexGen Lawns' fake grass backyard. Fake grass is made from synthetic materials that look and feel like real grass. It is easy to install and requires no maintenance - simply sit back and enjoy your beautiful, green lawn!

For individuals who don't have the time or inclination to maintain real grass, fake grass is an excellent alternative. It is also a great option for people with allergies - since there is no real grass to trigger allergies. It is a great way to enjoy the outdoors without worrying about allergic reactions.


Conclusion

Caring for your lawn can be a lot of work, but having a green, healthy lawn that you can enjoy all season long is worth it. Be sure to follow these tips to keep your lawn looking its best. And if you don't have the time or patience to care for a real lawn, consider using fake grass. It is a great way to enjoy the outdoors without all of the hassles!

Guest Contributor: Maggie Bloom

5 Real Estate Photo Tips to Sell Your House

RH Business Marketing Solutions

Are you thinking of selling your house? Whether you're moving to a new neighbourhood or just want to upgrade, getting your home ready for sale can be a lot of work. People are visual, and if your pictures don’t make them want to see more, they’re going to move on to the next listing.

Of course, you can hire a professional photographer to take photos of your property. A professional photographer will know how to capture the best angles of your home and make it look its best. Additionally, a professional photographer will have the right equipment to take high-quality photos.

If you don’t want to hire a professional that doesn’t mean to have to be left behind in the property-selling game. With the right photo tips, you can make your place look picture-perfect and help it sell fast. Here are five tips to take better real estate photos that will help get buyers through your door.

1. Choose a Good Camera

When it comes to taking photos of your home, you want to make sure you use the best camera possible. After all, these are photos that you'll be sharing with potential buyers, and you want them to be high quality. There are a few things to keep in mind when choosing a camera for real estate photos.

First, you'll want to make sure the camera has the capacity for interchangeable lenses. You'll also want to choose a camera with good low-light performance. Real estate photos are often taken in rooms with limited natural light, so a camera that can still take great photos in low light is essential.

Finally, you should consider a camera with image stabilization for clear pictures. If your camera doesn’t have stabilization, consider getting a tripod. This will help ensure that your photos are stable and don't have any blurriness.

2. Choose the Right Time of Day

When it comes to taking photos of your home, timing is everything. Whenever possible, you should try to use natural lighting in your photos. Using natural lighting will help to make the colors in your photos pop and will give the space a bright and airy feel. This means taking photos during the daytime hours when there is plenty of sunlight coming in through the windows.

The best time of day to take photos is in the early morning or late afternoon when the light is soft and flattering. Avoid taking photos during the midday sun, as the harsh light can cast unflattering shadows on your property. 

3. Stage Your Home

Before taking photos of your home, take some time to stage it. Staging involves arranging furniture and decor in a way that is pleasing to the eye and makes your home look its best. You want potential buyers to be able to envision themselves living in your home, so make sure it looks warm and inviting.

Spend some time looking at good real estate or interior design trends for inspiration. Take notes of which elements you can apply to your own home.

Like any kind of product photography, you want to show your home in its best light. Get rid of any clutter that may be in the room. This includes items such as toys, clothes, dishes, and anything else that may make the space look cluttered or messy. Removing clutter from your photos will make the rooms look larger and more inviting, which will appeal to potential buyers.

4. Use a Wide-Angle Lens

One of the most important real estate photo tips is to use a wide-angle lens. This will allow you to capture more of the room in your photo, which will give potential buyers a better sense of the space. Additionally, using a wide-angle lens will help to make rooms look larger than they actually are, which is always a plus when selling a home.

A wide-angle lens will also help to reduce distortion and make straight lines appear straighter. However, camera lenses are often the most expensive part of a photographer's gear. If you're not sure which lens to use, ask a professional photographer or rent a lens from a camera store.

5. Edit Your Photos

Once you've taken some photos of your home, don't forget to edit them! Editing your photos can help to improve their quality and make them more appealing to potential buyers. There are a number of different photo editing software programs available. You don’t need to be a computer whizz to learn the basics with help from a few online tutorials!

Make sure that any small details in your interior photos, such as cabinet hardware or doorknobs, are clearly visible. This can be a great selling point for potential buyers! Be sure to crop out any unwanted distractions, and use filters to enhance the colors and contrast.

Conclusion

With careful planning and attention to detail, you can take amazing real estate photos of your own home that will impress potential buyers and make your property stand out from the competition. By following these tips, you can help ensure that your photos are high-quality and will appeal to potential buyers. Look here for more information on how to enhance your real estate photos and increase your chances of selling your house.

Guest Contributor: Emma Murphy

How Much Does A Furnace Installation Cost In 2022?

RH Business Marketing Solutions

A furnace is your home’s primary heat source. It produces heat and distributes it evenly throughout your home via air vents and ducts. Hence, it’s important to ensure that it’s in good working condition, especially if you live in a cold region. 

However, the older your furnace gets, the more likely it’ll break. If that happens, you’ll need to have your furnace replaced with a new one. Also, don’t hesitate to ask furnace installation experts for assistance whenever necessary. 

When your furnace is no longer functional, the cost of a new one will be one of your top concerns. Installing a new furnace typically costs between USD$2,800 and USD$7,000; however, many factors can affect the final number.

So, what are these factors, anyway? This article will explain the cost of furnace installation, including the elements that drive it up and down. By reading this guide, you’ll be able to prepare yourself ahead of time. After all, addressing furnace issues can be expensive.

The Type Of Furnace

Although furnaces have similar functions and attributes, they’re not powered in the same manner. Some furnaces operate using electricity, while others use natural gas or oil.

Here are the three types of furnaces you’ll need to know:

  • Electric Furnace: This type of furnace costs around USD$2,000 to USD$7,000. It generates heat using electricity via heat coils; then, it’ll be distributed across your home through your air vents and ducts. However, you have nothing to worry about as it doesn’t use too much electricity to function.

  • Gas Furnace: Unlike electric furnaces, a gas furnace uses natural gas to produce and distribute heat across your home. The cost of installing a gas furnace may cost between USD$3,000 and USD$10,000, depending on its efficiency, whether high or low. Of course, a high-efficiency gas furnace costs more than a low-efficiency one.

  • Oil Furnace: This type of furnace uses neither gas nor electricity, but oil to generate and distribute heat. It’s also the most expensive type of furnace, costing between USD$6,000 and USD$10,000 (or even higher) to install. However, it’s found to be safer than gas furnaces because it’s less likely to cause leaks and explosions. 

If you want to save on your new furnace, go for the electric one. It’s efficient and doesn’t require too much electricity to operate. However, it doesn’t live long, unlike gas and oil furnaces, which have a lifespan of a decade or more when maintained properly.

Size Of A Furnace

The size of a furnace is measured in British thermal unit (BTU), depending on the size of your home. To compute the right furnace size, get the measurement of your home in square feet and multiply it by 40.

For example, if your home measures 3,000 square feet, you’ll need a 120,000-BTU furnace. You can go more than that if you live in extremely cold regions.

Generally, the cost is around USD$2,000 per 1000 square feet, which has about 40,000 BTUs. A larger home may go as high as USD$7,000. And, if your home has plenty of ceiling windows, consider a higher BTU because it allows more heat to penetrate your home.

Furnace Efficiency

Efficiency is an important factor to consider when choosing a furnace. If a furnace produces and distributes heat efficiently, you’ll be able to save more energy and money in the long run. However, high-efficiency appliances tend to be more expensive than those that aren’t, although they help save you a lot over time by lowering your consumption.

To determine if one is more efficient than the other, obtain their average monthly energy consumption. If it’s 25% more efficient than your current furnace, then that’s what you need to purchase.

Brand 

The furnace brand is another important factor to consider. Most popular furnace brands cost more than those who aren’t. But, it doesn’t mean that those who are cheaper than them aren’t up to the task. Sometimes, less popular brands are more efficient than popular brands. So, make sure to research both popular and less popular brands before making a decision.

When Should You Install A New Furnace?

Here are the telltale signs that you need to install a new furnace:

  • If your furnace is 15 years or older

  • If it starts to produce unnecessary noise

  • If it gets louder and louder over time

  • If some parts of your home don’t get warm

  • If it gets rusty 

  • If some functions aren’t working properly

  • If your energy consumption or bill suddenly increases

Final Words

Installing a new furnace may be required if you don’t have one yet or if your current one shows signs of malfunction. The cost typically goes around USD$2,000 to USD$7,000 (or even higher), but it depends on some factors. These include the type, size, efficiency, and brand of the furnace. To determine what’s best for your home and your budget, consult a furnace installation expert right away.

How To Find Interesting & Creative Ideas For Plumbing Content?

RH Business Marketing Solutions

The competition in the plumbing business is high, just like in any other industry. That is why plumbing businesses use various approaches to promote their services and stand out from competitors, one of which is content marketing. Despite the narrow specialization, there are tons of ideas for creative plumbing content you can apply from your website as well as social media content. And further, we would like to name the most appropriate of these content ideas.

Creative ideas for plumbing content

Share useful facts about plumbing

Social media is an excellent tool to reveal the professionalism of your services to the audience and build the face of your brand online. So the first idea you can consider for your plumbing content is sharing useful facts and myths about plumbing with your followers. You can dedicate the writing of this information to your experts, or your content writers who you can hire on the writing service Best Writers Online and who should always consult with your engineers to ensure the facts are true, whether this information is related to some historic knowledge or common everyday tips for your clients.

Show your services in progress

Another great benefit of having social media for your plumbing company is the capability of sharing not only text but also visual content. For example, you can post a photo or video before\after content to show the process of working with your specialists, what problems your customers had and how your company helped them. Or if you produce plumbing products, you can also share the process of creation of the next order for your customers, the completed results, and reviews whether the orders are according to customers' expectations. By the way, if you are going to share some cases or products, make sure your clients don't mind sharing this information about their orders.

Do-it-yourself videos are a good idea

One more creative content idea based on reviews from the writing service Writing Judge for promoting your plumbing services is creating DIY (do it yourself) videos. It can be short instructions on how to care for plumbing products or their serviceability at home, without even calling plumbers. Surely, your customer will not be capable of doing the serious repair on their own but sharing some tricks shows your reliability and willingness to be useful to followers. Such types of videos are commonly viral and get high views and shares among other users on certain social media, not just your followers.

Provide social media account for each physical location separately

If your plumbing business has different physical locations in different cities, we recommend having different social media profiles for each location. Foremost, it will be more convenient for your clients to make an order or consult about the required services. Secondly, the content is variable due to the location it is targeted to, meaning people perceive information differently. For example, a joke at one place may not be clear to people from another location. Having different social media profiles will help to differentiate the type of content and make it more personalized for your audience. Moreover, it increases the chances of choosing exactly your company instead of competitors due to the various location keywords included in the posts.

Promote our services in videos

Video is always a working tool to attract more followers to the business's social media accounts. One more idea for your video marketing strategy is filming how-to guides. It is not about what your followers can do on their own, these videos are made for the purpose of showing all your services in action. Such videos can be of different lengths. Surely, people are not willing to watch 45 minutes of repairing the toilet but you can upload an expanded review of this or that service on your YouTube channel, for example. This is a kind of landing page on your website, but you precisely show how your team works.

Publish testimonials from your clients

And the last idea for writing plumbing content we would like to mention is posting testimonials from your real clients. These days, text reviews are not working well. That is why we recommend filming video testimonials with your clients, where they can discuss your cooperation in detail, including advantages and disadvantages. The more real reviews you post on social media, the more credibility and reliability it adds to your plumbing services, enabling your followers to purchase exactly your company for their needs. In addition, you can ask your client to leave reviews on Google and Facebook, where they cannot be falsified in any way.


Taking everything into account, we also would like to suggest you test various content marketing tools and approaches to better learn the preferences of your audience and provide them with relevant content. Don't compare your content approach with competitors, as some approach doesn't work for them, it can work profitably for your plumbing business.

Guest Contributor: Frank Hamilton

These 6 Tricks Will Give Your Home A Brand New Look

RH Business Marketing Solutions

Do you wish your house looked different every day? Do you find yourself exhausted by the same old furnishings and décor? If that's the case, it's time for a change! In this article, we will discuss six ways to give your home a brand-new look. Whether you are looking to make a few small changes or a complete overhaul, these tips will help get you started. So what are you waiting for? Get creative and start decorating!

1. Change out the textiles

One easy way to give your home a fresh look is to switch out the textiles. This includes things like throw pillows, blankets, towels, and rugs. If you have a lot of patterns and colors in your home, try switching to more neutral tones. This can help create a calming atmosphere in your space. You can also experiment with different textures to add interest. For example, try pairing a soft velvet pillow with a rough-hewn wool blanket.

If you are looking for something more dramatic, you can also change out your window treatments. This is a great way to add color or pattern to your space. Consider using curtains or drapes in a bold print or bright color. You can also add shutters or blinds to give your windows a new look.

2. Update the flooring

Another easy way to change the look of your home is to update the flooring. If you have a tired, old carpet, try replacing it with hardwood floors or tile. This can brighten up any space and make it look more modern. Otherwise, you can choose to do concrete floor polishing to make your floors shine. If you are looking for a more temporary solution, you can always add area rugs. This is a great way to experiment with different colors and patterns without making a long-term commitment. You can find area rugs in a variety of sizes, shapes, and colors to suit any space.

3. Update the hardware

Updating the hardware is a small change that can make a big impact. This includes things like door knobs, cabinet pulls, and light fixtures. If your hardware is looking dated, consider replacing it with something new. You can find plenty of great options at your local home improvement store. When choosing new hardware, be sure to think about the finish. You want it to coordinate with the other elements in your room. For example, if you have brass fixtures, you might want to choose hardware with a similar finish.

4. Paint the walls

One of the quickest and easiest ways to give your home a new look is to paint the walls. This is a great way to add color and personality to your space. When choosing a paint color, be sure to think about the mood you want to create. For example, if you are looking for a calming space, you might want to choose a light blue or green. If you are looking for a more energizing space, you might want to choose a bright color like yellow or orange.

5. Add new lighting

Adding new lighting is a great way to change the look and feel of your home. If you are looking for a more dramatic change, you can replace your old light fixtures with new ones. This is a great way to add personality to your space. When choosing new fixtures, be sure to think about the style and finish. You want it to coordinate with the other elements in your room.

If you are looking for a more subtle change, you can also add new lamps or sconces. This is a great way to add additional light to a room without making too much of a change. When choosing new lighting, be sure to think about the function of the space. You want to make sure the light is adequate for the task at hand. For example, if you are looking for a reading lamp, you will want something that emits a lot of light.

6. Add new accessories

Adding new accessories is a great way to change the look of your home without making too much of a change. This includes things like pillows, rugs, and décor. When choosing new accessories, be sure to think about the colors and patterns you want to use. You can use these elements to add personality to your space.

If you are looking for a more permanent change, you can also consider adding new artwork. This is a great way to add color and personality to your space. When choosing new artwork, be sure to think about the scale and placement. You want the piece to fit well in the room and complement the existing décor. 

Here are just a few of the many methods you may use to give your house a fresh new appearance. You can make a big difference with a little bit of planning and effort. So get started today and see what you can accomplish!

How To Dissolve Toilet Paper Clog? - Clear Sewerage Line

RH Business Marketing Solutions

The great life of the home with family is interrupted when a toilet paper clog happens. Blockages in sewerage pipes can cause many other problems in the house that may lead to financial loss. How To Dissolve Toilet Paper Clog is very important for you as this problem forces you to hire an expert plumber.

How to Unclog a Toilet: Pro Techniques - YouTube

How To Dissolve Toilet Paper Clog? - Troubleshoot Easy On Finger Tips

Toilet paper is the most common cause of clogging in the bathroom. Toilet paper, or TP, is commonly made from wood pulp and other chemicals such as bleach, starch, and perfumes. When flushed down a toilet, it dissolves quickly into small pieces that are too small to be seen by the naked eye. Read on if

Reasons For Clog Due To Toilet Paper

A toilet paper clog occurs when the toilet paper does not completely flush down the drain. The toilet paper forms a ball in the sewerage pipe and blocks the water flow. It is important to dissolve this ball to prevent it from blocking more pipes and causing more problems.

Causes include:

- Improper installation of the toilet paper holder

- Overflowing of water in the tank

- Use of feminine hygiene products by women

- Use of facial tissue to wipe up after going to the bathroom

There could be some other reasons as well, like;

1) The toilet paper was not flushed properly and formed a ball in the pipe.

2) You attempted to flush too much toilet paper at once, which caused it to stick together and form a blockage.

3) The pipes were not cleaned regularly or were full of grease and other debris that got stuck onto the sides of the pipes during use.

What Are The Effects Of Toilet Paper Clog

Many homeowners neglect home maintenance, resulting in costly problems, particularly plumbing issues like a leaky faucet and toilet paper clog.

The most obvious effect of a toilet paper clog is a blockage in the toilet drain. Excessive toilet paper or other materials accumulating and obstructing the pipes can prevent water from flowing freely. As a result, water backup occurs, leading to overflowing or difficulty in flushing. 

If a clogged toilet overflows, it can cause water damage to your bathroom or adjacent areas, causing soaked floors, walls, and carpets. These problems can lead to stains, structural damage, and potential mold growth if not addressed promptly. 

In addition, repeated or severe toilet paper clogs can strain your plumbing system, potentially causing damage to pipes, seals, or other components. Sometimes, it may require professional intervention to clear the clog and repair any plumbing issues. 

A toilet paper clog can cause a sewer backup in more severe cases. If the clog extends beyond the toilet drain and affects the main sewer line, it can result in wastewater backing into your home. This plumbing situation can be unsanitary and hazardous, requiring immediate attention and professional assistance from an Orlando plumber or one in your local area. 

A clogged toilet can be inconvenient and uncomfortable, especially with limited bathroom facilities. It can disrupt your daily routine, causing stress and frustration. To prevent toilet paper clogs, use an appropriate amount of toilet paper, avoid flushing other items like wet wipes or feminine hygiene products, and ensure proper plumbing system maintenance.

Ways To Dissolve

If you have toilet paper clogged in your home, here are some ways to dissolve it. We are describing a few of those here in this article. The most common way to dissolve toilet paper is by using a chemical solution, but there are other ways that we will discuss.

Use Of Water

The first thing that happens is that the water washes away all the chemicals and bleaching agents from the toilet paper. This helps to remove stains from clothing and other materials. After this process, most of the water has been removed from the TP, leaving only some fibers behind, which can then be washed away with more water. The small number of remaining fibers are then flushed down into your sewerage pipes, where they eventually reach your septic tank if you have one installed at your home or apartment building.

Use Drain Cleaner

One of the most effective ways to dissolve a toilet paper clog is by using a drain cleaner or liquid plumber. It's important to follow all packaging directions carefully when using this type of product because it can be extremely dangerous if used improperly. After pouring this chemical down your toilet bowl, wait about an hour before flushing again to see if it works. If not, try another method listed below.

Boiling Water In A Bucket

Another way to dissolve a toilet paper clog is by catching the water in a bucket and pouring boiling water down the drain after rinsing out the sink with cold water. This process will allow you to remove any remaining debris that might be stuck inside your pipes so they can function properly again after they've been cleaned out completely with boiling water.

Hot Water With Vigorous Towel Rubbing

Another best method is to use hot water in a bucket and vigorous rubbing with a towel or sponge to break apart the fibers. This will eliminate most of them, but not all, so you will still need to follow up with a chemical agent if you want to get rid of them at once.

Using Plunger With Chemicals

You can also use bleach for this purpose and some other chemicals designed specifically for dissolving toilet paper clogs in drains and pipes. These products contain chemicals such as sodium hypochlorite (NaClO) or hydrogen peroxide (H2O2). When these chemicals come into contact with toilet paper, they will begin to break down the fibers, allowing you to flush away the rest of the toilet paper without any more problems.

Method To Use

  • The first thing that you need to do is pour a generous amount of your chemical down on top of the clog. 

  • Make sure that it covers every inch of it so that it has a chance to work properly. 

  • After doing this, allow the chemical to sit on top of the clog for at least 10 minutes before using any drain cleaner containing acid. This will give you enough time for your chemical to do its job properly before adding more chemicals to your problem area.

  • After waiting 10 minutes, use a plunger and plunge into your toilet bowl several times until all of the water comes out completely clean from underneath the plunger head itself. If this does not work, repeat this process again until you have no more water coming up from under the plunger head.

  • Once you are done plunging, flush your toilet and see if it drains properly. If it does not drain properly, then repeat steps 1- 4 times until it does.

    Vinegar and Baking Soda

Combining vinegar and baking soda is one of the most popular remedies for unclogging toilets. The acid in the vinegar helps dissolve the buildup, while the baking soda helps neutralize it. To use this method:

  1. Pour 2 cups (480 ml) of white vinegar into the toilet bowl.

  2. Pour 1/2 cup (120 ml) of baking soda into the water in the bowl.

  3. Once it sits for 15 minutes, flush the toilet again.

Plunger

A plunger is another common tool for unclogging toilets that forces air into the clogging material so it can push out of its place in the pipe system. To use this method, place a bucket under your toilet bowl before plunging because there will be some splashing when you plunge and flush again — if you don't have one already, buy one from any hardware store or home goods store near you. Next, lift the plunger handle so that it fits snugly over the base of your toilet bowl. Then lower it down over the hole in your toilet with enough force to create suction between the plunger head and the water in your bowl. Pump up and down several times until the water starts flowing freely from your toilet.

Conclusion

The toilet paper may get clogged and cause a bad smell in your bathroom. Sink overflow while the toilet is flushed or the water pressure is strong. That is why we have searched extensively on the internet and consulted several plumbers. Still, we could not find a conclusive answer or a specific method to dissolve the toilet paper clog. As such, we can only suggest you some general ways that are supposed to dissolve the toilet paper, however unlikely they might seem. We suggest you find the solution to your problems regarding bathroom savage or others, visit Bath Tricks - Ultimate Bathroom Buyer's Guides and Reviews.

Guest Contributor: Rijay Fatima