Google+

contact us

Use the form on the right to contact us.

Day or Night, we are here to serve you. Leave your plumbing problem to us.


Tinley Park, IL

(708)845-7922

Residential and Commercial plumbers and plumbing contractors available in Orland Park, Tinley Park, Oak Lawn, Palos Heights, Midlothian, Oak Forest, Homer Glen, Mokena, Frankfort, and the surrounding Chicago South Suburbs. Emergency plumbers.

copper water lines.jpg

Kevin Szabo Jr Plumbing Blog

Kevin Szabo Jr Plumbing is Tinley Park, Orland Park, Oak Forest, Midlothian, Orland Hill, Homer Glen, Mokena, Frankfort, Crestwood, Palos Heights, Oak Lawn, local plumber. Read our blog for advice, tips, a good laugh, and basic home improvement.

**We are moving our old blog to our new and improved website. Too see all our posts visit kevinszabojrplumbing.blogspot.com

Filtering by Category: August 2022

7 Common Causes Of Water Damage In Your Home

RH Business Marketing Solutions

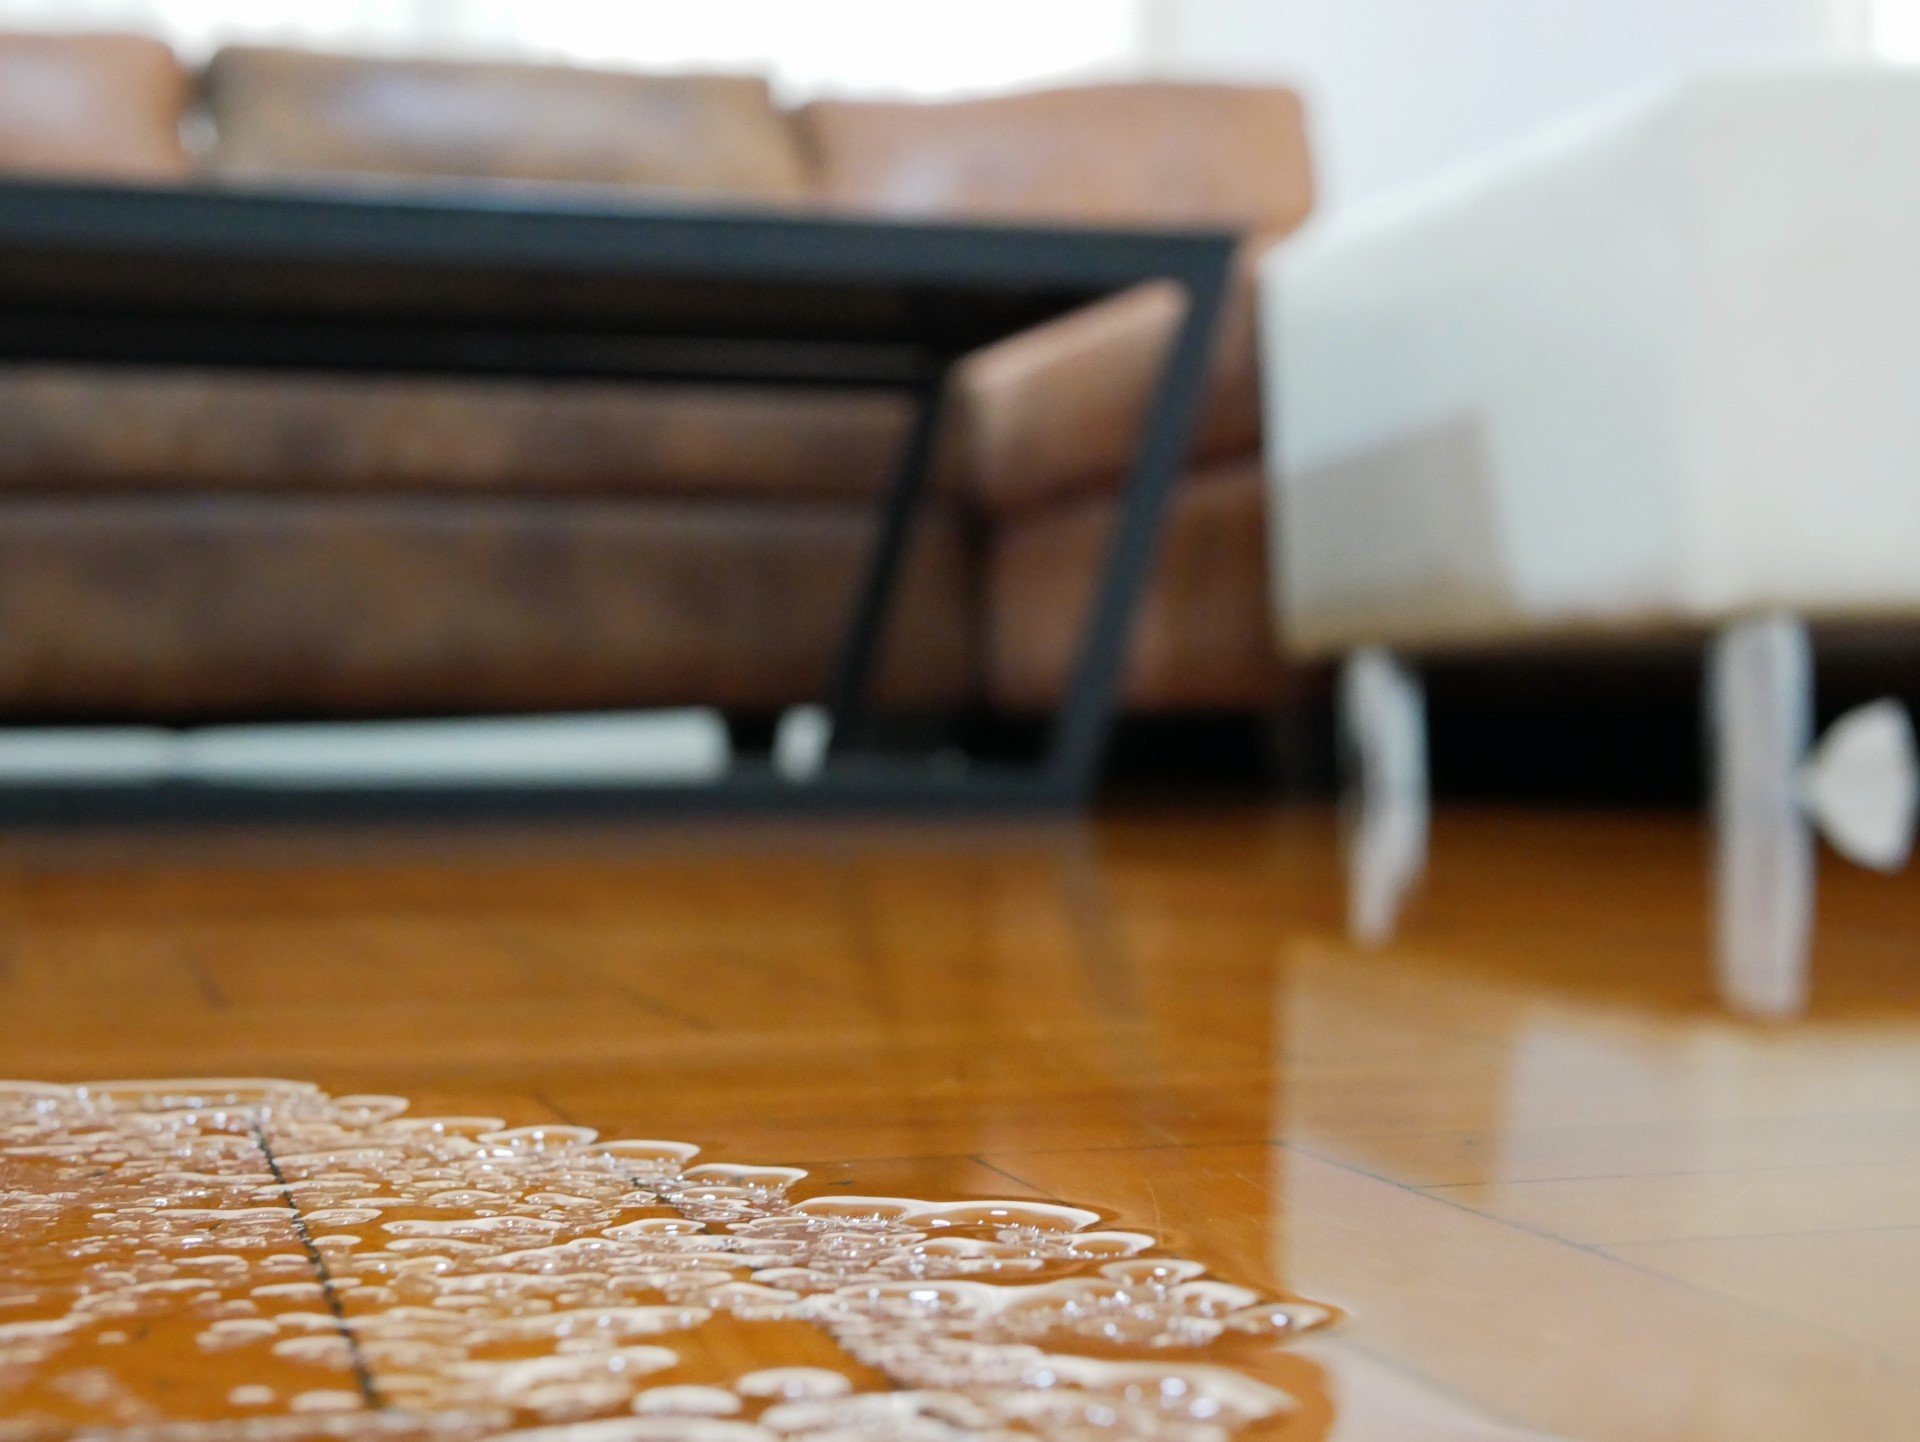
Water damage can be a huge problem for any homeowner. Not only is it unsightly, but it can also lead to mold growth and structural damage. Apart from these issues, water damage can also lead to health problems. 

Unfortunately, it can also be one of the most expensive to repair. Water damage can occur for various reasons, ranging from plumbing leaks to heavy rains. Therefore, it's essential to be aware of them so you can take steps to prevent them.

Here are seven of the most common causes of water damage in homes:

1. Leaking Or Burst Pipes

One of the most common causes of water damage in your home is leaking or burst pipes. This can happen for many reasons, such as wear and tear, freezing temperatures, and tree roots growing into the pipe. If you have a pipe leaking, or if you suspect that your pipes might be at risk of bursting, you should call a plumber immediately to have them fixed. You may visit this page or contact professionals near you to prevent water damage in your home.  

2. Severe Weather

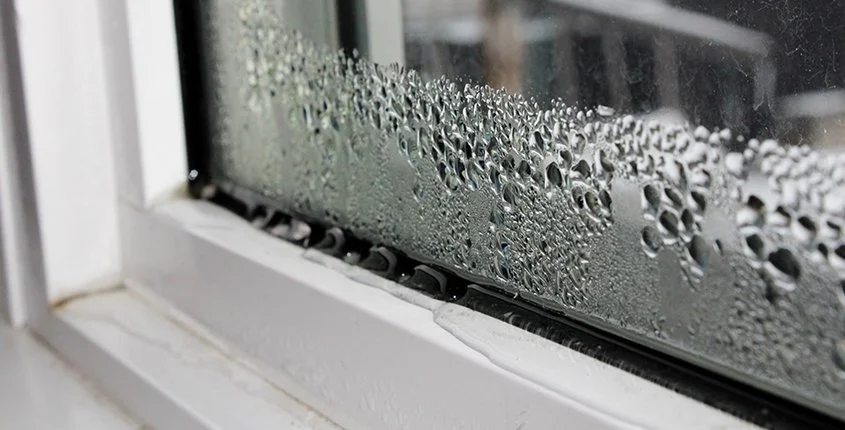
Severe weather is another common cause of water damage in your home. Strong winds can break windows and allow rainwater to enter your home, while heavy rains can cause flooding and leaks. Even something as simple as clogged gutters can lead to water damage, as the accumulated water can seep into your home and cause mold and mildew to grow. As a result, it's important to be prepared for severe weather and take steps to protect your home from water damage. 

For example, you should regularly check your gutters and downspouts to ensure they're clear. Moreover, you should also have a plan for what to do if your home suffers water damage. Being prepared can help minimize the damage caused by severe weather.

3. Sewage Backup

Another common cause of water damage in your home is sewage backup. This occurs when sewage from the main line backs up into your home through the drains. It can happen for many reasons, such as a clog in the main sewer line or a blockage in your home's drains. 

A sewage backup is extremely dangerous as it can contain harmful bacteria and viruses that can cause serious illness. If you suspect a sewage backup in your home, you should call a professional immediately to have it cleaned up.

4. Groundwater Intrusion

Groundwater intrusion can happen without any warning. When groundwater rises due to heavy rains or other conditions, it can seep into foundations and walls, causing severe damage. Sometimes, the water table may rise so high that it floods your basement or crawlspace.  

Even if the water doesn't reach that level, it can still saturate the ground around your foundation, putting pressure on your walls and causing cracking and leaking. Unchecked groundwater intrusion can lead to severe structural problems that can be very expensive to repair. 

5. Appliance Leaks

Washing machines, dishwashers, and water heaters can develop leaks over time. In some cases, the leak may be minor and won't cause much damage. Trouble can start with a small drip, but it doesn't take long for a leaky appliance to cause extensive damage. Water can quickly ruin floors, walls, and ceilings, and it can also lead to the growth of mold and mildew. 

In addition, appliance leaks can be tricky to spot since they may not be immediately visible. A leaky dishwasher, for example, may not show any signs until the floor beneath it is saturated. Therefore, regularly inspecting your appliances for signs of leaking, such as rust or water stains, is important. If you do find a leak, be sure to have it fixed as soon as possible to prevent further damage.

6. Sump Pump Problems

If your home has a sump pump, it's essential to keep an eye on it to ensure it's working correctly. A sump pump is designed to remove water from your home accumulated in the sump pit, typically located in the basement. However, if the sump pump fails or is not working properly, the water can overflow into your home and cause serious damage. Therefore, it's vital to test your sump pump regularly and have it serviced if necessary.

7. Poorly Maintained Gutters

Gutters are essential to your home's drainage system and play a crucial role in preventing water damage. Gutters channel water away from your home and prevent it from seeping into the foundation or leaking into the basement. However, if gutters are not properly maintained, they can become clogged with leaves and debris, which can cause water to back up and overflow.  

In addition, a poorly maintained gut can also lead to leaks and cracks, which can allow water to enter your home. Therefore, it's necessary to regularly clean your gutters and ensure they are in good working condition.

Wrapping Up

Water damage is a serious problem that can cause extensive damage to your home. By being aware of the common causes of water damage, you can be proactive in preventing it from happening. Furthermore, if you experience water damage, it's important to act quickly to minimize it.

DIY Basement Flooring: 10 Flooring Options You Can Choose From

RH Business Marketing Solutions

When you think of a basement floor, "cozy" isn't usually the first thing that comes to mind. Instead, you probably imagine some chilly, hard concrete that becomes disgustingly filthy and makes your feet feel weird after walking across it in socks. But it doesn't have to be that way! With a little bit of effort and the right materials, your basement floor can be transformed into something warm, comfortable, and yes - even cozy.

There are a few things though that you'll need to take into consideration before choosing your new basement flooring, such as:

  • The condition of your existing concrete floor - is it cracks that can be fixed by filling with epoxy, or is it stains, or otherwise in need of repair? 

  • The amount of foot traffic your basement gets - will it be a high traffic area or will it see more occasional use?

  • Your budget for the project - some materials are more expensive than others

Once you've taken those factors into account, you can start exploring the many different basement flooring options that are available to you.

Why Picking the Right Material Matters

When you are trying to figure out what material is best for your home, it's important to understand that not all materials are created equal. There are many factors that come into play when choosing the right flooring. And one of those factors is foot traffic. If your floor experiences high foot traffic, meaning a lot of people are walking on it every day, you want to make sure that the material can withstand that wear and tear.

Next, is the ease of maintenance. You want to choose a material that won't require a lot of work to keep it looking good. If you have to spend hours every week scrubbing and cleaning, it's probably not the best option for you. The weather also contributes to the type of material you should choose. If you live in an area that experiences a lot of moisture, then you want to make sure the material you choose can withstand that moisture without becoming damaged.

Finally, you need to take your budget into consideration. Some materials are more expensive than others and if you're working with a limited budget, you'll need to choose accordingly. But even if you have a limited budget, there are still some great options available that won't break the bank.

Let's take a look at some of the best basement flooring options available.

The Best Flooring Options for Your Basement

1) Laminate Flooring

Laminate flooring is a synthetic material that is made to look like wood. It is composed of multiple layers of material that are fused together with heat and pressure. Laminate flooring is a popular choice because it is very durable and easy to maintain. It is also resistant to scratches, stains, and fading. Nowadays, it comes in a variety of colors, styles, and textures. You can choose from a variety of wood species, including oak, maple, cherry, and more. You can also find laminate flooring that looks like stone or tile plus, using laminate flooring is another way of achieving the look of hardwood floors without the high cost.

Pros:

  • Durable

  • Easy to maintain

  • Resistant to scratches, stains, and fading

  • Inexpensive

Cons:

  • Can't be refinished like real wood

  • Can be damaged by water

2) Engineered Wood Flooring

Engineered wood flooring is a type of wood flooring that is made up of multiple layers of wood. The top layer is a thin veneer of real wood, while the bottom layers are made of plywood or hardwood. Engineered wood flooring is very stable and less likely to warp or cup than solid hardwood floors. It can also be installed over concrete subfloors. Engineered wood comes in a variety of colors, styles, and wood species. It can also be stained and refinished just like solid hardwood floors.

This type of flooring is particularly popular because it is more stable than solid hardwood. In addition, it is also less susceptible to shrinking and expanding with changes in humidity and temperature.

Pros:

  • More stable than solid hardwood

  • Less susceptible to shrinking and expanding

Cons:

  • Can be damaged by water

  • The veneer is not as thick as solid hardwood

3) Solid Wood Flooring

Solid wood flooring is exactly what it sounds like—it is made of solid pieces of wood. It is the most traditional type of wood flooring and has been around for centuries.

Solid wood flooring is very popular because it is very durable and easy to repair. It can also be refinished multiple times, so it can last for many years.

Solid wood flooring comes in a variety of colors, styles, and textures. You can choose from a variety of wood species, including oak, maple, cherry, and more.

Pros:

  • Very durable

  • Easy to repair

  • Can be refinished multiple times

Cons:

  • Can be damaged by water

  • Requires more maintenance than other options

4) Brick Pavers

Brick pavers are a popular choice for basement floors because they are very durable and easy to maintain. They are also resistant to stains and fading. Brick pavers come in a variety of colors, styles, and textures. You can choose from a variety of bricks, including clay, concrete, and more.

Pros:

  • Durable

  • Easy to maintain

  • Resistant to stains and fading

Cons:

  • Can be cold to the touch

5) Bamboo Flooring

Bamboo flooring is a type of wood flooring that is made from the bamboo plant. It is a very popular choice because it is sustainable and environmentally friendly. It is also very durable and easy to maintain.

It is also a popular choice especially in tropical climates because it is resistant to moisture and insects.

Pros:

  • Sustainable and environmentally friendly

  • Durable

  • Easy to maintain

  • Resistant to moisture and insects

Cons:

  • Can be damaged by water

6) Linoleum Flooring

Linoleum flooring is a type of flooring that is made from natural materials, including linseed oil, cork dust, wood flour, and limestone. It is a popular choice for many because it is affordable and easy to maintain. A lot of those who rent their houses choose this flooring option because they can install it themselves.

Pros:

  • Affordable

  • Easy to maintain

  • Can be installed by renters

Cons:

  • Not as durable as other options

  • Subject to staining and fading over time

7) Concrete Flooring

Concrete flooring is a good choice for basements and other areas because not only a concrete floor is a low-cost flooring option, but it is also very durable and easy to maintain. In addition, a concrete basement is also resistant to mold and mildew which is why many people  who have allergies or asthma choose this flooring option.

A concrete floor comes in a variety of colors, styles, and textures. You can try a concrete stain or a sealant to give it a unique look. You can also choose from a wide variety of concrete paints,  which can be used to create different designs to personalize and amp up your living space. This option is quite common in the basement for it is very easy to maintain and easy to clean. However, it requires regular cleaning as it accumulates dirts overtime if it’s not being taken care of.

Pros:

  • Durable

  • Easy to maintain

  • Resistant to mold and mildew

  • Easy to clean

Cons:

  • Can be cold to the touch

  • The surface can be uneven

8) Tile Flooring

Tile flooring is a type of  flooring that is made from a variety of materials, including ceramic, stone, glass, and more. It is a popular choice for many because it is very durable and easy to maintain. In addition, tile floors are also fire resistant which makes them a good choice for homes with young children. IInstalling a tile floor in your basement may be a great way to have some fun with design while also rapidly covering over existing concrete floors.

If you want a tile floor that is warm and comfortable underfoot, it's important to select the right material before installation. A concrete subfloor can be expensive but  they also provide good insulation. If you are looking for an inexpensive option, however, you can always use a self-leveling underlayment  which will help to create a smooth surface for your tiles.

Pros:

  • Can last a lifetime

  • Easy to clean and maintain

  • Fire resistant

  • Can be used to create a variety of designs

Cons:

  • More expensive than other options

  • Can be cold and hard on the feet

9) Carpet Tiles

Consider carpet tiles for a warm and comfortable basement floor that is also easy to install and maintain.  Installing carpet tiles is easy and many homeowners love the idea of carpet floors for basement flooring because  they can add color and style to the space. Not to mention, they are also very affordable. As for designing your basement floors, with carpet tiles, you can create a bright design with various hues or stick to a more traditional hue and contrast combination.

Pros:

  • Can be installed by homeowners

  • Very affordable

  • Add color and style to the space

Cons:

  • Not as durable as other options

  • Can be damaged by water

10) Rubber Tiles

Lastly, rubber flooring is a type of flooring that is made from recycled rubber. It has become a popular choice for many because it is sustainable and environmentally-friendly. These are ideal for family home gyms or anyplace where there is a lot of activity. They can endure a lot of abuse and are great for places that will be subjected to lots of use. Rubber flooring is also very durable, slip-resistant, and easy to clean.

They're also rather low-cost and simple to put together, good for DIY projects. Most homeowners can get their flooring covered in a few hours or less.

Pros:

  • Sustainable and environmentally friendly

  • Durable

  • Slip-resistant

  • Easy to clean

  • Soft and shock-absorbent

Cons:

  • Can be damaged by water

  • Requires more maintenance than other options

Conclusion

There are many different types of flooring ideas that you can choose from for your basement. Each type has its own set of pros and cons that you should consider before making a decision. In the end, it is important to choose a flooring option that is right for your needs and budget.

Guest Contributor: Rachel

6 Tips to Help You Move Into Your New House

RH Business Marketing Solutions

Whether you’re moving to a new home for affordable living or because of a growing family, packing your household stuff, transporting it safely, and organizing it is a daunting feat to achieve. Starting preparation early on and making a solid plan for relocating is a must. Read on as we enlist proven tips to make your relocation to your new home a breeze.

1. Make Inventory

Start with enlisting all of your household items under different categories or color codes. Doing this will help you keep a record of the items. The list can also be used for insurance purposes. After you are done making an inventory, make another list dividing these items into 2 categories: the items you use the most and the stuff that you never use. 

The household items you never use will only take up space while transporting. It's best to de-clutter these items by distributing them to charitable organizations, giving them to a friend, or putting up a yard sale to make use of these items. Packing and moving your stuff will be a lot easier when you have less stuff to deal with. 

2. Inspect The Premises

Before calling the movers, inspect your new household and make sure the property is in tip-top shape. Do a walk of the property to identify any signs of structural damage, sanitary malfunctions, etc. If you want to further upgrade the household by installing an HVAC system or go energy-efficient with solar energy, now is the time to make the necessary upgrades before moving in. 

You should also look at the sales contract if you are purchasing a used home. The sales contract will contain all the relevant information about what will be covered in the contract. You need to keep an eye out when relocating to a used home. Make sure the agreed-upon repairs are done and everything ranging from power outlets to the roof is intact without any issues.     

3. Calling Professional Movers

You might be surprised by the stuff you already have in your household. Packing all the items into boxes, safely transporting, and unpacking is not everyone’s cup of tea. There’s even a possibility that you need to relocate to another state or a city. Transporting on your own is risky as well as time-consuming. By getting a cheap local mover, you can take a load of stress off your hands, as they provide transportation facilities at affordable prices. However, when picking a mover, make sure to check the quality of services they are providing. A reliable mover will have a name in the industry and plenty of testimonials to back their claims. 

Furthermore, compare the quotes each mover provides so you can pick an affordable option. Due to a competitive industry, you will surely get a lower quote from companies. One more thing to look into is reviewing the terms and conditions of your contract. See who will bear liability if an accident occurs and ensure your household goods are transported safely. 

4. Unpacking Stuff

The way you arranged your appliances, furniture, and other household stuff earlier might not be possible in your new home. Instead of replicating the way things were placed in your old home, rethink the arrangement according to the new space. When packing stuff, make sure to use a color-coded system so it becomes easier for you to unpack it later on. 

5. Cleaning The Premises

Before the boxes come in, dedicate some time to deep clean your new home. Even if the contractor or real estate agent has cleaned the space for you, it is still crucial to clean it on your own. Doing this will take care of mold, dander, or debris that might cause allergies or trigger any respiratory illness. Start with cleaning high then go low. 

Lighting, fixtures, ceiling fans, and shelvings should be cleaned first before moving on to the floors. However, if you don’t have the right expertise, consider availing of deep cleaning services that will help in making your new home squeaky clean. 

6. Ask For Help

Whether you hire movers or not, you will still need some help in transporting, packing, and sorting through the stuff. Make sure to inform everyone involved early on so they can join in. Weekends are a great choice as most are off work on weekends, making them free to help out. You can also delegate tasks to friends so the process of moving household items remains streamlined.

The tips we shared above can easily make moving to your new home a hassle-free experience. It’s still a lot of work so never hesitate to seek help, whether you receive it from peers, family, or a service provider. Happy moving! 

6 Tips To Help You Deal With Construction Waste

RH Business Marketing Solutions

Construction waste is one of the biggest issues faced by the world right now. Even though waste of all sorts is dangerous, construction waste poses a special threat. Whether it's wood, cement, or chemicals, they need to be handled in a sophisticated way. Dealing with construction waste can be quite challenging, especially if it's in large quantities. Waste control and disposal are serious matters as they directly impact the environment we live in. In this article, we'll look at 6 tips to help you deal with your construction waste.

1. Reduce The Waste 

To manage your waste properly, the first thing you can do is reduce its creation. Less waste means fewer problems and more waste means more problems. Reduction of waste, however, isn't as easy as it sounds. The idea is to increase the life cycle of old structures and optimize it in a way that you don't have to construct new ones or demolish old ones. This isn't just going to reduce waste but also save you a handsome amount of cash. Once you decrease the sources, the production of waste automatically decreases. 

2. Find Suitable Disposal Techniques 

Waste disposal is one of the most challenging tasks. With a mix of so many materials, it's not feasible to dump them all in one remote location. Disposing of waste needs to be cost-effective, thorough, and safe. As suggested by Virginia Beach dumpster rental services at https://virginia-beach.bintheredumpthatusa.com/dumpster-rental-newport-news-va, use tagged bins for the proper disposal of different types of waste. You can also hire a waste disposal service for this purpose. Make sure that you choose a competent service, one that has the right equipment and knowledge to deal with your waste. 

3. Recycle Your Waste

Recycling your waste can prove extremely beneficial for you. The majority of waste products can be recycled and reused. However, some substances cannot be used for this purpose. Make sure that you're separating the recyclable and non-recyclable materials properly. Many metals, polymers, and construction materials are recyclables and can benefit you further. Wood can be used for furniture while gravel is usually made from recycled concrete waste. Recycling isn't just great for the environment, it can also save you a lot of money on your construction project.

4. Reuse Your Waste

Some waste products can be directly reused. Most products can be incredibly beneficial even though they may seem like trash for your construction project. Gravel and asphalt are the two best examples of this. They can be transported and used in various other projects. Waste reuse is one of the best ways to protect our environment. Materials such as plastics and wood along with insulating materials can directly be used again in one way or the other. Recovered bricks from a demolished structure are likely to be in a good condition to be reused. 

5. Disposal of Hazardous Waste

One of the biggest mistakes people make is the disposal of hazardous waste. It's extremely dangerous for the environment. Some compounds can be carcinogenic as well. Disposal of hazardous waste needs to be taken carefully. Be careful not to mix hazardous waste with normal waste to dispose of it. The best practice is to dispose of these dangerous products at a hazardous waste disposal facility. They are deadly for the environment in the short term as well as the long term. These products need to be carefully processed before disposal. Make sure to label your trash bins so you don't end up mixing such materials with others. 

6. Donate Construction Waste

Sometimes, your trash can be another person's luxury. If you can't find suitable disposal methods, you should consider donating your waste. As we've established earlier, construction waste is dangerous for the environment and it's better if it's reused than thrown away. It can be donated to anyone as building debris can come in handy sometimes. This is also environmentally friendly and can have a positive impact on your construction company's reputation. Moreover, it may also help someone in need. 

Managing construction waste is difficult, to say the least. The first step is to try and reduce the waste produced. Afterward, you can try to recycle the recyclable products. Find ways to reuse your waste as some of the products can be repurposed. Some products just can't be reused or recycled, and you'll need to dispose of them carefully.

Consider hiring a waste disposal service or, if you have the knowledge and equipment, dispose of it yourself. Don't mix hazardous materials with ordinary construction waste as it can be quite problematic. It is of the utmost importance that you manage your waste properly as the majority of the states have waste management laws. 

6 Things To Consider When Changing Your Kitchen Layout

RH Business Marketing Solutions

The kitchen is one of the highlights of your home. Aside from being a space where you spend preparing meals that the family will share, modern kitchens can also be a space where people can gather and socialize. 

Suppose you’re planning a kitchen remodel soon. Perhaps, you want to spruce up your outdated kitchen, or you’re looking to add more storage. Whatever the case is, besides the aesthetics, one of the essential things you’ll need to do is decide on a layout.

For one, your kitchen layout can significantly impact how it looks and how well it functions. And while there are many kitchen styles to choose from, note that not all of them could work for your space. After all, no one design fits all. 

With that, to help you make the best decision for your kitchen remodeling project, here are five things to consider:

1. The Work Triangle

The work triangle refers to the space between the stove, sink, and refrigerator. An efficient kitchen should be easily accessible and minimize travel time between these three components. And so, when planning your kitchen’s new layout, keep the work triangle in mind. This can go a long way in ensuring you end up with a kitchen that’s easy and convenient to maneuver in.

You can also look for services that offer custom kitchen designs. This can be an excellent option if you have an oddly shaped kitchen. To start, you can search for a recommended site online or ask a friend for a referral. This way, you can be confident you're working with a reputable company and get a kitchen that's specifically designed to fit your needs.

2. Storage Needs

It's no secret that kitchens are full of stuff. There's a lot to keep track of, from pots and pans to small appliances and fixtures. That's why storage is such an essential consideration. And so, when remodeling your kitchen, ensure you have adequate room for everything you need to store and easy access to it all.

Think about how you use your kitchen space and what you need to have within easy reach. For example, if you do a lot of cooking, you'll want your pots and pans to be close. If you entertain often, you might want to consider a layout with a built-in bar or buffet. On the other hand, too much storage can make the room feel busy, so strike a balance that works for you.

3. Traffic Flow

Traffic flow is another essential consideration for an efficient kitchen layout. This is particularly important if you have young children or often entertain guests in your home. You'll want to create a layout that allows for smooth traffic flow throughout the space while ensuring functionality. 

With that, pay attention to the main pathways in your kitchen and be sure they're clear of obstacles. You should also have enough space to open doors and drawers without blocking walkways. After all, this area is one of the busiest in your home, so you don't want it to be cramped or inconvenient and bump into things or run into people constantly.

4. Plumbing System

Another critical component you’ll need to consider when remodeling your kitchen is the plumbing system. This needs to be factored into the overall design, as it can affect the functionality of your kitchen. And as much as possible, you want a layout that works around your existing plumbing to minimize the costs of rerouting pipes or reinstalling new ones.

On the other hand, if you’re looking to modify your kitchen completely, it’s best to reach out to professionals to ensure your home’s plumbing system will accommodate your desired kitchen layout and design. 

5. Natural Light

Who doesn't love a kitchen with lots of natural light? If you're lucky enough to have ample sunlight in your space, consider taking advantage of it by going for a layout that makes the most of the light coming in. For example, you may want to put your sink near a window to enjoy the view while washing dishes. Or perhaps, you'd like to create a breakfast nook near a large window where you can enjoy your morning cup of coffee.

Although, it’s also essential to note that too much light can also be a problem. If your kitchen is mainly sunny, you may consider using window treatments such as blinds or shades to help control the light coming in. These can also help to reduce heat and glare, making your kitchen more comfortable.

But, suppose your kitchen is on the darker side. You can brighten it up with some strategic lighting fixtures. For instance, under-cabinet lights are a popular option, as they can provide bright, focused light while freeing up the counter area. Alternatively, pendant lights or a chandelier can help add character and create a more inviting space. Whatever you choose, be sure the room is well-lit enough to cook and prepare meals comfortably.

6. Budget

Lastly, it's important to have a realistic idea of what you can spend on your new kitchen layout. After all, a complete renovation can be pretty costly. Focus on essential updates such as new countertops or appliances if you're working with a limited budget. Or, consider a smaller-scale renovation that still allows you to make some significant changes to the space.

It's also best to list down all the changes you'd like to make and then prioritize them based on your budget. Afterward, get multiple estimates from contractors to get a better idea of how much the project will cost. This way, you can make informed decisions about what's feasible and what's not.

Takeaway

These are just a few things to consider when changing your kitchen layout. By taking the time to plan from the onset, you can be sure to create a space that's both stylish and functional. You can have the kitchen you've always wanted with some forethought.


Hot and Humid? How to Reduce Excess Indoor Humidity

RH Business Marketing Solutions

Have you noticed your home feels more humid than usual? Did changing the setting on your thermostat make no difference? The plumbing, lack of insulation in the home, and poor ventilation can cause humidity issues. 

If you experience high humidity, it can be detrimental to your health, your furniture, and even your home. Let’s look at the potential problems and how to address them most easily.

Start with Your HVAC System

An improperly functioning HVAC system tops the list of causes of improper humidity. Have your air conditioner serviced. A maintenance visit typically costs little but can provide valuable improvements to HVAC operation. The HVAC technician recalibrates the system and changes out the filters. They also examine the working parts to ensure reliable operation during the heating or cooling season. 

Add Whole Home Ventilation

Homes need ventilation, too. Do you know that breath of fresh air you experience when you step outdoors? Your home needs its own version of that to ensure adequate air supply. This can be remedied by installing a ventilation fan that runs continuously. Energy Star fans only cost between $7 and $15 per year to operate and they help control humidity by ensuring proper airflow. Purchase and installation typically range from $700 to $1,000.

An insulation upgrade project is the ideal time to add ventilation to your home. Ventilation and insulation form two little discussed components of a full HVAC system. In some locations, an insulation contractor can also install a ventilation system, but in other areas, the municipality requires a licensed HVAC contractor to complete the work.

Choose from a ventilation exhaust system or a balanced ventilation system. The former removes air from your home and expels it outdoors, while the latter sends out indoor air and pulls in outdoor air. An energy audit from your utility service can help you determine if this would suit your home. You can also opt to get vented logs for your fireplace to ensure that’s not causing any issues. 

If that doesn’t address the issue and the humidity in the home still feels unbearable, try examining the plumbing, starting with your bathroom.

Check for Plumbing Leaks

While you should start in the bathroom, also check the kitchen, your home’s utility room, and any other room with plumbing. It also includes any workshop you might have built onto your home that includes a sink or bathroom.

  • Look for condensation on the pipes first. What defines excess condensation? Well, if you see it and notice it, that’s too much.

  • Check the pipes for leaks, too. That tiny puddle of water beneath the sink offers a dead giveaway as to the humidity issue. Likewise, a dripping faucet or shower head causes problems with excess moisture.

  • On the exterior of each wall, check for targeted moisture or discoloration. Sometimes, the leak lives inside the walls. Look at the ceiling, too. Feel the wall. A wall with a leak behind it feels spongy. Turn off the water and phone a plumber.

Check the Ventilation in the Bathroom

You might think that you can get away without having a ventilation fan/ceiling heater in the bathroom, but that’s incorrect. You need those fans to vent the moisture out of your toilet or to dry it quickly.

Some older homes vent the bathroom exhaust into the attic. That simply redirects the problem.

Instead, have the ventilation fan run to the exterior, so the humidity moves outside your home. The attic needs to remain dry to help protect the rest of your house, and any stuff in storage in the attic. While you wait for the HVAC service to fix it, you can crack a window in the bathroom while you shower to ensure that moisture gets expelled instead of being trapped.

Check Your Home’s Insulation

Examine your home’s insulation beginning with the attic. Insulation seals your home from the elements and keeps it dry. From the attic door, look directly into the attic and examine the floor joists. If you can see them, you don’t have enough insulation.

Adding insulation to your attic and your basement, if your home has one, will decrease your humidity. It will also help lower your utility bills. Choose higher R-value insulation and cover the attic in it so that you can no longer observe the floor joists.

Check the Windows and Walls

Replace older, inefficient windows with Low-E windows that have higher insulating properties. These help reduce drafts and block condensation. You can also update the insulation in the walls when you remove the window for replacement since this opens up the framing. Your walls may not have the appropriate insulation, but window upgrades offer an ideal time for this, especially if you use blown in insulation.

It may seem odd that your plumbing or insulation could affect your home’s humidity but it does. While most homes receive their insulation when the HVAC gets installed, your home may need an upgrade of both. Addressing these issues fixes humidity problems and can help restore comfort to your home.

Guest Contributor: Ryan Greene

The Art of Cleaning Your Home to Maintain Your Zen

RH Business Marketing Solutions

It can be challenging to focus or relax when you’ve got a lot going on in your mind. Sometimes you feel like your days are even more chaotic if you see that your house is messy and cluttered. 

Cleaning and organizing your home are effective mental grounding technique that helps distract you from overwhelmingly stressful and distressing thoughts and emotions. Believe it or not, accomplishing household chores and seeing your home neat and clutter-free can help you achieve a sense of calm and control or that positive Zen feeling. 

In this article, Elizabeth Shields of SuperCleaning, a professional cleaning company in Louisville, shares an expert guide on how to excellently master the art of organizing and cleaning your home to maintain your Zen and happiness. 

Start with small cleaning projects

Cleaning can be meditative and therapeutic. However, undertaking a major cleaning project can have the opposite effect on some people. Instead of spending a weekend trying to do a whole house cleaning project by yourself, create a cleaning checklist that breaks it down to room by room and task by task. 

Kickstart your cleaning spree by taking on the easiest items, like loading clothes in the washing machine or the dishes in the dishwasher. Ticking them off your list will make you feel more accomplished and fuel your motivation to continue.

Be realistic with your cleaning goals

If you only have 20 minutes to tidy up or feel worse for wear already because you’ve just gotten off work, then maybe it’s not the best time to declutter your wardrobe or deep clean your kitchen. Pushing it will only make you stressed, hate cleaning, and dread doing it even more in the future. 

Here are some examples of quick 10-minute cleaning tasks if you only have time and energy to do short burst cleaning.


  • Strip down your beddings, throw them in the washer, and replace them with fresh linens.

  • Walk around the house with a basket and pick up random items lying around the house, like clothes or dirty clothes.

  • Clear and wipe the kitchen counter.

  • Declutter and organize your dresser.

  • Clean your stovetop or kitchen sink.

  • Declutter expired food items from your fridge or pantry. 

Do it for the process, and don’t expect perfection

On the other hand, don’t expect perfection or be too obsessive about cleaning. Acknowledge the fact that it’s never going to be spotlessly clean 24/7, and that’s normal, especially if you share the home with a partner, children, or pets.


Make cleaning a routine instead of a one-time thing

Incorporate cleaning as a regular part of your daily life to ease the pressure and stop yourself from procrastinating. Use cleaning as a welcome distraction whenever you’re feeling anxious. Look around and check for areas usually ignored for a routine cleaning such as your gutter. For another example, if you’re worried about having a dirty home because you know you’ll have a hectic week ahead because of work, you got sick, or someone in the family did, and you have your hands full from taking care of them and have no time to clean, go ahead and hire a professional house cleaning company. That way, you still enjoy a clean and calming home without a sweat. 

Guest Contributor: Elizabeth Shields

How to Determine If a Home Fountain Suits Your Home

RH Business Marketing Solutions

When you think about adding a fountain to your landscaping, you first need to determine if it will fit in with the style of your home. Fountains come in all shapes and sizes, and some would look great on any property. However, others may not be the best choice for your home. Below are some tips for determining if a home fountain is right for you.

1. Decide on the Overall Look You Are Trying to Achieve in Your Landscaping

A fountain may not be the best choice if you want a more formal look. Conversely, pond fountains could be a great addition if you’re going for a more natural look. They give an aesthetic appeal.

They also provide aeration, which helps oxygenate the water and reduce excessive algae growth. By keeping the water moving, the pond aeration provided by many fountains helps remove bad smells and decrease mosquito activity.

2. Consider the Size of Your Property

A large fountain may not be the best option if you have a small yard. Conversely, a smaller fountain could get lost in the landscape if you have a large property. The size of the fountain also needs to be considered in relation to other features in your yard.

For example, a large fountain may make the pond look even smaller if you have a small pond. By calculating the area of your pond, you can work out how much water you have and choose the right fountain for your pond.

3. Think About How Much Maintenance You Are willing to Do

Fountains require maintenance, such as cleaning the pump and ensuring the water level is full. If you’re not willing to do this type of maintenance, then a fountain may not be the best choice for you. It’s important to read the instructions that come with the fountain before buying it to ensure you are aware of the maintenance required.

4. Determine Your Budget

Fountains can range in price from a few hundred dollars to several thousand dollars. The cost of the fountains and aerators depends on a number of factors. The first is the size of your pond and the amount of water you need to pump. The more powerful the pump, the more it’s likely to cost. If you have a limited budget, you may choose a smaller fountain or one that does not have all the bells and whistles. Fountain Mountain sells budget fountains to very large ones.

5. Consider Your Climate

If you live in an area with freezing temperatures, you will need to take extra care of your fountain to ensure it does not freeze and crack. Conversely, if you live in a hot climate, you’ll need to ensure your fountain has enough shade to keep the water from evaporating.

This is especially important if you live in an area with high humidity. Choosing a fountain made from materials that can withstand your climate is important.

6. Determine the Best Location for the Fountain

This is important because you need to ensure the fountain gets enough sunlight and is close enough to an electrical outlet. You also want to ensure the fountain is not in a low-lying area where water could pool and cause flooding. It’s important to consider the fountain's placement before you buy it to ensure it will work in your landscape.

7. Choose the Right Material for Your Fountain

Fountains are made from a variety of materials, such as:

●      Concrete

●      Stone

●      Metal

●      Plastic

The material you choose should be durable and able to withstand the elements. It should also be easy to clean and maintain.

8. Select the Right Pump for Your Fountain

The pump is the heart of the fountain and needs to be the right size for the fountain and the pond. Ensure the pump you buy will fit dimensionally into your fountain’s basin. Many fountains have cutout areas in which a pump is placed. It also needs to be durable and able to withstand the elements.

Conclusion

Fountains can be a great addition to your home, but there are a few things you need to consider before you buy one. By following the tips in this guide, you can be sure to choose the right fountain for your home.

Guest Contributor: Samantha Higgins

Tips On Choosing The Right Kind Of Tiles For Your Personal Needs

RH Business Marketing Solutions

There are a variety of options when it comes to choosing the right type of tile for your home renovation project. You can choose from ceramic, porcelain, natural stone, and glass tiles, among others. So how do you decide which type is right for you? Here are a few tips to help make your decision a little bit easier.

1) Bathroom

When it comes to choosing bathroom tiles, you have a variety of options available to you. You can choose from ceramic, porcelain, natural stone, and glass tiles, among others. So how do you decide which type is right for you? Here are a few tips to help make your decision a little bit easier.

Consider your budget - one of the most important factors to consider when choosing bathroom tiles is your budget. Ceramic and porcelain tiles are generally more affordable than natural stone or glass tiles. For example, your bathroom wall tiles could be ceramic, while your floor tiles could be porcelain. Think about the look you want to achieve - another important factor to consider when choosing bathroom tiles is the overall look you want to achieve. Do you want a classic look or something more modern? Natural stone tiles can give your bathroom an elegant, luxurious feel, while glass tiles can add a touch of glamour.

Think about your lifestyle - if you lead a busy lifestyle and don't have time to clean often, then you may want to consider choosing a tile that is easy to clean and doesn't require a lot of maintenance. Ceramic and porcelain tiles are both good options in this regard.

2) Kitchen

When it comes to choosing kitchen tiles, you have a variety of options available to you. You can choose from ceramic, porcelain, natural stone, and glass tiles, among others. So how do you decide which type is right for you? Here are a few tips to help make your decision a little bit easier.

If you're looking for durability, then ceramic or porcelain tiles are a good option. They're both very strong and resistant to heat and moisture. Natural stone tiles are also quite durable, but they can be more expensive. Glass tiles are less durable than the other options, but they can add a unique look to your kitchen.

If you're worried about slips and falls, then you might want to choose tiles with a textured surface. These will provide more grip and help to prevent accidents. Smooth surfaces can be more slippery, so if you have young children or elderly family members, textured tiles might be a better option.

3) Outdoor areas

When it comes time to choose tiles for your outdoor area, you'll want to consider a few things. First, think about the climate in your area. If you live in a colder climate, you'll want to choose a type of tile that can withstand the cold temperatures and doesn't freeze easily. If you live in a warmer climate, on the other hand, you'll want to choose a type of tile that can withstand the heat and doesn't crack or fade in the sun.

Another thing to consider when choosing tiles for your outdoor area is how much traffic the area will see. If the area is going to be heavily used, you'll want to choose a type of tile that is durable and can stand up to wear and tear. If the area is more for show than for use, on the other hand, you can choose a more decorative type of tile.

Finally, think about your budget when choosing tiles for your outdoor area. Tiles can be expensive, but there are a variety of options available that fit different budgets. Choose the type of tile that fits your needs and your budget and you'll be sure to be happy with the results.

4) Bedroom

When it comes to tile, the bedroom is a great place to consider using something softer and more comfortable underfoot. A nice option for the bedroom is cork tiles, which are made from the bark of a cork oak tree. Cork tiles are natural, renewable, and biodegradable, making them a good choice for those who are environmentally conscious. They're also comfortable and insulating, which can make them a good choice in colder climates.

If you're looking for a more traditional look in your bedroom, ceramic or porcelain tiles can be a good option. These tiles come in a wide range of colors and styles, so you can find one that will suit your preferences. They're also durable and easy to clean.

No matter what type of tiles you choose for your bedroom, be sure to take into account the climate where you live. If you live in a cold climate, consider using tiles that will keep your feet warm underfoot. If you live in a hot climate, on the other hand, choose tiles that will help keep your room cool.

When it comes time to choose tiles for your home, there are a lot of different options available to you. You can choose from ceramic, porcelain, natural stone, and glass tiles, among others. So how do you decide which type is right for you?

How to Make a Faucet Spout Swivel Easily

RH Business Marketing Solutions

Is it easy to make a kitchen faucet spout swivel? If the spout of your kitchen faucet won’t swivel, you can still easily make it swivel. Whenever you buy faucets whether it’s touch sensing or manual, always make sure that it has spouts that can swivel easily.

The faucets spout with swivel helps you a lot with the water flowing and makes your life easy and comfortable, especially in the kitchen. If you don’t know how to make a faucet spout swivel easily, then follow this guideline.

4 Steps to Make a Faucet Spout Swivel Easily

Tools:

Rag (cloth for cleansing)

Silicon grease

Hex wrench

Adjustable wrench

Step 1: Turn Off the Water Supply

Both ball and cartridge are the same styles of a faucet. They both have a regular type of disc inside them. First, you will have to turn off the water supply. Either from the valves below the sink or from the main water supply, which connects the whole house.

So, you can repair it easily and water doesn’t be wasted. And cover the drain, so that small parts don’t go inside it. After that remove the handle from the sink.

Step 2: Remove the Handle from Sink

Now remove the handle from the sink. You’ll see two head screws that hold the faucet. You can easily do this with a wrench. Simply, loose the screws of your faucet and then pull out the faucet.

Step 3: Remove the Spouts and Clean it

Now remove the spouts from the faucet. Take it out completely by pulling it off. And then clean the spouts very carefully. Don’t break it. You can clean the spouts with a sponge or with spray also. Then keep it somewhere to become dry. Then apply silicon grease to O-rings.

Step 4: Apply Silicone Grease to O-rings

In this step, you will have to clean the O-rings which are inside the faucet. These O-rings are the main reason faucets don’t swivel. You can clean the O-rings with the help of a rag.


After cleaning it, apply some silicone grease around the O-rings. Apply some silicone grease inside the body of the sleeve of the faucet, where O-rings are attached. Never use regular grease because it will damage the O-rings and eventually cause them to leak.


How to Remove a Swivel Kitchen Faucet

Step 1: Loose the Screw

You need to look beside the faucet handle for a little oval shape screw. This screw prevents the faucet handle from coming out, whenever you turn the water on and off. Now, use an adjustable wrench.

Step 2: Use an Adjustable Wrench

To remove the handle, use an adjustable wrench to loosen the screw. This should allow the handle to lift off easily. Now, remove the metal nut.

Step 3: Remove the Metal Nut

Now, you must remove a round metal nut that helps to hold the faucet cartridge in place, but it’s made in the same soft metal as the faucet handle and spout.

If you try to pull it off by hand and it seems stuck, you can use locks to get some leverage. But wrap a rag around the metal first, or else the teeth of the locks will gouge it.

Keep those locks handy, though, because you’ll need them to remove the final nut. Twist it to the left until it pulls out completely.

What Happens When a Kitchen Faucet Won’t Swivel?

The O-rings which are inside the faucet make it hard to swivel. The mount’s underside is where it is located. As the months and years are going by, its O-rings will become tightened and is stiff to turn.

The reason is that the lubricant inside the faucet becomes dry or sluggish. And O-rings inside the faucet become so dry that it tightens the spout. This will make the faucet spout un-swivel.

This problem is very common in every house, and it can be repaired without spending single money. If you wait too long to fix this problem, then the spout of your faucet can be a problem or may become more tightened.

If you still confuse how to fix, follow Lisa Burk. She is an expert on faucet and sink plumbing.

Conclusion

Most people apply WD-40 for making the faucet spout swivel. They think it is an easy solution. But this is not a solution to the problem. If you want the right procedure to make a faucet spout swivel easily, you can follow all the above steps.

You can easily make your faucet spouts swivel by putting off all parts, applying grease to it, and then assembling it again.

Hopefully, now you can easily make the faucet spout swivel without any issue.

Guest Contributor: Karl Larabee