Google+

contact us

Use the form on the right to contact us.

Day or Night, we are here to serve you. Leave your plumbing problem to us.


Tinley Park, IL

(708)845-7922

Residential and Commercial plumbers and plumbing contractors available in Orland Park, Tinley Park, Oak Lawn, Palos Heights, Midlothian, Oak Forest, Homer Glen, Mokena, Frankfort, and the surrounding Chicago South Suburbs. Emergency plumbers.

copper water lines.jpg

Kevin Szabo Jr Plumbing Blog

Kevin Szabo Jr Plumbing is Tinley Park, Orland Park, Oak Forest, Midlothian, Orland Hill, Homer Glen, Mokena, Frankfort, Crestwood, Palos Heights, Oak Lawn, local plumber. Read our blog for advice, tips, a good laugh, and basic home improvement.

**We are moving our old blog to our new and improved website. Too see all our posts visit kevinszabojrplumbing.blogspot.com

4 Beautiful Ways to Add Character to Your Home

RH Business Marketing Solutions

When it comes to interior design, everyone has their preferences. There’s bound to be a certain look that you’re naturally attracted to and that makes you feel inspired. And the good news about interior design is that nothing has to be permanent, so the way your house looks right now isn’t the way it has to stay.

If you’ve been flipping through home design magazines and online looking for inspiration as of late, and you’ve come to the conclusion your home is lacking in character, then there are plenty of things you can do. Here are four beautiful ways to add character to your home.

Install an Intricate Ceiling Medallion

One thing that older homes are famous for is the lovely ceiling medallions in such spaces as the living room and even the bedroom. They instantly add interest to the space and they are the kind of feature that homeowners love to show off. The good news is that this is something homeowners can add and it can be done in a way that it looks like it was part of the home, and part of the original design.

This architectural detail is typically used in conjunction with a drop lighting fixture such as a chandelier or pendant light. They can be installed by you if you're somewhat handy, or you can hire a professional.

Replace Your Fireplace Mantel with an Antique Model

For those who have a fireplace in their home, you can also transform it into something beautiful with more character. Adding a mantel or hearth will make it appear older and as though it has a story behind it, even if you're in a newer build home. You want your fireplace to stand out for all the right reasons in the room. Marble, slate, tile, cast iron and wood are just some of the materials you'll be able to choose from. Shops such as Stonewoods make it possible for you to reimagine your fireplace.

Vintage Hardware Will Make a Big Statement

The hardware in your home is a really simple update that will bring instant character to the space. Get rid of all the modern or basic-looking hardware and replace them with vintage pulls and knobs. Doing this in the kitchen can give the illusion of brand-new cupboards and an even more customised look.

Get Strategic with Window Treatments

For those of you who love the look of high ceilings in more traditional and classic homes, you can create that same illusion in your house. It's all about strategic window covering placement. Instead of hanging drapes that fit with the window frame, install the curtain rod at the ceiling height and use full-length drapes.

By spanning ceiling to floor it makes the window appear much larger than it is, giving the room that beautiful character that you’re after. You are tricking the eye with this design update.

It’s all about putting on your thinking cap, getting creative and finding little areas that you can update in the home to give it more character.

These Tips Will Save Your Carpets & Rugs When They’re Water Damaged

RH Business Marketing Solutions

Carpets and rugs are great for making your home feel warm and cozy. Problems usually only occur with carpets and rugs if they get excessively wet. Unfortunately, 14,000 people’s homes experience water damage every day. Bad weather, leaking pipes, blocked drains, and old and faulty appliances are common causes of water damage. So, if the carpets in your home get flooded with water, what should you do?


Empty the room

First of all, don’t panic. The good news is that if the water is clean water and you’re sure of the source, your carpets and rugs can be salvaged. Gray water and black water are unsanitary. Carpets soaked with gray water can usually be cleaned by a professional. But, black water carpets should be disposed of. When clean water is the problem, quickly empty all items out of the room. Furniture can be ruined if it’s left to sit on a wet carpet. The dye used in soft furnishings can transfer to wet carpets and ruin them too. 


Dry carpets & rugs quickly

Water damaged carpets and rugs are only safe to keep if they’re dried out within 48 hours of being exposed to water. After this time, toxins, such as mold and bacteria, can form and your carpets will become a health risk. The first step is to remove as much of the water from carpets and rugs as possible with towels and a water vacuum. Next, dry the carpet quickly. You can use a combination of a fan, a dehumidifier, and a wet/dry vacuum to do this. 


Clean & disinfect

Cleaning and disinfecting water damaged carpets and rugs are crucial for removing stains and odors. Smaller rugs can be washed in a washing machine. However, if you’ve got an antique rug, you need to be more cautious. Always do a colorfast test to check for risks of bleeding. If this comes back okay, you can shampoo your vintage rug with a solution made from warm water, rug shampoo, and white vinegar. Place the rug on a flat surface to dry, making sure it’s out of direct sunlight. Cleaning a carpet is a little easier as you can steam clean it and shampoo it to get it back to its best.


Replace carpet padding

It’s best not to try and dry out carpet padding. Carpet padding is very absorbent and there will be a lot of water inside it. Putting a clean, dry carpet on top of padding that has been exposed to excess water is risky. There’s a good chance that mold will grow. In time, this will move into your carpet and ruin it. Another problem is that water will affect the quality of the padding and it’s likely to break. This means the underside of your carpet will wear more easily and could even damage it.


Flooding is a common problem in households up and down the US. As long as you act quickly and know how to recognize carpets and rugs that can be saved, you’ll save yourself a lot of money and hassle.

6 Roofing Tips You'll Want To Know Before A Renovation

RH Business Marketing Solutions

Renovating your roof can be a daunting and expensive task, but it doesn't have to be! With the right information and preparation, you can save time and money while ensuring that the job is done properly.  In this article, we will provide six essential tips for anyone considering a renovation of their home's roofing system. From assessing the condition of your existing roof to researching materials and contractors, these practical steps will help you plan ahead for a successful project. So if you're ready to take on a new challenge or simply want to refresh your home's exterior appeal, read on for all the details you need before starting any major renovation work!

1. Assess the Condition of Your Existing Roof

Look for any signs of wood rot, missing or lost shingles, and other structural damage that could cause problems during the renovation process. Have an experienced professional inspect your roof if necessary. Now, experts at helmuthroofing.com agree that it does not always make sense to replace a roof that has life to it yet. However, if significant damage has occurred or if the roof is more than 10 years old, it might be a good idea to consider a replacement. The entire process of roof assessment should be done with caution, so it is best to consult a professional before making any decisions. Especially, if you are interested in a complete overhaul of your roofing system.


2. Research Materials and Contractors

Start by researching the different types of materials available for your roofing project. Consider how long each material will last, as well as its aesthetic appeal and impact on energy efficiency. Also, take into consideration the climate in which you live and any local building codes that may apply. Once you have a better understanding of what is available, it's time to start researching contractors who have experience with the type of roofing work you are looking for. Make sure that any contractor you hire has a good reputation and is properly licensed and insured. Additionally, ask for references and ensure that they are bonded and insured as well.

3. Calculate the Cost of the Project

Before starting any roofing project, it's important to get an accurate estimate of the cost. This includes the materials, labor, and any additional equipment that may be necessary. Research prices for different types of materials and compare them to find the best deal. Additionally, make sure you factor in hiring professional help. Experienced contractors can save time and money in the long run, so it's worth investing in their expertise. Furthermore, make sure you inquire about any discounts or financing options available to help defray the cost of your renovation.

4. Consider Any Building Code Requirements

Depending on where you live, there may be certain codes or regulations that must be followed for any major renovation project. Take the time to understand what is required before starting your work and make sure that your contractor is aware of any applicable rules or laws. This will help ensure that the job is completed properly and legally. Additionally, you should always obtain the proper permits and inspections to guarantee that your new roof meets all local building codes. Moreover, this will help protect both you and your contractor from any possible legal complications.

5. Get Proper Permits Before Starting Work


Before any major renovation project, it is essential to determine the proper permits needed for your project. Different areas will have different requirements and restrictions, so make sure that you check with your local government or building department before beginning work. Having the necessary permits in place will help ensure that the job is done safely and legally. Additionally, these documents provide an extra layer of protection in case any issues arise during the renovation process.

6. Make Sure to Have Adequate Insurance Coverage

Make sure that you have adequate protection in place that will cover any damages or accidents that may occur during the renovation process. Additionally, be aware of any warranties offered by the manufacturer of your materials, as well as any guarantees provided by your contractor. Having this information in place can provide added peace of mind and help protect you from any unexpected costs. 

Taking the time to understand the process, research materials and contractors, calculate the cost of the project, consider building codes, obtain permits, and have adequate insurance coverage will all help ensure that your renovation is a success. With careful planning and preparation, your roofing project can be completed quickly and efficiently, helping you enjoy the results for years to come. Furthermore, having the proper information and knowledge about roofing can help you save time and money, both now and in the future. Ultimately, by taking the time to do your research upfront, you will be able to enjoy a beautiful roof that will last for many years.


10 Tips to Keep Your Home in Tip-Top Shape

RH Business Marketing Solutions

Maintaining a home can feel like a full-time job on its own. Between managing other aspects of your life, it's understandable if home maintenance falls through the cracks. However, a home is such a massive investment. You owe it to yourself to keep your home in tip-top shape with the following tips.

1. Cultivate a Daily Cleaning Routine

If you have a busy schedule, it might seem difficult to carve out time to clean your home every day. However, you'd be surprised at how much you can do in 15 minutes. Set the timer for 15 minutes, and solely focus on tidying up the most commonly used areas of your home. By wiping down the countertops and surfaces, sweeping the floor, and putting items in their rightful place, you'll create a great start to a fruitful and consistent cleaning routine.

2. Prioritize Indoor Air Quality

When you're living in your home, you're used to its scent. Therefore, it's easy to get used to a bad smell and not realize it exists. This phenomenon is called nose blindness. By prioritizing indoor air quality, it's much easier to keep a clean scent in the air. Open the windows for 15 minutes each day. Make sure to take out the trash routinely, and address foul odors as soon as you detect them. Instead of burning candles for hours, set up essential oil diffusers to release natural fragrances through the air.

3. Create a Quarterly Maintenance Routine

Whether you hire various service providers or inspect areas on your own, make time for a quarterly maintenance checklist. Whether you're checking the gutters before the fall months or inspecting the HVAC unit before the winter cold comes in, check areas that you'd normally forget about because they're not immediately causing issues.

4. Keep an Eye Out for Industry Changes

Smart technology continues to evolve as people enjoy the benefits of smart refrigerators, lighting systems, and more. Keep an eye out for some of those fun amenities you can add to your home in order to upgrade it. When you incorporate improvements such as tiling by tile roofers in Palm Beach County, you're more likely to find intentional ways to maintain them.

5. Make It Visually Appealing

Maybe the color scheme in your home is less than inspiring. If your home doesn't look great, consider the aesthetics. In fact, it's a great idea to change them. A can of paint can do wonders for the look or appeal of a home. Whether you opt to paint the walls, add some throw pillows, or hang beautiful wooden blinds, cultivate beauty inside of your home. It'll inspire you to treasure your home more.

6. Make Small Improvements Over Time

Don't try to remove the carpet, install hardwood floors and change the stove in one week. Give yourself the space and grace to make improvements over a period of time. Work on one project at a time. As you take your time in beginning and completing projects, home maintenance becomes more manageable.

7. Set Home Improvement Goals

At the beginning of the year, most make resolutions. Instead, consider areas in which you'd like to gradually make improvements. Make home improvement one of the areas you'll work on. Whether you'd like to replace the windows, get a new roof, or get new furniture, write those goals down. Then, create a plan to make those goals turn into your reality over the next 12 months.

8. Host Friends and Family Members

For some reason, many people wait until they have company to clean up. If you know you'll be hosting friends and family in your home, this can serve as a fun incentive to make sure your home is always ready for guests.

9. Set Aside a Specific Budget for Home Maintenance

For many people, home maintenance is more about having the money to pay for the upgrades. In the same way, you'd create a budget for your groceries and utilities, and set aside a certain amount for home improvement projects and maintenance. Also, look for ways to get homeownership grants to cover the costs. Many counties in various states offer incentives for homeowners who want to improve their homes.

10. Create a Digital Vision Board of Inspiration

Without a vision, it's difficult to know how to move forward. Download home decor apps or social media apps like Pinterest in order to get visual inspiration for how you'd like to maintain your home. Peruse the apps once or twice a week to remind yourself to remain inspired to keep your home's maintenance up.

Bottom Line

Take your time in cultivating these tips. Find a rhythm that works for you. Don't be afraid to ask for help. You don't need to DIY the process. By developing a plan that's feasible and realistic for your life, keeping your home in tip-top shape will eventually become an effortless process.

 Guest Contributor: Samantha Higgins

The Ultimate Guide to End of Lease Rubbish Removal

RH Business Marketing Solutions

For all renters, there comes a time when you are approaching the end of your lease.

If you intend to, or have been asked to vacate the property, it can be a stressful time. Not only do you have to find somewhere else to live, but you also must ensure you leave your current rental property in an acceptable enough condition to get your full bond back.

For this reason, in addition to cleaning, end-of-lease rubbish removal is a necessary task for tenants to undertake. However, as anyone who has ever moved out of a rental property will tell you, it can be a challenging, time-consuming and darn right frustrating process.

In this article, we will discuss the reasons for end-of-lease rubbish removal, how to set about doing it, and provide you with some tips to make it a stress-free experience.

The importance of end-of-lease rubbish removal

There are several reasons why it is important to perform end-of-lease rubbish removal.

Firstly, it is a critical step in protecting your security deposit, as well as avoiding legal action. But beyond that it also creates a positive impression with your real estate rental agency who may be willing to rent out another property to you.

Furthermore, end of lease rubbish removal can also help you practice environmental sustainability and even save you time and money if planned properly.

When is the best time to get in contact with a rubbish removalist?

The best time to start an end of lease rubbish removal depends on the size of property you have been leasing. But as a rule, the more time you can give yourself to do it the better.

Four to six weeks prior to your lease ending is generally considered a good lead in time to start the process. This will give you enough time to declutter, clean, sell and dispose of any rubbish in a safe and efficient manner.

By contrast, waiting until a couple of days before your lease runs out to start the project can be very stressful and result in a rushed or incomplete job – which could impact upon the amount of your bond you get back.

How to declutter your end-of-lease property

Knowing when to begin is one thing, but doing it is another thing entirely. For this reason, it is worth having a clear strategy on how you will declutter your rental property, in order to facilitate an end-of-lease rubbish removal process.

Here are some tips for decluttering your property:

Create a plan: Start by making a list of the items you need to declutter and the rooms they are located in. This will help you stay organized and focused on your goal.

Tackle one room at a time: Don't try to declutter the entire property at once. Instead, focus on one room at a time to avoid feeling overwhelmed.

Decide what to keep, sell, donate, or dispose of: For each item, decide whether you want to keep it, sell it, donate it, or dispose of it. Keep only what you really need and sell or donate items that are in good condition.

Get rid of duplicates and items in poor condition: If you have multiple items that serve the same purpose, keep only one and get rid of the rest. Also, dispose of items that are broken, worn out, or no longer useful.

Store items you need to keep: If you have items you need to keep but don't have room for in your new property, consider putting them in a storage unit until you have space for them.

Donate items to charity: Donating items to a local charity is a great way to declutter your property and help those in need. Here are some charities that will pick up your unwanted items for you.

Sell items online: You can sell items you no longer need on platforms such as eBay, Facebook Marketplace, Depop or Gumtree.

Dispose of items properly: Make sure to dispose of items in an environmentally responsible manner. Be mindful that some items, such as electronics and hazardous waste, may need to be disposed of at a special facility.

Cleaning

Decluttering your property is not just about removing rubbish; it's also about creating a clean and organized space that you can be proud of.

Once the property has been decluttered, tenants should then focus on cleaning.

This includes thoroughly wiping down surfaces, cleaning the bathrooms and kitchens, and vacuuming or sweeping the floors. This will ensure the property is left in a spotless and tidy state.

Get the professionals in

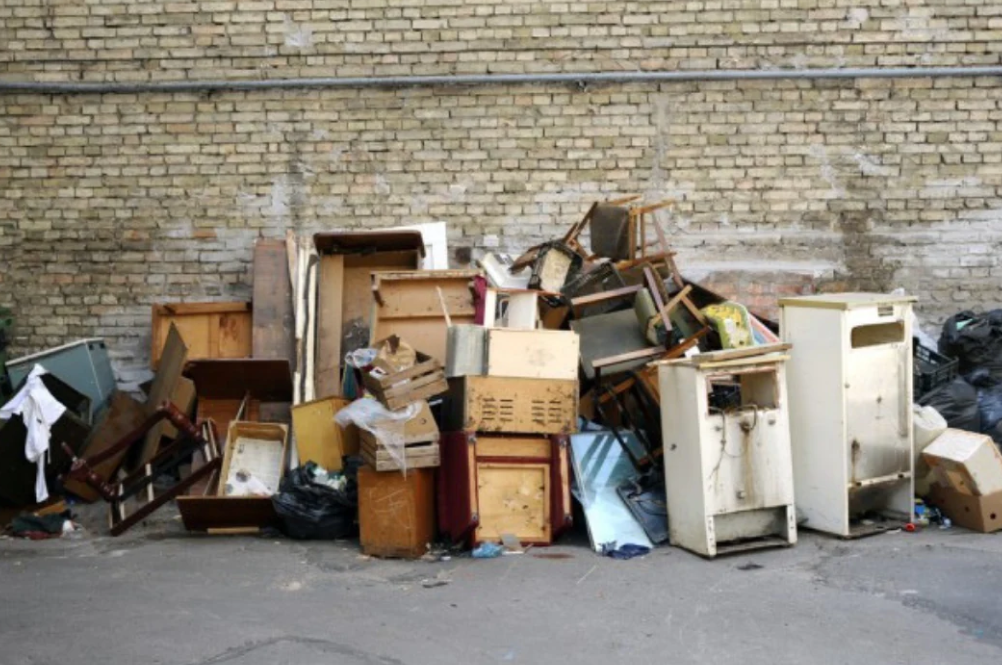
One of the biggest challenges of end-of-lease rubbish removal is disposing of large items such as furniture and appliances.

Unfortunately, most local councils will not accept these items for curbside collection, so tenants will need to arrange for alternative disposal. This can include taking the items to a landfill or recycling centre or hiring a rubbish removal company to collect and dispose of the items.

Hiring a rubbish removal company is often the easiest and most convenient option for tenants. These companies have the expertise and equipment to safely and efficiently remove large items, and they will also handle the disposal of the items, ensuring this is done in an environmentally responsible manner.

Organize your end of lease rubbish removal with 1300 Rubbish or another similar company. Just make sure you choose one that is experienced, reliable, and insured.

Tenants should also ensure that the company is familiar with the rules and regulations for disposing of certain items, such as hazardous and electronic waste.

It is also worthwhile checking out online reviews from previous customers to gauge the quality of service they offer.

As touched upon above, tenants can also reduce the amount of rubbish that needs to be disposed of by recycling and repurposing items. This can include donating items that are still in good condition to charity, or selling items that have value.

By doing this, tenants can reduce the amount of waste that ends up in landfill and help to protect the environment.

What items can they remove?

It is worth checking with individual removal companies about what items they can help you remove.

But typically, you can expect most businesses to be able to shift bed frames and mattresses as well as items like carpets, household appliances, TVs, furniture and lounges.

They should also be able to dispose of wood, garden waste and household rubbish for you as well.

Conclusion

While end-of-lease rubbish removal is a necessary task for tenants, it does not have to be a stressful experience.

By following the tips outlined in this article, tenants can ensure that the process is smooth and efficient, and that the property is left in a clean and tidy state.

With careful planning and preparation, you can also reduce the amount of waste that ends up in landfill and help to protect the environment.

So, if you are facing the end of your lease, remember to start preparing for end-of-lease rubbish removal well in advance, and take advantage of any resources and services available to make the process as stress-free as possible.

Guest Contributor: Rebecca Lee

Tips for Maintaining a Flat Roof

RH Business Marketing Solutions

Maintaining a flat roof is an important part of keeping your property in good condition. Flat roofs are more vulnerable to damage from extreme weather conditions and must be checked regularly for any signs of damage or leaks. In this article, we will discuss tips for maintaining a flat roof, including keeping the roof clean, checking for damage, checking for leaks, applying sealant, trimming trees, and checking drainage. With the right maintenance and care, your flat roof can remain in good condition for many years to come.

Keeping The Roof Clean

Keeping the roof clean is one of the most important aspects of maintaining a flat roof. It is important to remove any debris such as leaves, twigs, and dirt from the roof regularly. This is especially important during the fall when leaves are likely to accumulate on the roof. If left on the roof for too long, these can cause damage to the material. Additionally, it is important to inspect the roof for any signs of damage such as cracks or loose material. These should be addressed and repaired immediately to prevent further damage. It is also important to keep an eye out for any leaks around the roof, as these can cause major damage if left unchecked.

If debris is left on the roof, it can cause damage to the material and lead to mold and mildew growth. Additionally, if any signs of damage are not addressed and repaired quickly, it can lead to further damage and potential structural problems. Any leaks that are left unchecked can cause major damage to the roof and the structure of the building, as water can seep into the walls and cause rot and mold.

Checking for Damage

When checking for signs of damage on a flat roof, it is important to inspect the following areas:

  1. Roofing Material: The roofing material is located on top of the roof, and any signs of damage such as cracks or loose material should be visible to the naked eye.

  2. Seams: The seams between the roofing material and flashing can also be inspected for any signs of damage such as gaps or missing pieces.

  3. Flashings: Flashings are the metal strips around the roof that are designed to prevent water from entering the building. It is important to check the flashings for any signs of rust or corrosion, as this can weaken their structure and lead to leaks.

  4. Gutters: Finally, it is important to check the gutters to ensure they are free of debris and clogs. If they are blocked, they can cause water to back up and cause damage to the roof.

If any signs of damage are not addressed and repaired quickly, it can lead to further damage and potential structural problems. Any leaks that are left unchecked can cause major damage to the roof and the structure of the building, as water can seep into the walls and cause rot and mold. Additionally, the roof can be weakened and become more vulnerable to damage from extreme weather conditions such as high winds or hail. Taking the necessary steps to inspect the roof for any signs of damage and to repair any issues promptly will help to ensure that the roof remains in good condition for years to come.

Professional Inspections

Although it is important to regularly inspect the roof for any signs of damage or leaks, it is also important to have a professional inspection done periodically. This is because a professional inspection will cover much more than the areas mentioned above, and can identify any underlying issues that could be causing damage. A professional will be able to identify any structural problems, as well as any signs of wear and tear that can lead to major damage if left unchecked. Additionally, they can also provide advice on how to best protect and maintain the roof, as well as help to identify any potential issues that may arise in the future.

Having a professional inspection done periodically is an important part of maintaining a flat roof. This will help to ensure that any potential issues are addressed quickly and that the roof remains in good condition for years to come. It is also important to make sure that the roof is inspected by a reputable contractor who is experienced in flat roof maintenance. By taking the necessary steps to protect and maintain the roof, homeowners can ensure that their roof remains in good condition for years to come.

Applying Sealant to the Roof

Applying sealant to the roof periodically is another important aspect of maintaining a flat roof. This will help to prevent moisture from entering the roof, which can cause major damage if left unchecked. Additionally, it will help to prevent any damage caused by the weather, such as high winds or hail. Applying sealant is relatively easy, and can be done by most homeowners. It is important to make sure that the sealant is applied correctly and that it is allowed to dry completely before any objects are placed on the roof. It is also important to reapply sealant periodically, as it can wear away over time.

There are three main types of sealant that can be used on flat roofs. The first type is an asphalt-based sealant. This type of sealant is designed to withstand extreme weather conditions and can provide a long-lasting solution for protecting the roof from moisture and other damage. The second type is an elastomeric sealant, which is made from rubberized material and is designed to expand and contract with varying temperatures. This type of sealant is also very durable and can help to protect the roof from extreme weather. The third type is an acrylic sealant, which is a water-based sealant that is designed to be highly flexible and can help to protect the roof from moisture and extreme temperatures.

Checking for Leaks

It is important to check for any leaks around the roof, as these can cause major damage if left unchecked. When checking for leaks, it is important to be aware of the three main causes of leaks in flat roofs:

  1. Improper installation: This can occur when the roof is not installed correctly or when materials are not used that are suitable for the climate.

  2. Poor maintenance: This is the most common one and occurs when the roof is not regularly inspected for any signs of damage or when repairs are not addressed quickly.

  3. Age-related deterioration: This occurs when the roof is not regularly maintained or when the materials become worn or brittle over time.

It is essential to take immediate action when dealing with any potential causes of roof damage, as neglecting to do so could result in costly repairs. Regular inspections should be conducted to identify any underlying issues that could be causing damage and to address them promptly before the situation worsens. Taking the necessary steps to protect and maintain the roof will ensure that it remains in good condition for years to come.

Trimming Vegetation

If the vegetation is not trimmed and maintained properly, it can cause significant damage to the roof. Overhanging vegetation can cause debris to accumulate on the roof, which can lead to mold and mildew growth. Additionally, if left unchecked, the vegetation can act as a bridge for animals to access the roof. This can lead to further damage as they may dig or scratch the roofing material and cause leaks. To properly trim vegetation around the roof, it is important to follow a few simple steps:

  1. Assess the Area: Before beginning, assess the area around the roof to identify any trees or shrubs that may be overhanging the roof. It is important to trim any vegetation that is too close to the roof, as this can cause debris to accumulate and can provide an entry point for animals.

  2. Trim the Vegetation: Once the area has been assessed, it is important to trim the vegetation back. This should be done carefully, as too much trimming can damage the vegetation and potentially cause further damage to the roof. It is best to use a pair of sharp scissors or shears to ensure a clean cut.

  3. Clean the Area: Once the vegetation has been trimmed, it is important to clean up any debris that may have been created during the process. This will help to prevent further damage to the

Checking Drainage

In addition to regularly inspecting the roof for any signs of damage or leaks, it is also important to check the roof’s drainage. This is because if the roof is not draining properly, it can cause water to collect on the roof and cause damage. It is important to make sure that the gutters are free of debris and clogs, as this can prevent proper drainage. Additionally, it is also important to check the downspouts and make sure that they are clear and in working order. If any of these components are blocked or not functioning properly, it is important to address the issue promptly to prevent water from collecting on the roof and causing damage.

Last Thoughts

In conclusion, it is important to take the necessary steps to maintain a flat roof. This includes regularly inspecting the roof for any signs of damage or leaks, applying sealant periodically, trimming any vegetation that is too close to the roof, and checking the drainage system to ensure it is working properly. Taking the necessary steps to protect and maintain the roof will ensure that it remains in good condition for years to come. For more information on flat roof maintenance or to get professional flat roof services from a reputable contractor, visit flatrooforegon.com.

If you would like to stay up to date on the latest flat roof advice, be sure tosubscribe to our email list. By subscribing, you will receive weekly emails filled with helpful tips and advice from experienced professionals in the flat roofing industry.

Guest Contributor: Andrew Putilin

How To Run A Rubber Roofing Business Effectively

RH Business Marketing Solutions

Some EPDM installations are ideal for DIY enthusiasts, but a professional contractor is required for many installations. This is where your roofing company comes in. Here, we will provide some of the best tips on how best to run your EPDM roofing business along with how your team can perform procedures to a professional standard.


You might be under the assumption that a simple set of basic tools is sufficient to install a rubber roof to a professional standard, but you should also remember that it also requires knowledge, skills, and patience. If your contractor teams are unable to get even the basics right, you will end up not only losing both valuable materials and money but also the reputation of your business eventually.

1.      Provide Proper Training

Training is one of the most important factors, if not the most important factor when it comes to any roofing business. Even the most experienced and qualified roofers always need to keep up their training and professional development, which means that training isn’t just for those that have recently joined the industry


Having properly-trained staff not only helps boost the reputation of a business but also the development of your staff, ensuring that they undertake the installation process to the highest possible standard. Training also helps avoid potentially dangerous or damaging performance issues or any accidents that may occur if staff are aware of the risks and undertrained.

2.      Invest in a Leaf Blower

Flat roofs need to be clear from any debris or rubbish before any work can be done. Investing in a leaf blower can help you save both resources and time. Leaf blowers tend to be far more effective than manual brooms and will help you save much more time. It is particularly useful if there’s a lot of surface area, with significant amounts of dust, debris, or rubbish.

3.      Have Enough Resources

Your team always needs to be equipped with an adequate supply of materials to complete any roofing installation that you take on to professional quality no matter the job. Find the ideal pipe seals for quick and easy flashing. When working on projects, it’s always easy to replenish your supplies from a business float of products.


While most retailers offer fast delivery, there’s always a chance for delays in ordering or transportation so it is important to be prepared. The last thing you want is a half-finished job or having multiple projects to complete because you were not prepared with the right quantity of materials.

4.      Have Professional Contracts and Quotes System

You need to provide your clients with an accurate and professional quote and contract before you get started on any roofing project. Contracts should protect your client as well as business. The contract needs to outline timescales, payment information, and what should be done if and when something goes wrong or a customer needs to make a complaint.

5.      Provide Great Customer Service

It might sound obvious, but taking pride in your work extends to your customer service. The roofing industry is full of stories of poor workmanship and poor practice with regards to customer service, so you want to ensure that your business doesn’t fall in line with such companies.


The ability of businesses to communicate professionally with customers is key to building a strong relationship and reputation with clients. Great customer care is important and it definitely pays off to pay attention to the needs, worries, and concerns of your clients.

 Guest Contributor: Arslan Hassan

Red Mold 101: The Basics and How to Get Rid of It

RH Business Marketing Solutions

All homes frequently struggle with mold. Every homeowner will eventually have a few mold issues due to weather or climate. Green, black, or even pink mold are a few prevalent forms. The most common and harmful sort of mold may be black mold, which is renowned for its capacity to release toxic compounds and have lethal effects.

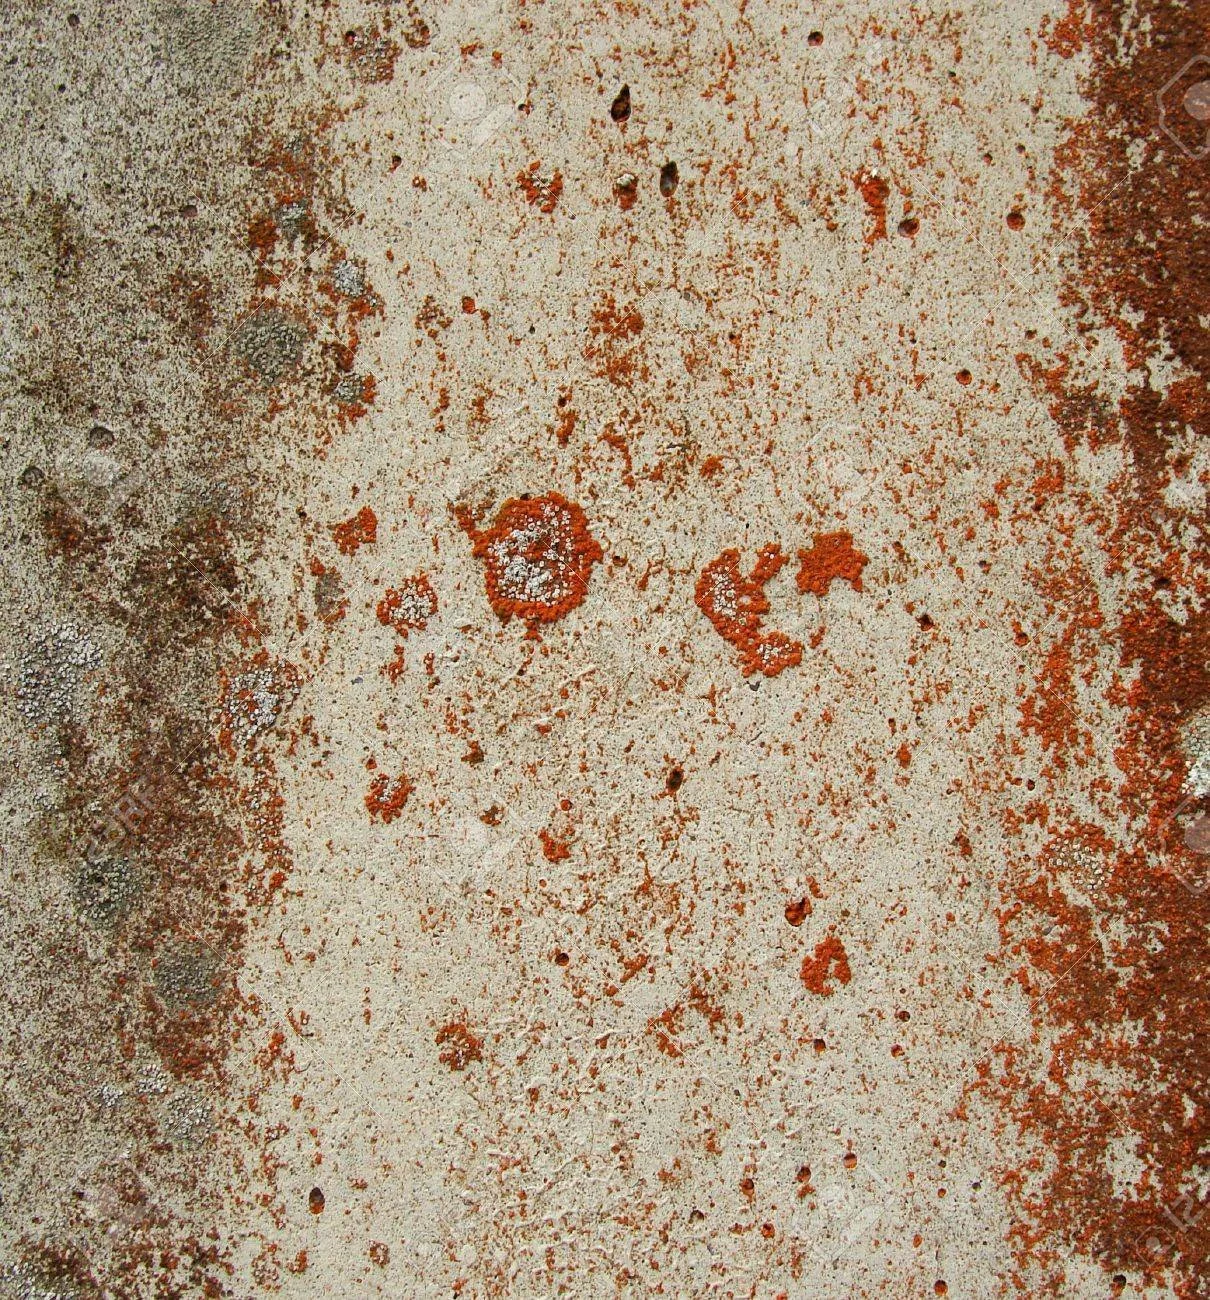
You should be aware of various types of mold even though black mold and green mold are frequently encountered. Like other varieties of mold, this one is bright red and can be found in wet, moist conditions. This mold is referred to as red mold because of its color.

Red mold can be found in humid areas such as basements, crawl spaces, bathrooms, or even attics. You’ll most likely find them on walls, fabrics, or any organic matter. This bright red mold might seem harmless, but don’t be fooled by its microbial size. Red mold can be quite dangerous and can cause a lot of health problems if left untreated. 

Air quality and mold growth are related. Moisture and humidity can worsen indoor air quality and encourage the growth of mold spores. Homes with low humidity, however, have a lower probability of developing mold.

If you think you might have spotted some red mold in your home, don’t fret just yet. The most important thing would be to identify it and take steps to remove it. In this article, we’re going to break down the basics of red mold, how to identify it and remove them from your home. We’ll also give you a few tips on how you can improve your air quality and prevent mold growth. 

What is Red Mold?

Red mold is a type of fungus that can grow both indoors and outdoors. While it does not always pose a health hazard, some people can be allergic to it or may experience respiratory problems if they are exposed to high levels of mold spores.

The presence of red mold can also indicate a bigger problem in your home, such as severe leaks or water damage. When red mold is present, it usually means that the spores have been released and are now airborne. If you spot red mold on any surface in your home, remove it as soon as you can to prevent them from spreading even further. 

How Do You Identify Red Mold?

Red mold can be a difficult problem to address in your home, especially if you’re dealing with a large amount of it. Mold is usually gray or black, but sometimes appears reddish-brown and is often found in places with water damage or high humidity levels. Identifying red mold may be particularly challenging because it can look similar to other types of fungi, however, the key characteristics that help differentiate it include:

  • its color: a reddish-brown shade; 

  • its texture: slimy and soft to the touch;

  • its smell: musty or earthy in odor;

You may find red mold indoors, often growing on damp surfaces such as the walls or ceilings of bathrooms, laundry rooms, or other moist areas. They can also be found outdoors on plants, trees, or other organic materials. 

Health risks associated with red mold exposure

We’ve mentioned briefly that red mold can result in a flurry of health problems. Any household with red mold will most likely experience a decrease in air quality. This is because red mold spores can travel through the air and release allergens that can cause respiratory issues or allergic reactions. Being exposed to red mold spores will cause you to have coughs, sneezes, watery eyes, and in very severe cases— difficulty breathing.

Other than allergic reactions or respiratory issues, the presence of red mold spores can cause sore throats and asthma attacks. To avoid getting sick from red mold exposure, it’s recommended that you focus on identifying it and removing it as soon as possible. 

Mold problems usually appear due to high humidity. If your home has high indoor humidity, the chances of mold growth can be high. Although inhaling small doses of mold may not cause severe problems, being exposed to mold for long periods can result in serious illnesses such as bronchitis or pneumonia. 

Getting Rid of Red Mold

There’s no sure way to prevent mold spores from entering your home. Red mold can eventually make its way into homes, causing chaos and health risks along the way. Thankfully, there are a lot of steps you can take to not only safely get rid of red mold and keep it at bay. 

Keep humidity at a minimum

Mold remediation specialists always recommend removing any sources of water or moisture. This can be done by using air conditioners or dehumidifiers to keep your home cool and dry. The key is to keep your home well-ventilated. You can also regularly open your windows and doors to allow fresh air to enter your home. 

Sterilize potential mold areas

If you come across any red mold in your home, it’s important to clean and sterilize the area immediately. We recommend using cleaning solutions that are non-toxic but effective. You can use diluted vinegar, hydrogen peroxide, or even tea tree oil. Remember to wear protective clothing and a face mask when cleaning to avoid inhaling any mold spores. 

Clean your home regularly

Mold spores can spread quickly, so the best way to keep mold growth at bay is to keep your home clean and dry. Make time to regularly clean your household to improve air quality and minimize mold growth. Be sure to pay extra attention to areas such as bathrooms, basements, and crawl spaces. 

Keep an eye out for signs of damage

Regularly inspect your home for signs of water damage or leaks, which can create the perfect conditions for red mold growth. Keeping water damage untreated can increase the chances of red mold but can also lead to more serious problems such as structural damage. So, before it’s too late. it's best to identify and repair damages as soon as you find them. After all, prevention is always better than cure.

Properly seal your windows and doors

You can’t keep mold spores from entering your home completely, but you can still try to reduce the chances of them entering. Make sure your doors and windows are properly sealed to keep outdoor mold particles from entering your home and leading to a potential infestation. 

Tips for Red Mold Growth Prevention 

Now that you know how to get rid of red mold, it’s time to find out how you can prevent mold growth in the first place. Here are three tips we stick to prevent mold from growing in our homes. 

Invest in air quality

Keeping your air quality in its best condition might be the best way to prevent mold growth. So, consider investing in an air purifier, which can help to further reduce mold spores and other pollutants from the air. An air purifier will not only keep your home’s air quality at its highest, but it will also keep your mind at peace and ensure that your household is breathing in clean air. 

Keep your home ventilated

Another way to improve your indoor air quality is to properly ventilate your home. Keep doors and windows open for a few hours each day to allow fresh, clean air to enter the house. If you live in a humid climate, consider installing an air conditioner or dehumidifier can help to reduce humidity levels and create a less welcoming environment for mold growth. 

Never keep anything damp in your home

Avoid leaving damp things in your home. This includes wet clothes, towels, furniture, and other items that can easily become a breeding ground for mold spores. Damp or moist items can make the environment even more hospitable for mold growth, so make sure to always keep everything cool and dry. In addition to keeping things dry, you should frequently check your property for signs of water damage or leaks and repair them as soon as possible. This can help to prevent mold from growing in the first place.

Closing Thoughts

Red mold can be a challenge to deal with, but they’re not impossible to get rid of. They can also be prevented if you are proactive and take the right precautions. Although small amounts of red mold might not hurt you, it can pose a health hazard if left untreated. 

The key to keeping red mold from growing and infesting is by removing the source of moisture. In addition to removing moisture, it’s important to keep your home clean and dry. You should also regularly inspect your home for any signs of water damage since mold growth can indicate a bigger problem.

If you spot red mold in your home, it’s recommended that you take the right steps to identify it properly and remove it as soon as you can. If you’d like to find out more about mold prevention and improving air quality in your home, try contacting a local air quality specialist or check out some of our articles on mold and air quality.

Guest Contributor: Diana R.

What to Do When Storm Water Drains Get Blocked

RH Business Marketing Solutions

To save money on hiring a plumber to clear blocked stormwater drains, it is helpful to shop around and get quotes from multiple plumbers to compare prices.

When storm water drains get blocked, it can become a major problem for homeowners. To prevent a blocked storm water drain, it is important to inspect your pipes regularly. There are several steps that you should take to make sure that your drains are in good condition.

First of all, any debris such as leaves and twigs should be removed from the drain regularly. Additionally, check for any cracks or worn-out seals which could lead to water backing up into the house or yard. 

If these issues are found, it’s best to call a professional to repair them immediately. The best drain cleaners will have the appropriate materials such as CCTV cameras and hydro jets for long-term protection against flooding.

Unblocking a storm drain can be a messy job, but it is important to keep your neighbourhood street, driveway, and curb safe from water damage.

Saving Money on Clearing Blocked Stormwater Drains

To save money on hiring a plumber to clear blocked stormwater drains, it is helpful to shop around and get quotes from multiple plumbers to compare prices. Consider using a smaller or local business, as they may have lower overhead costs and be able to offer lower prices. 

Avoid using emergency services, as they tend to be more expensive. Understanding the problem and the solution can also help you negotiate a fair price with the plumber. Don't forget to ask about any discounts or promotions that may be available to save even more money.

If attempting to clean the problem yourself, use gloves and protective clothing when attempting to unblock a storm drain as debris and bacteria may be present in the clog. This debris can range from leaves, dirt and mud to plastic bags or other materials. 

It is also important to have the right tools on hand such as heavy-duty gloves, shovels, brooms and buckets for collecting any debris that needs to be removed before beginning the process of unblocking a storm drain.

Is Drain Cleaner a Budget-Friendly Way to Unblock Drains?

We all want to be careful with our finances in today's economy. While drain cleaners may seem like a budget-friendly way to unblock drains, it can actually cause more harm than good in the long run. The chemicals in drain cleaner can be harmful to the environment if they are not disposed of properly. 

Additionally, drain cleaner can be corrosive and can damage the pipes, leading to more costly repairs in the future. It is generally better to use more natural methods, such as a plunger or a drain snake, or to call a professional plumber to safely and effectively unblock the drain.

What You Should Know About Storm Water Drain Cleaning

Storm water drain cleaning is an important part of making sure that your property is safe from flooding. It should be done at least once a year to ensure that all debris, leaves, twigs and other materials are properly removed from the drains. 

One common sign that your storm water drains are blocked is the pooling of rain or melted snow around the drain area. This is most noticeable during heavy rainfall as pools will form quickly as the blocked drain has nowhere for the water to go. 

When it comes to residential storm drain cleaning, the best thing you can do is hire a professional. They have the knowledge and experience to get the job done quickly and safely, as well as access to specialised storm drain cleaning equipment like hydro jets. 

Blocked Stormwater Drains: Don't Break the Bank on Repairs

If you notice any leaks or damage to your drains, have them repaired as soon as possible to prevent further problems.


Here are some tips for preventing blocked stormwater drains that will save money in the long run:

  • Dispose of trash and debris properly: Do not throw items such as cigarette butts, paper towels, or food wrappers into storm drains.

  • Use a drain cover: A drain cover can help to prevent debris from entering the drain and causing a blockage.

  • Regularly clean and maintain your drains: Remove leaves, twigs, and other debris from around the drain to prevent blockages.

  • Fix any leaks or damage: If you notice any leaks or damage to your drains, have them repaired as soon as possible to prevent further problems.

  • Educate others: Spread the word about the importance of properly maintaining stormwater drains to help prevent blockages.

Top Causes of Blocked Stormwater Drains

The top causes of blocked stormwater drains include leaves, silt, debris, oil, and sediment buildup over time. 

  • Leaves fall into the pipes clogging up the system when they are not cleared away regularly enough. 

  • Silt is fine particles that accumulate in the pipes leading to blockages which prevent water from flowing freely. 

  • Debris such as plastic bags or other waste thrown into gutters or directly into drains also leads to serious blockages that require immediate attention.

How to Tell If You Have a Blocked Stormwater Pipe

To avoid major flooding and costly damage to your property, it’s important to be able to identify when you have a blocked stormwater pipe so that you can get it fixed as soon as possible. You can also save money by spotting early signs of a blocked stormwater pipe before it can cause major damages. 

Here are some signs that indicate you may have a blocked stormwater pipe: 

  • An unpleasant smell coming from drains or gutter outlets

  • Puddling around roof drains and gutter outlets

  • Wall and ceiling discolouration

  • Slow draining of water

How to Install Storm Water Drains in the Backyard

When you are deciding if you should build or buy a house, think about how much work you want to put into making sure everything is up to code. Knowing how to install storm water drains in the backyard is key for homeowners hoping to control their drainage issues and avoid remodelling nightmares. 

Here are some tips on how to properly install storm water drains in the backyard: 

  • Assess the area where you want to place the drain. Make sure there are no nearby trees or large rocks that could interfere with installation. 

  • Make sure there are no underground utilities in the vicinity before beginning work on any type of drain installation project. 

Once these steps have been taken care of, it’s time to begin digging a trench for the drain pipe. Make sure it is wide enough and deep enough so that all stormwater will flow into it without issue. 

Storm Water Drain Cleaner

The best way to clean storm water drains is with the help of a professional. A professional stormwater drain cleaner can inspect and clear the pipes, ensuring that all debris is removed from inside and outside of the pipe before it causes any serious issues.

There are a lot of tips for storm drain cleaning and maintenance but the best way to keep storm water drains clear is by preventing debris from getting into them in the first place. This can be done through regular inspections, cleaning up litter around the drain, and using the grate or filter system at the top of the drain to trap leaves and other large items that could clog it up. 

The best way to clean storm water drains is with the help of a professional. A professional stormwater drain cleaner can inspect and clear the pipes, ensuring that all debris is removed from inside and outside of the pipe before it causes any serious issues.

Equipment for Cleaning Stormwater Drains

Cleaning stormwater drains is an important process to ensure that water runoff is properly collected and discharged. Two key pieces of equipment used to clear blocked drains are CCTV cameras and hydro jets. 

Using specialised tools helps reduce labour costs associated with manual cleaning processes.

Who Is Responsible for Storm Water Drains?

It is common knowledge that plumbers are responsible for maintaining our home’s plumbing systems, but who is responsible for storm water drains? Storm water drainage systems are an essential part of any city or municipality, and they require regular maintenance to keep running smoothly. Plumbers play a key role in this process.

Does a Regular Plumber Do Stormwater Plumbing?

It depends on your location and type of plumbing project. In some places, a general plumber may be able to take care of stormwater plumbing without needing additional credentials or training. However, more complicated projects will require specialised knowledge and experience with stormwater systems.

How to Find an Affordable and Professional Stormwater Plumber

Ask friends, family, or neighbors for recommendations for plumbers they have used and trust.

Finding a reliable stormwater plumber can be a challenge. Knowing what to look for and the resources available will help you find the right plumbing service. A stormwater plumber is qualified to manage all types of drainage-related issues, from major emergency repair works to routine maintenance.

When searching for a stormwater plumber, it’s important to check their qualifications, experience and reviews. Before hiring any contractor, make sure they have relevant certifications and years of experience working with stormwater systems. 

Here are some tips for finding a professional and affordable stormwater plumber:

  • Get recommendations: Ask friends, family, or neighbors for recommendations for plumbers they have used and trust.

  • Shop around: Contact multiple plumbers to get quotes and compare prices. Richard S. with VIP Realty says, to save money on hiring a plumber to clear blocked stormwater drains, it is helpful to shop around and get quotes from multiple plumbers to compare prices.

  • Check reviews: Look for reviews online or ask the plumber for references to get a sense of their reputation and quality of work.

  • Consider using a smaller or local business: These companies may have lower overhead costs and be able to offer lower prices.

  • Don't be afraid to negotiate: Don't be afraid to negotiate the price with the plumber, especially if you have received multiple quotes.

Blocked Storm Water Drain Cost: Tricks for Reducing Your Bill

Homeowners and business owners alike may be frustrated to find out that they have blocked storm water drains. The cost of unblocking a drain depends on the severity of the blockage, as well as the type of drain being serviced. 

Clearing blockages in storm water drains can be difficult as they often contain tree roots or other objects that require specialised equipment to remove. Hydro jet cleaning services cost will also depend on the extent of blockage and the size of the pipe affected.

Hiring a professional plumber to clear your blocked drains is more affordable than you may think and is the best way to ensure that your drainage system runs properly. 

Not only will hiring a qualified plumber help prevent future blockages but they are also able to save you money on unnecessary repairs and costly house remodelling.

DIY Storm Water Drain Cleaning

Two ways to save money when clearing blocked stormwater drains in a DIY project are: 1) removing debris by hand instead of with expensive equipment, but this will take longer and will be dirty work, and 2) using readily available drain cleaning tools such as a wire hanger or a piece of flexible plastic to break up the blockage, or even a high pressure hose, if you have one. Both of these methods can be effective in unblocking drains and are generally more cost-effective than calling a professional plumber.

Frequently Asked Questions

Where Do Most Storm Drains Empty Into?

Most storm drains empty into bodies of water such as rivers, lakes, or the ocean. Storm drains are designed to channel rainwater away from roads, sidewalks, and buildings to prevent flooding and water damage. Stormwater can still pick up pollutants as it flows through streets and other paved surfaces, so it is important to be mindful of what goes into storm drains to protect water quality.

What to Do if Your Drains Are Blocked?

If your drains are blocked, you can try using a plunger to remove the blockage. If that doesn't work, you can try using a drain snake or pouring a mixture of hot water and vinegar down the drain. If these methods do not work, it is best to call a professional plumber to clear the blockage. Do not use chemical drain cleaners as they can be harmful to the pipes and can cause additional damage.

Why Is My Storm Drain Backing Up?

There are several reasons why a storm drain may be backing up. One possibility is that the drain is blocked by debris such as leaves, twigs, or trash. Another possibility is that the drain is clogged with grease or oil. A third possibility is that there is a problem with the drain's design or construction that is causing it to become blocked. If you are experiencing a backed-up storm drain, it is important to determine the cause and take steps to resolve the issue to prevent further problems.

How Do I Know if My Storm Drain Is Clogged?

If you notice standing water on the ground near your storm drain, it may be clogged. Other signs of a clogged storm drain include water backing up into the drain or overflowing when it rains, a foul smell emanating from the drain, and slow drainage when water is running into the drain. If you suspect that your storm drain is clogged, it is important to address the issue as soon as possible to prevent further problems.

Planning to Purchase a Generator? Here are Some Buying Tips

RH Business Marketing Solutions

When it comes to purchasing a generator, there is no shortage of options out there. The right choice, from small, portable models to large, heavy-duty ones, will depend on your individual needs and requirements. To make sure you buy the right generator for your needs, here are some top buying tips to help you out

Research Different Types of Generators

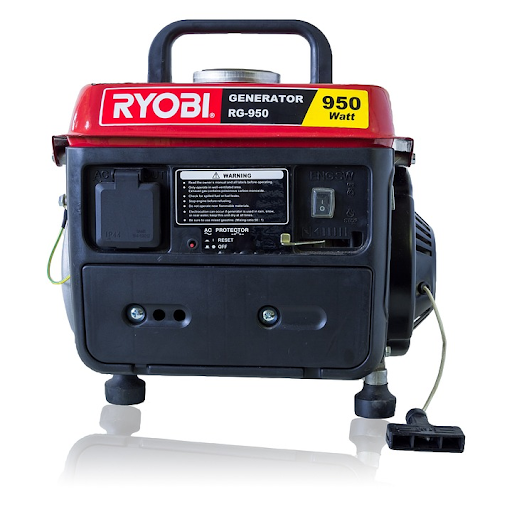
Suppose you are planning to buy a generator for your home or business. In that case, one of the most important buying tips is to research different generators available in Ontario, Manitoba, or other provinces. There are two main types of generators; portable and standby. Some of the most common types of Ontario generators include portable units powered by gasoline, propane, or diesel fuel and backup power systems for whole-building installations that use natural gas. Portable units are suitable for emergency power outages and short-term power needs. Backup power systems provide extended emergency protection when the lights go out and are best suited for residential or commercial buildings. Knowing what type of generator you need will help you narrow down your search and make it easier to find one that meets your needs perfectly.

Identify Your Needs

From your research, you can align your needs with the options available and decide what type of generator is best for you. Think about what exactly you need from one. What do you plan on using it for? Is it for emergency power backup in case of power outages or just occasional use? Knowing exactly why you want the generator will help narrow your search significantly and ensure that whatever model or brand you purchase satisfies your particular needs. This will also help you prepare for what budget might be necessary. Taking time to consider your needs before purchasing can help ensure that you get the right generator for the job. 

Calculate Your Power Needs

To ensure that you select a generator of suitable capacity, it’s important to calculate your exact power requirements before making a purchase. To do this effectively, make a list of all the devices that may potentially be powered by the generator at any one time — such as microwaves, refrigerators, TVs, ovens, and air conditioners — along with their exact wattage ratings. This will allow you to calculate the total wattage you need from a generator, ensuring that it is adequate for your needs. 

Consider Fuel Type and Noise Level

Another important factor when purchasing a generator is the type of fuel and noise level it produces when running. If you plan on using the generator in a residential area, you'll want to ensure it is designed for silent operation. Additionally, consider whether you want to use gasoline or diesel and what fuel storage capacity you need. 

Compare Warranties

The length and type of warranty the manufacturer offers can be a good indicator of quality. Make sure to compare warranties between different brands and models so that you know exactly what kind of coverage your generator will have should any problems arise. 

Following these tips guarantees you will purchase the best generator for your needs and requirements. Just remember to do your research, compare prices, look at warranties, consider fuel type and noise level, and ask about maintenance requirements to make sure you get the most value out of your new generator. With all this taken into account, you'll be able to confidently purchase a generator that meets all of your power demands.