Google+

contact us

Use the form on the right to contact us.

Day or Night, we are here to serve you. Leave your plumbing problem to us.


Tinley Park, IL

(708)845-7922

Residential and Commercial plumbers and plumbing contractors available in Orland Park, Tinley Park, Oak Lawn, Palos Heights, Midlothian, Oak Forest, Homer Glen, Mokena, Frankfort, and the surrounding Chicago South Suburbs. Emergency plumbers.

copper water lines.jpg

Kevin Szabo Jr Plumbing Blog

Kevin Szabo Jr Plumbing is Tinley Park, Orland Park, Oak Forest, Midlothian, Orland Hill, Homer Glen, Mokena, Frankfort, Crestwood, Palos Heights, Oak Lawn, local plumber. Read our blog for advice, tips, a good laugh, and basic home improvement.

**We are moving our old blog to our new and improved website. Too see all our posts visit kevinszabojrplumbing.blogspot.com

How to Properly Take Care of Electricity Supply While You’re Renovating Your Home?

RH Business Marketing Solutions

Renovating your home can be a daunting task, but with careful planning, it doesn't have to be. One of the most important things to consider when renovating your home in Australia is how to take care of your electricity supply. Here are a few tips on how to do that.

BEST POWER SOLUTION

One thing to consider when renovating your home in Australia is how you will keep everything powered up while the renovation process takes place. Some things will likely need more power than others, such as having all lights on inside or outside during the day while renovations are being done. If you're going to need more power supply or a new distributor, it's best to do an electric comparison first. This should be done before the renovation process begins to avoid any sudden changes in electricity costs.

Renovating your home can also change the cost of electricity for you. This is because there is more power being used at one time than there was before, so it might start to increase your monthly bills. Depending on how long you plan on staying in your home and what renovations will be done, again, it's important to do an electric comparison beforehand so that you're aware of any changes that may happen. If your electric bill does increase once everything has been completed, don't forget about energy-saving tips. These tips can help reduce the amount of energy you use around the house which can save you money in both the short term and long term.

You can also consider taking any items that need extra power off of the main distributor or get an alternative power source and one of the best ways to do this is by using a generator or inverter. These can be used indoors or outdoors depending on how your home is set up and which would work best for you. If possible, make sure that you use an inverter rather than a generator as it will produce less noise, making it ideal for an outdoor environment.

ELECTRICAL SAFETY

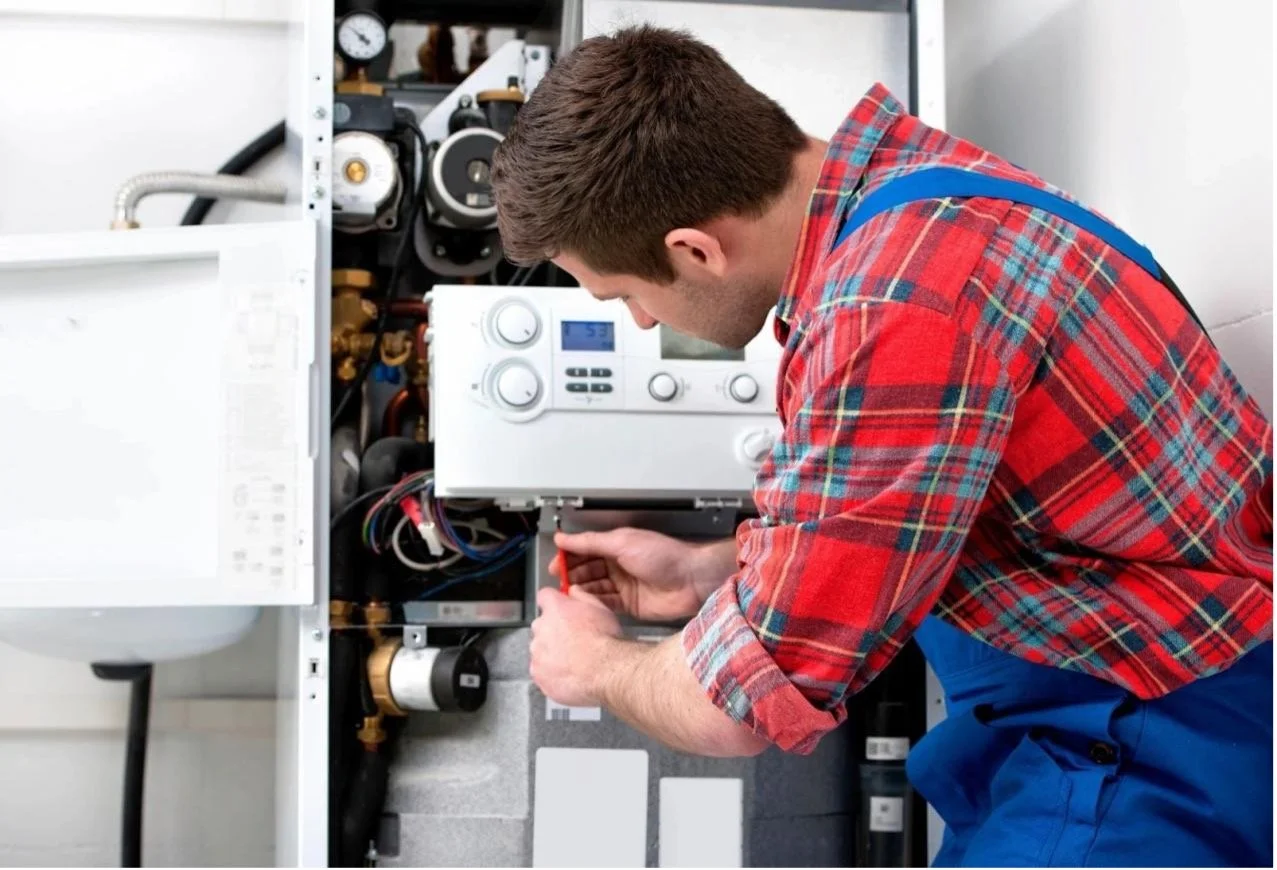
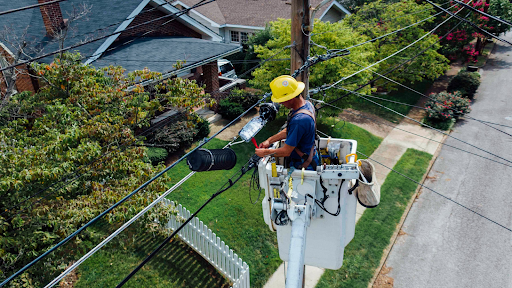
Though this may seem like an obvious one, it is still very important to ensure that everyone who is involved in the renovation process knows how to take care of the electricity supply. The last thing you'd want is for someone to accidentally turn off your main power supply while you're having work done on your home. Having someone around who knows how to safely take care of the electricity supply can help keep everyone safe and prevent accidents.

Also, it is important that everyone knows what can and cannot be done while taking care of the electrical supply. Most of the time, it's best to consult a qualified electrician before beginning work on your home's power supply. You certainly don't want to accidentally cause more damage or make things worse.

CHECK POWER CABLES REGULARLY

One of the most common causes of fires in homes is faulty wiring or electrical cords. To avoid any possible accidents, you should always check these things before using them. Basically, if something looks suspicious, don't use it until a professional has checked out first. This way, you can be sure that everything is safe and will continue to remain so.

Also, it's important to look at where the electrical cables are placed before you begin working on your home. This way, you can figure out if anything needs moved or changed for renovations to be completed properly. 

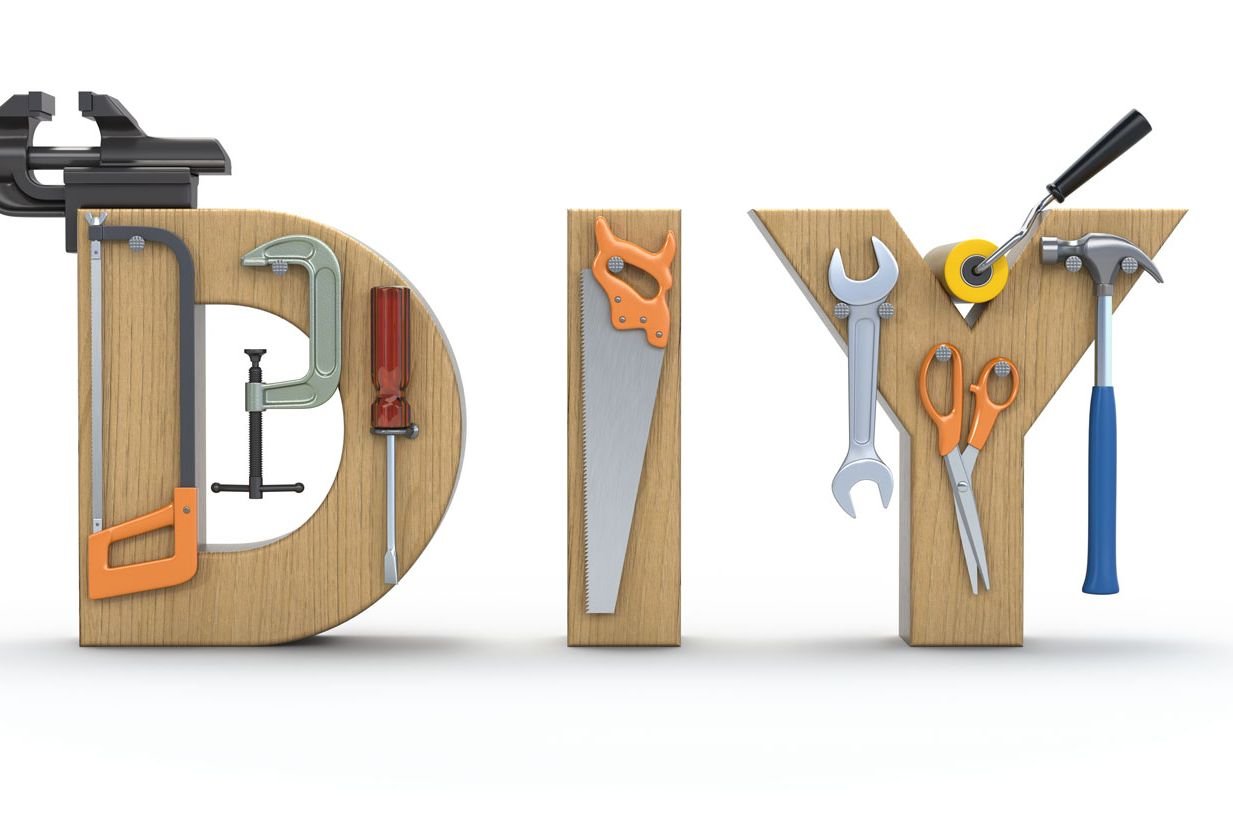
BE CAREFUL WITH POWER TOOLS

Using power tools while renovating your home can help speed up the process considerably, but they're not always completely foolproof. If you plan on using any power tools during renovations, make sure that everyone knows what they're doing and how to use them properly and safely.

For example, a multifunction tool may not only cut through wood but can also make holes in walls or create sparks as well. If anyone messes up, it's best to repair things before working on any electrical fixtures inside. Using power tools may save you some time, but they should only be used if absolutely necessary after taking safety precautions first.

One of the most important things to consider when renovating is how to take care of your electricity supply. Whether you're doing a DIY project or hiring someone, it's best to consult an electrician before beginning work on your home's power supply and make sure that any renovations won't cause more damage. It can also be helpful to do an electric comparison beforehand so that you know what changes might happen with your monthly bills and look at where electrical cables are placed for safety reasons. If using power tools during renovation, make sure everyone knows how they should be used safely and correctly in order not to injure themselves or anyone else around them.

ARE YOU REMODELING YOUR KITCHEN? HERE'S HOW TO DEAL WITH THE WASTE

RH Business Marketing Solutions

You might be wondering what to do with the waste during your kitchen remodeling. You'll find that there are many different ways of dealing with waste during this process, but you should try to use organic materials as much as possible. It's important to recycle and compost, but it's also very important not to put any excess burden on the environment by adding too much waste back into it. Let's see some solutions for dealing with waste in your kitchen!

LARGE TRASH BINS

One of the simplest solutions for dealing with kitchen remodeling waste is to simply place one or more large trash bins in the area where you're working. Be sure to keep them far away from food preparation surfaces, and clean them out regularly so that there isn't anything rotting inside. If you feel that you'll be making a lot of mess and waste, you can go for Gordon Park skip bin hire to put all that waste in large containers and have them shipped. This is one of the best options because it removes the burden from your shoulders.

REDIRECT YOUR KITCHEN SINK DRAINS

Your sink drains could be another source of organic materials for composting or recycling during your kitchen remodeling project. You can redirect them to large containers so that you can keep organic kitchen waste contained while it's working its way through the composting process. Be aware that some of these materials might need to be treated before they can go into general compost piles, so don't just toss everything into one container!

KEEP A DUSTPAN NEARBY

You'll probably create a lot of dust during your kitchen remodeling project. Even if you're wearing masks and gloves, there will be small particles in the air (and coating every surface) of your home. You can make it easier on yourself by keeping a small dustpan or shovel nearby at all times. This way, when you knock down insulation or other debris around your home, it can easily get swept up.

USE AS MUCH RECYCLED AND RECYCLABLE MATERIAL AS POSSIBLE

This is true for any project, but it's very important for kitchen remodeling projects in particular. If you use as much recycled material as possible, then it will be easier to recycle or compost the rest of your waste materials after your project is complete. Even if you have to pay more upfront, you'll save money later on because there won't be so much waste to deal with. During your kitchen renovation project always remember your local recycling plant so that you have a place to deposit all of those recycling materials when it's time for them to go! Not every plant accepts every material, so check beforehand to see what's accepted and what isn't. You don't want to create more waste than necessary during your kitchen renovation project! One way that you can reduce your overall waste despite using many different products is by using reusable materials whenever possible. Instead of buying disposable pans and trays, see if you can find reusable pans and trays that you can bring back with you when your project is over. You'll also probably be needing lots of cardboard boxes during your kitchen remodeling project so that all of your unwanted materials and belongings can be easily and safely transported to a storage unit or new home.

CLEAN UP PROPERLY

One way to reduce waste during kitchen remodeling projects, or any other type of renovation project for that matter, is to clean up properly after yourself once the job has been completed. Make sure that everything has been completely cleaned before you leave the scene so that you don't have too much cleaning up to do later on! If something goes wrong, don't feel pressured into doing more than necessary to fix it. If there are materials that you don't want around your property anymore, make sure they're gone before the actual kitchen remodeling project begins. This will save you time later on as well as reduce the overall amount of waste that has to be dealt with after all is said and done! If you have asbestos insulation, take care of it properly by hiring a contractor who specializes in this material before the renovation begins. If there is a problem that can't be dealt with, then just remember that other types of materials often look very similar so always double-check to make sure you're not accidentally exposing yourself to something dangerous!

The process of remodeling your kitchen is fun but it can be difficult to deal with the waste materials that are created. These tips will hopefully help you to create as little waste as possible so that you have a safer, cleaner remodeling experience!

8 Projects Beginner Flippers Shouldn’t DIY

RH Business Marketing Solutions

Home improvement has the potential to be fun, affordable, and extremely rewarding. But that doesn’t mean every DIY project is worth attempting. In fact, a recent report suggests that 4 in 10 Americans suffer from more DIY fails than successes, and that it takes an average of 5 hours of trial and error before calling in the professionals.

The bathroom is the most common room of the house to suffer at the hands of inexperienced DIY-ers, followed closely by the kitchen and yard. Even though the idea of hauling out your drill and cutting some home improvement costs is tempting, it’s important to remember that some tasks are simply best left to the professionals. 

It doesn’t mean you can never go for DIY projects that are within your range of expertise. It just means knowing when to hand the baton over to an experienced contractor. 

Here are eight DIY projects that beginners (and most intermediates) should never try. 

1.     Electrical Installation 

Aside from the odd light bulb change, almost all electrical installations should be reserved exclusively for professional electricians. The dangers surrounding electrical installations are vast and recurrent, making this form of DIY a very unsafe process to execute, no matter how confident you feel. 

Whether you want to install a new light fixture, replace your electrical panel, or perform a demolition of electrical components, these are all jobs that you should never attempt alone. 

The US Electrical Safety Foundation found that improperly handled electricity is annually responsible for 400 deaths, 4,000 injuries, and up to $1.6 billion in damages to property. So, next time you catch yourself gazing wistfully at the electrical box, promptly identify a good distraction. 

2.     Window Replacement 

Window replacements are tricky to execute because of how precise every component needs to be. Even the tiniest crack or mismeasurement around the walls, framing, and window in question can result in long-term water leaks and mold damage. 

Even though window installation may seem like a straightforward job, it’s the kind of project that requires a meticulous, experienced hand. 

Furthermore, any damage repair needed will not be cheap. And you may wind up spending more money fixing damages than it would have cost for a contractor to do a proper job the first time around. 

3.     Wall Removal 

The demolition or removal of a wall is a highly ambitious home improvement project that amateur DIY-ers should steer well clear of. This is due to the fact that only a professional will be able to tell whether or not a wall is load-bearing, meaning it is an integral support structure of the house. 

If you attempt to remove a wall without having performed the proper load-bearing analysis procedure, you could place yourself, your home, and everyone in it at risk. Having your ceiling cave in is not worth the time or energy it takes to attempt this project. Rather, get a professional to do the work for you. 

4.     Removing Chipped Paint 

Removing old paint from a wall might seem like child’s play. But in reality, it can result in serious health consequencesif you’re not careful. Buildings erected before 1978 (yes, even if they have been remodeled), are likely to contain lead-based paint, which is extremely toxic to humans. 

If you just decide to go for it and strip away the newer layers of paint, you could uncover the lead-based paint chips which lay beneath. In doing so, you put yourself at risk for lead poisoning, which can cause anemia, brain damage, and kidney damage. 

5.     Roof Leak Repair

 Your roof is an integral part of your house, and tampering with it when you don’t have professional experience can cause a lot of damage—while costing you an arm and a leg. If your roof has a leak, doing a simple patch-up job might seem like the best option. But in reality, it’s far more complicated than that.

To repair a roof leak, you have to identify the weak spot and replace the individual shingles (or other roof components) without causing more damage to the surface. A solid roof job should last anywhere between 13-18 years, but amateur repairs could just mean more problems in the long run. 

6.     Painting Kitchen Cabinets 

When it comes to painting the kitchen cabinets, choosing the perfect color is the least of your concerns. The job may seem simple, but there is far more to it than taking a foam roller and applying the latest shade of periwinkle. 

Particularly if the kitchen itself is old, there is likely to be a thick build-up of grease, finger oils, and cooking stains embedded in the surface of the wood. This means that an extensive preparation process is needed before fresh paint can go anywhere near the cabinets. Failing to prep the surfaces properly can lead to flaking paint, bubbles, and unsightly, hard to hide streaks.

7.     Repairing Drywall

If you think you’ve got what it takes to repair broken drywall, think again. This brittle material is finicky enough to deal with when it’s new. But there is so much more to repairing old drywall than what meets the eye. Even a small crack can reveal a huge issue with the joints or fastenings, and a simple patch job can cause more issues in the not-too-distant future.

Whether you are installing, repairing, or removing drywall in your home, there is a substantial amount of expertise needed to accomplish the job properly. Rather, get a quote or estimate from a professional and work the job into your budget than trying to tackle it yourself. 

8.     Adding A Skylight 

Adding a skylight to your ceiling might sound like a whimsical, fun DIY home project. However, the reality of the installation process is far more complex than what you might like to believe. 

The main challenge is around the installation, which is especially tricky when mounting onto a ceiling. The potential for gaps and leakage points becomes even greater with a skylight than with a normal wall window—which, as we’ve already covered, comes with its own set of troubles. 

Wrapping Up

When it comes down to it, just about any major infrastructure repair or installation to your home is best left to the pros. But don’t let that stop you from experimenting with some lower-stakes projects!

Guest Contributor: Nina Sharpe

An Effective Guide On How To Maintain A Good Indoor Air Quality

RH Business Marketing Solutions

Poor indoor air quality can have a serious impact on your health and well-being. According to the Environmental Protection Agency, indoor pollutants may be up to 10 times greater than outdoor pollutants. Fortunately, there are steps we can take to improve our home's air quality such as using a humidifier or installing better insulation. In this blog post, we'll explore some of the best ways to maintain the good indoor air quality in your home.

1 - Have an Air Purifier Installed

An air purifier can have a huge impact on your home's indoor air quality. If you're looking to remove pollutants from the air, such as dust and pet dander, a Rainmate air purifier could be just what you need. There are all sorts of different types, such as HEPA filters or ionic filters, that vary in price and effectiveness. Make sure to research different types so you can be confident that you're selecting the right one for your home. With the right air purifier installed, you can easily remove bacteria and impurities from your home's air. Getting an air purifier can be an excellent first step to take for better indoor air quality.

2 - Keep Your Home Well Insulated

In addition to an air purifier, keeping your home well insulated is essential for maintaining good indoor air quality. If the atmosphere lacks insulation, it leaves more room for cold air to escape during the winter, which means warm air escapes as well. This can result in higher electric bills, not to mention a chilly home. There are a few different types of insulation that you can use, such as cellulose insulation or spray foam. If you're looking to save money on your energy bills, consider having an insulation contractor come to your home to help you find the best insulation for your space.

3 - Maintain Your Home's Humidity

Maintaining good humidity levels throughout your house is another way to maintain healthy indoor air quality. A humidifier might be necessary if you live in an area with low humidity during the winter. On the other hand, maintaining high humidity levels might be necessary if you live in an area with high humidity. Either way, humidifiers, and dehumidifiers can help maintain a healthy level of indoor air quality. Your humidity levels should be at around 40-50%. If you're using a humidifier, make sure it's cleaned regularly so that bacteria doesn't build up.

4 - Ventilate Your Home

Ventilation is incredibly important when it comes to maintaining good indoor air quality. Ventilation is a key component in circulating the air throughout your home so that everything stays fresh and clean. During the winter, your windows may be closed up to keep out cold weather and warm air inside. However, this means that pollutants won't be able to escape. Consider opening your windows for at least 30 minutes every day so that fresh air can come in and pollutants can be exchanged. Proper ventilation can seriously help improve your home's indoor air quality. Why not consider installing ceiling fans throughout your whole house as this can help promote air movement in your home when necessary. Make sure your home is properly ventilated, especially during the summer months. You don't want to allow the atmosphere to get stuffy and stagnant that can also lead to poor indoor air quality.

5 - Use the Right Cleaning Products

It's important to use appropriate cleaning products when you clean your home. Many common household cleaners can be extremely toxic, which is bad for your health and can also impact the indoor air quality of your home. On the other hand, using natural cleaning products - such as a vinegar/water mixture - will improve the atmosphere of your home and help maintain healthy indoor air quality.

6 - Use Natural Deodorizers

On the same note, you should try to avoid using harsh chemicals and artificial materials for deodorizing your home. Burning incense, using natural deodorizer atmosphere, baking soda, or other such products can add a pleasant aroma to your home without compromising the. It's a safe and healthy way to maintain good indoor air quality.

Maintaining good indoor air quality is important for our health and well-being. Fortunately, there are many things we can do to achieve this goal, such as using an air purifier, keeping our home well insulated, maintaining humidity levels, ventilating our home properly, and using the right cleaning products. By following these tips, you can keep your home healthy and free from harmful pollutants.

Water & Flood Damage Restoration: 4 Things You Should Know About It

RH Business Marketing Solutions

Water damage can come about in many ways, but it is always inconvenient and costly. Floods are the worst culprits of water damage for many reasons, including the fact that they may affect an entire building or area. Because of this, floodwaters must be pushed out quickly before mold begins to grow. Whether you are suffering from flooding at home or the office, it may be in your best interest to learn more about water damage restoration. These four facts about flood and water damage restoration may help you understand what to do if you suffer from this type of damage.

What are the Common Causes of Water Damage?

One of the most common causes of water damage is leaks. These can happen from several sources, including plumbing, roofs, and even windows. Water seeping through cracks is one of the most difficult types to detect because it goes quietly until it has soaked everything into a soggy mess. Other less noticeable sources include broken appliances that spray water or sewage that backs up into a building due to blockage. Whatever caused your water damage, you need a restoration plan as quickly as possible.

Regardless of how it occurs, water damage often results in additional damage to the building's structure. Water that remains for too long will weaken the integrity of walls and floors, which means you can expect more problems if they are not repaired immediately. However, avoid trying to repair anything by yourself, and instead call for professional help, by reaching out to reputable water restoration companies. Even a single mistake could make the problem worse and end up costing more money in repairs, time lost from work, and so on.

What are the Proper Procedures for Water Damage Restoration?

As mentioned earlier, water damage restoration is a multi-stage process. The first step in this process should be to turn off the power by shutting off circuit breakers and removing fuses from the fuse box to prevent short-circuiting. You also need to remove personal items that have been soaked. This will prevent them from being damaged further when your building's structure begins to dry out.

While you are repairing the secondary damage caused by flooding, professionals need to begin drying out your walls and floors. This ensures that mold does not start growing before the building has had a chance to fully dry out. Once everything is ready, humidity can be brought down within 24 hours using dehumidifiers or other equipment designed specifically for this purpose.

The Difference Between Water Damage Restoration And Flood Cleanup

Water damage restoration is not the same as flood cleanup. Some companies specialize in one but not the other, even though both types of water damage require similar skills and equipment. However, restoring water damage after floods is more difficult because floodwaters are only the beginning of the problem. They leave after-effects, including mud and other debris that can be hazardous to your health. Flood damage restoration also involves cleaning up floodwaters that may have contaminated anything they touched, including your personal belongings. 

On the other hand, water damage caused by leaks or broken appliances is easier to repair because they are less likely to leave extensive after-effects. This makes them easier to clean up, however they also require professionals with the equipment and skills necessary to restore things such as air conditioning, water heaters, and other plumbing.

What to Do If You Have Water Damage Restoration Problems

If your building has already suffered water damage during floods or leaks, then you should take steps immediately to prevent further damage. This could include removing sections of walls that have been soaked. However, if you do not want this kind of demolition work done in your building, then you should turn off all power and start drying out your structure. While waiting for professional help, go through the damaged areas and remove items that are valuable enough to risk being damaged by mold or other contaminants left behind by floodwaters.

When working with water damage, it is best to act quickly. A little bit of neglect can lead to big problems down the road that require you to invest more time and money into fixing them. This means that waiting too long before hiring help or starting work yourself could end up costing you even more money in repairs later on. To avoid these kinds of problems hire professionals that you can trust, and work with them to clean up the mess left behind by water damage.

Water damage restoration is not a one-person job. It requires specific skills and experience to get the best results. Even if you try to handle it yourself, there are potential accidents that can't be dealt with without professional help. However, what you can do is to do your best to prevent these issues from occurring in the first place.  Things like using your dishwasher correctly, not flushing away non-organic substances down toilets, and following guidelines on how to use appliances can reduce the risk of water damage in your home. So, keep these things in mind next time you notice a sign of water damage in your home, act quickly and save yourself from more serious issues, at least.

What Should I Do If My Water Heater Isn't Working?

RH Business Marketing Solutions

Unlike household appliances like dishwashers and washing machines, your water heater will be used daily. This device is used to provide hot water for everyday purposes such as washing dishes, bathing, washing clothes, and making toilets. Your family uses water heaters every day, so it is not uncommon for problems to arise. Fortunately, tank water heaters are designed with minimal parts. You don't have to hire a professional to fix your water heater. We've compiled a list of common problems and solutions if your water heater isn't working.

Problems and solutions of water heaters

Loose or damaged drain valve

Unlike leaks near the bottom of the tank, leaks at the top of the system can be easily repaired. The most common cause of tank leaks is a loose tube valve. It's the top handle of a tank designed to turn the water flow on or off. To solve this problem, you need to hold the nut on the ball or globe valve. If the leak worsens after you tighten it, go to your local hardware store and get a new water heater valve.


Overpressure valve defective

Most types of water heaters are equipped with a pressure relief valve that reduces tank pressure when the tank pressure is too high. If there is a valve leaking on the top of your water heater, we recommend purchasing the new one online or from a local store. Removing and replacing the regulator is not difficult.


There is no hot water

If you have an electric water heater in your home, the number one cause of water shortage is a broken heater. The water heater has two heaters that heat the water entering the tank. When the heating element begins to fail, there is little or no hot water for showering, washing, and rinsing.

On the other hand, various problems can prevent hot water from being generated in a gas heater. This could be because the lights are off or the gas valve is defective. If the thermocouple is damaged, your home will run out of hot water. Any of these components can be easily replaced by purchasing a new component. If your water heater is not working properly, you will need to purchase new parts or contact a licensed plumber to repair the water heater.


Lack of hot water

Do you often run out of hot water? This problem can be a by-product of a bad hose. These pipes are designed to push and heat cold water at the bottom of the tank. If the dip tube begins to crack or leak, the cold water supply line may be at the top or center of the tank. This will send cold water to your home faucet and shower at the top of the tank. This water heater problem can be solved by replacing the immersion tube in the system. Since installing new piping is complex, we recommend that you seek the help of a qualified technician.

A lack of hot water can also be a sign of excess sediment in the tank. When the water heater reaches mid-life, water minerals such as magnesium and calcium begin to build up at the bottom of the tank. If the pain continues to increase, there will be less space to store hot water in the tank. To solve this problem, clean the water heater to remove excess minerals.


The temperature of the water is either too hot or too chilly.

If the shower water is too hot or too cold, you can adjust the water temperature by changing the thermostat setting. Setting the temperature to 120 degrees Fahrenheit will save you energy costs. This temperature is suitable if you are concerned about burns or rashes. Is this temperature too cold? You can set the thermostat to 140 degrees Fahrenheit to make the bathroom more comfortable. If the Want Water heater repair San Diego does not move after the temperature change, the thermostat may be defective. Find a qualified plumbing or heating company near you to repair or replace your thermostat.


Low water pressure

The breakdown of a water heater is not always the cause of low water pressure. If you live in an older home with little plumbing, the water flow will be restricted before it reaches kitchen or bathroom surfaces. The only way to fix this water heater problem is to connect a new 3/4 inch water line to the system. Another problem that can negatively affect water pressure is limescale deposits in the water pipes. If the pain continues to increase, there will be less space to store hot water in the tank. To solve this problem, clean the water heater to remove excess minerals.

As magnesium and calcium build up in the pipe, the diameter of the water pipe decreases. As a result, hot water from the water heater will not flow efficiently to the sink or electronics. The process of replacing plumbing involves removing drywall so the average unlicensed owner cannot fix this water heating problem.

Colored water

The water that comes out of your sink needs to be clean. Have you ever noticed that the water in your house is colored? This is a sign of aging at the anode start of the tank or water heater. Fortunately, if the problem is identified early, it can be fixed. If your home's water heater is not working properly, contact your local plumber for repairs and adjustments. A licensed HVAC plumber or Want Water heater repair san Diego can easily remove and replace the anode rod system.

If the rust spreads in the tank, small cracks can form. This can cause water to spill on the floor or furniture. Unfortunately, most tank leaks are irreparable. Instead, to fix this water heater issue, you'll need to buy a new system. To save money, it is a good idea to report the first signs of corrosion to a professional to make sure they have been fixed.

It took a long time to make hot water.

Once the tank is empty, it only takes a few minutes to recycle the hot water. If the water heater is taking an hour to get hot water, this indicates a dirty burner opening. On the other hand, increasing the pressure of the gas water heater can solve the problem of insufficient hot water supply. To clean the burner openings and adjust the gas pressure, contact your local licensed technician for immediate help with this water heater issue.

Call our team at  or make an appointment on our website in the event of malfunctions with the gas valve, the heating element, or the immersion tube. Our experienced team of technicians offers you repair and installation service for water heaters in your area. Want Water heater repair san Diego also provides repair and installation services for water softeners, drains, central air conditioning, ovens, and plumbing. Find Water heater repair San Diego offers upfront pricing for all types of HVAC and plumbing projects. Our team is billed for work, not hourly. In addition, every project we work on guarantees your satisfaction.

What to Know before Installing Metal Building

RH Business Marketing Solutions

Metal buildings are very practical, economical, and incredibly solid structures. They can keep warm and cold to extremes, so they are practical for all kinds of purposes. Metal structures can be used for different things like a garage, warehouse, or even a place to live.

Depending on the purpose, you also need to choose the best insulation for your metal building. There is no person in the world who doesn't want to save money, and choosing good insulation is the main thing in this case.

Good insulation will reduce the electricity costs you need for heating or cooling and do that for you. However, there are many things to know before installing a metal building that will help to make a choice.

Knowing your needs

Before engaging in the installation of a metal building, you must ask yourself what your needs and expectations are. First of all, do you need just a temporary object or a building you want to use in years ahead? If it's just a temporary object, you can easily do it yourself. But if you need it for something more lasting, it is better to contact some experienced contractors. It is good to know that experienced contractors will save you from poor insulation quality and structural damage. 

Installation on your own

Installation of your own metal building can be very interesting and simple if you have even a little construction knowledge. But if that's not the case, it's better to find someone with experience to help you. Before you embark on the installation process, take a good look at the instructions manual. In order to do this job properly, you must follow every step of the instructions manual and do it to the end. In order to do that keep your instruction manual near you every step of the way.

Insulating 

Maybe you're one of those people who choose to build a building without any insulation to save money. In that case, depending on what you need for a metal building, insulation can be crucial. If it's located in an area with extreme climate or temperature change, then you need to think of properly insulating a metal building if you want it to last. With good insulation, you can prevent corrosion and rust, most of them absorb moisture. In any case, think of it as something that will protect your investment, and keep you cozy during the coldest or warmest days.

The Foundation

One of the most important steps involves preparing the ground surface for pouring the foundation slab. The surface where your slab of cement will go must be completely flat. This is important so that the anchor bolts will be easily found. Make sure to see instructions to find out where your anchor bolts go.

Don't forget that during this phase, you need to install the I-beams, support columns, and secondary framing. It is good to install purlins at two-foot centers to give your building additional strength. Make the frame for openings, such as doors and windows, during this step as well.

Roof 

When we talk about the roof, what's very important is knowing that there's a formula for determining the steepness of the roof compared to its horizontal length. Here's how to calculate it, if the roof gradient value of 1:12 means the roof rises 1 inch for every 12 inches of roof’s length. Roof pitches of 3:12, 4:12, 5:12, or 6:12 work best for metal buildings if you live in a snowy climate country. Anything over a 6:12 pitch tends to make huge amounts of snow slide off the roof. Standing seam metal roofs, which permit snow to slide more easily, might do better with a 2:12 or 3:12 pitch. The other benefit of this formula is that insulation can be firmly pressed against the structures, without creating cracks. 


Guest Contributor: Mike

Unique Backyard Playgrounds

RH Business Marketing Solutions

Are you looking for ways to spice up your backyard for your kids to play that isn’t the standard playground? We gathered our favorite ideas of backyard playground that can mostly be done DIY style.

Have a child who doesn’t like playing in a playground but you’d like for them to have their own space? This cute little treehouse makes it easy for your little ones to escape to their own area to play and can easily be made with basic lumber.

Already have certain materials but want to spice it up still? Adding the rock climbing wall will definitely add a little extra to the slide and make it a bit more difficult to get up to burn some more energy.

We would recommend this for older children, but a DIY wooden playground seems like so much fun. There is a variety of things to do in such a small space but it definitely will burn some energy and create problem solving skills and aid in strength.

For those children who like rock climbing, make your own wall! This one is completely DIY by using blocks of wood instead of the typical rock climbing materials. Either way, your child should enjoy it just as much.

This one looks like loads of fun! If you don’t want to DIY a whole playground, this is definitely a good idea. Build a nice sturdy base for the playground, and then add things that are in a typical playground.

This is a great idea if you have guests over frequently with other little kiddos. A sandbox connected to a slide that comes off of the porch is an easy way to step away from your kids and let them play since the adults will be close by on the deck, able to supervise.

This jungle gym type of playground looks challenging but so much fun! It’s definitely unique and will challenge the kids to use their skills and problem solving skills.

A little play house with a playground attached to it, that’s the real definition of fun! This one looks almost completely all DIY, but like mentioned before, if you build a sturdy base and add pre-bought things, it will be just as fun!

The colored logs are a cute, creative way to lead to a playing area, and perfectly in the shade!

Guest Contributor: Tiffany Powell

Small Bathroom Interior Inspiration

RH Business Marketing Solutions

Adding in a new small bathroom or looking to renovate the bathroom you already have? It’s a good idea to look at other bathrooms to get an idea of what you’d like the remodel to look like.

When you add white to the bathroom it surely makes the bathroom way brighter and inviting. Everything looks well lit and everything matches white when it comes to choosing all of the other materials and decorations.

Using tile is a great way of making your bathroom have a theme and match. The tile can be used to tie in the appliances and make the bathroom look more pleasing to the eye.

Sage green is making it’s come back in 2022! Almost everything matches with sage green, and all of those plant lovers out there love to incorporate it because it looks so good with plants.

Adding a pop of color with the cabinets is a great way to make a statement without having multiple colors in your bathroom or having the bathroom any other color than white.

Farmhouse aesthetics are making a come back as well, and this bathroom is definitely inspired by it. The rug is a pop of color but adds so much detail without overwhelming the bathroom.

Blue, white and gold really compliment each other, and compliment even better when it’s in a tight space like a small bathroom. The colors just go so well together.

Need storage space but don’t like the look of cabinets? This small bathroom is the perfect example of adding storage directly on the wall for all of the bathroom necessities.

Do you want to incorporate your washer and dryer into the bathroom but don’t know how? This is a great way of adding them into the corner but still making it look nice and neat.

In really tight spaces, to make a statement in the bathroom it’s always a good idea to do a textured floor to bring some type of pattern.

Adding different textures makes them both stand out better and give more dimension in the room.

Another beautiful option is adding wallpaper into the room to give the room dimension. A cute vanity and nice wallpaper can really bring the bathroom together.

Small pops of black can really compliment the white in the bathroom and make it look even brighter.

Make the bathroom inspirational! Add pops of color on the shower curtain or the carpet.

A minimalist bathroom but still looks so spacious.

Guest Contributor: Tiffany Powell

Bedroom Color Schemes

RH Business Marketing Solutions

Are you updating your bedroom and need inspiration for color schemes? Look no further! We gathered our favorite color schemes so you don’t need to search!

Beautiful shades of pink and purple with the 2 dark shades to bring everything together

Sage green is a beautiful color and not often used for a bedroom color scheme. These shades of green match perfectly together and give off a relaxing aesthetic.

Incorporating different textures like the green blanket really ties together all of the color schemes.

Blue and dusty pink are the perfect colors to pair with each other. They match so beautifully.

This color scheme is unique with the amount of different colors, but they all seem to work so well with one another and compliment each other.

Another blue/grey with dusty pink. These compliment so nice!

A darker more elegant looking aesthetic, the blues really pull together and give a “clean, sleek” vibe to the room.

These are popular colors in 2021/2022 when it comes to putting colors together. The green and burnt orange match so well together.

Another dark blue room, except this time it’s brightened up by the choice of the blankets.

A range of different colors that blend so beautifully together!

Guest Contributor: Tiffany Powell