Google+

contact us

Use the form on the right to contact us.

Day or Night, we are here to serve you. Leave your plumbing problem to us.


Tinley Park, IL

(708)845-7922

Residential and Commercial plumbers and plumbing contractors available in Orland Park, Tinley Park, Oak Lawn, Palos Heights, Midlothian, Oak Forest, Homer Glen, Mokena, Frankfort, and the surrounding Chicago South Suburbs. Emergency plumbers.

copper water lines.jpg

Kevin Szabo Jr Plumbing Blog

Kevin Szabo Jr Plumbing is Tinley Park, Orland Park, Oak Forest, Midlothian, Orland Hill, Homer Glen, Mokena, Frankfort, Crestwood, Palos Heights, Oak Lawn, local plumber. Read our blog for advice, tips, a good laugh, and basic home improvement.

**We are moving our old blog to our new and improved website. Too see all our posts visit kevinszabojrplumbing.blogspot.com

Filtering by Category: October 2022

How to Make Your House More Structurally Supported

RH Business Marketing Solutions

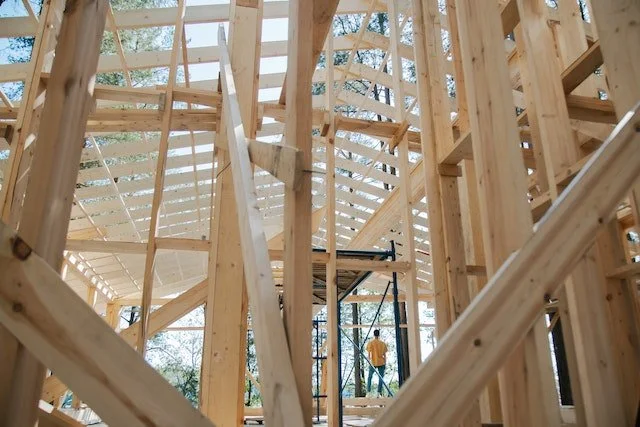
House frames are typically constructed with wooden studs and joists. These framing materials do not provide much structural support, so additional reinforcement is necessary to prevent structural failure of your home. The type of framing material used depends on the type of building being constructed and local building codes. Most homes were built using wood studs and joists, but steel-framed buildings are becoming more common for new construction because they require less maintenance over time than wood-framed homes.


Support Porch Railings

The solution is to use a lattice to support the railing. This material can be used as a base for the railing, or it can be used to attach the railing directly to concrete posts. Since this lattice is much cheaper than wood, it makes sense that you'd want to use it as a base for your porch railings instead of just throwing up some sturdy posts and attaching your porch canopy with nails.


Sill Plate

The sill plate is a horizontal piece of wood that sits on the foundation and supports the weight of your house. It should be 3 inches thick at least and bolted to the foundation with lag bolts (longer than normal screws) at every 16-inch seam. This will prevent moisture from getting into your home through cracks between the sill plate and foundation.

When installing the sill plate, ensure its level and centered over the foundation. If your house isn't plumb (straight up and down), install shims under the sill plate until its level.


Attach Garage Door Brace

To attach the brace to the garage door, you must drill pilot holes and use screws and a screwdriver. If your door is metal, use a drill bit that's no smaller than 1/2 inch; if it's wood or fiberglass, go with a 3/8 inch bit instead. Take care when drilling, so you don't damage any other part of your house.

Once you have finished this step, all that remains is attaching the brackets using screws long enough to reach through both pieces of wood or fiberglass, leaving 1/8 inch exposed on each end. Once these are in place, you should look at them from different angles before placing them exactly where they need to go.


Add Column Support

Adding column support to your house will give it more stability and help prevent collapse. Columns are vertical supports that are usually made of steel. Columns can be attached to the wall with bolts, or they can be attached to the floor with screws.

Columns should be able to hold at least 10 pounds per square foot of horizontal surface area, equivalent to two adults standing on top of each other's heads.


Steel Stud Framing

Steel studs are an excellent alternative to wood in residential construction. They are sturdy and can support walls and ceilings more efficiently than their wooden counterparts. Steel framing has been around for decades, but it has only recently become a popular choice for homeowners. Many people choose steel over traditional wood framing because of its superior strength, lower cost, and ease of installation.

Steel studs are made from hot-rolled or cold-rolled steel bars that have been cut into 2 feet by 4 feet (60 cm x 122 cm) panels that fit together to form walls—similar to wooden studs. However, unlike wood-framed houses where walls must be built separately and then connected with drywall or plywood panels afterward, steel-framed homes typically come with pre-fabricated wall panels already installed on site before construction begins; this saves time during construction while ensuring your new home will be structurally sound right from the start.


Popular Materials for structural support of your home

Aluminum angle has become material in construction, used to reinforce the structure of a building. It is made of aluminum and steel, making it lightweight but sturdy. It's used to provide structural support for beams and columns in your home.

It is also used to construct buildings that need to withstand high winds. it's an easy material for builders to work with and can be cut into different shapes with a saw or jigsaw.


Conclusion

The house is the most important investment that you will ever make. It is not only your home but also an asset for future generations. You have to ensure that it is structurally supported and safe for everyone living there.

Guest Contributor: Miranda Spears

Top 5 Best Residential Waste Service Providers

RH Business Marketing Solutions

Do you currently take care of your waste service in your home? Or do you leave it up to your landlord to handle everything? Maybe you share a common space with other tenants, but there's no one designated to take on the task. Fortunately, opting for a waste management company specializing in residential services can make things much more manageable. Your landlord may be willing to partner with one of these firms so that everyone has peace of mind.

How Residential Waste Services Work

Residential services tend to be much smaller in scale than commercial services, which means they can be much more customized and convenient. If you have a smaller residential property, you may have the option to work with a company that comes to your home and carpools your trash with others in the area. This can make things much more accessible and help keep costs low. On the other hand, more significant properties may have a dumpster they use to store waste temporarily until it can be collected.

There are two main options to consider when it comes to waste management.

●      A commercial service for businesses and properties like restaurants, office buildings, and more.

●      Residential service for people living in homes, condos, and other residential units.

Why Hire a Residential Service Provider?

A residential waste service provider can handle all of the duties related to your trash. They can schedule specific pickups, manage different types of waste, address any unexpected issues, and more. This can be especially helpful if you have a tight schedule or a large family where things pile up quickly. You also don't have to worry about the costs associated with trash collection. And with many providers, you can also sign up for recycling services, which can help save the environment and keep prices low.

What to Look for in a Residential Service Provider?

As you're researching residential waste providers, keep an eye out for the following:

●      Availability - First and foremost, ensure you find a provider that covers your area. If you don't see one close by, you may have to investigate long-distance options with higher costs.

●      Ease of Signing Up - You don't want to get caught up in a long and tedious sign-up process, so find a provider that allows you to get started quickly.

●      Cost - You'll need to research to see what different providers charge. Some companies charge based on the number of pickups you need, while others charge a flat monthly fee.

●      Contract Length - Ask about each contract's length and what happens if you want to end the contract early.

Which Companies Offer These Services?

For example, several residential waste services in Minnesota offer waste removal. Here are the top 5 residential waste services:

1. Aspen Waste Management

This company has been a residential waste service provider serving the Twin Cities for over 20 years. They pride themselves on making the process easy, affordable, and green for their customers.

2. Buzzi-Go

Buzzi-Go is another long-running company providing residential waste services to the Twin Cities for decades. They have multiple pricing options, including flat rates and pay-as-you-go.

3. Waste Management

This is one of the biggest waste management companies in the United States, with over 25,000 employees and thousands of customers. They offer commercial and residential properties residential waste services and provide various waste management solutions.

4. Progressive Waste Solutions

Progressive Waste Solutions is a global company operating for more than 20 years. They offer residential waste services in over 40 states and pride themselves on excellent customer service.

5. Veolia

Veolia is a global company operating for decades. They offer residential waste services in over 100 cities and pride themselves on green practices.

Conclusion

An excellent residential waste service provider can make a huge difference. They can help you avoid trips to the dump and ensure you comply with your city or county's regulations. Make sure to find a residential waste service provider that covers your area offers the services you need and comes at a price you can afford.

Guest Contributor: Hannah Boothe

5 Rookie DIY Plumbing Fails

RH Business Marketing Solutions

I'm sure you've heard that DIY projects are the worst. And while I'm not going to argue with that premise, it's important to remember that sometimes they can be done right! In this article, we'll look at some of the most common rookie plumbing fails and how to avoid them.

Turn off the water valve.

Your home may suffer significant damage from water. Call a plumber if you don't know where the main valve is located!

 It's simple to forget that the main valve may be used to cut off water, therefore it's crucial to do so before beginning any plumbing repair. Additionally, make sure that your plumbing system is free of leaks (even little ones) and that all drains are clear.

Wretched threaded connections.

Overtightening is when you tighten a threaded connection too much and strip the threads out of the head. This happens because you’re using a ratchet wrench or wrench that has a lot of torque, which can easily strip the heads if done incorrectly.

Under Tightening is when you loosen a threaded connection too much and allow water to leak into your line or pipe system. This happens because we often use tools like pliers (which don't have enough surface area) or screwdrivers (which don't have enough grip). If this happens in an older home, there's no way to fix it without ripping apart walls and ceilings—or replacing everything from scratch!

Misread/Cannot read the gauge.

The most common rookie mistake is to not read the gauge. If you’re tightening a fitting, it’s important that you use a wrench that matches up with the pipe size and threading of your connection (and this doesn’t always mean a pipe wrench).

If you are using an adjustable wrench, make sure that it has enough grip on all sides of whatever part of the fitting is being tightened—you don't want any slipping or slipping out as pressure builds up inside. Also keep in mind whether or not what kind of metal your connection is made from will allow for an adjustable tool; if not, then stick with using only one type throughout all connections.

You installed new components without replacing old parts.

Without exchanging worn-out components, you inserted new ones. 

This is a beginner error that is simple to see and can cause expensive issues in the future. Even if you don't even realize you're doing it until it's too late, the damage will have already been done if your pipes leak or your toilet runs nonstop. The good news is that most problems can be resolved quickly by simply replacing one component of your plumbing system. Therefore, be sure to replace any old pipes with new ones before any significant damage happens and after reading our article on how to fix common plumbing issues yourself (and how not to).

You didn’t replace worn-out parts.

If you’re like me, odds are you didn’t replace the old parts on your faucet. Even though they were in good shape when you got it and haven’t caused any issues since then, it might be time to take a look at them again—especially if they're starting to look worn out or rusty. Replacing worn-out parts with new ones can save you money in the long run by extending their useful life and reducing the need for repairs down the line. But how do you tell if something needs replacing? One way is by looking at them: If there's any kind of rust on a faucet handle (or anywhere else), then it's probably time for an upgrade!

It's better to call a plumber if you aren't sure what you're doing.

If you're unclear of how to handle an issue or the appropriate treatment, it's better to consult a plumber.

Do-it-yourself homeowners frequently attempt to solve their problems on their own without consulting a professional. It could be unsafe and possibly very expensive if something goes wrong in your house, particularly when dealing with plumbing issues like leaks and flooded basements.

It's possible for you to think that hiring a plumber just entails out-of-pocket costs, but this is inaccurate. Most usually, the cost of having someone come to your home and perform an assessment will cover their fees (in addition to any materials needed).


If you’re thinking about tackling your own plumbing, remember that it can be a dangerous job. Before you get started on any projects, make sure you have all the right tools and materials and always practice safe work habits. This article offers some great tips for beginners looking to tackle their own DIY plumbing projects from San Francisco plumbing professionals.

4 Wonderful Home Makeover Ideas to Rejuvenate Your Living Space

RH Business Marketing Solutions

Do you feel like your home needs a fresh look? If so, we understand.

It's hard to revitalize a space that you've spent so much time in if neither you nor your guests are enjoying it. But how do you go about finishing a home makeover without spending a fortune or taking forever?

Luckily for you, you've got our top tips. The following ideas will help you bring a new shine to your living space. 

So read on for the perfect home makeover ideas that you've been looking for!

1. Add a Pop of Color

There are many ways to add a pop of color to your home.

A great way to add a pop of color is to add a colorful piece of furniture or a colorful piece of art. You can also add a pop of color by painting a wall or adding a colorful rug.

If you want to add a pop of color to your home but don't want to do a lot of work, you can simply add some colorful pillows or throws. Whatever you do, adding a pop of color will rejuvenate your living space.

Adding a pop of color can brighten up any space and make it more inviting. It is a simple and inexpensive way to refreshen your home.

2. Create a Focal Point

One of the quick home makeover ideas to refresh any room is to create a focal point. This can be done by hanging a new piece of art, a statement piece of furniture, or simply rearranging your furniture.

By doing this, you will draw the eye to a specific area and make the room feel more inviting. It helps to add interest and can be also used to highlight a particular area.

If you want to add a touch of drama to your home, consider creating a focal point.

3. Incorporate Window Shutter

One of the best home makeover ideas is to incorporate interior shutters into your design plans!

Whether you choose wooden shutters for a classic look or plantation shutters for a more modern feel. Adding shutters to your windows can enhance the look and feel of your home.

Not only do they look great, but window shutters can also help to keep your home cooler in the summer and warmer in the winter.

If you're not sure where to start, consult with a professional home designer. For you to get some great ideas on how to incorporate window shutters into your home's design.

4. Use Lighting to Your Advantage

Lighting can make or break your home makeover. It can set the tone for the whole space and make it feel warmer, more inviting, and more personal.

Think about the function of the space. Is it a place to relax and unwind, or is it a space to be productive?

Then consider the different types of lighting and how they can be also used to create the desired effect.

Choose fixtures that reflect your style and make a statement. With careful planning and the right lighting, your home makeover will be a wonderful success.

Be Creative With Your Home Makeover Ideas

If your home is in dire need of a makeover, but you don't have the time or money for a complete overhaul, try these home makeover ideas to rejuvenate your living space.

By making a few simple changes, you can give your home a fresh new look. That will make you feel good every time you walk through the door.

If you think this article is helpful, check out our other blogs!

How to Cut Cast Iron Sewer Pipe

RH Business Marketing Solutions

Many older houses integrate a sewerage system composed of cast-iron pipes. Cast iron pipes were prominent before the invention of PVC pipes. Older houses may still have these pipes and you may need to replace them upon rusting or damage.

There are numerous tools to cut through a faulty cast iron sewer pipe. The most convenient tool to use is the reciprocating tool with carbide-tipped grit. The equipment achieves a clean cut in a fast and less stressful process.

If you don't have a reciprocating saw, you can use other tools including hackswas, circular saws, snap cutters etc. If you don't have these tools, check other ways to cut metal without tools.


What Can Be Used to Cut Cast Iron Pipe?

Commonly found in older homes, cast iron sewer pipes were primarily used for vents, main drains, and large drain pipes. The cast iron pipes are extremely heavy, tough, and prone to rusting. You can cut out a section of cast-iron pipe using various tools and equipment, as shown below;

Hacksaws

You can use old-fashioned hacksaws with good teeth blades to cut cast iron pipes. Hacksaws involve more handy work; therefore, using this tool requires you to exert maximum force when pushing back and forth. 

Hacksaws result in hard work and are time-consuming, especially when you have to cut several cast iron pipes. Use hacksaws to cut cast iron pipes when you have extended hours and energy to spare.

Reciprocating saws

Reciprocating saws feature an attachment at one end of the tool to help hold the long thin saw blade in place. Once triggered, the long cutting blade moves backward and forward at high speed, cutting through the cast iron pipe.

Reciprocating saws are ideal for cutting cast iron pipes as they make the process a breeze. Before using a reciprocating saw, ensure you have installed the right diamond/ carbide grit long cutting blade. The saw blades result in smooth edges on the cut cast iron pipe.

Circular Saws

You can cut cast iron sewer pipes using circular saws in a quick and less stressful way. A circular saw requires integrating a diamond blade specifically designed to cut cast iron material. The saws result in clean cuts and ensure the pipe has smooth edges.


Snap Cutters

Snap cutters are the best tools to use when cutting through cast iron pipes. The equipment is designed to facilitate quick and easy cutting with smooth and even edges on the pipes. Snap cutters resemble scissors with ratchet handles and a roller chain instead of blades.

Snap cutters are relatively expensive, but you can rent one from a reputable dealer. Place the chain around the pipe and wrap it tightly to use the tool. Then apply force on the handles to cut through the cast iron sewer pipe.

Best Blade for Cutting Cast Iron Pipe

Most traditionally made saw blades are made of carbide grit or diamond grit. But the best saw blade for cutting cast iron pipe is the carbide-tipped blade. Carbide-tipped blades provide improved cutting speed and durability in relation to diamond grit blades.

Carbide-tipped blades come in 3 lengths, including 6 inches, 9 inches, and 12 inches. The 8 teeth per inch (TPI) blade is ideal when cutting thick cast iron pipes. On the other hand, the 20 teeth per inch blade is suited to cutting thin metals and hence not ideal for cutting cast iron.

The best blade cut through cast iron pipes is usually 8 inches long, ¾ inch wide, and approximately 0.04 inches thick.


Step-by-step Procedure on How to Cut Cast Iron Pipe

Before cutting, always wear eye and hearing protection when cutting cast iron pipe. Remember, cast iron is heavy, so handle it carefully to avoid injuries. 

There are numerous tools to help in cutting damaged sections of cast iron pipes. Each tool may follow a slightly varying direction as per the manufacturer, but here are general procedures to follow;

Things you will require include;

  • Chalk

  • Saw blades

  • Snap cutters

  • Reciprocating saw

  • Eye and hearing protection

When Using Snap Cutters

Step 1: Make a clear path to access the pipe you are attempting to cut. Then, use chalk to make markings/ cut lines on the pipe. Ensure you make the cut lines as straight as possible

Step 2: Place the snap cutter around the pipe. Wrap the chain jaws of the snap cutter around the pipe. Ensure the chain is evenly wrapped and most cutting wheels are against the pipe. Ensure both hooks are placed on the pipe with the open side up.

Step 3: Rotate the ratchet clockwise to tighten the snap cutter jaws. Ensure the snap cutter jaws are square to the pipe and the chain is in place with the cutting line. You can support the cast iron pipe and keep it steady as you cut it.

Step 4: Apply pressure onto the snap cutter handles to cut the pipe. Let the wrapped snap cutter wheels cut into the pipe. Score the pipe numerous times before you make the final cut.

Step 5: If you are cutting a replacement pipe, rotate the pipe slightly before cutting. Then, repeat the mentioned steps on all other marked cutting lines.


When Using Reciprocating Saw

Step 1: Fit the reciprocating saw with a long heavy-duty metal cutting blade. Metal cutting blades are made with diamond or carbide grit to help cut along hard items.

Step 2: Spray the cast iron sewer pipe with a lubricator to help prevent blade wear.

Step 3: Mark the cut lines using a piece of chalk. Hold the iron pipe firmly and make straight cut lines so you’ll end up with smooth and clean edges.

Step 4: Set the saw at the lowest speed and cut at a steady pace. Do not apply undue pressure on the reciprocating saw; let the blade do the cutting work. Too much pressure/ speed can cause the blade to snap.

Step 5: Complete the cut by continuing with the moderate cutting motion until the entire pipe is cut with a single clean slice.


Cutting Cast Iron Pipe with an Angle Grinder

With the right cutting wheel placed on your sturdy angle grinder, you can cut the cast iron pipe with an angle grinder, especially if your pipework requires replacement. Removing cast iron pipe sections is usually tricky when working in a confined space.

Angle grinder swiftly cuts segments of cast iron pipe in a relatively simple process. The tool isn’t recommended for confined tight spaces as it produces an abundance of sparks. Some of the items you will need when cutting cast iron pipe with an angle grinder include;

  • Steel capped safety boots

  • Flame-resistant long sleeve work shirt

  • Wrap-around safety glasses

  • A pair of sturdy work gloves

  • Respirator mask

  • White/ yellow chalk or crayon

Steps to follow

  1. Fit the metal cutoff blade to the angle grinder and tighten it using the ratchet tool. Upgrade your cutoff wheel to a decent diamond wheel. Fit the wheel properly, and you are good to go

  2. Use chalk or crayon to mark the segments of the cast iron you will be cutting

  3. Wear the recommended PPE gear to protect your eyes, ears, and hands

  4. If you are operating on-site, secure the pipe in position. Then fire up the grinder and begin cutting through the pipe. Make a groove to weaken the pipe

  5. Work around the entire circular section and allow the grinding wheel to penetrate through a single point

  6. Since cast iron is very tough, you can use a cold chisel to finish through the remaining segment


What is the Fastest Way to Cut a Cast Iron Sewer Pipe?

The ideal way to successfully cut cast iron pipe is to carry out the process on a sturdy workspace with the pipe firmly held/ clamped. The fastest way to cut cast iron sewer pipe is using a reciprocating saw and a carbide-tipped blade with 8 teeth per inch spacing.

A Reciprocating saw is a reliable tool when operating in a confined space. Snap cutters are also ideal options as they make quick and smooth cuts.


Frequently Asked Questions

Can you cut the cast iron pipe with a soil pipe cutter?

A soil pipe cutter is a reliable tool when cutting cast iron pipe. The soil pipe cutters come in varying sizes and configurations. The tools feature a chain to wrap on the pipe when cutting.

Soil pipe cutters work with tension; hence the sewer pipe needs to be in decent condition for the cutter to work. Severely corroded or rusted pipes are not suited to cut using these tools.

Can you replace the cast iron pipe with PVC?

Yes, especially if you are dealing with leakages and burst cast iron pipes. Cast iron develops rust, therefore, posing potential leaks. You can replace damaged cast iron sewer pipe segments by installing PVC pipework.

Can you cut a cast iron pipe with a Dremel?

No. A Dremel incorporates a small motor that runs at a high rpm. Therefore, cutting cast iron pipe using Dremel may result in the burning up of the tool.

Conclusion

Cast iron pipes are mainly found in older homes where it was mainly used for large drain pipes, vents, sewer pipes, and main drains. As mentioned, there are different tools you can use to cut your old cast iron sewer pipe. Whichever you choose, use it carefully to avoid injuries.

Guest Contributor: Walter Bennett

7 Best Plumbing Tools For Your Home

RH Business Marketing Solutions

Plumbing issues can occur in your home at any time. But before you think of contacting a professional plumber, it’s essential to figure out if you can handle the repair yourself. 

Fortunately, most plumbing issues are easy to fix. And all you need is the right tools and knowledge to use them.

Since handling a DIY project gives one a sense of accomplishment, investing in plumbing tools to help you solve the issue successfully is crucial. 

If you’re looking forward to purchasing these tools, here are some of the best plumbing tools you might need in your toolbox:

1. Plungers

The first must-have plumbing tool should be a plunger. While it seems insignificant, a plunger will come in handy whenever you have clogged drains. 

A plunger consists of a rubber cup connected to a wooden or plastic handle. When the cup is pushed towards the drain opening, it sucks up the blockage that allows unrestricted water flow.

There are two types of plungers: cup or sink/tub plunger and flange or toilet plunger. Most homeowners are familiar with a cup plunger since it’s frequently used. In fact, most of them aren’t aware of the existence of flange plungers and use cup plungers to unblock their toilets.

A flange plunger is a bit different from a cup plunger. While it works like a sink plunger, a toilet plunger has a protruding rubber flap under its head. This extension acts as a toilet hole seal to allow effective blockage suction.

2. Olive Cutters

An olive cutter helps you to remove old olives from pipes without damaging the pipework (unlike olive pullers). These are equipped with two cutting blades. 

Generally, an olive cutter might be the only tool you require if you need to get rid of olives from a pipe. Olive cutters come in two types: a screw olive cutter and a plier olive cutter. A screw type is ideal for limited spaces, while a plier type is suitable for large spaces.

3. Hand Auger

This tool is vital for removing debris from drains without breaking a sweat. A hand auger is essential for professionals and DIY enthusiasts in similar measures. It’s also used by individuals who want a quicker substitute for shovels. 

If you have a broken pipe, you won’t experience difficulty digging around it using a hand auger.

4. Adjustable Wrench

The plumbing system is among systems with countless bolts and nuts. Therefore, you may require a tool that can help you lose and tighten these bolts when undertaking a DIY plumbing project. Luckily, with an adjustable wrench, you have just that. This tool helps adjust the grip size when working with different bolts and nuts. 

A Plumbing Tip: When shopping for an adjustable wrench, it might help to consider choosing six and ten-inch models to allow broad flexibility. A 10-inch adjustable wrench will help with greater reach, while its counterpart six-inch will provide seamless access in narrow areas like under a kitchen sink bench.

5. Plumber’s Tape

With time, the groves attaching fitting screws are bound to get worn out. They cease to create a tight seal, leading to water leaks. Luckily, a plumber’s tape can help seal gaps to prevent water leaks. Therefore, having a plumber’s tape in your toolbox is vital since you might never know when you’ll need it. 

If you don’t have a plumber’s tape, you can seal any gaps with regular duct tape. While this type might be a temporary solution, it may not be effective as a plumber’s tape.

6. Pipe Wrench

This tool is used to loosen and tighten fittings on bigger pipes. When shopping for this tool, you’ll need to purchase two since you’ll need one to hold the pipe while using the other to loosen or tighten the fitting. Since the pipe wrench comes with serrated jaws, it’s advisable to wrap the pipe with a cloth before gripping it to avoid damaging it.

7. Plumbing Snake

A plumbing snake comes in when unblocking a drain is challenging for a plunger. It comes with a metallic coil for easier and quick insertion into the drain. Depending on your requirements and preferences, you can choose a manual or a motorized plumbing snake.

While you’ll need to dig deeper into your pocket to purchase a motorized plumbing snake, it’s worth the cost since it’s more efficient than a manual one. On the other hand, a manual auger is cost-effective but harder to work with.

Understanding that a plumbing snake isn’t ideal for toilets with a flush is vital. If you need to use a plumbing snake on your blocked toilet, invest in a toilet plumbing snake to avoid damaging the toilet.

Conclusion

Plumbing systems experience different problems. These issues can be extensive, ranging from blocked drains to cracked pipes to leaks. Therefore, it's vital for a homeowner to have different kinds of plumbing tools to help correct these issues. 

There are a lot of plumbing tools, with each working differently. All you need is to research the most commonly-used tools to be prepared for any plumbing issue that might arise.