Google+

contact us

Use the form on the right to contact us.

Day or Night, we are here to serve you. Leave your plumbing problem to us.


Tinley Park, IL

(708)845-7922

Residential and Commercial plumbers and plumbing contractors available in Orland Park, Tinley Park, Oak Lawn, Palos Heights, Midlothian, Oak Forest, Homer Glen, Mokena, Frankfort, and the surrounding Chicago South Suburbs. Emergency plumbers.

copper water lines.jpg

Kevin Szabo Jr Plumbing Blog

Kevin Szabo Jr Plumbing is Tinley Park, Orland Park, Oak Forest, Midlothian, Orland Hill, Homer Glen, Mokena, Frankfort, Crestwood, Palos Heights, Oak Lawn, local plumber. Read our blog for advice, tips, a good laugh, and basic home improvement.

**We are moving our old blog to our new and improved website. Too see all our posts visit kevinszabojrplumbing.blogspot.com

Filtering by Category: December

What Home Improvements are Tax-Deductible?

RH Business Marketing Solutions

Tax season is close, and tax planning is a must every year if you want to save your hard-earned money. Are you looking to upgrade your home? That’s good news, considering you can write off a lot of home improvements from your taxes.

If you’re wondering if you can get a tax break on home improvements that you do, the answer is an emphatic “yes”. However, much like anything related to taxes, there are caveats, exceptions, and specifics you need to follow. Here are the home improvements that you can write off as tax deductions.

1. Energy-Efficient Home Improvements

Successful real estate agents know that among the best options for tax-deductible improvements to your home are energy-efficient upgrades. The government has encouraged energy-efficient homes for a while now. Homeowners can receive a tax credit for energy-efficient homes upgraded until the end of 2021.

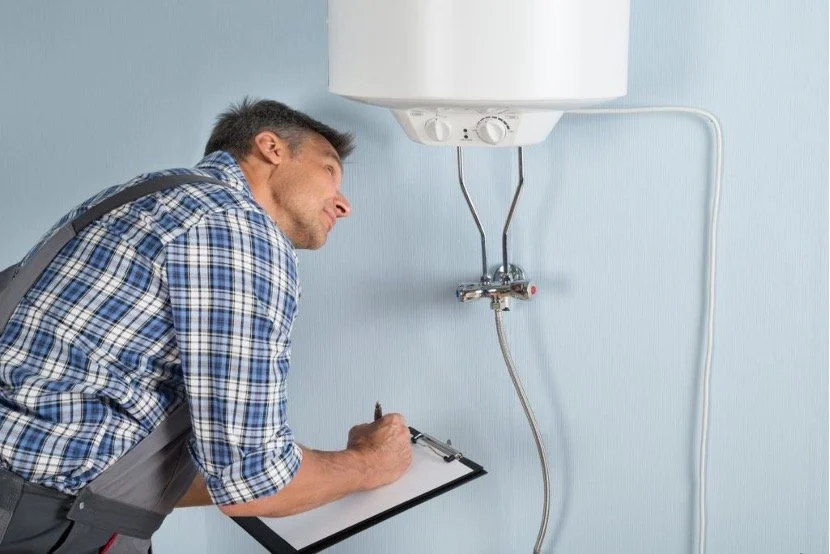
Energy-efficient improvements include low-E windows, doors, rooves, insulation, and even skylights. You can also deduct hot water heaters, central AC, air-source heat pumps, and circulation fans. 

If you add these to your home, you can expect a tax credit of as much as 10% of the cost, up to $500. You can also specify an amount that goes between $50 and $300, which changes depending on the improvement you make.

For those looking to utilize renewable energy sources like solar energy, fuel cells, geothermal heat pumps, wind turbines, and even biomass fuel, you’re also eligible for a tax credit. You may qualify for a federal tax credit that amounts to 26 percent.

2. Home Offices Improvements

Home offices are becoming a norm, and whether you’re using essential home renovation tools or not, you can get a home office deduction for yourself. Using a portion of your home as an office for your business can net you a tax deduction. However, there are specific requirements that you need to fulfill.

You have to be a business owner with a legitimately registered business entity, for starters. You also have to prove that you exclusively use one specific part of your home for your business. If you can qualify, you can expect as much as 100% of the cost of improvement.

Improvements to your home are depreciable according to how much you use the room as a home office. You can also take a simplified deduction for your home office, where you get a $5 deduction for every square foot of your home used for business, up to $1500 for a 300 square-foot space.

The good news with home offices is that repairs and improvements are eligible for the tax deduction if you qualify for the tax break. The caveat is that the repairs have to be on the parts of your home used for your business.

3. Home Improvements For Medical Care

Another home improvement that you can do that can qualify as a tax deduction are improvements towards medical care for a family member. These facilities are added for seniors or differently-abled members of the family to allow better mobility.

You can deduct expenses for medical equipment installed in your home if its primary purpose is to care for you, your spouse, or a dependent. These can be several kinds of improvements, including:

  • Building entrance and exit ramps

  • Support bars and pulls for the bathroom

  • Adding lifts for your staircase

  • modifying/powering your cabinets

  • Improving fire alarms and smoke detectors

When getting this tax deduction, make sure to claim it within the year. You can cover these home improvements under this tax and get your deduction when you apply for it.

The issue with home improvements as medical expenses is that you can’t deduct the entire cost. Even if you itemize, you can only deduct the value beyond 7.5% of your adjusted gross income (AGI).

4. Home Improvements For Property Sales

Not all home improvements can score you an immediate deduction. Then again, these special improvements can lower your tax bill once you sell your home.

For homeowners, qualified homeowners are eligible to exclude as much as $250,000 if you’re single, with up to $500,000 for married homeowners. The law notes that this calculation is based on the total financial investment you have on the property at the date of sale.

Any improvements that add value to your home, prolong its use, or adapt to new services are deductible from the home’s sales tax. If you make improvements using your Home Equity Line of Credit (HELOC), then the interest you accrue is deductible if you qualify for itemization.

If you make resale-focused home improvements, these home improvements will be part of your sale basis, which are tax exempt. The tax deductions can be available once you sell your home, so it’s vital to ensure that you itemize receipts and track where your money’s spent. This includes labor costs, so you need to be extra careful to not lose out on money.

5. Home Improvements For Partial or Full Rental Property

Another way that you can depreciate your home improvement costs is if you rent out a specific portion of your home. By renting out a room or a location in your home to others, you can set the cost of upgrades as rental expense. The amount is then deductible from the rental income that you receive.

Much like renting out a second home if you have it, there are specific caveats apart from getting a portion of your rental income depreciated. For starters, you need to split expenses between the unrented parts of your home and the area that you rent out. This includes mortgage interest, mortgage insurance, and even real estate taxes.

With qualified home improvement projects, you can also deduct expenses like electricity from your rental. Liability insurance is also something that you can deduct in its entirety because it qualifies as a rental expense.

Rental repairs can also be deducted within the year that they were completed. You can depreciate any upkeep that you need to do to maintain a habitable space for tenants. Room additions are also deductible over time with depreciation.

Final Thoughts

Not all home improvements are tax-deductible, but there are many that you can add to your list if you qualify for specific tax perks. Knowing how you can be eligible is essential, and it should save you a good chunk of money. If you’re doing home renovations, see if you have the requirements we listed above.


Guest Contributor: Kat Sarmiento

The most common winter plumbing problems

RH Business Marketing Solutions

As the winter is at our doorsteps, we need to remind ourselves of the troubles the low temperatures can cause. Just as we are affected by the cold weather, our plumbing systems may also suffer if not properly maintained and prepared, especially in colder parts of the states, where temperatures drop below freezing. Everyone should get familiar with common winter plumbing problems to avoid potential troubles. Since even the smallest fracture, or insulation problem, can lead to complete failure of your water system. On the other side, with simple maintenance and regular inspection, you can easily discover the threats before they cause additional issues and expenses.


Essential information about common winter plumbing problems

Because of water inside the plumbing systems, pipes, drains, and even water heaters are vulnerable in winter. Fortunately, Keving Szabo Jr Plumbing professionals have a few pieces of advice for you. You will be able to understand what happens in extremely cold weather, what troubles it can cause, and what to pay attention to. Even if issues occur, you will know where to look for help.


From the experience of our skilled plumbers, here are some of the most common winter plumbing problems:


  1. Frozen pipes inside your home

  2. Problems with your water heater

  3. Winter problems with kitchen drains

  4. Frozen pipes outside your home

  5. Problems with outdoor drainage

  6. Issues with sump pumps

  7. Winter plumbing problems with your septic system


1. Frozen pipes inside your home

During the winter months, pipes that supply water to your home may freeze. This usually happens on the outer walls because they are not as protected as the inner ones, particularly on spots where the pipe insulation might not be as good as it should be. While preventing the water flow is not so dangerous, the real danger is coming from the ice. Due to its expanding nature, it may cause cracks, fractures, and deformation of your pipes. As a result, the water may leak, often in not so easily approachable places, like inside the walls themselves. Even worse, you may not even realize the real problem until it has already caused considerable damage.


To prevent this from happening, you have several options:

  • Check insulation on your pipes before winter arrives

  • Leave your faucets slightly open during the winter so the flow can prevent water from freezing.

  • If possible, expose the pipes to the warmth from inside the home by opening the cabinets under the sinks

  • Make sure your pipe system has operational valves to reduce the pressure

Remember, water damage can cause not only temporary but also long-term consequences. Any potential damage can have negative effects on the value of your property. Not only will you have to pay to fix the damage, but you will also need to repair everything ruined with leakage. If by any chance trouble occurs, your best option is to call professionals to fix the problem.


2. Problems with your water heater

With more significant differences in water temperatures and potential increased usage during the holidays, your water heater will work harder in winter. If you already have problems with insufficient hot water, consider replacing it before winter comes. In addition to small repairs, depending on the type of the heater, you will also need to inspect the tank and all the pipelines. At least once a year, it's necessary to completely drain and clean your water heater. Also, you will have to check valves, pipes, and insulation, especially if you live in a larger house. To prevent any eventual emergencies in the cold winter days, call your local plumber to help you with inspection on time.


3. Winter problems with kitchen drains

The third part of the inner preparations of your plumbing before winter concerns kitchen drains. Just like the heaters, your kitchen sink and other drains in your home will be under additional pressure. People usually prepare food more often during the winter, especially because it's the holiday season. So, you have to be ready and check everything to prevent clogging.

Some of the necessary steps to prevent problems are: 

  • Check your garbage disposal and drains and clean them thoroughly

  • Avoid pouring greasy and thick fluids down the pipes

  • Flush the drains with hot water even after cleaning

  • Use stoppers to prevent larger pieces from clogging your sink

  • Practice separating the garbage by using trashcans more often

Again, if you can't properly clean the kitchen drains, call professionals to help you.

Keep your kitchen operational and ready for the winter holiday season.

4. Frozen pipes outside your home

Those living in houses often have problems with outdoor water systems during winter, especially if they own a garden or water features. As you can assume, unprotected pipes can easily break during the cold winter days. That's why it's necessary to protect your hose bibbs, for example. For this purpose, use insulating covers and disconnect and drain them for the season. As professional movers from evolutionmovingdfw.com notice, this is a common mistake many people make when they are in a hurry while packing and preparing to leave their home for the winter holidays.

Low temperatures can easily freeze your outdoor faucets.

5. Problems with outdoor drainage

Just like the pipes can freeze, so can outdoor drains. Because of the temperature changes, weak and vulnerable plastic components can easily break. To prevent it from happening, consider replacing them with metal counterparts. They have considerably less chance to break from temperature contractions. Also, don't forget to clean the leaves and debris that often piles inside gutters. And make sure all the drainage is not clogged so water may drain when the snow is melting.


6. Issues with sump pumps

If you have a sump pump, make sure it is functional before winter arrives. Even if everything is alright, you should not forget to check it often during winter. If it is in the basement, maintain the temperature in the room to prevent freezing. Clean the area close to your foundation from snow so it doesn't cause a flood in your basement. Also, don't forget the snow and dirt that can accumulate on your roof. Clean them as well, so it doesn't pose an additional threat once the snow starts to melt.

While it looks amazing, ice additionally encumbers your roof gutters.

7. Winter plumbing problems with your septic system

Finally, you will need to check if your septic system is adequately protected and ready for the winter. This is easily one of the most common winter plumbing problems that can cause you a lot of unpleasantries. Even with the minor damage and leakage, the odor can take months to disappear, especially if the surrounding soil is soaked due to leakage. Ensure there is no erosion around your septic system, check if the plumbing is functioning correctly, and get a temperature isolating cover if you suspect it might be required. And, of course, make sure the tank is empty and ready for the winter. If you are not comfortable with these tasks, you should not hesitate to call a plumber to make necessary preparations and repairs.

Plumbing a commercial kitchen what to have in mind when doing it

RH Business Marketing Solutions

Commercial kitchens can be a difficult design project for plumbers. They are complex enough to rival the entire plumbing system of a household. Common plumbing designs such as those found in apartments and office buildings only require a few types of plumbing fixtures: sinks, mop basins, and lavatories. These fixtures are common to plumbing engineers, who have a lot of experience with them. A commercial kitchen, on the other hand, requires specialized equipment and plumbing fixtures that include specialized equipment such as industrial dishwashers, waste grinders, and soda dispensers.

Many plumbers choose to specialize in commercial kitchen design. A layout of the equipment with the specifications is the starting point in the design process. This requires collaboration between the plumber and the commercial kitchen consultant. The equipment is responsible for determining factors such as the size of the piping, the water heater capacity, and specifications for grease interceptors.

Commercial kitchens require scrutiny and very meticulous work because here lies the center of operation of a food establishment. Any problems arising in the plumbing will affect the entire operation of the restaurant. Concerns about hygiene and sanitation can arise, and the establishment's reputation will be at stake. Because of this, reputable plumbers should be contracted to accomplish any plumbing jobs in a commercial kitchen. If you want to know more, visit this site: https://www.mrrooter.com/dallas/ or other similar ones.

Commercial kitchen plumbing design is not only a challenging engineering field but also requires specialized knowledge that varies by country. Because kitchen equipment can have a negative impact on public health, the requirements are also influenced by health authorities. 

This article will give an overview of the plumbing requirements for major commercial kitchen components.

Sanitary Drainage and Venting System

Because liquids can change in properties depending on what equipment is used to make them, the venting and sanitary drainage system must be able to handle all types of liquid waste. Here are some liquids you might encounter:

* From refrigerators, air conditioners, and ice machines to drain pans and cool and plumbing lines.

Drain fluids From commercial stainless steel sinks and other kitchen equipment.

Cooking By-products, such as oil and grease, are subject to strict laws regarding disposal.

Commercial kitchen equipment might need to have a waste connection.

* An indirect connection connects to a private drain system which is then connected to the public sewer. A direct connection is used for cold and hot storage as well as food processing equipment. This connection should include a backflow preventer.

* Direct connections lead directly to the public sewer, as indicated by their name. These connections may require grease traps in certain cases. Direct connections are used for fixtures like indirect waste spills or floor drains, floor sinks, and mop sinks.

Commercial kitchen plumbing also includes plumbing vents. They connect waste pipes to an outdoor connection via the roof. They are used to remove sewage gases from indoor spaces.

Hot and Cold Water Supply

Nearly every kitchen appliance requires a water supply. There are certain requirements in terms of flow, temperature, pressure, and pressure. These requirements impact piping design. Also, water may be needed at a higher temperature (than in normal domestic hot water (DHW)) - which can lead to a larger boiler capability.


All establishments must meet the requirements of commercial kitchens A plumbing system and fixtures must be capable of providing potable water to all areas. It is vital to keep the potable water supply clean. This will prevent backflow, siphonage, and cross-connection.

To simplify the maintenance, isolation valves should be used. This is where the plumbing engineer considers necessary. Accessories such as balancing valves or thermostatic mixing valves are also possible.

Grease Interceptors

The  Best Management Practices provide guidelines for grease interceptor use. Grease interceptors should be used for any direct or indirect discharge that is likely to contain grease. This includes kitchen fixtures like woks, food scrap, and meat preparation sinks, as well as automatic dishwashers, pot washers, stock kettles.

Grease interceptors are required for plumbing fixtures. They can be found in many places, including restaurants, cafeterias or butcher shops, fish markets, delicatessens, clubs, and slaughterhouses. These are generally non-residential areas where grease can reach drainage systems.


Gas Supply for Kitchen Equipment

You can choose to use electricity or gas in your kitchen equipment. Pipe sizing is dependent on the pressure and flow rate of gas. The manufacturer's input ratings determine the gas volume. It is usually measured in cubic feet per hour. These installations and accessories are subject to the  Fuel Gas Code.

 The Department of Health and Mental Hygiene might request construction documents to show the layout and specifications of kitchen equipment. They may also require plumbing installations and any other necessary complementary systems. If necessary, the Department may request another review during operation.

Guest Contributor: Peter Yordanov

What are the signs that your water heater needs replacement?

RH Business Marketing Solutions

Most of the households need hot running water on an everyday basis. Everything from washing, bathing, hand washing and even for dish cleaning there is the need of warm water, especially during the winter times. When you are using them round the clock there is a need for the replacement of the water heaters. It could be due to usage or the age of the tank that the replacement of the water heater is needed. While you can help prolong the life of your water heater with annual maintenance, chances are you’ll need to have the pre–existing tank replaced with a new one. Therefore, it’s important to know as a homeowner about the signs that would indicate when it’s time to replace your water heater. For the best water heater repair Temecula, you could click here.

 1.  The water heater is aged

There would be a moment where you need to replace the water heater you had been using. The major trouble in this area is not knowing when exactly to replace the heater. There are expiration dates that are mentioned and even though the heater might be working in the right condition, there is a need to replace it after the date mentioned so that there are no major risks involved with the heater acting up. For best emergency water heater repair you could call here. There are different ways in which you can figure out the age of the water heater and thus take the necessary steps.

2. Heater inlet and rusty water

Steel is one of the most strongest materials on the earth but it also faces the corrosion that actually spreads all across and slowly eats away the entire metal. The rust accumulation leads to water leaks in the future and hence has to be taken care of. So when you have rust coming in through the water, it is indicative of the water heater’s need to be repair. Rusting can occur in any water heater, even those that are only between eight and ten years old. One way to determine whether the rust is originating from your pipes or from the water tank is to drain several buckets worth of hot water from the tank. This, of course, would mean that it’s time to replace the water heater. 

3. Noise of water heater

Another very common sign of an aged water heater is the noise from the tank. With age, the rumbling noises increase and it starts consuming large amounts of water. Noise from a water heater could be due to sediments building up in them, or being not flushed regularly. Both of these reasons could cause an immediate effect. The best water heater repair Temecula is available right here.

4. Leaking issues

When the water heater is nearing its replacement period there is a huge chance for water leaks that happen in and around the tank. This could cause immense property damage if continued for a subsequent period of time. There are many reasons for water leaks like the immense number of heating cycles causing expansion of metals and so much more. Other reasons include fluctuations in temperature, loose fittings, and connections. If leaking is evident in either of those areas, there could be something wrong with the fittings, in which case you’ll need to have a plumber come and examine the issue. Therefore, if water is leaking directly from the tank, it’s time to replace your water heater.

 5. Non functionality of the heater

 The basic necessity of the water heater is the heating properties. If the water heater is nearing its time of replacement there is the possibility of losing this functionality by the water heater. You could call in the best emergency water heater repair here. The loss of heat in your water supply is likely down to one of three possible issues with your water heater like a broken heating component, or a broken thermostat. For any other adjustments, some of them could be fixed by you and might not need a replacement. 

 So these are five different signs which are indicative of a broken water heater in your home that needs replacement. Most of the times homeowners ignore these signs and sign up for more damages and potential risks involved with them. Always look out for all the different signs that the water heater is slyly presenting with. Regular maintenance and checking on the expiration dates could help in replacing the water heater at the right time. 

 The major function of a water heater is so much that a house needs its optimum functionality all around the day. Before fixing the woes through a do it yourself solution, be sure to check with a plumber for further assistance. Sometimes you might be ignoring some grave signs that professionals could search and detect. It is always better to replace the water heater at the right time so that further damage to the infrastructure and other goods could be avoided and worked through.

Author Bio:- Aimee Grace

Aimee is a marketing manager at EZ Plumbing & Restoration. She is very passionate in writing about discrete plumbing services and leakage detection as well as repair solutions.  Her vision is to educate people about the consequences of water and slab leaks at home or office and what they should do to repair them to avoid further water damage as well as property damage. 

Innovations have paved a way for smart devices to lead a convenient life. Plumbing industry is no different but only few people know about various tools used to fix the leakages. Stay tuned with the recent articles to know all about how to find water damage, slab leak, clogging, and ways to repair them, installation of new HVAC appliances in San Diego.

How to Fix a Hot Water Heater: A Guide for Do-It-Yourselfers

RH Business Marketing Solutions

Installing an electric water heater is much simpler than installing a Water Heater  Riverside but it's still a bit difficult. If you feel uncomfortable with the electrical or plumbing, it is highly recommended that you have a professional install Water Heater . In addition, it usually has an old water heater.

Step by step instructions for installing an electric water heater:

Step 1: switch off

 Turn off the water heater at the circuit breaker panel.

Check the wiring to the water heater using a voltage tester and make sure the unit is turned off. This is not covered in the video below, but before continuing you should always turn it off with a circuit breaker and make sure your water heater is not turned on.

Step 2: Empty the water tank.

Open the hot water faucet and run the water until it cools. Although this procedure is not described in the video, you can safely empty the water tank without getting burned.

Turn off the cold and Find professional for installing Water Heater in Orange County supply to the water heater (located on top of the unit).

 Connect the hose to the water heater's drain valve. Open the faucet and drain the water tank to the outside (or a floor drain or even a bucket).

If you turn off the hot water outlet in step 1, you need to turn it back on. You can also open the T&P valve. This will allow air to enter the tank, allowing water to drain out more quickly.


Step 3: Disconnect electricity

 Disconnect the wire at the top of the water heater. Always close the circuit breaker in the circuit breaker box first. Then check the wires with a voltage tester before you begin.

When connecting a new water heater in the future, cover and label the wires (or take a photo) to avoid confusion.


Step 4: Remove the pipes 

Remove the hot and cold water supply lines. If your water heater is connected to a copper pipe, you may need to cut the pipe. If you need to cut pipes, use a pipe (pipe) cutter to save as much pipe as possible.

If the T&P drain has been properly repaired, it can be removed from the T&P valve and reused as a new water heater.

Step 5: Disassemble the old water heater

When the water tank is empty, use the cart to lower the old water heater.

Put the new water tank in place. We recommend that you put a new water tank in the drip tray. Understand why.

Make sure there is enough power to reach the water tank. Carefully check that the drain panel and valve are accessible for maintenance.


Step 6: Pipeline preparation

If your old water heater uses copper pipes and you need to cut the pipes, you will need to prepare the pipes with sandpaper. Wipe the edges of the tube with a rag of sandpaper until they are shiny.


Step 7: Connect the wires.

Remove the junction box cover to access the wires.

Connect the ground wire to the green ground screw. Twist the other wire into a wire connector and connect it. Using the previous wiring connections as a guide, connect the wires the same way you disconnect them. 


Step 8: Connect the water supply line and turn on the water source.

Connect the hot and cold water supply lines. Make sure to connect the cold water pipe to the cold water inlet of the water heater (cold water and hot water can be easily connected).

If your old water heater uses a copper pipe, you can reconnect it to the copper pipe. However, it is recommended to use flexible hoses for the connection. Not only is it simple, but it is also a recommended safety feature in the event of an earthquake. Your pipeline will depend on your original setup and setup.

Connect the flexible hose to the connector on the water heater. 


Step 9: Connect the T&P drain pipe.


Install the drain hose on the T&P valve. The end of the pipe should be within 6 inches of the ground.

  • It uses a 3/4 "manual connector.

  • Apply pipe paint to the outside of the pipe fittings and the inside of the valve pipe fittings.

  • Connect the connector to the T&P valve connector and tighten.

  • Clean the seal at the end of the pipe.

  • Apply flux to the inside of the male connector and the outside of the pipe.

  • Connect the hose to the fitting.

  • Connect the pipes using solder and a torch.


Step 10: Switch on and drain the hot water supply line

Once the water heater tank is filled with water, turn on the circuit breaker in the main power box. Note: Switch on the device before the water tank is filled. Failure to submerge completely may result in dry combustion of electrical components. This will damage the electric heating element.

If your water heater does not have power, first turn off the circuit breaker and check the electrical connections to the Find Water Heater Installation Orange County.


Author Bio:-Angela Louise

Angela is a marketing manager at EZ Plumbing USA. She has a great interest in educating readers about various leakages that can happen in their home or offices through her articles. With extensive knowledge of water leak and slab leak detection techniques as well as HVAC systems, Angela wants to make readers aware about the warning signs indicating leakage and predictive AC and Heater maintenance and also how to fix them to refrain from dangerous and costly consequences. 

Read articles to get more valuable information about detection and damages of water and slab leak repair, techniques to fix clogging, and installation and maintenance of AC & Appliance in San Diego.

 Facebook: https://www.facebook.com/EZPlumbingUSA/

Twitter: https://twitter.com/EZPlumbingUSA1


8 Home Renovations You Can Do with Powder Coating

RH Business Marketing Solutions

Renovating your home is part of owning and taking care of your home. When you get a chance to renovate, do it. Some home renovations are also great at improving the quality of life and value of your property and not just for beautification. Here are some home renovations you can do with powder coating

8 Home Renovations You Can Do with Powder Coating

You may have encountered powder coating a few times when you look up home renovations on the internet. It’s a popular option for people looking to improve their homes. 

In this article, we’ll guide you on how powder coating works with home renovation and what home renovations you can do with powder coating. Powder coating is also easy to apply with the help of a powder coating gun making it easier to use for home renovations. 

Railings and Posts

Railings on the porch are important for safety in the front yard and back porch. They can be made of different materials with iron as the most usual choice. Iron is solid and comfortable on your hands. 


With powder coating, you can stay away from the traditional black or chrome color iron porch railings and posts usually have. You can choose brighter colors to give your outdoor look a more welcoming aura rather than the dull and gloomy black porch railings. 

Door and Cabinet Handles

Generally, the door and cabinet handle go well with the color of the furniture. However, the finish could fade with time or get damaged. You may also not like the color of the handle and customize it the way you want it. 


You can recolor your door and cabinet handles through quick sandblasting to strip off the old coating. You can then refinish with any color you want with powder coating. 

Fences

Fences can also be powder coated and given a custom-color theme. Aside from beautification,  powder coating also protects your fences from fading or chipping for a long time. However, we recommend you only do this with iron fences. 


The coating can last for up to 8 to 30 years depending on the environment. It’s up to you how you customize your fence. Just keep in mind, that it also comes with an added bonus protection. 

Light Fixtures

Light fixtures often get low-quality finishes because of mass production. Therefore, it easily becomes a liability in terms of decoration. Powder coating can help light fixtures be in theme with your home design. 

Plumbing Fixtures

Powder coating your plumbing fixtures can help improve their durability. You can also powder coat them for the sake of improving the appearance of your bathroom interior design. This only applies to powder coat plumbing fixtures that are made of metal. 

Furniture

Iron furniture like barstools, iron chairs, and tables, and other metal furniture can be renovated with powder coating. You need to sand-blast the furniture, repair it, and then refinish using powder coating.

Kitchen Utensils

Kitchen utensils like stovetop, sink, and other metallic kitchen utensils can be renovated with powder coating to create a color theme for your kitchen area. You can even apply it to smaller utensils like hanging pans for full customization. 

Flowerbed Trim and Planters

If you have a garden at home, chances are you have some iron flowerbed trim and planters. Maybe it’s time to renovate and decorate your garden to complement the plants and flowers you are growing. 

How Powder Coating Works

Powder coating is applied after the area it is applied to is thoroughly cleaned of all contaminants on its surface. The powder coating is then applied either by spraying or dipping in fluid with suspended powder material. The powder coating protects the surface from external elements

Frequently Asked Question

Is Powder Coating Worth the Money?

In most cases, powder coating is the best option for finishing because it provides excellent durability, texture, and simple application. The coating can last for many years and is also a safer option with its simple application. 

How Long Does Powder Coating Last?

Depending on the environment, powder coating can last for up to 20 years. If exposed to UV light and other outdoor environments, it might be lowered to around 5 to 9 years. Varying coatings also differ in lifespans. 

Conclusion

There are many home renovations you can do with powder coating. It’s up to you how to go about it. We recommend emphasizing prolonging the lifespan of your home equipment and then customizing it for aesthetics. 

Guest Contributor: Makayla Connors

5 CARPET CLEANING TIPS FOR PET OWNERS

RH Business Marketing Solutions

Most carpet cleaning companies will tell you professional cleaning is the only way to go for pet owners.  Pet stores are willing sell multitudes of cleaning products designed for pets.

Well-meaning fellow pet owners will be eager to share their homemade solutions with you. This article will discuss 5 important things to do if you have pets in the home, to keep your carpets looking and smelling good.

Keep your pet clean.

Muddy paws and sloppy eating habits are both major sources of mess on carpets. Some pet owners have chosen to keep washable rugs over high pet-traffic areas, especially near the door they enter and exit most often.

Keeping a spray bottle of mild soapy water and a soft cloth near that entrance can make for quick cleanup, but also cleaner carpets in the long term.

Be mindful of your pet’s diet.

Food would never be an issue, of course, if your pet never got sick. However, accidents happen, and food with dyes and chemical additives can make for a more difficult cleanup.

Have a good vacuuming routine, and clean the vacuum often.

Hair and dirt build up quickly in homes (and vacuums!) with pets, and taking a quick pass in high traffic areas every few days will make for much easier maintenance in the long run. Change the bag or empty the canister at least once every two weeks, or more frequently if you notice smells are lingering.

Invest in an extractor vacuum, and an enzymatic cleaner.

Getting liquids out of carpet quickly will go the furthest to minimizing unpleasant odors. Most pet stores stock targeted enzymatic cleaning products based on animal type and size.

You don’t need the most expensive bottle, but certainly check reviews and ask staff before you buy to be sure that you are getting something worth the money. Also, read the directions carefully.

The next step will explain basic cleaning procedures for accidental messes, but some products need to be applied at different steps in the process.

Basic cleanup steps after a pet accident:

1. Move your pet somewhere comfortable and secure. There is no need for paws or tails to get dragged through the mess.

2. Remove solids by pressing a dustpan or putty knife into the carpet outside the mess, moving in and lifting up. Try not to rub or press on the stain until all solids have been removed.

3. Extract liquids. Extracting even after a mess has been sitting for a while will still help, and make the enzymatic cleaner more effective.

If you don’t have a wet/dry vacuum, use dry towels, but don’t press too hard.

4. Spray enzymatic cleaner on the mess and some of the surrounding area. Read the label to know how much to put down, and how long to leave it.

Typically, enzymatic cleaners do not require rubbing, but if you have a stubborn stain, you may use a soft-bristle brush after it has worked for a while.

5. Allow the area to dry, then vacuum well.

Guest Contributor: Frank robertson

An Elf Tale: Plumbing Edition

RH Business Marketing Solutions

Running out of ideas and need inspiration for your elf on the shelf? Is there a plumber in the family? We’ve combined the two to find the best elf locations and set ups that every kid of a plumber would find amusing.

Elf’s gone fishing in the toilet bowl!

Oops! The elf pooped ON the toilet instead of IN the toilet!

Elf’s stealing the toilet paper! Don’t mind me, go ahead and pee!

The elf clogged the toilet!! He’s trying to unclog it with a plunger.

Shower time! Elves need to shower too.

Another Elf in the toilet! Make sure it’s a toilet you don’t need to use for a day, you can’t touch the elf!

Who doesn’t love marshmallows? A Marshmallow bath!

Use the toilet paper to leave a note behind!

Uh-Oh! The elf got tangled up in the floss!

This one can teach them to change the toilet paper roll when it’s empty!

Use cling wrap to play a prank on the kids!

TP’D the bathroom! Also wrote his name/the child’s name

Leave a gentle reminder for the kids to wash their hands!

Leave a trail of TP with the Elf in the middle!

The possibilities are endless when it comes to incorporating your elf into plumbing/the bathroom. We would love to see your Elf and his shenanigans if you do it!

Guest Contributor: Tiffany Powell

A Plumber's Christmas

RH Business Marketing Solutions

Ever wonder how plumber’s decorate for Christmas? We got you covered, we found the BEST plumbing decorations for Christmas.

A Christmas tree made out of pipes and valves! What screams Christmas and Plumbing more than this?

A reindeer head out of pipes!

Pipe candle holders!

Another Christmas tree made out of an assortment of plumbing parts!

Stick your elf in any type of iron plumbing pieces and tell your children he’s pretending to be iron man!

Use a copper pipe and cut it into pieces to make a Christmas tree ornament!

Need a clock? Find some copper pipe, and electrical ground wire and you’ve got all the tools to make one. If you need a gift for a plumber in your life, this could also work.

Another form of a Christmas tree made out of pipes! Even the base is sturdy and looks great.

If you’re a plumber, or know a plumber, odds are these are materials that are common and should have on deck at all times. If you make any of these for a plumber in your life, they won’t be disappointed. Plumbers have to celebrate in their own ways 🎄

Guest Contributor: Tiffany Powell

Struggling with Clutter in Your Small Living Space

RH Business Marketing Solutions

Clutter can mean very different things to different people. A good rule of thumb is if an item is broken or not useful, not aesthetically pleasing or sentimental, it’s probably part of your clutter and it may be time to toss it or donate it. The true definition of clutter is to fill or cover with scattered or disordered things that impede movement or reduce effectiveness. Not only can clutter reduce your effectiveness in everyday life but can also affect the mind. Clutter can affect anxiety levels, sleep patterns and your ability to focus. 


Unless you’re living in the home of your dreams, you probably have to work with the limited space that you have. Small rooms can fill up quickly and the addition of clutter will only make you feel that much more cramped. Here are some reasons why your space may be in disarray.


1.     Inability to Let Go: Many people tend to hold on to a specific piece of clothing or home item if it’s sentimental, a gift or being saved for a just-in-case event. Emotions can make belongings feel irreplaceable, but you should recognize when something is ready to go.


2.     Lack of Organizational Routine: Most clutter piles get bigger simply because they become part of the general landscape. By implementing a functional routine, cleaning could become second nature and clutter won’t have time to accumulate.


3.     Impulse Shopping: Impulse buying can be a recipe for disaster. Don’t buy sale items or hobby supplies if you’re not sure where to store them or when they’ll be used. Buying on impulse may give instant gratification, but it probably won’t help you in the long run.


So when you finally get serious about cleaning up and clearing out your space, it’s important to analyze your living style and understand how your physical space can help you, rather than work against you. To learn more about the potential effects of clutter in your life, continue reading below!

Guest Contributor: Grant Kamperschroer