Google+

contact us

Use the form on the right to contact us.

Day or Night, we are here to serve you. Leave your plumbing problem to us.


Tinley Park, IL

(708)845-7922

Residential and Commercial plumbers and plumbing contractors available in Orland Park, Tinley Park, Oak Lawn, Palos Heights, Midlothian, Oak Forest, Homer Glen, Mokena, Frankfort, and the surrounding Chicago South Suburbs. Emergency plumbers.

copper water lines.jpg

Kevin Szabo Jr Plumbing Blog

Kevin Szabo Jr Plumbing is Tinley Park, Orland Park, Oak Forest, Midlothian, Orland Hill, Homer Glen, Mokena, Frankfort, Crestwood, Palos Heights, Oak Lawn, local plumber. Read our blog for advice, tips, a good laugh, and basic home improvement.

**We are moving our old blog to our new and improved website. Too see all our posts visit kevinszabojrplumbing.blogspot.com

Filtering by Tag: Clean Crawl Spaces

What To Do When Insulation Gets Wet

Rona Regan

Learn How to Treat Water Damage on the Different Types of Insulation

If you’ve lived in the Pacific Northwest longer than a month, you know we get a lot of rain. Not, of course, as much as is painted by Hollywood in movies like “Sleepless in Seattle” or “The Killing”. However, the fall and winter months unleash a low, misty cloud-bank that keeps us all inside and snug in our black, gray, or dark blue jackets.

While the steady rainfall is also what we’ve got to thank for our lush, beautiful landscape, it also brings challenges as well — the most obvious being that all this damp weather makes it difficult to keep this moisture out of our homes and insulation.

So, what should you do when you notice that your insulation is wet? Well, that will depend on the type of insulation you’re dealing with. Now that we’re heading into our wet, fall weather yet again, it’s time to arm yourself with the knowledge gleaned from home insulation experts that can enable you to protect your home from the issues caused by damp insulation.

Checking Roof Insulation for Water Damage

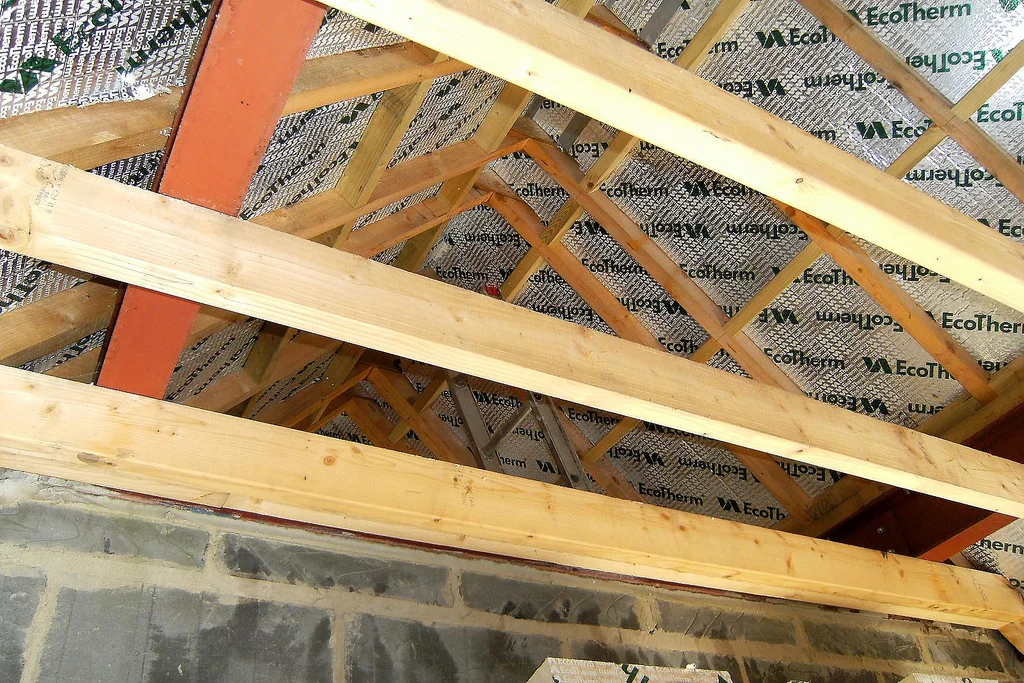
What To Do About Wet Spray Foam Insulation:

Aren’t you the lucky one! Closed-cell spray foam insulation repels water and provides a moisture barrier. This means the water won’t have penetrated the insulation itself and it should simply evaporate from the surface.

Clean up is fairly easy. Use an old towel to dry the spray foam to the best of your ability and place a fan nearby to dry out any water that you may have missed. Because spray foam insulation offers an airtight seal, the wooden structure behind should be dry as well, but just in case, you should take a peek yourself or have a professional come in to check it out. If water is getting between the wood and your spray foam insulation, it can begin causing wood rot, mold, and reduced insulation abilities.

What To Do About Wet Fiberglass Insulation:

Don’t fret — things could be worse! Fiberglass insulation is made from spun glass fibers. It won’t absorb water and, when a dousing does occur, the water won’t cause any major structural damage to the insulation.

However, water that has accumulated inside the fiberglass insulation will dramatically reduce the functionality of the insulation. Water conducts temperatures very easily, so when the warm air of your home presses against the insulation, the water will transfer that energy right outside. Additionally, the density of fiberglass insulation makes it difficult for the water to evaporate (usually only a problem when the insulation has been thoroughly wetted, in which case full replacement may be recommended). This means that moisture can lead to damage in the wood around the insulation.

So, your job is to help your insulation dry out. A dehumidifier and a few fans will often do the trick. Place them inside your attic or crawl space to help the area dry out. If possible, lift out the fiberglass bats that have been affected and place them in the sun or in a warm, dry area to let the water inside evaporate, then relay them. Please remember, if you do handle the insulation, do so only with gloves, long sleeves and pants, protective eyewear, and a breathing mask. Fiberglass fibers should not come into direct contact with your skin, eyes, or lungs.

Check up on your insulation over the next few weeks. If you start noticing a musty smell, it’s a sure sign that your insulation has been contaminated by the water. When this occurs, you’ll likely need to replace some or all of the insulation. This is most likely to happen after a flood, or if you’ve had pests in your home such as mice or rats.

What To Do About Wet Cellulose Insulation:

While cellulose insulation is for the win when it comes to being an eco-friendly or ‘green’ option, it’s not the best performer when it gets wet. Cellulose insulation is made from plant fibers, such as recycled newspapers. These fibers wick up moisture like a sponge. If your water damage is minimal, you may be able to simply have the affected area of cellulose insulation removed and (possibly) dried.

If your leak was significant, large areas of your insulation are likely affected. Unfortunately, cellulose is a great conductor of water and offers nutrients for mold and mildew. Usually, wet cellulose insulation will develop mold within a few days to a couple of weeks, which will require a total replacement of the insulation.

There is the possibility of removing and successfully drying cellulose batting, for those homeowners who have a large enough dry space for the batts to lay while they dry (this can take up to 10 days or more). If successful, the area in which they were laying can be thoroughly cleaned to prevent mold growth (and dried), and the bats can be laid down again.

What To Do About Wet Cotton Insulation:

As you might imagine, cotton insulation is prone to collecting moisture. Often made from recycled blue jeans or other plant fibers, cotton insulation will easily and rapidly absorb moisture. Thankfully, it is easier to dry out than other types of insulation, such as cellulose.

If you’ve only got a small area that’s been damaged, remove the insulation at least a foot further out than the visible wet area. Then, place the bat in the sun or in a warm dry place. Once dried, it can be replaced. Be sure to frequently check the area for any additional moisture or signs that mold growth is starting to develop.

Also, it’s important to know that if cotton insulation is subjected to repeated water exposure, it’s insular abilities often begin to decrease and the chemicals used to deter pests and slow the burn rate in the event of fire may have leached out.

If your cotton insulation has been saturated, such as in the event of a flood, all affected insulation will need to be replaced. It is possible that some insulation might be salvageable, but you would run the risk of introducing mold or moisture into your brand new insulation. Any cotton insulation that has mold growth should be scrapped.

What To Do About Wet Foam Board Insulation:

You’re in luck! Foam board insulation, like spray foam insulation, is water repellent and an unlikely host for mold or mildew growth. It is important to make sure you keep your foam board insulation dry, however, as well as the areas surrounding it. Because foam board is impermeable to water, it can create a seal that traps moisture in an area of the home, such as in a wall cavity. The wooden beams and drywall or sheetrock are not water resistant — they will be damaged and require replacement.

If you’ve noticed your foam board insulation has condensation or moisture on it, thoroughly dry the area with a towel. If there is any chance that moisture could have gotten behind the foam board, have a professional inspect the area to make sure you catch any water damage before it becomes a serious problem.

Home Insulation Options and Installation

Have a type of insulation that we didn’t mention here or are curious to learn more about getting new insulation installed in your home? We’d recommend contacting a reputable local business that specializes in insulation installation for attics, crawl spaces, and other areas of your home. They’ll be able to provide insight on the types of insulation best used for your home, the R-value of each option, and quotes for installation.

Featured images:

I'm the marketing manager for Clean Crawls, a Pacific Northwest crawl space cleaning & insulation company. At home, I love to spend time with my wife, 4 children, and golf. At work, I help connect my clients to their customers through content that helps people solve problems. 

9 Things In Your Crawl Space You Should Know About

Rona Regan

How Homeowners Can Easily Maintain Their Crawl Space

Few of us have a desire to go exploring in the dark recesses of our crawl space. Why would we? Cobwebs, dirt, dust, and ductwork is all that there is to greet us — well, hopefully. Additionally, most crawl spaces leave little space to move around, much less walk.

Unfortunately, this lack of easy accessibility causes many homeowners to ignore their crawl space area entirely — a mistake that can sometimes cost them thousands of dollars later on.

There are 9 common things that every homeowner should know to keep an eye out for when it comes to maintaining their crawl space area. We’ve got a list of them for you — along with what you should do when you encounter each one.

Keeping your crawl space clean

1. Dirt

Most homeowners in the Greater Seattle area have bare dirt or exposed rock ground as the floor of their crawl space area. Sometimes homes may have had a vapor barrier or insulation installed years before, of which pieces still remain. While there isn’t much harm in dirt itself, there are issues that come along with exposed dirt floor in the crawl space.


What to do about dirt:

Install a vapor barrier. These help prevent moisture and condensation coming up out of the dirt and into the air of your crawl space. Thanks to the Stack Effect, the air of your crawl space is suctioned up into the rest of your home. In fact, up to 40% of your air circulating through your house has come from your crawl space!

Vapor barriers are comprised of thick plastic sheets laid across the floor and secured with stakes or tape. They contribute to lessened moisture build-up as well as helping your home air stay clean. If you can see dirt in your crawl space, it’s best that you have a professional come in to install a vapor barrier as soon as possible.

2. Ductwork

Many home appliances run through the crawl space area. The accompanying ductwork is usually exposed. Washers and dryer ducts are all commonly found running along the ceiling of the crawl space on their way to your home exterior or to external holding tanks. The ductwork for your homes HVAC system will also typically be found down here.

What to do about ductwork:

There’s nothing wrong with having ductwork running through your crawl space, but it does need to be properly insulated. If HVAC ductwork is not insulated, you run the risk of wasting energy and increasing the cost of heating and cooling your home. Additionally, the changes in temperature can encourage excess moisture and mold development. All this heat and moisture attracts pests, who in turn can damage your ductwork and insulation while diminishing the air quality of your home.

Yeah - big ramifications to such a simple issue.

If you’ve got uninsulated ductwork in your crawl space, the best thing to do is to call a professional crawl space team to come in and install insulation. Insulate the ductwork incorrectly, and you’ll have all the exact same issues as if you hadn’t insulated at all — possibly worse! Ductwork and pipe insulation isn’t a DIY job, so find a reliable, affordable local business to come in and help you out.

3. Plumbing Pipes

Just like ductwork, most homes have at least a few lines of plumbing that run through their crawl space on their way to the septic tank or sewer system. These pipes are usually heavy duty and seemingly impervious to threat — unless it’s from a clogged drain.

But plumbing lines can actually create a pretty poor crawl space environment very quickly. Changes in temperature thanks to water flowing through them and the seasonal temperature changes can cause condensation on the pipes, especially during the coldest and warmest months of the year. This condensation can easily lead to mold infestations if not dealt with properly.

What to do about plumbing:

Call in the experts! A good crawl space cleaning team will insulate and wrap your ductwork and plumbing pipes all in one go. This insulation has to be done carefully, however, as trapping moisture against the pipes can still lead to mold growth and possible damage to your pipes. Be sure you work with a crew who knows what to wrap, how, and when.

4. Electrical Wiring

Wiring sometimes dangles like spider webs from a poorly kept crawl space. These cables and wires usually run along beams as they supply energy to various areas of your home. All you need to do is make sure these wires are protected from the gnawing teeth of mice and rats.

What to do about wiring:

Tack electrical wiring snugly against the beams with nail-in cable clips. Ideally, these electrical cables would lay underneath your crawl space insulation. This keeps them out of easy reach from any crawl space invaders who have made it into your home.

5. Drain and Pumps

Some crawl spaces have been installed with a drain or pump system. In most cases, the pump is a sump pump, designed to carry excess water away from the home in the event of a flood. Drains would have been installed for the same purpose, usually draining the water to a culvert, septic tank, or sewer system.

What to do about a drain:

Do not ever cover a drain or pump! These devices should be left open so that when water does gather, it can be easily drained away. You should occasionally check on pumps and drains to ensure they are still in working order – after all, a plugged drain will not do you any good when a flood occurs. Sooner, in this case, is always better than later.

6. Vents

Most crawl spaces are equipped with multiple vents along the bottom or top of the walls. These vents allow air movement through your crawl space.

What to do about vents:

Do not block your crawl space vents! Many homeowners mistakenly think that by blocking these vents, they’ll help keep their crawl space warmer/cooler. These vents are actually very important in allowing proper ventilation. Check that the mesh of the vents is secure and without holes. The mesh should be fine enough to prevent insects from squeezing through, yet still allow for air movement.

7. Exposed Beams

The beams in your crawl space are what keep your home standing. These foundational beams run vertically and horizontally throughout your home. Ensuring that these are in good shape is a hugely important part of keeping your home safe.

What to do about exposed beams:

Leave them be! Do not ever cut out beams or boards that are ‘in your way’. However unimportant they may seem to you, these are actually vital in the stability of your home. What you can do is once a year or after a flood check these beams for any signs of decay, termite damage, or cracking.

8. Dirty or Damaged Insulation

Insulation is one of the most vital aspects of your crawl space. You can lose up to 45% of your home’s energy through non-insulated crawl spaces. If your crawl space features dirty, ragged or limited insulation, you’re probably wasting a lot of money each month on your heating bills. Additionally, crawl spaces with dirty insulation are more likely to encourage mold growth and attract insects, rodents, and other bothersome pests.

What to do about insulation:

Replace it. Ensuring your crawl space is well-insulated is definitely worth the investment. Not only will you be keeping your energy bills lower and your home more comfortable, you’ll also be deterring pests and lessening the chances of mold and mildew growth. Some homeowners see up to 30% reduction in energy bills following the installation of insulation in the crawl space. It’s easy to see how a crawl space cleanout can rapidly pay for itself.

9. Pests

Most crawl spaces will have some vermin — especially those that have not been maintained. The dark, warm area naturally attracts pests of all sorts, including mice, rats, squirrels, snakes, spiders, ants, beetles, termites, and many more types of pests.

What to do about crawl space pests:

Getting these pesky invaders out of your home can be challenging. For some DIY-ers, home remedies and traps will do the trick. (If that’s you, here are some handy resources on how to remove rodents and snakes from your crawl space). For large-scale, persistent invasions or for those homeowners who prefer to have the issue dealt with professionally.

After the pests are eradicated, it’s time to clean up the mess. Rodents and some types of insects can leave quite a mess behind. Chewed insulation, ripped vapor barriers, feces, and carcasses all need to be removed. In most cases, it’s better to leave the reparation job up to the professionals.

Featured images:
  •   I'm the marketing manager for Clean Crawls, a Pacific Northwest crawl space cleaning & insulation company. At home I love to spend time with my wife, 4 children, and golf. At work, I help connect my clients to their customers through content that helps people solve problems. 

Guest Contributor, CleanCrawls.com