Google+

contact us

Use the form on the right to contact us.

Day or Night, we are here to serve you. Leave your plumbing problem to us.


Tinley Park, IL

(708)845-7922

Residential and Commercial plumbers and plumbing contractors available in Orland Park, Tinley Park, Oak Lawn, Palos Heights, Midlothian, Oak Forest, Homer Glen, Mokena, Frankfort, and the surrounding Chicago South Suburbs. Emergency plumbers.

copper water lines.jpg

Kevin Szabo Jr Plumbing Blog

Kevin Szabo Jr Plumbing is Tinley Park, Orland Park, Oak Forest, Midlothian, Orland Hill, Homer Glen, Mokena, Frankfort, Crestwood, Palos Heights, Oak Lawn, local plumber. Read our blog for advice, tips, a good laugh, and basic home improvement.

**We are moving our old blog to our new and improved website. Too see all our posts visit kevinszabojrplumbing.blogspot.com

Filtering by Tag: Crestwood plumbers

Decorating with Rugs: the Essentials

RH Business Marketing Solutions

IMG_5055.jpeg

Decorating with Rugs: the Essentials

When a room starts to appear dull and boring, replacing a rug might solve the problem. Even though most people see it just as an accessory, the right rug can change the entire feel of the room and set the foundation of the entire design. By playing with its colour, pattern, shape and size, you can add more interest and vibrancy to your space and use the rug to visually tie together various elements, give it a stronger definition and add more warmth and style. Here are several different ways to decorate a room with rugs.

Make Sure to Get the Right Size

It might be tricky to determine the right rug size for your room since in this case, bigger isn’t necessarily better. A rug that is too big can swallow the room and take away from the beauty of your hardwood flooring, and a tiny rug can chop up a room and make it seem disconnected.

The general tip is to pick a rug that is 3 feet smaller in length and width than your room. These bare edges will make the room seem bigger. Dining room rugs should be at least 24 inches wider than the edge of your dining table so the back legs of chairs can stay on the rug even when pulled out to allow your guest to sit. As for runners, they should be about 4 inches narrower and 18 to 24 inches shorter than your hallway, but large enough to have both of your feet on the rug as you pass through.

Use Rugs to Define Areas

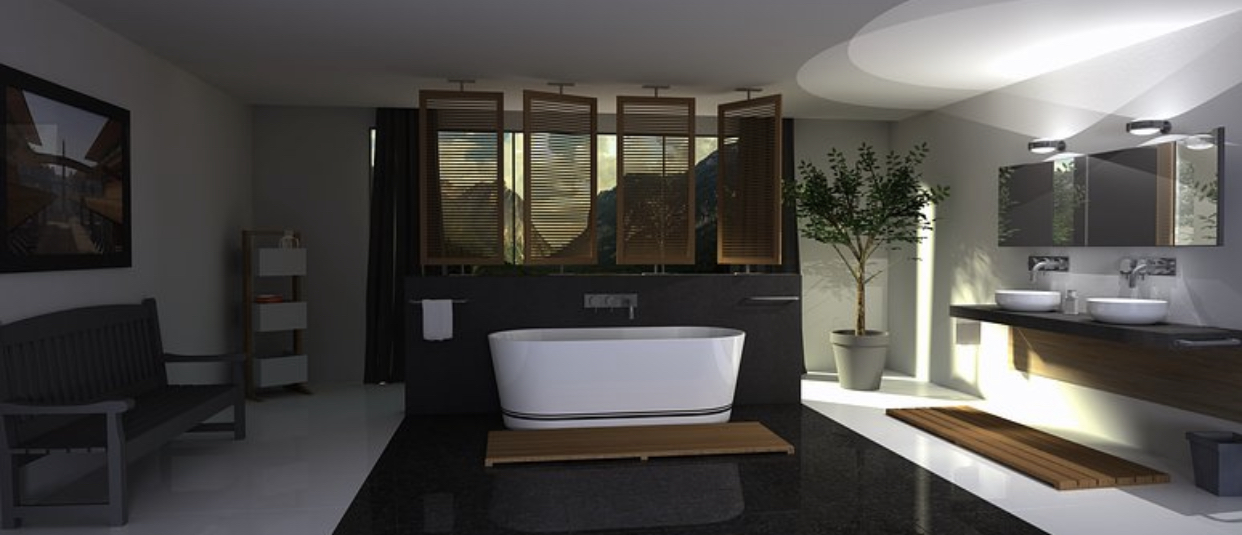
Rugs can be a very effective tool in defining spaces, both small studio apartments and large rooms equally well. In smaller spaces, leave a narrow strip of the floor visible to make the room appear bigger and brighter, and in larger rooms, experts’ advice is to have the front legs of your furniture on the rug and the back legs off. It unifies the area without cutting it off form the rest of the room.

You can also use the rug as a focal point and make a strong impact. The trick is to create a contrast by painting your walls in one of the rug accent colours. And, don't think that a rug has to be a rectangle. Sometimes a square, round or oval shape can complement your furniture arrangement better than a classic rectangular one.

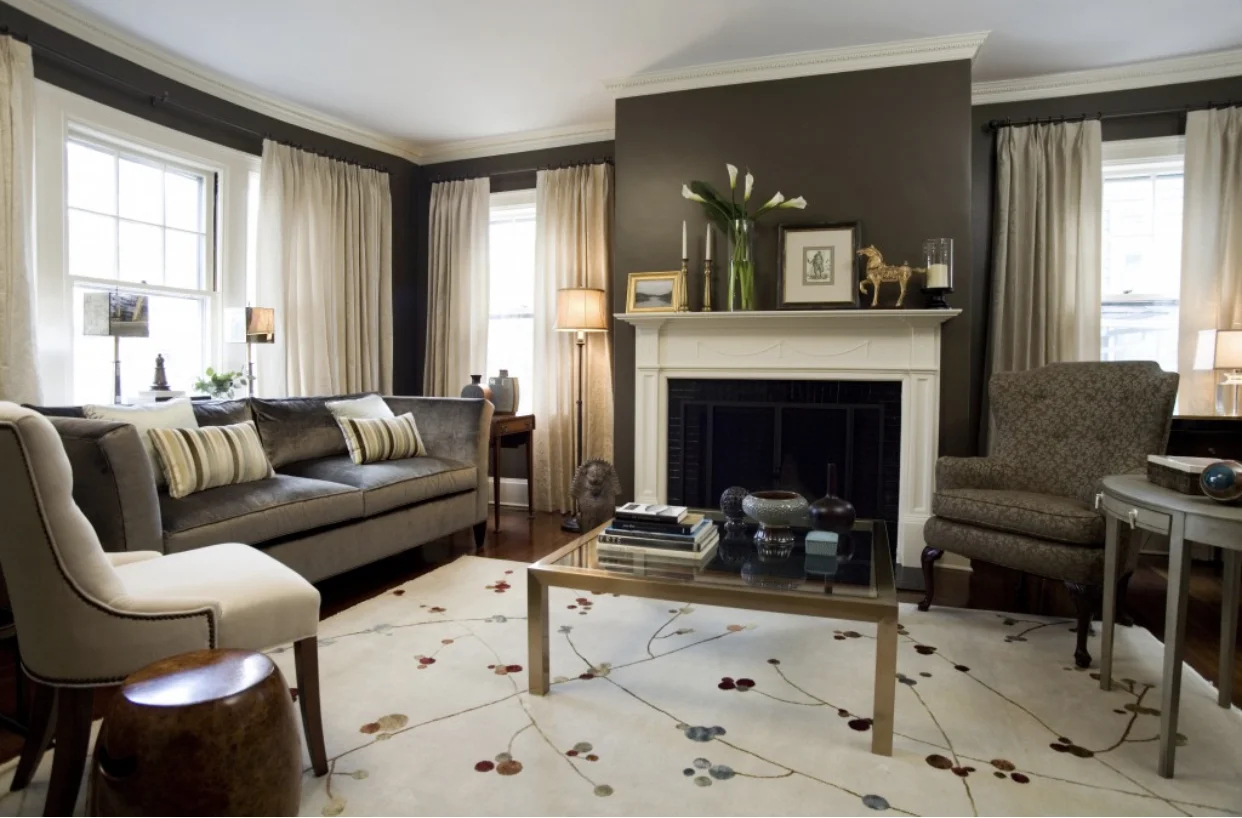
Set up a colour scheme

Your rug of choice can be used to set the basis of your colour scheme, or if you introduce it later, it can emphasise and tie in your existing colour scheme. You can use a rug can visually soften the room or add more accent. Bear in mind that achieving balance is the point of good design, so don’t overdo it. If your walls are soft and neutral, go with a bold coloured rug, and vice versa.

Choosing among so many different colours and patterns can be overwhelming, so you might decide to buy your rugs onlinesince there you will usually have a much bigger choice of rugs and more affordable prices. 

Achieve harmony and variety

Rugs add a touch of playfulness and variety to a room, but you need to be careful how you size and position them. If you’re planning on using two rugs, variety will be achieved with different sized rugs. Otherwise, the room will be visually cutin two.

Make sure the two rugs complement each other in style or the final result will be awkward and unpleasant. Too many different styles and patterns will disrupt the harmony. 

Use rugs as decorative tools

Rugs can be great decorative tools if used correctly. For instance, by changing both your pillows and rugs with the changing of seasons, you'll easily transform the room and make it appear trendy and fresh. And if you hang your rug on the wall, you'll have an original focal point.

The bottom line is that anything can work, it all depends on what you find most appealing and what can create the best effect in your home.

Guest Contributor, Lillian Connors

All You Need to Know About an Expert Plumber Service

RH Business Marketing Solutions

IMG_4781.jpeg

All You Need to Know About an Expert PlumberService

Call for an expert plumber service is never pre-defined. Plumbing emergencies can happen at any point of time. A good plumber comes into picture when a person finds himself in a pinch of plumbing problems. Numerous advertisements are out there in the market of people claiming to be an excellent plumbing service. Sometimes, those may prove to be misleading ones. Clinging on to a professional plumber requires a bit of research as fixing plumbing complications is tedious. A licensed plumber is the one who possesses sound technical skills as well as knowledge to serve his or her clients efficiently. 

Tips for Choosing the Expert Plumber Service:

License and Legal Documentation:

Every expert plumber service provider must possess an official permit for running his plumbing business. For those who seek a plumber’s assistance should ask for relevant and valid working license conferred by the State Government. No matter whether it is a residential or a commercial plumbing emergency, hiring a professional plumber without a valid working permit should never be entertained. License assures for the compliance of the service being provided by the plumber to be in accordance with the state regulations. 

Experience Accounts for The First Priority:

Out of all the governing factors, experience of the plumber is must. Thus, when a person is in search of an expert plumber, it is important to track for how long the plumber is functional in the market. New plumbing professionals may or may not be able to meet all your plumbing requirements.

On the other hand, an experienced plumber shall evaluate the plumbing requirements of any commercial or residential set-up and customize solutions accordingly. This helps their customers to save on their time and money investment. Warranty of the plumbing service is not an issue whenexperienced personnel is hired. 

Cling More on Recommendations:

While connecting with an expert plumber service provider, it is better to look on for suggestions. Recommendations or referrals give an insight into the best and worst plumbing service providers available near you. Ask family and friends about their recent experience with a professional plumber. Also, jot down all the plumbing issues they faced and the solutions provided by their plumber. Some professional plumber service providers have their Google listings wherein a customer can cross-verify about the past customer feedback and experience. 

24/7 Customer Support Facility:

While choosing an expert plumbing solution service provider, it is essential to check for their 24/7 customer service availability. Water is a crucial resource, and no one can afford wasting water due to erroneous plumbing issues. Plumbing emergencies can arise at any point of time, and hence, a professional plumber should be reachable quickly. Ensure for their quick reachability through text messages, calls or even through their website. Customer service and satisfaction should top their priority list. Finally, they a professional plumbing solution provider should stand high with a technical troubleshooting ability.

Affordability Matters:

There are heaps of expert plumber service providers claiming themselves as highly experienced with a wide array of services. However, it is the customer’s responsibility to take a dig at the pricing of their service of interest. An excellent and professional plumber shall never overcharge for the service above the market price. A professional plumber is the one dedicated towards a quality intact servicing at highly affordable pricing. This benefit in two-ways- the plumbing service provider has an excellent customer retention ratio, and the customers invest low on their money. 

Thus, choosing an expert plumber service provider requires a bit of thorough research on experience, service quality, and affordability. Reliability and trustworthiness of a plumbing solution provider go hand-in-hand with these three characteristics.

 Guest Contributor, Nivi Watson

5 Ways to Choose the Best Plumbing Company If You Have Blocked Drains

RH Business Marketing Solutions

IMG_4419.jpeg

5 Ways to Choose the Best Plumbing Company If You Have Blocked Drains

Blocked drains are one of the biggest problems with any household. Drainage system faltering can get messy and cause huge problems. Having the drain cleaned once in a while is a good option but it gets hard to figure out when exactly the drain might get damaged. For times like these, one needs a good idea about how this entire mess works. Therefore, needs a good plumbing company to sort the mess. There are a lot of plumbing companies out there and it can get a little too tough to choose but here are some ways which can be followed while choosing a plumbing company if one has blocked the drains.  

1. Look for Certifications: To get the best out of the lot one needs to check for quality certification. The certification of the plumbing company is important since it measures the quality of the work of the plumber they will send. Having this part sorted can guarantee a good service since qualified workers delivers quality work. Therefore, looking for certifications is an important job. 

2. Reputation Research: Reputation of any worker is worth of gold so is the case for a plumber or a plumbing company. A researchregarding the reputation of the company will provide a good deal of information and an insight of things. Customer reviews, asking around, ratings on customer services can be a good way of testing the reputation of the company. Better the reputation, better the work on the blocked drains.

3. Look for Specialities: All plumbing companies have a special set of specialities. For example, some of the plumbing companies are commercial and the plumbers work in the generic old-fashioned manner. On the other hand, there are companies that provide high tech work or even eco-friendly work. Once one looks into the specialities of the different companies, it will be easier to select the perfect company as per the need.

4. Warranties and Repair Plans: Warranties and repair plans are important to look for when it comes to any repairing work even for blocked drains. It is clever to look up the companies’ terms and conditions when it comes to repair and warranty because this might come handy later. This can turn out to be cost effective and beneficiary for the future. Having purchased a good plumbing plan can not only help with blocked drains but also with the broken pipes, pump failures, and all other plumbing problems.

5. Do Cost Estimates: After an extensive research, one must look for the perfect plan and plumbing company keeping in mind the cost estimate. Doing the cost estimate will provide the perfect company which one can afford. This factor is important and can plan the perfect budget for the services and make it cost effective with the quality of the service. For the best results out of this plan one should consult at least four to five different plumbing companies before narrowing it down to one. 

Choosing a plumbing company can be a headache at times since there are too many things to look into but if these simple steps and ways are looked into, the work becomes much easier. These ways not only guarantee the solution to the problem of blocked drain also provides the solution with the quality services. The services that the plumbing company will provide will be cost effective. Therefore, the matter to be solved can come with a solution which guarantees warranty, quality, and less of a mess.    

Therefore, opt for the best solution for the blocked drain in case you are looking for the plumber or a plumbing company.

Guest Contributor, Lara Buck 

How Your Garage Became So Cluttered

RH Business Marketing Solutions

Plumbers in Crestwood IL

How Your Garage Became So Cluttered

To understand how the garage came to play such a significant role in the average American acquisition, it’s easier if you have a bit of background on how architecture and the building industry affected the placement and use of the garage.

Housing developments

The first carriage houses and later, garages, were built behind the home. When housing developments became popular in the seventies and eighties, the architecture of homes changed to streamline traffic. The family garage was relocated to the front of the home and attached to the house. The average family now uses the automatic garage door as a primary means of entering their home rather than the front or back door.

Ebb and flow

Today, the garage door is also often the most significant architectural element in the front of many homes. For this reason, a new garage door can transform the look of a home. At the same time, the ease with which we enter and depart from our homes via the garage has given us the opportunity to use the garage as a holding area of sorts. Most of our purchases enter through the garage via the family car.

Much of our garbage exits through the garage door when we take out the trash cans. If items are too good to throw away but not good enough to keep in the home, they often become stuck in a holding pattern. After all, a garage isn’t a room in the house where cleanliness and comfort are required. As a result, we often allow the space to become so cluttered it becomes a safety hazard. We’ve all managed to trip over a bicycle or carelessly placed box at some point. Also, the automatic garage door can break, or its function is threatened if overstacked boxes or other items fall on the mechanisms.

Storage

As the middle class expanded, advertising told people to buy more stuff.  Even if you already had a coat, for example, advertising reminded us that the styles had changed and for a relatively reasonable price, you could own a brand-new stylish one. Since the old coat wasn’t worn out, you kept that one, too. Soon, we all had a mountain of old outerwear, dishes, knick-knacks, and kitchen appliances. It seemed reasonable to store the old stuff in the garage until the next garage sale, drop-off at the thrift store, until someone needed it, or until some mishap befell the new one.

Municipalities and HOA’s have added to the temptation to store items in the garage because many of these governing entities stopped issuing permits for sheds and other structures, or banned them altogether.

Hobbies and sports

Since the middle class is no longer required to work long hours to keep families from starving, there are new opportunities for leisure activities such as hobbies and sports activities. The tools and equipment from these activities are often stored in the garage as a matter of convenience.

Looking forward

In light of our new understanding of how the garage came to be a kind of private loading dock, we no longer have to be victims of an architectural decision from years ago. By rethinking the garage as a living space specifically for the car will help us become more respectful of the area.

Just as warehouses use floor tape to designate areas which are to remain clear at all times, a family can create a mental ‘safe zone’ in their garage, one in which walkways are clear, and boxes or other items aren’t abandoned: they ’re either appropriately stored or hauled away. If the project is overwhelming, asking for help is reasonable. Garage storage units can also be helpful.

Guest Contributor, Danny Cappello

About the author: Danny Cappello is a co-founder of Quick Response Garage Doors and Quick Response Garage Cabinets. When not busy with work Danny enjoys playing tennis, and spending time with his family.

5 Tips Organize Your KitcheN

RH Business Marketing Solutions

IMG_2950.jpeg

If you want to function in the kitchen then the only way is to keep it organized. Nothing is worse than having to work in a messy, disorganized kitchen with bits and bobs laying all over the place.

Not only is it difficult to cook in a messy kitchen, but it is also challenging to find things. So, to avoid all this, it is crucial that the kitchen is kept tidy and organized at all times. 

Keeping all this in mind, we have created the top five tips to help you to keep your kitchen fully organized and neat. Let's go and take a look at it. 

Use of transparent jars for the junk drawers

We are all familiar with that drawer in the kitchen that holds all kinds of necessary junk items. This drawer holds the things that come in handy but is so messy to the point that it is a quest to find anything in there when you really need it. 

Here is an idea, bring some small transparent jars with lids and fill each of them up with all the similar category items and then sort them out in the drawer.

This trick will help you to save a  lot of space inside the drawer and also make room for other items. Plus, you will be able to find things more easily around the kitchen. 

Sort the cutting boards in a magazine holder

Have cutting boards laying aimlessly on the kitchen counter and taking up all the space and messing things up? Well, worry no more, as we know just what you should do. 

It is not a great look for the kitchen counter when you just let your cutting boards lay anywhere haphazardly. Plus, this eats up a lot of workspace in the kitchen. 

So, what you have to do is, bring in a magazine holder and put all of your slicing or cutting boards in that. Magazine holders can easily hold your cutting boards and give your kitchen an organized look plus make a lot of space for you to work in. 

Keep measuring spoons in a transparent jar near the stove

This is a great tip that will not only organize the kitchen but will also help you to access the measuring spoons easily whenever you need it as you won't have to waste time finding them as all you measuring spoons will be stacked in one single place. 

Well not just that, it looks really good when you keep the spoons in the jar and adds a dainty touch to the kitchen. 

Use hooks around the kitchen to hang accessories and other useful items

Using hooks that can be stuck with the walls around the kitchen is a great way to clean up a disorganized kitchen. 

You can hang pots and large spoons or other items in these hooks instead of letting them sit idly in the kitchen top blocking space.

Store all your small spice jars in a large cake pan

This is one of our favorite tricks, to keep the kitchen organized and also to ease up the work around the kitchen while cooking. 

Keeping spice jars in a single cake pan will not only organize the kitchen but will also help you cook as all the spices you need will be stacked in one single place. 

Conclusion

Nothing feels better than working in an organized kitchen. The above tips will allow you to make more space and store more useful items.

Plus a clean and tidy kitchen is much more fun to work in as you can easily grab the things you need without wasting time to find them from a pile of objects.

Guest Contributor, Carl Nevins

Warming Places in Cook County

RH Business Marketing Solutions

IMG_1956.jpeg

We’re lucky to have heat in our homes, unfortunately there’s families without heating or proper housing. It’s more sad to think that there’s homeless people dealing with this weather. It’s -50, please help the people that you could and if you can’t, call one of the numbers below they should be able to advise you.

Here’s a list of all the Warming Places in Cook County.

Berwyn (Library)

2701 S. Harlem Ave.
Berwyn, IL

9:00 a.m.- 9:00 p.m. M-THU
9:00 a.m.- 5:00 p.m. F-SAT
1:00 p.m.- 5:00 p.m. SUN
Transport: No

Berwyn (Freedom Park)

3701 S. Scoville Ave.
Berwyn, IL

9:00 a.m. – 5:00 p.m. M-THU
9:00 a.m. – 3:00 p.m. F
Transport: No

Berwyn (Recreational Dept.)

6501 W. 31st St.
Berwyn, IL

7:00 a.m. – 9:00 p.m., M-F
Transport: No

Bloom

425 S. Halsted St.
Chicago Heights, IL

8:00 a.m. – 8:00 p.m. M/W
8:00 a.m. – 4:40 p.m. T/THU/F
Transport: No

Bremen

16361 S. Kedzie Parkway
Markham, IL

9:00 a.m. – 5:00 p.m., M-F
Transport: No

Calumet

12633 Ashland Ave.
Calumet Park, IL

8:00 a.m. – 4:00 p.m. M-F
Transport: Yes, please call 708.388.6606.

Cicero (Village Building)

4949 W. Cermak Rd.
Cicero, IL

8:00 a.m.- 8:00 p.m. M-F
Transport: No

Cicero (Library)

5444 W. 34th St.
Cicero, IL

8:00 a.m.- 8:00 p.m., M-F
Transport: No

Cicero (Community Center)

2250 S. 49th Ave.
Cicero, IL

8:00 a.m.- 8:00 p.m., M-F
Transport: No

Elk Grove

2400 S. Arlington Heights Rd.
Arlington Heights, IL

9:00 a.m.-4:00 p.m. M-F
Transport: No

Hanover (Senior Center)

240 S. IL Route 59
Bartlett, IL

8:30 a.m.- 4:30 p.m. M/W/F
8:30 a.m.- 8:00 p.m. T and THURS
8:30 a.m.- 12:30 p.m. SAT
Transport: Yes

Lemont (Township Offices)

1115 Warner Ave.
Lemont, IL

9:00 a.m.- 4:00 p.m. M-F
Transport: Yes, please call 630.257.2522

Lemont (Community Center)

16300 Alba St.
Lemont, IL

9:00 a.m.- 2:00 p.m. M-F
Transport: Yes, please call 630.257.2522

Leyden

2620 N. Mannheim Rd.
Franklin Park, IL

6:00 a.m.- 9:00 p.m. M-F
6:00 a.m.- 2:00 p.m. SAT
6:00 a.m.- 12:00 p.m. SUN
Transport: No

Maine

1700 Ballard Rd.
Park Ridge, IL

9:00 a.m.-5:00 p.m. M-F
Transport: No

Niles

5255 Lincoln Ave.
Skokie, IL

9:00 a.m.- 5:00 p.m. M-F
Transport: No

Norwood Park

7833 W. Lawrence Ave.
Norridge, IL

9:00 a.m.- 4:00 p.m. M – THUR
9:00 a.m.- 3:00 p.m. F
Transport: No

Oak Park

130 S. Oak Park Ave.
Oak Park, IL

8:00 a.m.- 5:00 p.m. M-F
Transport: No

Orland Park

14807 Ravinia Ave.
Orland Park, IL

8:00 a.m.- 4:30 p.m. M/W/THUR/F
8:00 a.m.- 6:00 p.m. T
Transport: Yes, for seniors 55 and older. Please call 708.403.4222.

Palatine

721 S. Quentin Road
Palatine, IL

8:30 a.m.- 7:00 p.m. M
8:30 a.m.- 4:00 p.m. T- F
8:30 a.m.- 12:00 p.m. SAT
Transport: No

Palos

10802 S. Roberts Road
Palos Hills, IL

8:30 a.m.- 4:30 p.m. M-F
Transport: No

Proviso

4565 W. Harrison St.
Hillside, IL

8:00 a.m.- 4:30 p.m. M-F
Transport: Yes, for seniors 60 and older. Please call 708.449.4300.

Rich

22013 Governors Hwy
Richton Park, IL

9:00 a.m.- 4:00 p.m. M-F
Transport: No

River Forest

8020 W. Madison St.
River Forest, IL

8:00 a.m.-8:00 p.m. M-F
Transport: No

Riverside

27 Riverside Road
Riverside, IL

9:00 a.m.-5:00 p.m. M-F
Transport: No

Schaumburg

1 Illinois Boulevard
Hoffman Estates, IL

8:30 a.m.-10:00 p.m. M-THURS
8:30 a.m.- 9:00 p.m. F
Transport: No

Stickney

7745 S. Leamington Ave.
Burbank, IL

8:30 a.m.- 4:00 p.m. F
Transport: No

Wheeling

1616 N. Arlington Heights Rd.
Arlington Heights, IL

8:00 a.m.- 4:30 p.m. M-F
Transport: No

Worth

11601 S. Pulaski Rd.
Alsip, IL

8:30 a.m.- 4:30 p.m. M-F
Transport: No

Tips to Avoid Common Heating Problems This Winter

RH Business Marketing Solutions

IMG_0734.jpeg

Tips to Avoid Common Heating Problems This Winter 

They say winter is the most magical time of the year, but is that still so if your heater breaks down? There’s nothing more troublesome than going through the cold months with a faulty heating system. Sure, it’s nice to watch the snow falling and feel the cold breeze once in a while, but it’s a different story when you’re looking forward to a cozy night at home only to find your heater fail you.

Keeping your home warm over the winter months is not only essential to your comfort but your health as well. The drop in temperature can affect your immune system and make your body more vulnerable to sickness and infections. That said, it is imperative that you take the time to make sure that your heater works well before the colder days hit.

How To Keep Your Heater Working Smoothly 

Schedule regular heater maintenance

Nobody will ever do it better than the pros. Make it a point to schedule a heater tune-up before winter starts and another when it’s over. Having your heater cleaned and checked by professionals will extend its life and give you peace of mind throughout the season.

Make sure the pilot light is on

Checking if the pilot light on your furnace is lit should be one of the first things on your list when preparing for the cold days ahead. This is a fairly simple task, and the steps on how to do it should be on your user's manual.

Clean your heater and perform a visual inspection

Wipe the dust off your heater and clean or replace dirty filters. Also, give your heater a visual once-over to ensure that all parts are intact. Check the wires closely for any signs of damage or fraying. If you see something wrong with the wirings, get in touch with an electrician as soon as possible.

Watch out for weird noises

As you clean your heater, turn it on and listen for any odd noises. Any weird or gurgling sounds could mean that there's a leak, a crack, or some other problem within. Holes in the heater can be dangerous and should be addressed by an HVAC professional immediately.

Give your heater a trial run

Lastly, do a trial run. Turn your heater on for about 10 to 20 minutes to make sure that the system is generating the expected level of heat. This will assure you that your heater is in prime condition and will work like new when you need it to.

Guest Contributor, Michelle West

How to Install a Ventilation Fan in Your Bathroom

RH Business Marketing Solutions

IMG_0732.jpeg

How to Install a Ventilation Fan in Your Bathroom

Your bathroom is the one room in your home that is constantly under assault from a variety of sources. Harsh chemical cleaners, steamy showers and the remnants of last night’s Mexican entrees all need a way out and vent fans can do just that.

While the odor of a recently used restroom is definitely something we want to get rid of, the more important factor in installing a ventilation fan is evacuating the steam and water vapor created from baths and showers. 

This moisture, if left unaddressed can cause floors to bow, caulking to degrade, and mold to grow in our bathrooms, leaving us with costly repairs and unsightly walls, floors and ceilings. 

When you’re ready to start keeping your bathroom dry, here’s how to do it. 

Selecting a Ventilation Fan

Finding the right fan for your bathroom is an easy process, but an important one. When considering which fan fits your needs, consider the following. 

● Square footage. Fans are designated by the CFM (cubic feet per minute) of air that they move. You’ll want a fan that has at least one CFM for every square foot of your bathroom. Find square footage by multiplying the length of a room by its width. 

● Features. It may sound silly, but this is the 21st century, even our ventilation fans come with features and options now. Modern fans can commonly be equipped with a built in light, a heater, humidity sensor, motion detector, night light and even Bluetooth speakers. 

● Install options. Vent fans can be installed with or without attic access, on the ceiling or walls, and with or without cutting into the wall material. Figure out which option suits you best and pick a fan to match. 

The Tools

Installing a vent fan is a diy task that most homeowners can take on. However, you will need a few tools. 

● A drill with bits and drivers

● Screws

● Flathead and phillips screwdrivers

● Utility knife

● Jigsaw or drywall saw

● Respirator and eye protection

● Duct tape

● Wire cutters and crimpers

● Assorted electrical connectors (may be included with fan)

Time to Get Started

Once you’ve selected the right fan and have assembled the tools, you’re ready to get going. First, determine where your fan will be installed and gain access to that area. If you’ll be venting the fan through the ceiling, you’ll need to be able to get into the attic. 

Drill a Reference Hole

Find a suitable position on the ceiling, ideally between the shower and the toilet, and drill a reference hole through to the attic. A 3/8” bit is big enough for this. 

Measure the vent fan housing and note it on a piece of paper, you’ll need this next. 

Now, climb into the attic and locate your reference hole. Clear away any debris, insulation, or stored objects from the area. Using the measurement you just took, locate the final position of the fan between two joists nearest your hole. 

Note that position in relation to your reference hole so you can transfer that to the ceiling back in the bathroom. 

Mark the Layout in the Bathroom

Back in the bathroom, measure the inside dimension of the fan’s intake. 

Using your reference hole and the notes you made in the attic, transfer the measurements from the attic to the ceiling and use a square to mark out the intake port on the ceiling. 

Cut the Hole

Using the saw you have on hand, cut along the lines you just drew for you intake port. Be sure to wear your airway and eye protection and support the cut-out piece so that it doesn’t rip drywall paper from the ceiling as you finish the cut. 

Drop in Your Fan

Now, head back into the attic with your vent fan. Attach a 90-degree elbow to the outlet port of the fan and secure it with duct tape (preferably foil duct tape).

Remove the knock out panel and attach applicable wiring (you may need an electrician for this portion).

Attach the metal brackets to the fan at the designated points. 

Drop the fan into position, through your ceiling hole 

Secure the Fan

Using the drill and 1 ½” drywall screws, secure the brackets to the joists. 

Slide the flexible ducting over the elbow you installed and secure in place with foil tape. 

Cut Your Vent Hole

All exhaust fans need to be vented to the outdoors. Never allow a fan to blow into the attic or other space, this will cause mold and water damage as the steam condenses into water. 

Locate a spot on the inside of the roof close to your vent fan. Using a hole saw sized to the cap kit, cut a hole through the roof to the outside. 

Connect Your Flexible Hose

Once you’ve cut your hole, make your way onto the roof and locate the opening. Using the cap or vent kit, place the cap in position and secure it according to the instructions provided.

The SheltonRoofing.com information guide says that while you’re up there, check out the condition of your roof. Aging and disheveled roofs cause homeowners a multitude of problems and can be extremely costly if they fail.

Back in the attic, connect the other end of your flexible hose to the cap or vent kit and secure it with foil tape. You may also need to fill any gaps around your ceiling hole with spray foam or caulking. 

Give it Power

Ensure that power to the wiring you’ll be using is disconnected. 

In the bathroom, expose the blower motor and its wiring. 

Make the applicable connections using the wiring diagram provided in the fan kit. If you’re uncomfortable with home wiring, consider hiring an electrician. 

Secure all wiring and attach the ground. Cover the blower motor and turn on power to the fan. If it comes on, you’re good to go. 

Finishing Up

Replace the cover to the vent fan and secure it in place. Caulk or silicone any gaps between the fan and ceiling. 

Retest the operation and that’s it, you’re in the venting business.

An exhaust fan makes an excellent addition to any bathroom and removes the water and odor vapors that can cause you bathroom headaches for years to come. With this guide, we hope you can get a new vent fan installed in no time!

Guest Contributor, Tom Masters  

Transform Your Bathroom into a Luxurious Spa Experience

RH Business Marketing Solutions

IMG_0727.jpeg

Transform Your Bathroom into a Luxurious Spa Experience

Can you imagine just how perfect it would be if you could enjoy a relaxing spa experience every day? Well, if you want it, you don’t have to dream it. You just need to go for it. And if this is something that feels like it would better your life considerably, investing your time, money and energy into creating a perfect bathroom spa experience in your own home is well worth it. Even more so if you live in a tropical climate such as Australia where taking the time for a shower or bath is true bliss. But, regardless of where you are in the world, bathroom time is your quality “alone” time and you deserve to make it truly special. So, what’s the secret to your own bathroom spa? Keep on reading to find out.

1. Take care of the colors

First things first: you need to create a relaxing atmosphere in your bathroom. This is one of the simple tricks that you can use even when you’re not ready to invest in your plumbing. In general, spa colors involve soothing neutral colors such as white and beige. You can’t go wrong with these. But before you decide to go in this direction, take the time to think about the colors that soothe you the most. While you should always go with gentle pastel hues, you may find that green, pink, yellow or blue work better for you.

IMG_0731.jpeg

2. Incorporate natural elements

This is where things can get more complicated. But, if you want a perfect bathroom spa in your own home, wood and stone should be a part of it. Wooden elements and stone countertops don’t have to be too challenging if you know what kind of a layout you want. In recent years, Zen-inspired bathrooms have been all the rage in Australia, which is why it’s not that difficult to imagine the best ways to incorporate these elements into your bathroom. In the end, waterproof vinyl wallpaper that imitates wood and stone can be your budget-friendly option. Also, let your creativity run wild. It’s not just about the countertops and shelves. A wooden bench or a similar seating arrangement inside a bathroom is definitely spa-like.

IMG_0728.jpeg

3. The real deal – plumbing

If you’re set on transforming your bathroom into a spa oasis completely, you’ll definitely need to invest more time and money into this project. Essentially, plumbing will be your biggest concern. But, as mentioned, the whole country of Oz fell in love with Zen-inspired bathrooms years ago, which is why you can have a professional service for plumbing in Gold Coast get this done for you. You may want to transform your shower area by making it bigger with proper seating and side table, or you may want to have a whole new spa tub installed. Just make sure to consult with your contractors in order to find the best possible option for your space. 

IMG_0729.jpeg

4. Get rid of the clutter in favor of plants and candles

It’s important to know what your bathroom spa essentials are. You can’t possibly relax properly if there’s clutter everywhere, and especially half-empty bath products you never use. It’s time for a thorough declutter. Get rid of everything you don’t use. The whole point is to keep only those products that you love and that make you happy when you use them. Also, organize them so that you can keep them on display and easily reachable. On the other hand, don’t hesitate to enrich this space with real greenery. There are plenty of plants that thrive in bathrooms. Of course, don’t forget a scented candle here and there.

IMG_0730.jpeg

5. Play with the details

Details are very important for the perfect bathroom spa experience. Just like plants and candles, these can make or break the whole project. In that respect, embrace natural light and openness and ditch the curtains altogether. You want to achieve that warm, relaxing look of a spa with the mentioned natural elements but opting for warm (perhaps bronze or rose gold) pipe and plumbing finishes can look absolutely amazing. Furthermore, a bathroom mat that matches the overall style will add much-needed texture to this room. And if you want, you can add more personality with the use of patterned vinyl wallpaper in strategic places or with an interesting mirror frame. 

While there are some general guidelines for creating a home bathroom spa, the important thing is to always follow your intuition and stick with the theme that helps you relax the most. The concept of self-care is very important in Australia, and it’s time for you to embrace it wholeheartedly. 

Guest Contributor, Diana Smith


How To Clean and Maintain Your Kitchen Sink Drain

RH Business Marketing Solutions

IMG_3604.JPG

If you like your things to run and work smoothly, you need to maintain them. Your kitchen sink drain needs maintenance. It’s very easy to maintain your kitchen sink drain. 

1. 1/2 cup of baking soda

2. 1/2 cup of vinegar

3. Lemon juice

Let the baking soda and vinegar sit for 30 minutes, then add the lemon juice. Give it a few minutes, then rinse. Follow these steps once a month, and you should have a very happy kitchen sink drain.  

Watch the video below to see how easy it is to maintain your kitchen sink drain.