Google+

contact us

Use the form on the right to contact us.

Day or Night, we are here to serve you. Leave your plumbing problem to us.


Tinley Park, IL

(708)845-7922

Residential and Commercial plumbers and plumbing contractors available in Orland Park, Tinley Park, Oak Lawn, Palos Heights, Midlothian, Oak Forest, Homer Glen, Mokena, Frankfort, and the surrounding Chicago South Suburbs. Emergency plumbers.

copper water lines.jpg

Kevin Szabo Jr Plumbing Blog

Kevin Szabo Jr Plumbing is Tinley Park, Orland Park, Oak Forest, Midlothian, Orland Hill, Homer Glen, Mokena, Frankfort, Crestwood, Palos Heights, Oak Lawn, local plumber. Read our blog for advice, tips, a good laugh, and basic home improvement.

**We are moving our old blog to our new and improved website. Too see all our posts visit kevinszabojrplumbing.blogspot.com

Filtering by Tag: Best plumbers near me

Design Tips Perfect for Older Adults

RH Business Marketing Solutions

IMG_6115.jpeg

Design Tips Perfect for Older Adults

While not everyone can completely remodel their home to fit their aging needs, there are a few design tips that can ensure every older adult has a more pleasant and safer life. The best way to start your renovation is to look at senior homes and seek some inspiration for safe and stylish senior life. Let’s see what older adults need and prefer when it comes to interior design.
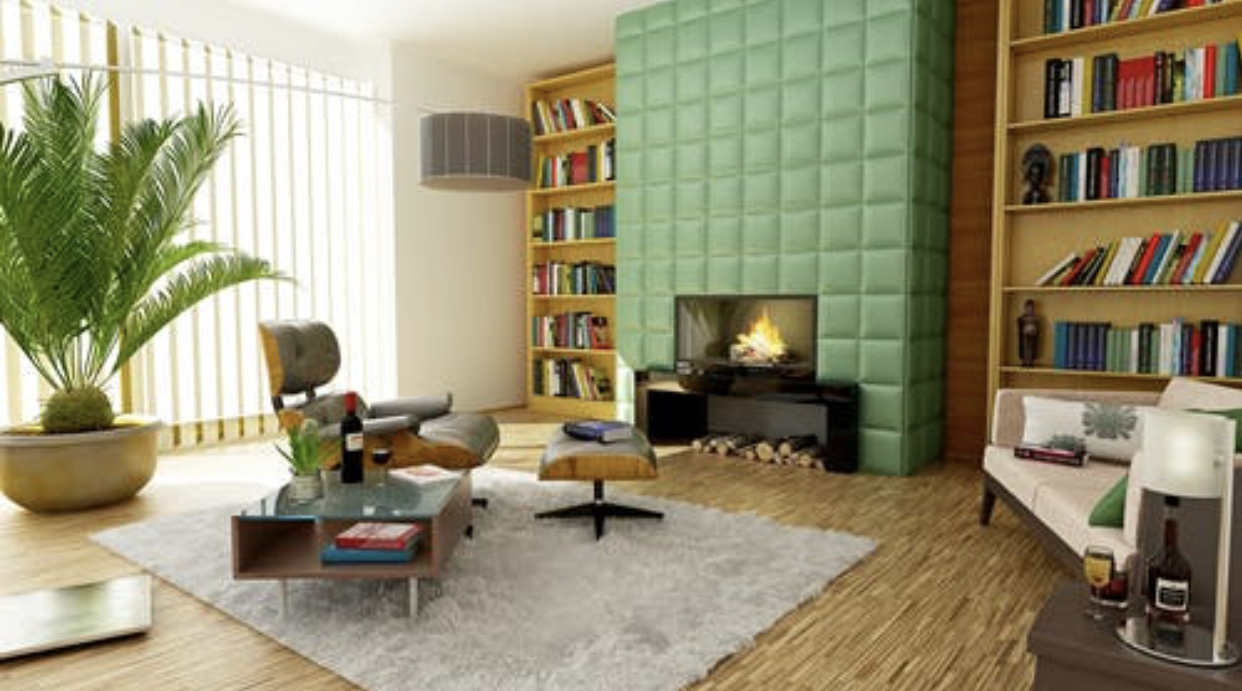
Practical entryways

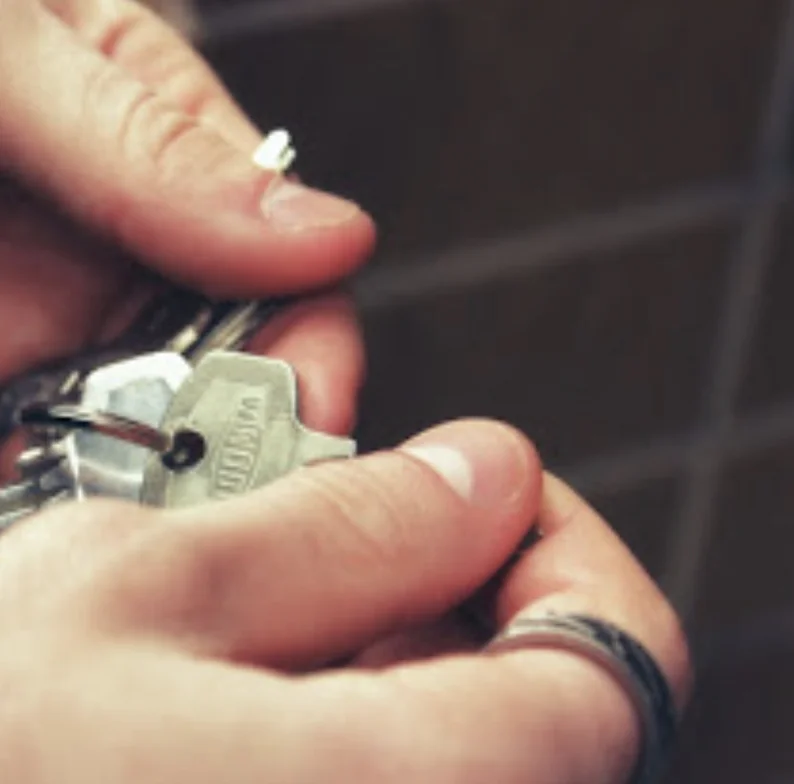
Every house starts with a good entryway, so make sure to make it practical and safe. For instance, fumbling for keys while you hold grocery bags can cause you to get distracted and lose your balance. So, it can be smart to place a small table or bench next to your entrance. This addition will not only boost the practicality of your entryway but also increase its aesthetic appeal.
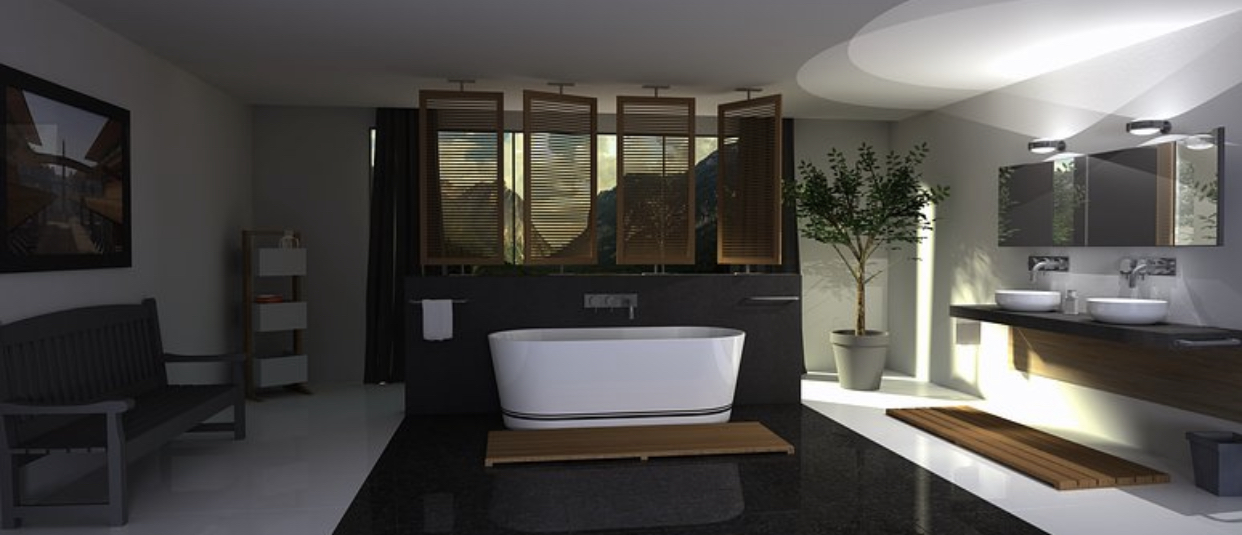
IMG_6114.jpeg

Safe bathrooms

Many falls at home happen right in the bathroom due to slippery showers, baths and floors. So, consider investing in practical grab bars you can find in many places in senior care facilities. These ensure a more practical and safer entrance and exit out of the bath. But, their stainless steel look can also boost elegance in your space. You can also place them next to your toilet for when you need extra support getting up. Additionally, consider ditching baths and investing in a practical step-in shower and hand-held showerhead. This combination will ensure the most practicality and style.

IMG_6113.jpeg

Good lighting

Any dark corner, poorly-lit room and shady stairway can result in a potential fall or a bump. This is especially important for stairs, hallways and entryways that usually hide the biggest number of obstacles, so it’s no wonder every modern aged care facility is well lit from the entrance to the last room. For instance, if you look at retirement living at Mark Moran Vaucluse you can see that the facility is filled with layered light, both natural and artificial. Their design experts chose to shower the rooms with light to prevent injuries and promote wellbeing. So, make sure to take inspiration from these respectable facilities and light up your space, especially those nooks that can hide sharp corners and other hazards.

IMG_6116.jpeg

Smart doors

In order to boost mobility between rooms, try to invest in pocket doors. They always stay out of the way when opened and they prevent them from getting caught on clothing or walking aids. Additionally, you can also replace all your doorknobs with more practical levers. These are easier to grip and handle, especially for seniors with arthritis and similar afflictions.

IMG_6118.jpeg

Easy-to-climb stairs

For older people, stairs are often a true nightmare. They are exhausting and dangerous, so make sure to equip any stairs in your home with handrails, preferably on both sides. Clearly visible and separate steps can also make your ascend and descend safer, even if your vision is impaired. There are cheap stickers you can get that will allow you to mark your steps and prevent trips and falls.

IMG_6119.jpeg

Anti-slip floors

Oftentimes, danger lurks under your feet. With age, you start to lose your balance and speed, so slips can end up with a serious injury. The easiest way to prevent slips yet keep your home stylish is to invest in nonskid mats under your rugs. If you use a walker or wheelchair to get around, it’s best to opt for a low-pile carpet that won’t get caught in your wheels and walkers. You can also ditch your area rugs and embrace the popular minimalist style that’s also very easy to keep clean.

If you follow these senior design tips, you’ll have a home that will allow you to age with grace, safety and style. You’ll get to enjoy your home for many, many years to come, but whenever you notice you can’t take care of your safety, make sure to find a good senior care facility.

Guest Contributor, Diana Smith

Tips To Pull Off A Gorgeous Eclectic Design

RH Business Marketing Solutions

IMG_2953.jpeg

Tips to Pull Off a Gorgeous Eclectic Design

Eclectic design is super attractive. It’s full of freedom, mismatched items and fun colors. However, because it’s so hard to define, creating a beautiful eclectic space is not an easy task, especially if you don’t want to end up with an overly kitsch home. Luckily, here are a few tips that will help you create a successful eclectic design that matches your lifestyle and feels just right!

Start from scratch

This is a trick that many interior designers swear by: every time you’re designing a new look, start with a blank canvas. Since the eclectic look is definitely in-your-face and very eye-catching, starting with a neutral background is a great idea to avoid creating an overwhelming space. While neutral colors like white, gray and beige instantly come to mind, you can also opt for various natural materials like wood and stone. They are eco-friendly and look neutral, but are also warm and inviting.

Coordinate your colors

Many people think that nothing is supposed to match in eclectic design. However, that’s not true! The key is in coordinating your colors that will allow you to create a successful design and a coherent space. For instance, choose a color that can be introduced in multiple areas in your home and use it on everything from textiles to art and paint. Opt for a variety of different prints and patterns in your chosen color to stay true to your eclectic design yet subtly pull the room together.

Add statement pieces

Every space needs a statement piece that will be the star of the show. No matter if you opt for an art piece or a furniture item, this is the element that will make your eclectic design come to life. So, don’t hesitate to make it bold and make it big. In this case, forget everything about coordination, because you want your statement piece to pop. Even your quirky collection of items can serve as a focal point. For instance, if you’re an avid comic book fan or someone obsessed with music, there are super cute bobbleheads in all styles and themes that can be grouped together. These figurines will look amazing when displayed on your shelf and will definitely start a few conversations. All in all, find something you like, make it stand out and you have your statement piece!

Find balance

The goal of every interior is to have balance in symmetry and scale. Even if you have furniture in different styles, textures or from different periods, you can still use similar lines and sizes to create a sense of harmony. Your space is meant to be lived in, so don’t sacrifice good layout and organization for forced diversity.

Mix textures

In order to add more interest to your eclectic home, try to invest in different textures. When you combine rough and smooth textures, you can opt for a simpler color palette and still have a fun and quirky space. For instance, think fluffy pillows, shaggy rugs, rough wooden furniture and smooth, polished finishes. Combine them and your home will be full of surprises.

Think outside the box

The eclectic look has no clearly defined rules, so take advantage of that and let your mind play with different ideas and solutions. Grab an item and find a new and unusual use for it or instead of throwing something away, repurpose it and give it new life. This process is super fun and will give your space character and interest—that’s what eclecticism is all about!

Creating a successful eclectic look is all about achieving balance. Don’t give yourself too many limits, but also don’t go crazy. Eclectic design can easily get out of hand if you’re not paying attention! So, keep these tips in mind, be moderate but let your imagination fly high.

 Guest Contributor, Diana Smith

An Introduction To Renters Insurance Coverage

RH Business Marketing Solutions

IMG_2632.jpeg

An Introduction to Renters Insurance Coverage

Renters insurance is an extremely affordable way for tenants to keep their belongings safe, with the average premium totaling less than $150 per year. Yet under 40% of all renters are insured, in large part because of a lack of awareness among tenants about the benefits of renters insurance.

It’s impossible to predict when an emergency situation will strike, and the best way to prepare for the unexpected is to stay insured. Understanding the benefits and coverage of a renters insurance policy will allow you to make an informed decision about acquiring coverage.

How Does Renters Insurance Work?

Since relatively few people purchase renters insurance, there are some common misunderstandings regarding what exactly is covered under a typical policy. Some tenants assume that they’re automatically protected under their landlord’s insurance, but the truth is that you need your own policy to be covered in case your possessions are damaged or stolen.

Many tenants wonder if renters insurance covers water damage, bedbugs, and other unexpected occurrences. While there are some important differences in the fine print of many policies, a typical renters insurance plan provides coverage up to a certain limit in case of weather events such as rain, wind, fire, and hail. That said, more extreme conditions like earthquakes and floods will generally require additional coverage, so it’s important to make sure you’re protected if you live in a vulnerable region.

Your policy will also pay for temporary relocation in case your apartment is no longer habitable, a responsibility that may or may not be picked up by your landlord. The price of a few coffees each month is well worth the peace of mind that comes from knowing you’ll be kept on your feet no matter what happens.

Exceptions to Renters Insurance Coverage

While renters insurance provides critical protection for a number of costly situations, there are some things that most policies won’t cover. The first two examples are earthquakes and flooding, which many insurance companies offer as a separate policy. 

Under a standard renters insurance policy, you won’t be compensated for any damage done to extremely valuable or rare items such as jewelry and fine art. The most common insurance limit is $100,000, but you’ll likely still need to purchase additional insurance if you want these items covered.

Other common situations tenants often find themselves in, like losing a phone or having a pet cause damage, are not covered under renters insurance. Your protection also won’t apply to anyone else living in the apartment unless they purchase their own coverage.

Renters insurance is a low-cost, reliable method of keeping your belongings safe and ensuring you’ll have a place to stay even in a worst-case scenario. For less than a dollar a day, you can cover all the possessions in your apartment from loss or damage resulting from anything from fire to theft.

Guest Contributor, Armand Levitz

Make a DifferencE, change the roll

RH Business Marketing Solutions

Everyone Wants to Change the World

“Changing the toilet paper roll won’t make a difference to the world, but changing the toilet paper roll will make a difference to one person.”

Make a Difference, Change the Roll.

IMG_1092.jpeg

Tips to Avoid Common Heating Problems This Winter

RH Business Marketing Solutions

IMG_0734.jpeg

Tips to Avoid Common Heating Problems This Winter 

They say winter is the most magical time of the year, but is that still so if your heater breaks down? There’s nothing more troublesome than going through the cold months with a faulty heating system. Sure, it’s nice to watch the snow falling and feel the cold breeze once in a while, but it’s a different story when you’re looking forward to a cozy night at home only to find your heater fail you.

Keeping your home warm over the winter months is not only essential to your comfort but your health as well. The drop in temperature can affect your immune system and make your body more vulnerable to sickness and infections. That said, it is imperative that you take the time to make sure that your heater works well before the colder days hit.

How To Keep Your Heater Working Smoothly 

Schedule regular heater maintenance

Nobody will ever do it better than the pros. Make it a point to schedule a heater tune-up before winter starts and another when it’s over. Having your heater cleaned and checked by professionals will extend its life and give you peace of mind throughout the season.

Make sure the pilot light is on

Checking if the pilot light on your furnace is lit should be one of the first things on your list when preparing for the cold days ahead. This is a fairly simple task, and the steps on how to do it should be on your user's manual.

Clean your heater and perform a visual inspection

Wipe the dust off your heater and clean or replace dirty filters. Also, give your heater a visual once-over to ensure that all parts are intact. Check the wires closely for any signs of damage or fraying. If you see something wrong with the wirings, get in touch with an electrician as soon as possible.

Watch out for weird noises

As you clean your heater, turn it on and listen for any odd noises. Any weird or gurgling sounds could mean that there's a leak, a crack, or some other problem within. Holes in the heater can be dangerous and should be addressed by an HVAC professional immediately.

Give your heater a trial run

Lastly, do a trial run. Turn your heater on for about 10 to 20 minutes to make sure that the system is generating the expected level of heat. This will assure you that your heater is in prime condition and will work like new when you need it to.

Guest Contributor, Michelle West

How to Install a Ventilation Fan in Your Bathroom

RH Business Marketing Solutions

IMG_0732.jpeg

How to Install a Ventilation Fan in Your Bathroom

Your bathroom is the one room in your home that is constantly under assault from a variety of sources. Harsh chemical cleaners, steamy showers and the remnants of last night’s Mexican entrees all need a way out and vent fans can do just that.

While the odor of a recently used restroom is definitely something we want to get rid of, the more important factor in installing a ventilation fan is evacuating the steam and water vapor created from baths and showers. 

This moisture, if left unaddressed can cause floors to bow, caulking to degrade, and mold to grow in our bathrooms, leaving us with costly repairs and unsightly walls, floors and ceilings. 

When you’re ready to start keeping your bathroom dry, here’s how to do it. 

Selecting a Ventilation Fan

Finding the right fan for your bathroom is an easy process, but an important one. When considering which fan fits your needs, consider the following. 

● Square footage. Fans are designated by the CFM (cubic feet per minute) of air that they move. You’ll want a fan that has at least one CFM for every square foot of your bathroom. Find square footage by multiplying the length of a room by its width. 

● Features. It may sound silly, but this is the 21st century, even our ventilation fans come with features and options now. Modern fans can commonly be equipped with a built in light, a heater, humidity sensor, motion detector, night light and even Bluetooth speakers. 

● Install options. Vent fans can be installed with or without attic access, on the ceiling or walls, and with or without cutting into the wall material. Figure out which option suits you best and pick a fan to match. 

The Tools

Installing a vent fan is a diy task that most homeowners can take on. However, you will need a few tools. 

● A drill with bits and drivers

● Screws

● Flathead and phillips screwdrivers

● Utility knife

● Jigsaw or drywall saw

● Respirator and eye protection

● Duct tape

● Wire cutters and crimpers

● Assorted electrical connectors (may be included with fan)

Time to Get Started

Once you’ve selected the right fan and have assembled the tools, you’re ready to get going. First, determine where your fan will be installed and gain access to that area. If you’ll be venting the fan through the ceiling, you’ll need to be able to get into the attic. 

Drill a Reference Hole

Find a suitable position on the ceiling, ideally between the shower and the toilet, and drill a reference hole through to the attic. A 3/8” bit is big enough for this. 

Measure the vent fan housing and note it on a piece of paper, you’ll need this next. 

Now, climb into the attic and locate your reference hole. Clear away any debris, insulation, or stored objects from the area. Using the measurement you just took, locate the final position of the fan between two joists nearest your hole. 

Note that position in relation to your reference hole so you can transfer that to the ceiling back in the bathroom. 

Mark the Layout in the Bathroom

Back in the bathroom, measure the inside dimension of the fan’s intake. 

Using your reference hole and the notes you made in the attic, transfer the measurements from the attic to the ceiling and use a square to mark out the intake port on the ceiling. 

Cut the Hole

Using the saw you have on hand, cut along the lines you just drew for you intake port. Be sure to wear your airway and eye protection and support the cut-out piece so that it doesn’t rip drywall paper from the ceiling as you finish the cut. 

Drop in Your Fan

Now, head back into the attic with your vent fan. Attach a 90-degree elbow to the outlet port of the fan and secure it with duct tape (preferably foil duct tape).

Remove the knock out panel and attach applicable wiring (you may need an electrician for this portion).

Attach the metal brackets to the fan at the designated points. 

Drop the fan into position, through your ceiling hole 

Secure the Fan

Using the drill and 1 ½” drywall screws, secure the brackets to the joists. 

Slide the flexible ducting over the elbow you installed and secure in place with foil tape. 

Cut Your Vent Hole

All exhaust fans need to be vented to the outdoors. Never allow a fan to blow into the attic or other space, this will cause mold and water damage as the steam condenses into water. 

Locate a spot on the inside of the roof close to your vent fan. Using a hole saw sized to the cap kit, cut a hole through the roof to the outside. 

Connect Your Flexible Hose

Once you’ve cut your hole, make your way onto the roof and locate the opening. Using the cap or vent kit, place the cap in position and secure it according to the instructions provided.

The SheltonRoofing.com information guide says that while you’re up there, check out the condition of your roof. Aging and disheveled roofs cause homeowners a multitude of problems and can be extremely costly if they fail.

Back in the attic, connect the other end of your flexible hose to the cap or vent kit and secure it with foil tape. You may also need to fill any gaps around your ceiling hole with spray foam or caulking. 

Give it Power

Ensure that power to the wiring you’ll be using is disconnected. 

In the bathroom, expose the blower motor and its wiring. 

Make the applicable connections using the wiring diagram provided in the fan kit. If you’re uncomfortable with home wiring, consider hiring an electrician. 

Secure all wiring and attach the ground. Cover the blower motor and turn on power to the fan. If it comes on, you’re good to go. 

Finishing Up

Replace the cover to the vent fan and secure it in place. Caulk or silicone any gaps between the fan and ceiling. 

Retest the operation and that’s it, you’re in the venting business.

An exhaust fan makes an excellent addition to any bathroom and removes the water and odor vapors that can cause you bathroom headaches for years to come. With this guide, we hope you can get a new vent fan installed in no time!

Guest Contributor, Tom Masters  

Transform Your Bathroom into a Luxurious Spa Experience

RH Business Marketing Solutions

IMG_0727.jpeg

Transform Your Bathroom into a Luxurious Spa Experience

Can you imagine just how perfect it would be if you could enjoy a relaxing spa experience every day? Well, if you want it, you don’t have to dream it. You just need to go for it. And if this is something that feels like it would better your life considerably, investing your time, money and energy into creating a perfect bathroom spa experience in your own home is well worth it. Even more so if you live in a tropical climate such as Australia where taking the time for a shower or bath is true bliss. But, regardless of where you are in the world, bathroom time is your quality “alone” time and you deserve to make it truly special. So, what’s the secret to your own bathroom spa? Keep on reading to find out.

1. Take care of the colors

First things first: you need to create a relaxing atmosphere in your bathroom. This is one of the simple tricks that you can use even when you’re not ready to invest in your plumbing. In general, spa colors involve soothing neutral colors such as white and beige. You can’t go wrong with these. But before you decide to go in this direction, take the time to think about the colors that soothe you the most. While you should always go with gentle pastel hues, you may find that green, pink, yellow or blue work better for you.

IMG_0731.jpeg

2. Incorporate natural elements

This is where things can get more complicated. But, if you want a perfect bathroom spa in your own home, wood and stone should be a part of it. Wooden elements and stone countertops don’t have to be too challenging if you know what kind of a layout you want. In recent years, Zen-inspired bathrooms have been all the rage in Australia, which is why it’s not that difficult to imagine the best ways to incorporate these elements into your bathroom. In the end, waterproof vinyl wallpaper that imitates wood and stone can be your budget-friendly option. Also, let your creativity run wild. It’s not just about the countertops and shelves. A wooden bench or a similar seating arrangement inside a bathroom is definitely spa-like.

IMG_0728.jpeg

3. The real deal – plumbing

If you’re set on transforming your bathroom into a spa oasis completely, you’ll definitely need to invest more time and money into this project. Essentially, plumbing will be your biggest concern. But, as mentioned, the whole country of Oz fell in love with Zen-inspired bathrooms years ago, which is why you can have a professional service for plumbing in Gold Coast get this done for you. You may want to transform your shower area by making it bigger with proper seating and side table, or you may want to have a whole new spa tub installed. Just make sure to consult with your contractors in order to find the best possible option for your space. 

IMG_0729.jpeg

4. Get rid of the clutter in favor of plants and candles

It’s important to know what your bathroom spa essentials are. You can’t possibly relax properly if there’s clutter everywhere, and especially half-empty bath products you never use. It’s time for a thorough declutter. Get rid of everything you don’t use. The whole point is to keep only those products that you love and that make you happy when you use them. Also, organize them so that you can keep them on display and easily reachable. On the other hand, don’t hesitate to enrich this space with real greenery. There are plenty of plants that thrive in bathrooms. Of course, don’t forget a scented candle here and there.

IMG_0730.jpeg

5. Play with the details

Details are very important for the perfect bathroom spa experience. Just like plants and candles, these can make or break the whole project. In that respect, embrace natural light and openness and ditch the curtains altogether. You want to achieve that warm, relaxing look of a spa with the mentioned natural elements but opting for warm (perhaps bronze or rose gold) pipe and plumbing finishes can look absolutely amazing. Furthermore, a bathroom mat that matches the overall style will add much-needed texture to this room. And if you want, you can add more personality with the use of patterned vinyl wallpaper in strategic places or with an interesting mirror frame. 

While there are some general guidelines for creating a home bathroom spa, the important thing is to always follow your intuition and stick with the theme that helps you relax the most. The concept of self-care is very important in Australia, and it’s time for you to embrace it wholeheartedly. 

Guest Contributor, Diana Smith


Best Ways To Prevent The Most Common AC Problems

RH Business Marketing Solutions

Find out the best ways that can help prevent the most common AC system problems from happening.

Read More

How To Clean and Maintain Your Kitchen Sink Drain

RH Business Marketing Solutions

IMG_3604.JPG

If you like your things to run and work smoothly, you need to maintain them. Your kitchen sink drain needs maintenance. It’s very easy to maintain your kitchen sink drain. 

1. 1/2 cup of baking soda

2. 1/2 cup of vinegar

3. Lemon juice

Let the baking soda and vinegar sit for 30 minutes, then add the lemon juice. Give it a few minutes, then rinse. Follow these steps once a month, and you should have a very happy kitchen sink drain.  

Watch the video below to see how easy it is to maintain your kitchen sink drain.