Google+

contact us

Use the form on the right to contact us.

Day or Night, we are here to serve you. Leave your plumbing problem to us.


Tinley Park, IL

(708)845-7922

Residential and Commercial plumbers and plumbing contractors available in Orland Park, Tinley Park, Oak Lawn, Palos Heights, Midlothian, Oak Forest, Homer Glen, Mokena, Frankfort, and the surrounding Chicago South Suburbs. Emergency plumbers.

copper water lines.jpg

Kevin Szabo Jr Plumbing Blog

Kevin Szabo Jr Plumbing is Tinley Park, Orland Park, Oak Forest, Midlothian, Orland Hill, Homer Glen, Mokena, Frankfort, Crestwood, Palos Heights, Oak Lawn, local plumber. Read our blog for advice, tips, a good laugh, and basic home improvement.

**We are moving our old blog to our new and improved website. Too see all our posts visit kevinszabojrplumbing.blogspot.com

Filtering by Category: April

HOW TO FIX A CLOGGED SINK

RH Business Marketing Solutions

Got a sink that’s stubbornly clogged and driving you nuts? Don’t panic. We’ve all been there. 

Whether it’s a slow drain or a complete blockage, dealing with a clogged sink can be a real headache. 

In this article, I’ll walk you through the steps to get that sink flowing freely in no time. 

Are you ready to say goodbye to standing water and hello to smooth draining?

Let’s get started. 

WHAT CAUSES A CLOGGED SINK 

Clogged drains and sinks are one of the most common plumbing problems. Pouring non-liquid things into the sink is the leading cause of clogged sinks. 

Food scraps and grease waste are common items that cause kitchen sink clogs. If you dump food scraps into the sink instead of the bin, small scraps will wash away, and the larger ones will get deposited. With time, the scraps can build up and cause blockages. 

Grease waste becomes solid at room temperature. Hence, this too can block your sink. 

Hair, toothpaste, and soap buildup are the leading causes for the bathroom sink to get clogged. 

Additionally, since the bathroom sink is heavily used, it’s more likely to undergo clogging.


STEPS TO FIX A CLOGGED KITCHEN SINK OR A BATHROOM SINK

If your sink is not draining, draining slowly, or releasing a bad odour it’s more likely clogged. 

To unclog your sink, you must have basic knowledge of the sink parts and their functions. Now, don’t panic. I’ll explain everything you need to know. Just keep reading.

Kitchen sinks and bathroom sinks are almost similar, with some minor differences. 

Kitchen sinks are connected to garbage disposals and dishwashers, while bathroom sinks involve faucets, drains, and stoppers. The stopper allows you to fill the sink with water.

Most sinks have a curved pipe under them known as the P-trap. The P-trap holds water and creates a block against sewer gases entering the kitchen or bathroom through the sink drain. 

Now, let’s go through the steps to remove clogs from your sink.

CLEAN OUT THE STANDING WATER

Standing water supports the growth of bacteria, insects, and mould. Hence, if you find any standing water in the sink, remove it immediately. This also makes room for water that you will  add later to flush out the drain. 

If you see any food scraps or other debris, remove them by wearing rubber gloves.

Check out this article for tips and tricks to prevent pest infestations in your plumbing system.  


INSPECT THE GARBAGE DISPOSAL

If your kitchen sink is clogged, the first thing you should do is inspect the garbage disposal to find out whether it’s blocked. Here’s how you do it:

  • Turn on the garbage disposal and run it. Clogs might break while the garbage disposal is running. 

  • If it’s not running, check whether it’s overheated. Reset and turn on the disposal again for this. 

  • If the clog is not cleared even after running the disposal, disconnect it from power and proceed to the next steps.

POUR BOILING WATER

Boiling water can dissolve soap and fat. Hence, it’s effective in removing clogs caused by oil and soap deposits. 

First, remove any standing water in the sink. Then, pour a pot of boiling water into the sink drain in a steady stream. 

The water will begin to drain. If not, allow the water to cool and remove it with a mug. Then, pour hot water again. 

You’ll have to repeat this process several times to remove the drain blockage. 

Warning: Boiling water can damage plastic pipes. Therefore, don’t use boiling water if your sink is attached to PVC pipes. 

POUR A BAKING SODA MIXTURE/WHITE VINEGAR/CAUSTIC CLEANER

Baking soda and vinegar are useful ingredients to unclog the sink drain naturally. They’re gentler on the pipes than chemical drain openers. 

When baking soda and vinegar are mixed, it causes a bubbling reaction that helps to remove the clogs. 

Pour a cup of baking soda followed by one cup of white vinegar. If it’s your bathroom sink, remove the drain stopper before pouring. 

Let the mixture stand for around 15 minutes. Wait till the bubbling stops, and then flush with hot water. 

You can also use a cup of baking soda and half a cup of salt, and then flush it with hot water after 15 minutes. If the drain is still not cleared, try this process several times. Be careful not to overdo it. 

Caustic cleaners can remove grease, hair, food, and other organic materials blocking your sink. 

However, they are very strong and leave harsh chemicals in your pipe. So use them only as a last resort. When using caustic cleaners, make sure to wear gloves and use them in a well-ventilated area.


PLUNGE THE SINK

If boiling water, baking soda, and vinegar are not working, try plunging your sink. Plunging creates enough pressure to dislodge minor clogs.

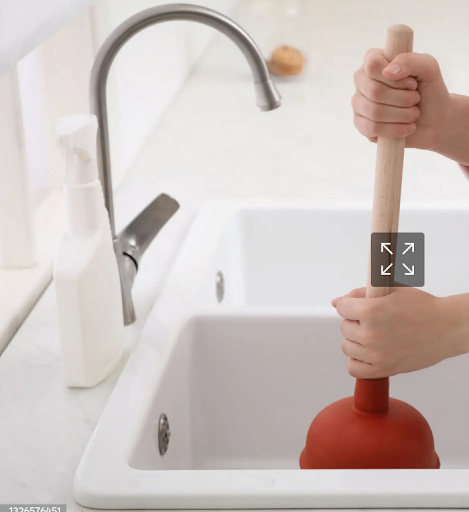
Remove the stopper and cover the overflow opening with a wet cloth. Fill the sink with 2-3 inches of water. It should be enough to cover the head of the plunger without overflowing. 

Place the plunger cup on the drain hole, press it firmly, and then move it up around 1 inch.  Repeat this up-and-down movement for 15-30 seconds. 

Check whether the water drains and flush with hot water to remove any remaining clogs.  

Useful tip: Apply a thick layer of petroleum jelly onto the rim of the plunger cup. This will create a tighter seal and make plunging more effective. 

If your kitchen sink is connected to a dishwasher, close the dishwasher line using a clamp or a pair of vice grips on its hose. 

If you’re worried about damaging the hose, disconnect it and cover the disposal inlet with a pipe cap. This prevents water from back-flowing into the dishwasher line while plunging. 

Note: Keep a toilet plunger separately to use for bathroom sinks.

USE AN AUGER/DRAIN SNAKE ON THE UPPER PART OF THE PIPE

If solid material is stuck in the drain, you can unclog it with an auger, also called a drain snake. 

Connect the drain snake to a drill. Insert it down the drain till it meets resistance. When the snake meets resistance, run the drill to unclog it. Then, move the snake further down and repeat the process. 

Usually, you can connect the snakes to any standard drill or use it without a drill. 

While using a hand snake, first feed the drain with it. Then, twist it around to get the proper angle. 

Once you meet resistance, allow the barb to hook the clogged material. Then, pull out the snake along with the clog. Finally, flush out the sink drain with hot water to remove any remaining clogs.

You can buy a drain snake from a hardware store or make one at home using a coat hanger. 

Let’s make a drain snake at home:

  • Take a metal coat hanger. 

  • Unwind and twist it to make a long, thin wire. 

  • Use needle nose pliers and bend the end to make a small hook. 

There you have a DIY drain snake. Now, you can insert it into the drain and pull out or break down the clogs. 

USE A WET-DRY VACUUM

Pressure from the wet-dry vacuum can unblock a clogged drain. Plug up the vacuum for wet use. If you don’t know how, refer to the user manual. 

Place the end of the vacuum’s hose on the drain opening and tighten the seal around it. Then, turn on the vacuum at the highest setting. 

If you have a double sink and only one side is clogged, cover the other side with a drain stopper before turning on the vacuum. 

USE PLIERS TO REMOVE CLOGS 

Hair collects under the stopper in the bathroom sink and blocks the drain. You can remove these efficiently using a nose needle plier. 

Simply remove the stopper, pull out the clog with a plier, and put back the stopper.


INSPECT THE P-TRAP

If all the above-given methods are not working, it’s time to fix your clogged sink from beneath it. 

There’s a curved pipe underneath your sink known as the P-trap. The P-trap holds water between the open drain and the home’s plumbing to prevent odours.

You must disassemble the P-trap and see if any materials are blocked in it. Before that, place a bucket underneath the kitchen sink so that water or debris can fall into it while removing it. 

Loosen the slip nuts on the P-trap arm and wiggle it free. If there is any debris, remove it. 

Reassemble the pipe and run water into the sink to check whether the clog is removed correctly. While reassembling, don’t tighten the slip nuts too much. 

Note: You can use rubber gloves and a wrench to make the above process easy.


USE AN AUGER ON THE WALL PIPE

Suppose the water is not running through the sink drain after you inspect the P-trap; this means the clog is present farther up the pipe. 

To remove it, disassemble the P-trap again and remove the horizontal pipe that connects the sink to the wall pipe. 

Insert the auger into the wall pipe, twist and turn, and pull out any debris or run the drill to break it. 

After removing the debris, fix the pipes back. Remember not to tighten the slip nuts too much. Hand tightening and a quarter turn with a wrench would be enough. 

If you can’t remove the clog from your bathroom or kitchen sink, call a professional plumber or contact a drain cleaning service as soon as possible.

HOW TO PREVENT CLOGGING OF YOUR SINK

We all want our sinks to function smoothly. It isn’t very pleasant if you have to unclog your bathroom/kitchen sink frequently. 

Follow the instructions below to keep your sink drain free of clogs. 

  • Avoid disposing food scraps into the kitchen sink.

  • Don’t overload the garbage disposer. Grind a maximum of one cup of food waste at a time. 

  • Collect waste materials such as oil, grease, and coffee grounds into a disposable bag and discard them. Don’t allow them to flow through the sink drain.

  • Flush out the sink with hot water after every use.

  • Freeze some ice cubes, pouring vinegar and water in equal proportions. Drop one or two ice cubes into the disposer to keep it fresh and support the unclogging of minor waste deposits. 

  • Pick up any long hairs in the bathroom sink using an old toothbrush rather than flushing them out into drains. 

SOME ESSENTIAL TOOLS REQUIRED TO UNCLOG A SINK

You don’t have to call a plumber to unclog a sink every time. Keep the simple tools below with you at home so you can do it yourself if it’s a simple issue:

  • Plunger.

  • Nose needle plier. 

  • Gloves.

  • Adjustable wrench. 

  • Drain snake.

  • Flashlight.

  • A bucket or pail that fits under your sink.


CAN YOU UNCLOG A SINK BY YOURSELF?

Your bathroom or kitchen sink can get clogged due to excess food scraps, hair, oil, and other organic waste. 

If you have a sink blockage, first follow the easy methods, such as flushing it out with boiling water, baking soda, and vinegar. If it doesn’t get flushed for these, try unclogging it with a plunger, vacuum pump, or drain snake. 

If the clog is stubborn, you’ll have to remove the P-trap and take the waste out. If any of the above are not working, call a licensed plumber. Check out the importance of hiring a licensed plumber here.    

FAQS

1. WHAT’S THE QUICKEST WAY TO UNCLOG A SINK?

The quickest method to unclog a sink depends on the extent of the clog. So, start with the easy steps, like pouring hot water, and then move to the complex methods like removing the P-trap if any of the simple techniques don’t work. 

2. WHAT’S THE BEST NATURAL DRAIN CLOG REMOVER?

Baking soda and white vinegar can unclog a sink naturally.


3. WHAT’S THE SAFEST WAY TO UNCLOG A SINK?

Start with simple techniques like pouring boiling water and adding baking soda and vinegar. If this doesn’t work try unclogging with a plunger or auger. Then try to remove the P-trap to unclog. If you’re not comfortable with any of the above, call a professional service to sort out the issue.


4. IS IT OK TO USE A CHEMICAL DRAIN CLEANER TO UNCLOG THE SINK?

Chemical drain cleaners can damage your pipes. Hence, use it only as a last resort before calling a plumber.

Ways to Transform Your Home Exterior and Elevate Your Curb Appeal

RH Business Marketing Solutions

First impressions matter, and the exterior of your home is the first thing people see. Whether you’re planning to sell your home or simply want to enhance its appearance, boosting your curb appeal can make a significant difference. Elevating the aesthetic appeal of your home not only captures the attention of passersby and potential buyers but also increases the overall value of your property. An inviting exterior can create a welcoming atmosphere while reflecting your personal style. Let’s explore several effective ways to transform your home’s exterior, from fresh paint to artistic embellishments.


Brighten Up Your Home with a Fresh Coat of Paint

House painting is one of the most effective ways to transform your home’s exterior. Choosing the right color scheme can instantly rejuvenate an aging facade. It’s essential to select quality exterior paints that can withstand the elements while providing lasting beauty. Consider how your color choices will look in different lighting throughout the day and how they coordinate with features like roofing and landscaping. In recent trends, neutral tones with bold accents on the door or shutters are popular, offering a timeless appeal that enhances most architectural styles.


Welcome Home: Revitalizing Your Entryway

Your front door serves as the centerpiece of your home’s curb appeal. Choosing a door that reflects the architectural style of your home while adding a pop of color can make a striking statement. Materials such as fiberglass and solid wood are not only durable but also aesthetically versatile. Adding details like decorative glass panels or ornate door handles can further personalize your entryway, making it both inviting and reflective of your personal taste.


Cultivating Charm: Elevate Your Landscaping

Effective landscaping goes beyond planting a few flowers. Consider designing a garden that blooms throughout the seasons, keeping your home surrounded by color and vibrancy all year long. Adding fresh mulch to garden beds can enhance the contrast of the surrounding greenery and blooms. The strategic placement of trees can provide both shade and a natural frame for your house, and integrating native plants ensures lower maintenance and better growth.


Illuminate Your Space: Outdoor Lighting Solutions

Good lighting is essential for safety and can also be used to accentuate the architectural features of your home. Pathway lights add a welcoming glow leading up to your front door, while spotlights can highlight your landscaping or architectural details. Ambient lighting, such as lantern-style lights or string lights, can create a warm and inviting outdoor environment. Energy-efficient options like LEDs or solar-powered lights offer sustainability while keeping your property illuminated.


Pathways to Elegance: Upgrading Your Driveway and Walkways

The condition of your driveway and walkways can significantly impact the first impression of your home. Resurfacing an old driveway can bring new life to your property’s entrance. Using pavers can provide a touch of elegance and are available in various materials and colors to match your home’s style. Adding creative edging along the walkways can also enhance the garden beds, providing a clean and manicured look.


Framing Perfection: Window Trims and Shutters

Updating or adding window trims and shutters can significantly boost your home’s visual appeal. When choosing trims and shutters, consider colors that contrast with your home’s primary color to make them stand out. Different materials offer varying levels of durability and maintenance, with wood offering classic beauty and vinyl providing longevity with minimal upkeep. Shutters add a layer of texture and color, while trims define the windows distinctly against the siding.


A Facelift for Your Home: New Siding

New siding can drastically change the appearance of your home. It not only protects your home from weather elements but also serves as a major factor in aesthetic appeal. Materials like vinyl and fiber cement offer durability and a wide range of color options, allowing for complete customization of your home’s exterior. Assessing your home’s architectural style and environmental demands will guide your choice, ensuring both beauty and resilience.


Personal Touches: Artistic Elements for Your Home Exterior 

Adding personal artistic touches can make your home stand out in the neighborhood. Creative mailboxes, unique house numbers, and exterior artworks such as sculptures or wall hangings can express your personality while adding visual interest. These elements should complement the home’s overall style rather than clash, creating a cohesive and attractive exterior. This personalization not only enhances aesthetic appeal but also creates a sense of identity and belonging, making your home truly yours. Integrating elements like wind chimes, a decorative weathervane, or custom-made outdoor signs can further highlight your personal tastes and make your home feel even more welcoming and unique.

5 Beauty Products to Keep in Your Bathroom

RH Business Marketing Solutions

Here Are Five Must-Have Beauty Products For Your Bathroom

When talking about "beauty" in the practical sense, we should think beyond images of airbrushed perfection and overflowing makeup bags. Beauty is not limited to the salon; it is about feeling confident and comfortable in your skin through self-care techniques. Having a few key beauty products at home makes sense perfect sense; you can use them when you want to enhance your natural radiance, refresh your look, try something different, or simply pamper yourself.

With the above in mind, here are five beauty products that you should keep in your bathroom cabinets or near the spot where you check your hair and overall look:


Skin Lotions and Creams

Thanks to decades of dermatology and pharmaceutical research, the average skin care lotions or creams you can get from drugstores and supermarkets provide a reasonable level of protection and nourishment. A good moisturizer, for example, is like a daily dose of hydration for your skin because it prevents dryness and irritation while promoting a healthier complexion. You can get skin lotions and creams in a variety of formulas that cater to specific skin concerns. Whether you're looking for something to prevent dryness, keep fine lines moisturized, or control oil, chances are that you'll find more than one suitable product that you should keep at home.


Laser Hair Removal Device

Keeping hair under control can greatly contribute to improving your overall look. Hair tends to grow faster and often thicker on unwanted spots; this is a Murphy's Law situation that is relatively simple to take care of, and the most efficient way to do it is with a laser hair remover you can use at home.

Think about the endless cycle of shaving, waxing, or tweezing unwanted hair. These methods are effective, but they mostly provide temporary relief; plus, they sometimes can't reach certain parts of your anatomy unless you have the flexibility of a yoga instructor. When you use a laser-powered device for hair removal, you get to target and weaken hair follicles, thus reducing future growth and leaving you with smoother skin. You don't have to completely abandon other methods such as shaving; many people who use laser hair removers do so as a complement and to reach skin contours that can't be easily reached with blades, scissors, or tweezers. 

Something important to remember about laser hair removal is that it may be contraindicated for people who live with certain skin conditions; to this effect, you should consult a doctor if you have sensitive skin or suffer from chronic conditions such as psoriasis, skin cancer, or cutaneous lymphoma.


Teeth-Whitening Mouthwash

These products are sold as "smile management systems" or simply as an oral rinse, which is the most accurate description. In essence, these mouthwash solutions are formulated to provide antibacterial and bleaching action plus fresh breath. Unlike bleaching gel, which is meant to be applied infrequently, you use whitening mouthwash as often as you brush; some are pre-brushing rinses and others are post-brushing mouthwashes, but they all contain hydrogen peroxide plus other bleaching ingredients. According to a 2015 study conducted by Turkish odontologists, the whiteness of teeth that can be achieved with daily mouthwash use is efficient when used over time. For better results, be sure to rinse vigorously so that the whitener spreads evenly across all teeth, and don't keep the solution in your mouth for longer than recommended.


Shampoo, Conditioner, and Hair Treatment

Even if you shampoo and apply conditioner every day, you will want to keep a few bottles of the exceptionally good stuff, the kind used by beauty salons for wash and rinse services. You are invariably going to spend more for quality hair products that include treatment, but you don't have to get large bottles because these products are not meant for daily use. If you are the kind of beauty salon customer who is surprised by how good your hair looks even without a perm, chances are that you are blessed with a mane that responds well to certain hair products.

Here's a secret of the beauty salon industry that everyone deserves to know: A good combination of shampoo, conditioner, treatment, and perhaps some hair cream will account for about 75% of how good your hairstyle looks. This is why many beauticians recommend that you don't skip hair washing when you are already at the salon.


Loofah or Gloves for Scrubbing

Exfoliation is key to removing dead skin cells and revealing a brighter, smoother complexion. But when it comes to choosing your weapon of choice, the battle lines are drawn between loofahs and exfoliating gloves. If you want to enjoy brighter skin that feels refreshing, be sure to keep loofah items in your shower or bathtub so you can use them often; you only need light scrubbing every few days, but be sure to make it a routine.


Written by Taylor McKnight, Author for Laser & Glow

Home for the Holidays: Tips and Tricks for Holiday Home Decor

RH Business Marketing Solutions

The holiday season is a time for joy, warmth, and festive cheer, and what better way to celebrate than by transforming your home into a winter wonderland? There are countless ways to deck the halls and create a lovely setting that embodies the spirit of the season, from shimmering decorations to twinkling lights. This comprehensive guide will explore expert tips and tricks for holiday home decor that will help you create a festive and inviting space that delights family and friends alike.


Setting the Scene with Lighting

Lighting sets the mood for any holiday gathering, so it's essential to get it right. Start by illuminating your interior and outdoor areas with Christmas LED mini lights to create a comfortable, welcoming atmosphere that swiftly turns your house into a winter wonderland. These energy-efficient lights come in a variety of colors and styles, from classic white to multicolored strands, allowing you to create the perfect ambiance for your holiday celebrations. Utilize LED mini lights inside to accentuate your fireplace, staircase, and Christmas tree. Weave them into wreaths and garlands to create a stunning impression.


Creating Festive Centerpieces and Tablescapes

During the holidays, spending time with loved ones around the table to enjoy meals and create memories is customary. Create beautiful centerpieces and tablescapes that become the center of attention for your celebratory feasts to uplift your holiday home décor. The first step in planning a successful Christmas party is settling on a theme or color palette that works with your current furnishings. Use components like decorations, candles, pinecones, and fresh greenery to create eye-catching arrangements that perfectly reflect the festive atmosphere of the season.


Welcoming Guests with Festive Entryway Decor

Make sure your doorway leaves a lasting impression on visitors as soon as they arrive, as it sets the tone for the rest of your holiday home décor. Start by hanging a beautiful wreath composed of berries, pine cones, ribbons, and fresh foliage over your front entrance. For a little festive brightness, hang a garland from the railing or porch. Use Christmas LED tiny lights or luminaries to light up the walkway leading to your door to help visitors find their way to your house. Once inside, establish a warm and inviting entrance bench or console table with seasonal decorations like lanterns, candles, and ornamental embellishments.


Decking the Halls with Festive Garlands and Wreaths

Traditional holiday decorations like garlands and wreaths instantly give any area a sense of elegance and charm. These classic decorations, whether they are placed on mantels, windows, doors, or stairs, bring back fond memories and feelings of comfort. For a rustic and aromatic touch, go for garlands and wreaths made of fresh foliage like pine, cedar, or eucalyptus. To add color and texture, adorn them with ribbons, berries, pine cones, and decorations. Hang wreaths to add a festive touch to any area in your house by placing them on walls, mirrors, or inside doors.


Creating Cozy Nooks and Seating Areas

The holiday season is a time for cozying up by the fire with loved ones and enjoying the warmth and comfort of home. Throughout your house, designate comfortable sitting sections and quaint alcoves where loved ones can congregate to unwind. To create a comfortable and inviting ambiance that promotes relaxation and discussion, arrange big cushions and luxurious throw blankets on couches and armchairs. Cozy knit blankets in seasonal colors and designs and accent cushions with holiday themes will provide a festive touch. Create a reading corner with a comfortable armchair, a stack of holiday books, and a soft throw blanket for curling up with a good book.


Personalizing Your Holiday Decor with DIY Touches

Incorporate DIY components that showcase your style and individuality to give your holiday home décor a personalized touch. Create handcrafted garlands, table decorations, and ornaments to showcase your artistic abilities and infuse your holiday gatherings with a unique touch. Get your loved ones together for a crafty celebration where you can create your centerpieces, wreaths, and decorations. To add charm and character to your design, use natural and rustic accessories like pine cones, acorns, cinnamon sticks, and dried citrus slices.


Conclusion

In conclusion, transforming your home into a festive holiday wonderland is a joyful tradition that brings warmth, cheer, and magic to the season. You can create a warm and magical environment that delights both family and friends by using professional holiday home décor ideas and techniques. So, whether you're hosting a cozy gathering with loved ones or simply enjoying the festive ambiance on your own, take the time to infuse your home with holiday cheer and create cherished memories that will last a lifetime. Happy decorating and happy holidays!

A Deep Dive into Sheet Pile Retaining Walls

RH Business Marketing Solutions

Sheet pile retaining walls are a workhorse of a solution for projects involving water or unstable soil. These walls consist of interlocked steel panels driven into the ground, creating a strong and watertight barrier. Their versatility makes them ideal for various applications, including waterfront projects, deep excavations, and areas with weak or unstable soil conditions.

This article delves into the world of sheet pile retaining walls, providing a comprehensive guide for those considering this method:

·         We'll explore the unique benefits that sheet pile walls offer for retaining walls.

·         Different sheet pile materials that are available, and we'll break down the options.

·         Key factors influencing the design of sheet pile retaining walls.

·         The typical sheet pile wall Installation process:

·         We’ll highlight the role of experienced sheet piling contractors, to ensure a successful sheet pile wall project.

Advantages of Sheet Pile Walls:

Steel sheet piles can withstand high soil and water pressure, making them durable and stable in the long run. Sheet piles can be driven to different depths, accommodating both shallow and deep excavations. Interlocking steel panels form a near-impervious barrier, preventing water infiltration in waterfront projects or areas with high groundwater levels.

Prefabricated sheet piles can be driven into the ground rapidly, saving time compared to traditional concrete walls. Sheet piles are also suitable for soft or loose soils where other retaining wall options may struggle to perform well.

Types of Sheet Pile Walls:

Sheet pile walls are categorised based on the profile of the interlocking steel members and the material used. Here's an overview of common types:

Z-Shaped Sheet Piles: These are widely used, offering good lateral strength and efficient interlocking.

U-Shaped Sheet Piles: These provide high bending resistance and are often utilised for deep excavations.

Hoesch Sheet Piles: These feature a wavy profile offering excellent watertightness and are suitable for waterfront projects.

Vinyl Sheet Piles: While less common, vinyl sheet piles offer a lightweight and corrosion-resistant option for certain applications.

The optimal sheet pile type for a project will depend on factors like wall height, soil conditions, and required watertightness. Consulting with geotechnical engineers and piling contractors is crucial for making the right selection.

Design Considerations for Sheet Pile Walls:

The design of a sheet pile retaining wall involves meticulous planning and calculations to ensure its stability and functionality.


A thorough geotechnical investigation determines soil properties like strength, bearing capacity, and water table level. This information is vital for designing the wall to withstand the anticipated loads.

Structural engineers calculate the forces acting on the wall due to retained soil, water pressure, and any potential surcharges (additional loads). This determines the required wall thickness, penetration depth, and any necessary reinforcements.

For taller walls or those subject to high loads, tie rods or anchors might be needed to provide additional stability. These are typically installed behind the sheet piles and connected to deadman anchors (large concrete blocks) buried in the ground.

Depending on the project location and environmental conditions, sheet piles might require a protective coating or sacrificial anodes to prevent corrosion.

Sheet Pile Wall Installation Process:

Building a sheet pile retaining wall involves several steps:

1. Site Preparation: The area is cleared and levelled, and any utilities that may be in the way are relocated. If needed, a temporary guide wall made of wood or metal is built to help guide the sheet piles.

2. Pile Driving: Special hammers are used to drive the sheet piles into the ground to a set depth, making sure they overlap and align correctly.

3.Excavation: Once the sheet piles are in place, they act as a temporary retaining wall, so the area behind them can be excavated to create the desired space.

4. Temporary Support: If the excavation is deep or the soil is unstable, temporary supports or braces may be needed to keep the trench from collapsing.

Summary

To summarise, sheet pile retaining walls are often used for projects near water, excavations that are deep, and in areas with weak soil. Consisting of interlocking steel panels (sheet piles) that are inserted into the ground. are strong and can hold back large amounts of soil.

They can be installed quickly and easily in many soil conditions. They are relatively inexpensive to construct.  To achieve a successful retaining wall solution, it is important to understand the advantages and complexities of sheet pile walls and to work with qualifiedsheet piling contractors.

Creating a Cozy She Shed

RH Business Marketing Solutions

Transforming a backyard shed into a cozy retreat, also known as a she shed, is a popular trend that allows you to create a personal sanctuary just steps from your home. Whether you're turning it into a craft room, reading nook, or yoga studio, the possibilities are endless. In this infographic from Sofas and Sectionals- retailer of flexsteel furniture, we'll explore essential tips and creative ideas to help you design and decorate your own she shed. From choosing a decor theme to incorporating versatile lighting and pet-friendly features, we've got everything you need to turn your ordinary shed into an extraordinary space you'll love spending time in.

Preparing Your First Home: Essential Pre-Move Tips

RH Business Marketing Solutions

Preparing for your first home move can be an exciting yet daunting task. Ensuring a smooth transition requires careful planning and organization. With this infographic from Mountain Movers- a moving company in Round Rock TX, we've compiled essential pre-move tips to help you navigate this process seamlessly.


From researching moving companies to unpacking essentials in your new home, we've got you covered every step of the way. Begin by researching moving companies and gathering packing supplies such as boxes, tape, and bubble wrap. Start packing nonessentials, labeling boxes for easy unpacking, and decluttering items you no longer need. Creating an inventory of belongings, disposing of hazardous materials safely, and shopping for furniture for your new home are all important steps in the pre-move process.


As you move closer to your moving date, arrange utility connections, schedule inspections, and gather important documents such as passports and medical records. Notify schools or educational institutions about the upcoming move and update your address with work, doctors, and other necessary parties. Plan for the disposal of perishable items in the kitchen and coordinate the transportation of vehicles if necessary. By following these pre-move tips, you can ensure a smooth transition into your new home and start enjoying life in your new space hassle-free!

Upcycling Old Décor for a Home Refresh

RH Business Marketing Solutions

Transforming your home décor doesn't have to break the bank or harm the environment. Upcycling old home decor items is a fantastic way to breathe new life into your space while reducing waste. In this infographic from Foton Pearled Candle, we'll explore creative and sustainable upcycling ideas to inspire you to give your old home decor a fresh and eco-friendly makeover. From repurposing furniture to reinventing decorative items, discover how you can add style and personality to your home while minimizing your environmental footprint.

Home Design Materials That are Kid & Pet Friendly

RH Business Marketing Solutions

Little hands and paws can wreak havoc on your home, causing premature wear-and-tear such as unremovable stains in the carpet and scratch marks on furniture. However, there are proactive measures you can take to defend against this mess and destruction. Below, we'll explore several materials and home design choices to make your house more resistant to the challenges of living with kids and pets.


Let’s begin with one of the most problematic areas: your floors. Experiencing heavy traffic day in and day out, certain flooring materials may wear much faster than others. Solution-dyed fiber carpeting is an excellent choice for families with young children or accident-prone pets. Utilizing modern technology, this method allows the carpet fiber to soak up the dye, making it highly resistant to new colors or “stains.” Available in a wide range of shades, these carpets are also free of harmful materials and chemicals, ensuring both aesthetics and the well-being of your family.


Another flooring option to consider is waterproof luxury vinyl flooring,  particularly those with stone plastic composite (SPC). Sustainable and waterproof, the stone dust core layer makes this surface denser and more durable than other vinyl planks and composite flooring options. Featuring a transparent wear layer, it offers excellent scratch and stain resistance. SPC flooring is easy to install and comes in a variety of wood and stone visuals to complement your desired design.


Next, let's turn our attention to the walls. With children using them as canvases and pets splashing muck up to the ceiling, your walls need some defensive reinforcement from time to time. Enhance your walls with the right paint choice, opting for a satin or eggshell finish. This makes the walls much easier to maintain, as messes can be wiped away quickly and easily.


For those who want to add flair while maintaining family-friendly walls, consider pet-proof wallpaper. Perfect for accent walls or enchanting entryways, modern wallpaper offers endless design potential. Crafted from safe, durable materials, it provides stronger resistance and easy clean-up. When renovating your walls, explore the wide selection of non-woven or laminated options to find a unique look you'll love.


Lastly, when selecting furniture fabrics, it's essential to choose wisely. Numerous fabrics have been developed to withstand even the most active of households. Solution-dyed acrylic fabrics, for example, are spill- and stain-proof, making them perfect for both functional and decorative throw pillows and furniture cushions. If you've already invested in furnishings, consider using slipcovers to make upkeep easier. Machine-washable and versatile, modern slipcovers can be cycled seasonally and help prolong the life of your higher-traffic furniture.


For further information on kid- and pet-friendly materials for your home, check out the accompanying resource from Floor Covering Associates.

How to Manage Plumbing Around Elevators

RH Business Marketing Solutions

In tall buildings, the plumbing and elevator systems are installed close together. If not properly managed, this can lead to hazards like water leaks that damage elevators and put people at risk.

This guide covers best practices for integrating these critical systems, ways to prevent and handle plumbing issues near elevators, and how to maintain safe building operations. Let's get into the details.

Integration of Plumbing and Elevator Shafts

Understanding the Infrastructure

Elevator shafts and plumbing systems are often close together in buildings because plumbing needs to reach all floors, and placing it near the elevator shafts is practical.

This proximity requires careful planning to prevent the systems from interfering with each other. Ensuring the plumbing does not cross into the elevator’s mechanical space is crucial. It's all about placing everything correctly to avoid future problems.

Best Practices for Integration

Setting up plumbing near elevators needs thoughtful planning to make sure both systems work well together. Here are some simple guidelines:

1. Strategic Placement of Plumbing Access:

Place plumbing access points where they won't interfere with the elevator's mechanics. This avoids problems between the systems and ensures maintenance can be done without affecting elevator service.

Making sure these points are easily reachable will also help in quick fixes without extensive downtime.

2. Simplify Maintenance Access:

Organize the plumbing in a way that maintenance can be carried out swiftly and easily, without having to stop the elevator. This reduces inconvenience for building users. Regular and easy maintenance prevents larger issues and keeps both the plumbing and elevator running smoothly.

These steps help ensure that plumbing and elevators can operate side by side efficiently, minimizing the risk of complications and simplifying upkeep. Effective management of these systems is key to maintaining a safe and functional building environment.

Safety Protocols and Legal Standards

Recognizing Potential Hazards

When plumbing and elevator systems do not work together properly, it can create dangerous situations. A common problem is water leaks that get into elevator equipment and wiring, which can stop the elevator from working or cause electrical issues. It’s important to spot these risks early to keep everyone in the building safe.

Regular checks can help identify leaks before they become a major issue. This proactive approach reduces the risk of accidents and increases the overall safety of the elevator system.

Adhering to Regulations

It is crucial to follow safety codes and regulations. Elevator experts are well-versed in the relevant codes and regulations. These rules are set by bodies like the American Society of Mechanical Engineers (ASME) and by local government laws. They make sure that elevator and plumbing systems are installed and maintained safely. Sticking to these standards helps prevent problems and ensures the safety of everyone using the building. 

Being familiar with and understanding these regulations can also help building managers avoid legal issues. Regular updates and training on these standards are necessary for maintenance staff to stay informed.

Regular Routine Inspections

Regular inspections are essential to keep both elevator and plumbing systems safe and up to code. These checks can find small problems before they turn into bigger, more dangerous ones. Inspections also make sure that all parts of these systems are working well and are safe to use. This consistent review is crucial for the long-term safety and functionality of building systems.

Keeping a detailed record of all inspections and maintenance work is also beneficial for tracking the health of the systems and proving compliance with safety regulations.

Preventing and Handling Water Leaks Near Elevators

Implementing Preventive Strategies

Regular checks and routine upkeep are important to stop water leaks near elevators. These checks help find problems early, which can stop big damage later. Installing sensors and automatic systems in elevator pits can also help. 

These tools alert you early when there's a leak, giving you time to act before it gets worse. This way, you can keep everything running smoothly and avoid costly repairs.

Steps to Manage Water Leaks

When water leaks happen near elevators, it's key to act fast to keep things from getting worse. Here’s an easy guide to help you handle leaks quickly:

Step 1: Detect and Assess the Leak

First, figure out where the leak is coming from. Use the sensors installed to quickly find the leak’s location and see how bad it is. Knowing the size of the leak helps plan the best way to stop it. This step is critical to prevent the leak from affecting other parts of the building.

Step 2: Contain the Leak

Once you know where the leak is, do what you can to stop the water from spreading. This might mean turning off the main water supply or using barriers to block the water. 

Quick action here helps minimize damage and keeps the elevator from being affected. This is all about stopping the water fast to protect your building.

Step 3: Repair the Leak

Call plumbing professionals to fix the leak properly. Ensure they look at why the leak happened and fix it so it won’t happen again. Fixing leaks right away helps prevent bigger, more expensive problems in the future. 

It’s important to choose experienced plumbers who know how to handle leaks near elevators safely.

Step 4: Restore and Test the Elevator System

After fixing the leak, clean up any water and check the area for any other issues. Make sure the elevator works right by testing it thoroughly before using it again. This step makes sure everything is safe and working well.

Testing helps ensure that the elevator is safe to use, which is very important for everyone in the building.

Following these straightforward steps can help you manage water leaks effectively, keeping your elevator and building safe. Regular maintenance and quick responses are key to preventing and handling these issues.

Impact of Plumbing Problems on Elevators

Immediate Effects of Plumbing Failures

Water leaks or other plumbing issues near elevators can quickly make them unsafe to use. These problems can stop the elevator from working, creating safety risks for people who use them.

It's important to fix these issues quickly to keep everyone safe and the elevator running smoothly. Regular checks can help catch these problems early before they lead to bigger issues.

Long-Term Risks to Elevator Health

If water keeps getting into elevator parts, it can cause a lot of damage over time. This damage can be expensive to fix and might mean the elevator needs to be out of service for a while.

Keeping an eye on these issues and dealing with them quickly helps avoid big repair bills and long downtimes. It’s crucial to keep the elevator’s surroundings dry and well-maintained to prevent lasting damage.

Common Plumbing Challenges Near Elevators

Elevator areas in buildings often have specific plumbing problems. One common problem is clogged drains in elevator pits, which can cause water to build up and flood the area. 

This flooding can stop elevators from working and may damage the building. To prevent these issues, it’s important to keep the drains clear and check them regularly. Clear drains help ensure that water flows out properly and does not accumulate.

Addressing Clogged Drains

Clogged drains are a significant concern near elevators because they can quickly lead to flooding if not addressed. Regularly cleaning these drains can prevent debris from blocking them. Ensuring these drains are not blocked is vital for the smooth operation of elevator systems. 

Scheduled maintenance to remove debris and buildup can keep water flowing correctly and prevent emergency situations. It's a simple but crucial task to maintain safety and functionality.

Implementing Preventative Solutions

Installing sump pumps and backflow preventers can effectively solve common plumbing issues near elevators. These devices help manage excess water and ensure it does not back up into the building. 

Sump pumps remove water that collects in elevator pits, while backflow preventers stop dirty water from contaminating clean areas. Together, these systems protect the building from water damage and maintain health standards. 

Regular testing of these devices ensures they are always ready to work when needed. This proactive approach saves time and money by preventing larger problems.

1. Sump Pumps

Sump pumps are installed at the lowest part of an elevator pit to pump out accumulating water. By doing this, they keep the area dry and protect critical elevator parts from water damage. Having a working sump pump is essential for preventing water from damaging the elevator mechanics. 

Regular checks ensure these pumps are operational, especially during rainy seasons or in high-risk flood areas.

2. Backflow Preventers

Backflow preventers are devices that ensure water flows only in one direction. They are crucial for preventing the reverse flow of water, which can carry contaminants and cause flooding. Installing these in elevator areas helps maintain clean water and prevents the mixing of different water sources.

Regular inspections guarantee that these preventers are functioning correctly, which is essential for building safety and hygiene.

Conclusion:

In conclusion, managing plumbing around elevators is essential for safety and smooth operations. It involves properly integrating both systems, adhering to regulations, preventing leaks, understanding the impact of plumbing issues, and addressing common challenges like clogged drains.

Regular inspections, maintenance, and proactive solutions like sump pumps and backflow preventers are crucial. By following best practices, building managers can effectively manage plumbing near elevators, avoiding hazards and downtime.

Don't compromise on the safety and functionality of your building. Consult experts today and implement a comprehensive plan to seamlessly integrate and maintain your plumbing and elevator systems for a secure and efficient environment.